manuals.online logo
Brands
  1. Home
  2. •
  3. Brands
  4. •
  5. SCC
  6. •
  7. Automobile Accessories
  8. •
  9. SCC QUICK GRIP 1100 Series User manual

SCC QUICK GRIP 1100 Series User manual

Meets S.A.E. Class “S” requirements for vehicles
with limited clearance. (Refer to your vehicle
owner’s manual)
This product is intended for use on snow and ice
covered roads. As such, it is legal in every state
and province in North America, including those
where studded tires are prohibited.
Refer to page four of this booklet for important
information regarding the use of this product.
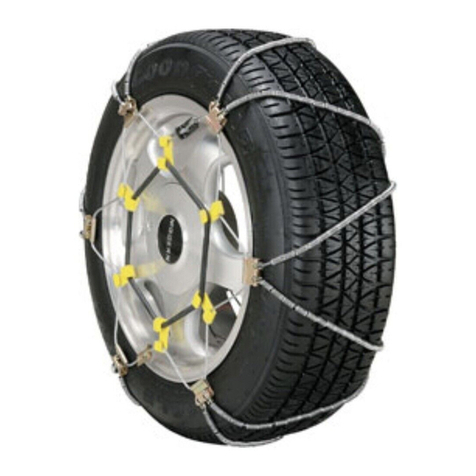
Passenger LLink CChain (1100 SSeries)
Installation and Removal Instructions
Thank you for choosing Quik GGrip tire chains.
Please read and follow the installation and
usage tips shown here. The few moments spent
familiarizing yourself with this product’s features
will give you the best service possible for safe
winter driving.
*
*
*Div. of Burns Bros. Inc.
P.O. Box 949
Clackamas, OR 97015-0949
Approperly iinstalled cchain:
Important: We strongly recommend
that the chains be fitted to the tire
prior to actual use to insure proper
fit. Tire sizes may vary because of
age, manufacturer, tread or type.
Please ensure that the following
points are correct when installing
your chains.
1. The chain should drape at least 2
inches over each side of the tire from
the edge of the tread toward the rim.
2. Check to make sure that you
have the correct size chains and
that there is enough clearance
between the chain and bodywork,
suspension and brake parts, etc.
3. The chains should be tightened
as snug as possible using chain
tighteners. Smooth portion of
hooks should be against tire.
© Security Chain Co. Div of Burns Bros
Inc., Clackamas, OR 97015-0949
All rights reserved; no part may be
reproduced in any form or by any
means without written permission.
CHAIN TIGHTENERS SHOULD BE USED WITH THIS
PRODUCT AND MUST BE PURCHASED SEPARATELY.
4
3
2
1
Park vehicle on firm level ground, and turn off the
engine. Set the parking brake. Unroll the chains and lay
them out flat making sure there are no twists or tangles.
Make sure the smooth side of the cross chain hooks are
toward the tire.
Drape the chain over the tire, again making sure the
cross chain hooks are facing upward. Hooks that face
down (towards the tire) will cause damage to the tire.
Pull one cross chain down to the point where the tire
meets the ground. Move the vehicle so that 1 or 2 cross
chains pass under the tire.
Reach behind the tire and fasten the inside connector
on the 2nd or 3rd link.
Installation
5
Next fasten the outside fastener making sure it is
as tight as possible. Drive a short distance and
re-tighten all fasteners. For best results, make sure
all connections are equal and as tight as possible.
Pg. 2
Close-UUpoofiinside ffastening ssystem
Pg. 3
Installation
Drive vehicle off highway to safe level ground. Turn off the engine and set
emergency brake. Unhook the chain tightener and the outside fastener.
Repeat procedure on inside fastener. Lay the chains on the ground and drive
vehicle off chains. Inspect chains for damaged or worn parts. After use, clean
and spray with an all-purpose lubricant.
Removal
One YYear LLimited WWarranty
This product is warranted free from defect in workmanship and material for one year from
the date of delivery to the user. Defective product may be returned to the manufacturer,
freight prepaid, within 10 days of alleged defect. Inspection will be made to determine
cause of failure. Chain determined to be defective will be repaired or replaced. Buyer shall
not be entitled to recover any incidental or consequential damages. No compensation will be
made for any labor claim, delays or damages incurred by using this product. Although this
warranty gives you specific rights, you may have other legal rights which differ from state to
state. For more information, please write to:
Security Chain Co.
Customer SService DDept.
P.O. Box 949
Clackamas, OR 97015-0949
Speeds oover 330mmph, iimproper ffit ooriimproper iinstallation vvoids tthis wwarranty.
6
Attach the rubber tensioner to take up the additional
slack. To make this simpler, attach the first hook at the
“11 o’clock” position, the next at the “5 o’clock” position
and so forth. Tighteners must be purchased separately.
CAUTION: All winter traction products will wear out with extended use. They can
also break due to misfit, misapplication or misuse. If this should occur, stop immediately
and remove the chain. Care should be taken when using this product on wheels or wheel
covers that protrude outward beyond the sidewall of the tire. Wheel covers should be
removed to prevent possible markings made by rubber tensioners. On vehicles with
protruding alloy wheels, other traction products that do not use a rubber tensioner (such
as SCC’s Z-Chain or ladder-style cable products) should be used. If these cautions are
ignored, Security Chain Co., and it’s distributors are not responsible for injury or vehicle
damage.
Avoid speeds over 30 mph and driving on bare pavement. This will increase wear and
cause cross members to break. Damage could occur to chains, tires and vehicles.
Insure rubber tensioners are used at all times.
Avoid spinning tires: start slowly, even on uphill conditions.
Avoid locking brakes: the best braking technique is a pumping action.
If a cross member should break, stop & remove or replace it immediately.
After use, clean and spray with an all-purpose lubricant.
Pg. 4
For mmaximum cchain llife
*
*
*
*
*
*

Other SCC Automobile Accessories manuals

SCC Alloy Radial Chain User manual

SCC

SCC Alloy Radial Chain User manual

SCC Z-CHAIN User manual

SCC

SCC Z-CHAIN User manual

SCC Quik Grip User manual

SCC

SCC Quik Grip User manual

Popular Automobile Accessories manuals by other brands

Enelion LUMINA LB-32-3-MGR-00 Series installation guide

Enelion

Enelion LUMINA LB-32-3-MGR-00 Series installation guide

Sealey TPK252.V2 manual

Sealey

Sealey TPK252.V2 manual

Victory 4x4 V4R-PET Install instructions

Victory 4x4

Victory 4x4 V4R-PET Install instructions

Cruz 934-515 Assembly instructions

Cruz

Cruz 934-515 Assembly instructions

Calix M5T 186A Assembly instructions

Calix

Calix M5T 186A Assembly instructions

Whispbar K604W Fitting instructions

Whispbar

Whispbar K604W Fitting instructions

Viessmann 3570 Operation manual

Viessmann

Viessmann 3570 Operation manual

EUFAB EASY BIKE Alu Plus manual

EUFAB

EUFAB EASY BIKE Alu Plus manual

BOSSTOW F1185 quick start guide

BOSSTOW

BOSSTOW F1185 quick start guide

Modula MOCSAC 008 quick start guide

Modula

Modula MOCSAC 008 quick start guide

Pyronix CAR DEFENDER manual

Pyronix

Pyronix CAR DEFENDER manual

Holman 31080C instruction manual

Holman

Holman 31080C instruction manual

UBL U-LITE instruction manual

UBL

UBL U-LITE instruction manual

Whelen Engineering Company CenCom Core installation guide

Whelen Engineering Company

Whelen Engineering Company CenCom Core installation guide

Aries S223015-2 installation manual

Aries

Aries S223015-2 installation manual

SIERRA OFFROAD 10-40-YJS Installation guidelines

SIERRA OFFROAD

SIERRA OFFROAD 10-40-YJS Installation guidelines

Seecode 232519 instruction manual

Seecode

Seecode 232519 instruction manual

rough country 47120580 manual

rough country

rough country 47120580 manual

manuals.online logo
manuals.online logoBrands
  • About & Mission
  • Contact us
  • Privacy Policy
  • Terms and Conditions

Copyright 2025 Manuals.Online. All Rights Reserved.