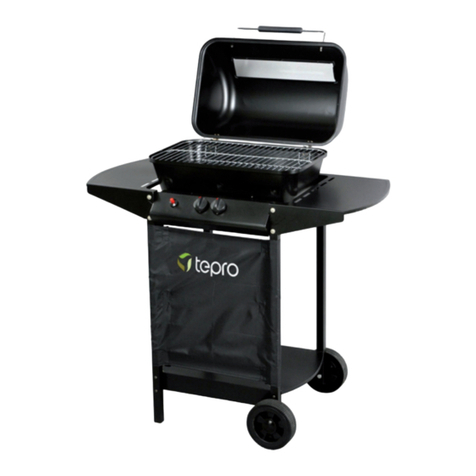
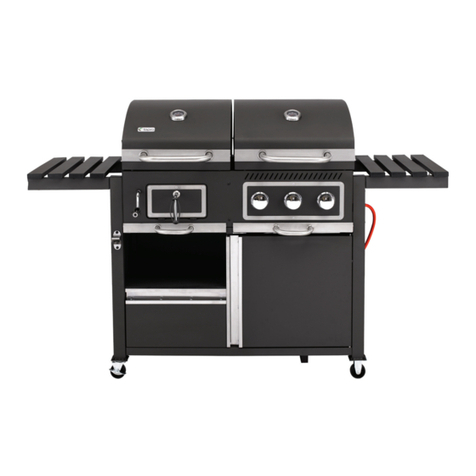
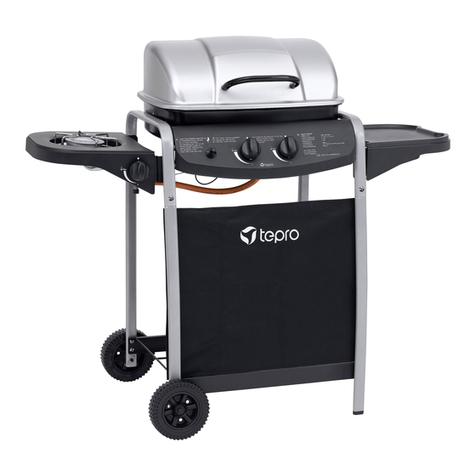
tepro 3160UK User manual

Bitte aufklappen
01.04.2010 13:38:13 Uhr
tInstruction Manual
GAS BBQ "Bloomfield"
Version 2017,
Item No. 3160UK
P160144_TEPRO_3160UK_Bloomfield_2Brenner_20161007_EN(UK).indd 1 7/10/16 9:39 AM

P160144_TEPRO_3160UK_Bloomfield_2Brenner_20161007_EN(UK).indd 2 7/10/16 9:39 AM

3
t
Contents
Before using the device........................................................................................................................ 4
Scope of delivery................................................................................................................................... 4
Intended use .......................................................................................................................................... 5
For your safety.................................................................................................................................. 5 - 6
Signal symbols................................................................................................................................... 5
General safety instructions ................................................................................................................ 5
Safety instructions ........................................................................................................................ 5 - 6
Assembly........................................................................................................................................... 6 - 8
Preparation ........................................................................................................................................ 6
Required tools ................................................................................................................................... 6
Assembling the BBQ..................................................................................................................... 6 - 8
Inserting batteries ................................................................................................................................. 9
Connecting the Gas Bottle ................................................................................................................... 9
Regulator and Hose........................................................................................................................... 9
Storing the BBQ................................................................................................................................. 9
The Gas Bottle................................................................................................................................... 9
Connection to the BBQ ...................................................................................................................... 9
Checking for Gas Leaks .................................................................................................................... 9
Setting up the BBQ.............................................................................................................................. 10
Before grilling ...................................................................................................................................... 10
Operation....................................................................................................................................... 10 - 11
Maintenance and Cleaning ................................................................................................................. 11
Troubleshooting .................................................................................................................................. 12
Disposal................................................................................................................................................ 12
Declaration of conformity................................................................................................................... 12
Technical details.................................................................................................................................. 12
Service ................................................................................................................................................. 13
Distributor ............................................................................................................................................ 13
Matching accessories (not included in the delivery scope)............................................................ 14
P160144_TEPRO_3160UK_Bloomfield_2Brenner_20161007_EN(UK).indd 3 7/10/16 9:39 AM

4
t
Before using the device
After unpacking and before every use, check whether the item
shows any signs of damage.
Should this be the case, do not use the item, but notify your
retailer.
The operating manual is based on the norms and regulations
that are applicable in the European Union. In non-EU countries,
observe country-specific directives and laws!
Before start-up, first read through the safety information
and the operating manual carefully. Only by doing so will
you be able to use all of the functions safely and reliably.
Keep the operating manual and pass it on to any third party that
might own the BBQ gazebo after you.
Scope of delivery
1 Burner housing 1
2 Warming grate 1
3 BBQ Grate 2
4 Flametamer 2
5 Grease capture
container 1
6 Left side rack 1
7 Hook 4
8 Right side rack 1
9 Door 1
10 Long front right support
leg (RF) 1
11 Long back right support
leg (RB) 1
12 Crossbeam 1
13 Short front left support leg
(LF) 1
14 Short back left support leg
(LB) 1
15 Side cover 2
16 Base plate 1
17 Axle 1
18 Wheel 2
19 Wheelcap 2
20 Temperature regulator (2)
21 Hose with regulator
Fasteners
A Screw M6x50 8
B Screw M6x10 32
C Nut M8 2
D Stepped screw M5x16 1
E Washer 1
F Spring washer 1
G Nut M5 1
Please check that the delivery is complete and undamaged.
Should a part be missing or defective, please contact your dealer.
Claims relating to damages or missing parts made after assembly
has taken place or commenced will not be recognised.
P160144_TEPRO_3160UK_Bloomfield_2Brenner_20161007_EN(UK).indd 4 7/10/16 9:39 AM

5
t
Intended use
Use this BBQ to heat, cook and grill food.
It is suitable exclusively for outdoor use and in a domestic setting.
Only use the item as described in this operating manual. All other
uses are considered improper and can lead to material damage
or even to personal injuries.
The manufacturer accepts no liability for damages caused by
improper use.
For your safety
Signal symbols
Danger High risk!
Failure to observe the warning can lead to potentially
fatal injuries.
Attention Moderate risk!
Disregarding this warning can lead to property
damage.
Caution Low risk!
Facts that should be respected when handling the
device.
GENERAL SAFETY INSTRUCTIONS
- to be observed in each use
–Use outdoors only!
–Read the instructions before using the appliance.
–WARNING! Accessible parts may be very hot. Keep young
children away.
–Do not move the appliance during use.
–Turn off the gas supply at the gas cylinder after use.
Safety instructions
Danger Fire hazard!
Parts of the BBQ become very hot during operation
and can cause fires.
– It is essential that you have a fire extinguisher and first-aid kit
ready and be prepared for an accident or fire.
– Place the BBQ on an even, horizontal, secure, heat-resistant
and clean surface.
– Set up the BBQ with at least 1 m clearance from highly
flammable materials such as awnings, wooden patios or
furniture.
– Do not move the BBQ during use.
– Some foods produce flammable fats and juices. Clean the
BBQ regularly, preferably after each use.
– Never leave the BBQ unattended during use.
Danger Fire hazard!
Never turn on/fire up the BBQ with the lid closed.
– Operate the gas BBQ with a small flame when the lid is closed.
Danger Risk of burning and accidents!
This device is not intended for use by persons (incl.
children) with limited physical, sensory, or mental
capacities or lacking experience and/or lacking
knowledge.
– Such persons must be informed about the dangers of the
device and supervised by a person responsible for their safety.
– Any modifications to the product represent a large safety
risk and are forbidden. Do not undertake any unauthorised
interventions yourself. In case of damages, repairs or other
problems with the BBQ, contact our service point or a
professional in your area.
– Keep children and pets away from the device.
The BBQ, the gas flame and the food on the BBQ can become
very hot during operation, such that any contact with these can
cause very severe burns.
– Keep sufficient distance from the hot parts, since any contact
can lead to severe burns.
– Always wear oven or BBQ gloves when grilling.
– Use only long-handled utensils with heat-resistant grips.
– Do not wear any clothing with wide sleeves.
– Let the BBQ cool down completely before cleaning and/or
storage.
Danger Risk of deflagration!
Flammable liquids that are poured onto the flames
can form flashes or deflagrations.
– Never use flammable liquids such as petrol or spirits.
Danger Risk of poisoning!
Gas is odourless and can be lethal in closed spaces!
– Use the grill outdoors only.
Danger Health risk!
Do not use any decolourants or thinners to remove
stains. These are harmful to health and must not
come into contact with food.
Danger Risks to children!
While playing, children can become caught in the
packaging film and choke.
– Do not let children play with the packaging films.
– Make sure that children do not put any small assembly parts
into their mouths. They could swallow the parts and choke on
them.
Danger Risk of injury!
Both the BBQ and individual parts have some sharp
edges.
– Be careful with individual parts to prevent accidents and/or
injury during assembly and use. Wear protective gloves if
necessary.
P160144_TEPRO_3160UK_Bloomfield_2Brenner_20161007_EN(UK).indd 5 7/10/16 9:39 AM

6
t
Assembling the BBQ
1. First read through the assembly instructions completely.
2. Allow yourself enough time for assembly and find an even
working space of two to three square meters.
3. Place the necessary tools within reach. Small parts such as
handles will probably be preassembled.
4. Two people are needed for the assembly.
– Do not set up the BBQ near entryways or high-traffic zones.
– Always exercise extreme caution while grilling. If distracted,
you can lose control of the device.
– Always be attentive to and aware of what you are doing. Do
not use this product if you are unfocussed or tired, or if you are
under the influence of drugs, alcohol, or medications. Just one
moment of carelessness during use of the product can lead to
serious injuries.
Attention Risk of damage!
During use, the screws can loosen slowly and impair
the BBQ's stability.
– Check the stability of the screws prior to each use. If necessary,
tighten all of the screws again to ensure the BBQ gazebo is
standing securely.
Attention Risk of damage!
Do not use any strong or grinding solvents or abrasive
pads, since these can attack the surfaces and leave
behind scrape marks.
Danger Risk of burning and accidents!
Caution! If you detect the smell of gas:
– Immediately close the gas intake of the gas bottle.
– Extinguish all open flames.
– Do not operate any electrical devices.
– Ventilate the surrounding area.
– Carry out a leakage point test, as described in this operating
manual.
– If, after testing and once the leakages have been remedied,
you continue to detect the smell of gas, do not continue to
use the BBQ. Immediately inform a gas technician or the
distributor from which you purchased the equipment.
Danger Risk of burning and accidents!
Do not store the gas BBQ in immediate proximity
to combustibles (e.g. petrol) or other flammable
liquids or gases.
– The gas bottle must be separated from the gas BBQ during
storage.
– Do not store the gas bottle in immediate proximity to the gas
BBQ.
– Do not place the gas bottle immediately under the gas BBQ.
Assembly
Preparation
Danger Risk of injury!
Failure to follow these instructions can lead to
problems and risks while using the BBQ.
– Follow all of the assembly instructions listed here.
Required tools
1 x Phillips screwdriver
1 x adjustable spanner
Step 1
20
21
Screw the hose with the regulator (21) to the burner housing (1)
Attach the temperature regulator (20) to the control panel of the
burner housing (1).
Step 2
A
14
13
B
12
10 11
Fasten the long support leg (RB) (11) with screws (A) to the right
back side of the burner housing (1).
Fasten the short support leg (LB) (14) with screws (A) to the left
back side of the burner housing (1).
Fasten the short support leg (LF) (13), the cross rod (12) and the
long support leg (RF) (10) with screws (A) and screws (B) to the
front side of the burner housing (1).
P160144_TEPRO_3160UK_Bloomfield_2Brenner_20161007_EN(UK).indd 6 7/10/16 9:39 AM

7
t
Step 3
B
15
15
Fasten the side cover pieces (15) with screws (B) between the
front and back support legs.
Step 4
B
16
Fasten the base plate (16) with screws (B) between the support
legs.
Step 5
6
Step 5
19
18
17
C
Step 6
G
F
E
D
9
Insert the wheel axle (17) through the holes below in the short
support legs.
Stick the wheels (18) on the ends of the wheel axle.
Secure the wheels using the wheel nuts (C).
Stick the wheelcaps (19) onto the wheels.
Step 6
6
Step 5
19
18
17
C
Step 6
G
F
E
D
9
Place the door (9) on the left onto the pins in the base plate
below.
Slide the door underneath the crossbeam at the top.
Fasten the door with a stepped screw (D), a washer (E), a spring
washer (F) and a nut (G).
Step 7
7
6
Screw the hooks (7) onto the left side rack (6).
P160144_TEPRO_3160UK_Bloomfield_2Brenner_20161007_EN(UK).indd 7 7/10/16 9:39 AM

8
t
Fasten the right side rack (8) using screws (B) at the top to the
long support legs and the burner housing.
Step 8
Fasten the left side rack (6) using screws (B) at the top to the
short support legs and the burner housing.
Step 9
8
Step 9
2
Step 10
3
4
5
Hang the warming grate (2) in place.
6
8
B
Step 10
8
Step 9
2
Step 10
3
4
5
Place the flametamer (4) over the burners.
Insert the BBQ grate (3) in the burner housing.
Slide the fat collection tray (5) beneath the burner housing.
Important:
All screws must be tightly fastened.
P160144_TEPRO_3160UK_Bloomfield_2Brenner_20161007_EN(UK).indd 8 7/10/16 9:39 AM

9
t
Inserting batteries
You need to insert batteries into the device for automatic burner
activation. One 1.5 V battery size AA (not included!) is used. The
battery compartment is between the regulators 1 and 2. Remove
the battery compartment lid and insert a 1.5 V battery of the type
LR6/R6/AA. Pay attention to the correct polarity (+/-). The plus of
the battery must point outward. Close the battery compartment
by screwing down the battery compartment lid. The battery
compartment lid simultaneously serves as a push button of the
piezo-igniter. It is made operational by inserting the battery.
Connecting the Gas Bottle
Regulator and Hose
These accessory parts are supplied with the gas BBQ.
Replacements are available at your BBQ distributor or an
authorised LPG gas supplier. Use only regulators and hoses
that are certified for LP gas with the pressure values mentioned.
The lifespan of the regulator is approximately 2 years. It is
recommended that the regulator be exchanged within 2 years
from the production date.
The use of an incorrect or defective regulator and gas hose is
dangerous. Before each use of the gas BBQ, check that the
correct parts are being used.
The gas hose used must conform to the regulations and provisions
of the country in which the BBQ is being used. The length of the
gas hose must not exceed 1.5 metres. Worn or damaged hoses
must be exchanged immediately. The hose must be connected
without twists or bends. Ensure that the gas hose is not bent
or constricted and that it does not come into contact with the gas
BBQ, with the exception of the hose connection.
Storing the BBQ
The gas BBQ must only be stored indoors, once the gas bottle
has been disconnected. If the BBQ is not being used for an
extended period of time, it should be covered with a protective
hood and stored in a dry and dust-free environment.
The Gas Bottle
A gas bottle is not supplied with this BBQ. The gas bottle must be
provided by the end user. Do not drop your gas bottle or handle
it roughly or inappropriately.
When the BBQ is not being used, the gas bottle must be
separated from the BBQ. Fit the gas bottle with its protective cap
once it has been disconnected from the BBQ. The gas bottle
must be stored separate from the BBQ.
The storage of gas bottles is not permitted in underground
spaces, in stair wells, passageways and thoroughfares of
buildings, or in their immediate vicinity. The valves must be fitted
with valve protection caps and lock nuts.
Gas bottles - including empty ones - must be stored upright.
Gas bottles must be stored outdoors in an upright position and
out of reach of children. The gas bottle must not be stored in
areas in which the temperature exceeds 50ºC. Do not store the
gas bottle nears flames or other flammable sources. Do not
smoke in the vicinity of gas bottles!
Connection to the BBQ
Place the gas bottle next to or behind the BBQ on the floor.
Do not in any case place the gas bottle on the support under the
grill.
Before the gas bottle is connected to the BBQ, you must ensure
that there is no dirt in the heads of the gas bottle, the regulator,
or the burner. Spiders and insects can get in there and thus block
the burner or the venturi tube at the opening. A blocked burner
can cause a fire underneath the BBQ. Clean blocked burner
openings using a sturdy pipe cleaner.
Mounting the gas hose
• Depending on national regulations, there are two ways to
connect the gas hose to the grill. First take the protective cap
off the gas connection if present.
Method 1:
• Firmly screw one end of the gas hose onto the gas connection
(left-hand threading). Do not use an extra gasket!
• Tighten the gas hose union nut securely using a size 17
spanner; at the same time hold the gas connection in place
with pliers or a second size 17 spanner.
Method 2:
• Run a hose clamp of the right size a few centimetres over
the loose end of the gas hose. Then slide this end onto the
gas connection (wet the gas connection somewhat to facilitate
sliding onto the hose). Fix the connection with the hose clamp.
• Connect the other end of the gas hose with the pressure
regulator included.
Separate instruction manuals are included with the gas hose
and the pressure regulator. Follow these instructions very
closely when you connect the pressure regulator to the gas hose
and gas container (the figures may differ for the hose, pressure
regulator and gas container depending on the respective
national standards).
Lay the hose so that it is not kinked or twisted.
Warning!
Prior to use test all connections for gas leaks.
Always perform the test using soapy water. Never use an open
flame to detect leaks.
Checking for Gas Leaks
• Mix one part dishwashing liquid with 3 parts water. For testing,
approx. 50 ml of soapy water is needed.
• Ensure that all temperature regulators are set to (off).
• Connect the regulator with the gas bottle and turn on the
burner using the left temperature regulator. Ensure that the
connections are securely made.
• Turn on the gas intake.
• Apply the soapy water to the hose and to all connections. If
bubbles appear, a leak is present.
• Fix the leak and then start the test again.
• Switch off the gas once the test has been concluded.
• If a leak is found and it cannot be repaired, do not attempt to
repair the leak further. In this case, contact a professional.
• Do not use the BBQ until the leak has been properly repaired.
P160144_TEPRO_3160UK_Bloomfield_2Brenner_20161007_EN(UK).indd 9 7/10/16 9:39 AM
10
t
Setting up the BBQ
Attention Risk of damage!
During use, the screws can loosen slowly and impair
the BBQ's stability.
– Check the stability of the screws prior to each use. If necessary,
tighten all of the screws again to ensure the BBQ gazebo is
standing securely.
• Before use, place the BBQ on a level, solid base located
outdoors.
• Do not in any case place the gas bottle on the support under
the grill.
Before grilling
• Wash off possible rough production residues using warm
water; in doing so, avoid the use of cleaning agents or
dishwashing liquid.
• Rub the BBQ grate by a cloth wetted with cooking or frying oil.
• Pre-firing
Before barbecuing for the first time, heat up the BBQ for a min.
15 minutes with a closed lid and high flame without food. The
heat cleans the internal parts and burns away the finishing
residues of coloured BBQ parts. In the process, odours and
some smoke may develop. However, this is harmless and only
lasts a short time. Ensure sufficient ventilation.
• Preheating
It is recommended that you preheat the BBQ before each use
for approx. 10-15 minutes with a closed lid.
Operation
Danger Risk of burning!
The BBQ and the food become very hot during
operation, such that any contact with these can cause
very severe burns.
– Keep sufficient distance from the hot parts, since any contact
can lead to severe burns.
– Always wear oven or BBQ gloves when grilling.
– Use only long-handled utensils with heat-resistant grips.
– Do not wear any clothing with wide sleeves.
Danger Risk of explosion!
Read through the following instructions for turning
on/firing up the BBQ and all warning and safety
information first, before actually firing up the BBQ.
– Check the BBQ for cracks, cuts or other damage, before using
it.
– Do not use the BBQ any more if the gas hose is damaged or
porous.
– Open the lid of the BBQ before firing up the burner. An
explosive flash may otherwise result, which can cause severe
physical injuries and even death.
Ignition system - ignition with the piezo-igniter
1. Open the lid of the BBQ before turning on the burner.
2. Set all temperature regulators to (off).
3. Connect the regulator with the gas bottle. Turn the gas
intake on the regulator to the On setting. Do not bend over
the BBQ surface.
4. First push in the left knob and turn it to the left (high
flame) simultaneously pressing the piezo-igniter to ignite
the burner. Release the piezo-igniter when the burner is on.
5. Should the burner not have ignited within 5 seconds, turn
the knob to setting “OFF” and wait 5 minutes, so that
the gas can escape and repeat the process described
above. If the burner still does not ignite, ignite it manually
as described in the operating manual (see section
Conventional Ignition with Match).
6. The flame temperature can be adjusted by the temperature
regulator in the range between (high flame) and
(low flame).
7. The side burner is turned on and operated in the same way
as the main burner.
8. To switch off the BBQ, turn the regulator on the gas bottle
to the “Off” position. Then turn the temperature regulator on
the BBQ to (off).
Conventional Ignition with Match
Danger Risk of burning!
Never ignite the BBQ with a match from above,
always from below.
1. Open the lid of the BBQ before turning on the burner.
2. Set all temperature regulators to (off).
3. Connect the regulator with the gas bottle. Turn the gas
intake on the regulator to the On setting. Do not bend over
the BBQ surface. With the aid of soapy water, check if leaks
are present between the gas bottle and the regulator.
4. Press the left temperature regulator and turn it counter-
clockwise to the position.
5. Stick a burning, commercially available chimney match
(extra-long) from below through the large hole in the base
of the burner housing into the vicinity of the burner.
6. Repeat the process with the second burner.
7. If the side burner is not on, set the temperature regulator
to (off). Press the side burner temperature regulator
and turn it counter-clockwise to the position. Using a
chimney match fire up the flames from below near the gap
between the ignition head and the burner.
8. Consult your distributor in order to remedy the ignition
problem on the BBQ.
P160144_TEPRO_3160UK_Bloomfield_2Brenner_20161007_EN(UK).indd 10 7/10/16 9:39 AM

11
t
Cooking with the Lid Closed
Gas BBQs with lids enable gentle cooking of larger pieces of
meat and entire fowls, similar to an oven.
With a closed lid only a flame is necessary. Set the temperature
to a small or medium flame and close the lid. AVOID EXCESSIVE
HEATING OF THE BBQ. Unnecessary opening of the lid allows
heat to escape each time and thus lengthens the cooking time.
You should therefore avoid opening the lid unnecessarily.
Concluding barbecuing
As soon as the food has been prepared, the BBQ should be
allowed to burn for 5 minutes on a high flame. Residues on the
burner are thus burned away and cleaning is made easier. Make
sure that during this process the lid is opened.
Turning off the BBQ
To switch off the BBQ, turn the regulator on the gas bottle to the
“Off” position. Then turn the temperature regulator on the BBQ
to off. Wait until the BBQ has cooled down sufficiently before
closing the lid.
Danger Risk of burns and accidents!
If the burner does not ignite, turn the temperature
regulator clockwise to (off) and then turn the regulator
on the gas bottle clockwise to the Off position.
Maintenance and Cleaning
Your grill is made of high-quality materials.
Clean the BBQ after each use. To clean and maintain the
surfaces, please heed the following instructions:
Danger Risk of burning!
Let the grill cool down completely before cleaning.
Danger Health risk!
Do not use any decolourants or thinners to remove
stains. These are harmful to health and must not
come into contact with food.
Attention Risk of damage!
Do not use any strong or grinding solvents or abrasive
pads, since these can attack the surfaces and leave
behind scrape marks.
• After each use, let the BBQ burn for approx. 5 minutes without
any food on it. This reduces the food residues.
• Set the regulator on the gas hose to the Off position, before
starting to clean the BBQ.
• Remove the BBQ grate and clean it thoroughly with soapy
water. Rinse it with clean water and then dry it off thoroughly.
• Use a wet sponge to remove loose residue from the grill.
• If a grease layer has formed on the internal surface of the lid,
this can be cleaned off using a strong, hot soapy solution.
Then rinse with clean water and dry completely before using
the BBQ again.
Warning! Never use commercially available oven
cleaners!
• Food residues on the base of the BBQ can be removed with
a brush, spatula, or cleaning sponge. Then wash again with
soapy water. Rinse with clean water and dry.
• Clean the internal and external surfaces using warm soapy
water.
• Use a soft, clean cloth for drying. Do not scratch the surfaces
when wiping them dry.
• Tighten all screws before every use to guarantee the stability
of your BBQ at all times.
• If the gas BBQ is not being used, it should be covered with a
protective hood.
Cleaning the burner
• Turn the regulator on the gas bottle to the Off position. Then
set the temperature regulator on the BBQ to (off) and
disconnect the gas hose from the gas bottle.
• Remove the BBQ grate.
• Clean the burner with a soft brush or with pressurised air.
Then wipe it down with a cloth.
• Clean blocked openings with a sturdy pipe cleaner, a wire or
with the opened end of a paperclip.
Cleaning the Ignition Head
• If it becomes difficult to ignite the flame, this may be due to
the fact that the tip of the ignition head is dirty. In this case it
needs to be cleaned. The ignition head tip is located next to
the burner opening.
• To ensure perfect functioning, food residues between the
ignition head tip and the burner must be removed. Use fine
sandpaper in order to clean the ignition head tip and the
burner edge.
• The ignition head tip should be approx. 4 - 6 mm away from
the burner edge. This is the ideal distance for reliable ignition.
IMPORTANT INFORMATION
You may have acquired a protective hood for your BBQ. In
order to protect your investment, it is recommended that a BBQ
protective hood is always used when the BBQ is not in operation.
However, please ensure that the protective hood is only put on
once the BBQ has cooled down and is clean and dry. The use of
a protective hood may be required. Caution! A protective hood
that is placed on a warm, wet, or unclean BBQ can lead to heavy
corrosion.
For this reason, the BBQ should always have cooled down
and be cleaned of surface dirt and thoroughly dried before
the protective hood is placed on it. This is particularly important
when the BBQ is not going to be used for an extended period of
time and, for example, stored over winter.
In order to preserve the quality of this gas BBQ for a long time,
the owner should ensure that these care and maintenance
instructions are followed precisely.
Take care of your investment and it will serve you well for years
to come.
P160144_TEPRO_3160UK_Bloomfield_2Brenner_20161007_EN(UK).indd 11 7/10/16 9:39 AM

12
t
Troubleshooting
Problem Possible cause Suggested solution
Burner won’t ignite. – LP gas bottle is empty – Replace with full LP gas
bottle
– Defective regulator – Get the regulator tested or
replace it
– Blockage in burner – Cleaning the burner
– Blockage in the gas nozzles
or in the gas hose
– Clean the gas nozzles
and gas hose
– Electrode cable loose or
separated from electrode or
ignition unit
– Reconnect the cable
– Electrode or cable defective – Replace the electrode
or cable
– Defective ignition switch – Replace the ignition
switch
Burner does not
ignite with match
– LP gas bottle is empty – Replace with full LP gas
bottle
– Defective regulator – Get the regulator tested or
replace it
– Blockage in burner – Cleaning the burner
– Blockage in the gas nozzles
or in the gas hose
– Clean the gas nozzles
and gas hose
Small flame or flame
blowback (fire in
burner tube or a
roaring noise can be
heard)
– LP gas bottle is too small – Use larger gas bottle
– Blockage in burner – Cleaning the burner
– Blockage in the gas nozzles
or in the gas hose
– Clean the gas nozzles
and gas hose
– Wind in gas BBQ area is too
strong
– Position the gas BBQ in
an area protected from
the wind
Temperature
regulator difficult
to turn
– Gas valve blocked – Replace gas valve
Disposal
The packaging is made from environmentally friendly
materials, which you can dispose of at your local
recycling points.
Do not under any circumstance dispose of the BBQ in
normal household waste! Dispose of it at an approved
disposal business or at your community disposal facility.
Respect the currently valid regulations. If in doubt, get
in touch with your disposal facility.
Information on (rechargeable) batteries
Please do not throw batteries into household waste.
Every consumer is legally obligated to hand in batteries
at a collection point in his or her community or suburb,
or at the distributor’s outlet. From there, the batteries
can be disposed of in an environmentally friendly way.
On batteries containing harmful materials, you’ll find
the chemical symbols Cd for cadmium, Hg for mercury,
and Pb for lead. Batteries are identified with the symbol
depicted above.
Declaration of conformity
This product fulfills the valid European and national directives.
This is confirmed by the CE mark (corresponding declarations
are lodged with the manufacturer).
Technical details
Product: Item No. 3160UK, Gas BBQ
"Bloomfield"
Weight: approx. 24 kg
Overall dimensions: approx. 112 x 58 x 100 cm
(LxWxH)
Grill surface: approx. 42 x 45 cm
Main burner: 2 pieces, approx. 3 kW each
Power: max. 6 kW
Consumption: max. 436 g/h
BBQ category: I3+ (28-30/37), GB
Gas type/Gas pressure: LPG
Butane 28-30 mbar
Propane 37 mbar
Nozzle main burner: 0.85 mm
Battery: 1x 1.5V AA (not included)
P160144_TEPRO_3160UK_Bloomfield_2Brenner_20161007_EN(UK).indd 12 7/10/16 9:39 AM

13
t
Service
Please contact our service point for assistance with technical
questions. This product was carefully manufactured and
packaged. Should you nevertheless have a complaint, our
employees are more than happy to assist.
The gas grill should be serviced once a year by a qualified
professional.
For service questions, you can reach us at the following email
address (distributor).
Subject to technical modifications and typographical errors.
Distributor
tepro Garten GmbH
Carl-Zeiss-Straße 8/4
D-63322 Rödermark
Web: www.tepro-gmbh.de
P160144_TEPRO_3160UK_Bloomfield_2Brenner_20161007_EN(UK).indd 13 7/10/16 9:39 AM

14
t
Matching accessories (not included in the delivery scope)
Universal covering hood - for medium Gas BBQ
tepro Item Number 8604
– Made from high-quality, durable, polyester fabric 300 x 250D
– with water-repellent PVB coating
– resistant to UV radiation
– side vents
– with Velcro fastener
– Material:
Exterior: PVB (Polyvinyl butyral)
Interior: 100% polyester
– Hood dimensions approx. 130 x 65 x 100 cm (WxDxH)
P160144_TEPRO_3160UK_Bloomfield_2Brenner_20161007_EN(UK).indd 14 7/10/16 9:39 AM

Bitte aufklappen
01.04.2010 13:38:13 Uhr
P160144_TEPRO_3160UK_Bloomfield_2Brenner_20161007_EN(UK).indd 15 7/10/16 9:39 AM
Table of contents
Other tepro Grill manuals

tepro
tepro Fremont Installation manual

tepro
tepro TORONTO User manual

tepro
tepro IRVINE User manual

tepro
tepro TORONTO XXL User manual

tepro
tepro PETERSBURG User manual

tepro
tepro HARTFORD User manual

tepro
tepro VISTA User manual

tepro
tepro HIGHLAND User manual

tepro
tepro TORONTO CLICK 1164S User manual

tepro
tepro TORONTO COMPACT User manual

tepro
tepro 1146 User manual

tepro
tepro Winston User manual

tepro
tepro MELROSE User manual

tepro
tepro DETROIT User manual

tepro
tepro KEY WEST 1065N User manual

tepro
tepro Toronto Click Installation instructions

tepro
tepro TORONTO COMBI User manual

tepro
tepro Albertville User manual

tepro
tepro Louisville User manual

tepro
tepro ATLANTA User manual