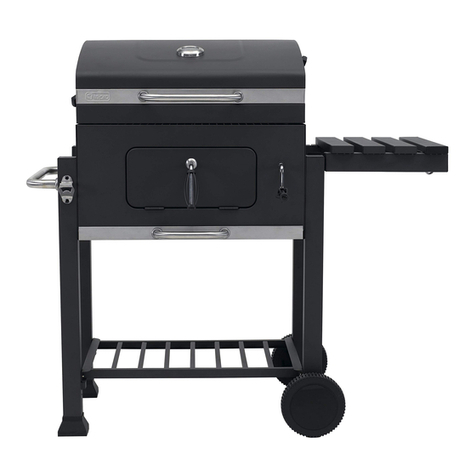
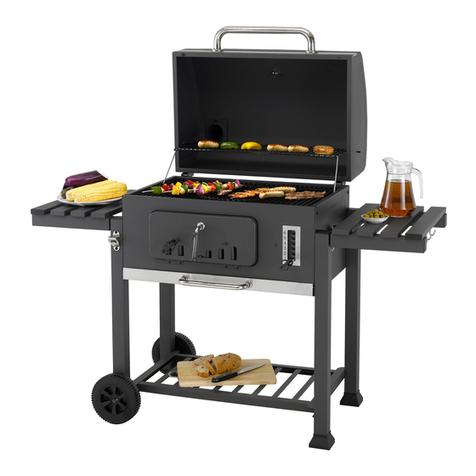
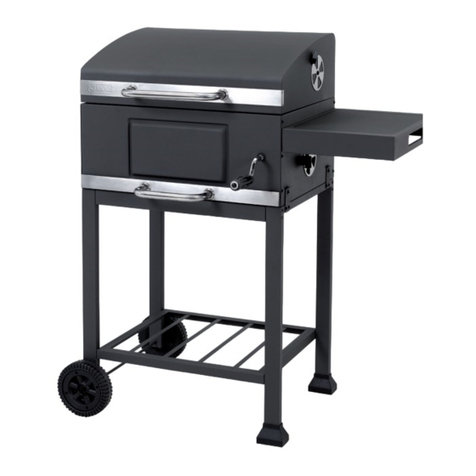
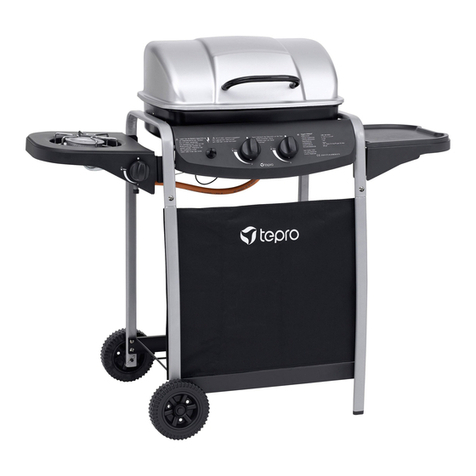
tepro BUFFALO User manual

Bitte aufklappen
01.04.2010 13:38:13 Uhr
tInstruction Manual
CHARCOAL-GAS-COMBI-GRILL „BUFFALO“
Version 2017/
Art. Nr. 3131UK
P160163_TEPRO_BUFFALO_3131UK_kombi_A4_20161017.indd 1 17/10/16 11:19 AM

P160163_TEPRO_BUFFALO_3131UK_kombi_A4_20161017.indd 2 17/10/16 11:19 AM

3
t
Contents
Before using the grill............................................................................................................................. 4
Scope of delivery................................................................................................................................... 4
Intended use .......................................................................................................................................... 4
For your safety.................................................................................................................................. 4 - 6
Signal symbols................................................................................................................................... 4
Safety instructions for gas grill........................................................................................................... 4
General safety instructions ............................................................................................................... 4
Safety instructions ........................................................................................................................ 4 - 5
Safety instuctions for batteries........................................................................................................... 5
Safety instructions for charcoal grill ................................................................................................... 6
General safety instructions ................................................................................................................ 6
Safety instructions ............................................................................................................................. 6
Assembly......................................................................................................................................... 7 - 11
Preparation ........................................................................................................................................ 7
Required tools ................................................................................................................................... 7
Assembling the BBQ................................................................................................................... 7 - 11
Connecting the gas bottle ........................................................................................................... 11 - 12
Regulator and Hose......................................................................................................................... 11
Storing the BBQ............................................................................................................................... 11
The Gas Bottle................................................................................................................................. 11
Connection to the BBQ .................................................................................................................... 11
Mounting the gas hose .................................................................................................................... 12
Checking for Gas Leaks .................................................................................................................. 12
Setting up the BBQ.............................................................................................................................. 12
Before grilling ...................................................................................................................................... 12
Using the gas grill ........................................................................................................................ 12 - 13
Using the charcoal grill....................................................................................................................... 14
Maintenance and cleaning........................................................................................................... 14 - 15
Care of grill surfaces and lid .............................................................................................................. 15
Troubleshooting .................................................................................................................................. 16
Disposal................................................................................................................................................ 16
Declaration of conformity................................................................................................................... 16
Technical data...................................................................................................................................... 16
Warranty .............................................................................................................................................. 16
Service ................................................................................................................................................. 16
Distributing company.......................................................................................................................... 16
Matching accessories (not included in the delivery scope)..................................................... 17 - 19
P160163_TEPRO_BUFFALO_3131UK_kombi_A4_20161017.indd 3 17/10/16 11:19 AM

4
t
Before using the grill
After unpacking and before every use, check whether the item
shows any signs of damage.
Should this be the case, do not use the item, but notify your
retailer.
The operating manual is based on the norms and regulations
that are applicable in the European Union. In non-EU countries,
observe country-specific directives and laws!
Before start-up, first read through the safety information
and the operating manual carefully. Only by doing so will
you be able to use all of the functions safely and reliably.
Before start-up, first read through the safety information and the
operating manual carefully. Only by doing so will you be able to
use all of the functions safely and reliably.
Scope of delivery
Part No. Article Qty.
A Warming Rack 2
B + B1 Cooking Grid half + Cooking Round Grid 4 + 2
CFlame Tamer 3
DChimney Assembly 1
E Lid and Firebox Assembly 1
F Side Shelf Assembly (R) 1
F1 Bottle Opener 1
G Charcoal Box Handle 1
H Cart Rear Panel 1
I Cart Side Beam (R) 1
J Storage Panel 1
K Cart Leg (Right/Front) 1
L Cart Leg (Right/Rear) 1
MBottom Panel Assembly 1
M1 Castors without lock 2
M2 Castors with lock 2
N Door Handle 1
N1 Door benzel 2
ODoor Assembly 1
P Cart Beam (Front) 1
P1 L Bracket 1
Q Cart Side Panel (L) 1
R Cart Beam (Rear) 1
S Hook for Grease Bowl 1
T Grease Bowl 1
U Hose and Regulator 1
V Charcoal Box Handle 1
W Side Shelf Assembly (L) 1
W1 Handle Bezel 1
W2 Side Shelf Handle 5
W3 Hooks 2
1 Screw 1/4 73
2 Screw 5/32 8
Please check whether the scope of delivery is complete and
undamaged. Contact your retailer if a piece is missing or
damaged.
Complaints regarding damaged or missing pieces made after
assembly is completed or begun will not be recognized.
Intended use
Use this BBQ to heat, cook and grill food.
It is suitable exclusively for outdoor use and in a domestic setting.
Only use the item as described in this operating manual. All other
use.s are considered improper and can lead to material damage
or even to personal injuries.
The manufacturer accepts no liability for damages caused by
improper use.
For your safety
Signal symbols
Danger High risk!
Failure to observe the warning can lead to
potentially fatal injuries.
Attention Moderate risk!
Disregarding this warning can lead to property
damage.
Caution Low risk!
Facts that should be respected when handling the
device.
SAFETY INSTRUCTIONS FOR GAS GRILL
GENERAL SAFETY INSTRUCTIONS
to be observed in each use
–Use outdoors only!
–Read the instructions before using the appliance.
–WARNING! Accessible parts may be very hot. Keep young
children away.
–Do not move the appliance during use.
–Turn off the gas supply at the gas cylinder after use.
Safety instructions
Danger Fire hazard!
Parts of the BBQ become very hot during operation
and can cause fires.
– It is essential that you have a fire extinguisher and first-aid kit
ready and be prepared for an accident or fire.
– Place the BBQ on an even, horizontal, secure, heat-resistant
and clean surface.
– Set up the BBQ with at least 1 m clearance from highly flammable
materials such as awnings, wooden patios or furniture.
– Do not move the BBQ during use.
– Some foods produce flammable fats and juices. Clean the
BBQ regularly, preferably after each use.
– Never leave the BBQ unattended during use.
P160163_TEPRO_BUFFALO_3131UK_kombi_A4_20161017.indd 4 17/10/16 11:19 AM

5
t
Danger Fire hazard!
Never turn on/fire up the BBQ with the lid closed.
– Operate the gas BBQ with a small flame when the lid is closed.
Danger Risk of burning and accidents!
This device is not intended for use by persons (incl.
children) with limited physical, sensory, or mental
capacities or lacking experience and/or lacking
knowledge.
– Such persons must be informed about the dangers of the
device and supervised by a person responsible for their safety.
– Any modifications to the product represent a large safety
risk and are forbidden. Do not undertake any unauthorised
interventions yourself. In case of damages, repairs or other
problems with the BBQ, contact our service point or a
professional in your area.
– Keep children and pets away from the device.
The BBQ, the gas flame and the food on the BBQ can become
very hot during operation, such that any contact with these can
cause very severe burns.
– Keep sufficient distance from the hot parts, since any contact
can lead to severe burns.
– Always wear oven or BBQ gloves when grilling.
– Use only long-handled utensils with heat-resistant grips.
– Do not wear any clothing with wide sleeves.
– Let the BBQ cool down completely before cleaning and/or
storage.
Danger Risk of deflagration!
Flammable liquids that are poured onto the flames
can form flashes or deflagrations.
– Never use flammable liquids such as petrol or spirits.
Danger Risk of poisoning!
Gas is odourless and can be lethal in closed spaces!
– Use the grill outdoors only.
Danger Health risk!
Do not use any decolourants or thinners to remove
stains. These are harmful to health and must not
come into contact with food.
Danger Risks to children!
While playing, children can become caught in the
packaging film and choke.
– Do not let children play with the packaging films.
– Make sure that children do not put any small assembly parts
into their mouths. They could swallow the parts and choke on
them.
Danger Risk of injury!
Both the BBQ and individual parts have some sharp
edges.
– Be careful with individual parts to prevent accidents and/or
injury during assembly and use. Wear protective gloves if
necessary.
– Do not set up the BBQ near entryways or high-traffic zones.
– Always exercise extreme caution while grilling. If distracted,
you can lose control of the device.
– Always be attentive to and aware of what you are doing. Do
not use this product if you are unfocussed or tired, or if you are
under the influence of drugs, alcohol, or medications. Just one
moment of carelessness during use of the product can lead to
serious injuries.
Attention Risk of damage!
During use, the screws can loosen slowly and impair
the BBQ's stability.
– Check the stability of the screws prior to each use. If necessary,
tighten all of the screws again to ensure the BBQ is standing
securely.
Attention Risk of damage!
Do not use any strong or grinding solvents or
abrasive pads, since these can attack the surfaces
and leave behind scrape marks.
Danger Risk of burning and accidents!
Caution! If you detect the smell of gas:
– Immediately close the gas intake of the gas bottle.
– Extinguish all open flames.
– Do not operate any electrical devices.
– Ventilate the surrounding area.
– Carry out a leakage point test, as described in this operating
manual.
– If, after testing and once the leakages have been remedied,
you continue to detect the smell of gas, do not continue to
use the BBQ. Immediately inform a gas technician or the
distributor from which you purchased the equipment.
Danger Risk of burning and accidents!
Do not store the gas BBQ in immediate proximity
to combustibles (e.g. petrol) or other flammable
liquids or gases.
– The gas bottle must be separated from the gas BBQ during
storage.
– Do not store the gas bottle in immediate proximity to the gas BBQ.
– Do not place the gas bottle immediately under the gas BBQ.
Safety instuctions for batteries
– Only use top-quality batteries. Cheap batteries could leak and
damage the device as a result.
– If the batteries leak, remove them with a cloth and dispose of
them accordingly. Ensure that leaking battery acid does not
come into contact with skin and eyes. If you do get battery
acid in your eyes, flush them thoroughly with lots of water
and consult a physician immediately! If battery acid comes
into contact with your skin, wash the affected area with lots of
water and soap.
– If you will not use the device for an extended period, the
battery should be removed since the device can be damaged
through possible leakage.
– If the performance deteriorates (ignition), the battery must be
replaced.
– Batteries are very dangerous if swallowed. Please keep the
batteries and the device components away from children at
all times. If a battery is swallowed, seek medical attention
immediately.
– Batteries must not be recharged or activated with other
means, dismantled, thrown into fire or shortcircuited.
– Remove the batteries prior to disposing of the device.
P160163_TEPRO_BUFFALO_3131UK_kombi_A4_20161017.indd 5 17/10/16 11:19 AM

6
t
SAFETY INSTRUCTIONS FOR CHARCOAL GRILL
GENERAL SAFETY INSTRUCTIONS
- to be observed in each use
–Do not use indoors!
–WARNING! Do not use spirit or petrol for lighting or
relighting!
–Use only firelighters complying to EN 1860-3!
–WARNING! This barbeque will become very hot, do not
move it during operation!
–WARNING! Keep children and pets away!
Safety instructions
Danger Fire hazard!
Live coals and BBQ components get very hot during
operation and can start fires.
– It is essential that you have a fire extinguisher and first-aid kit
ready and be prepared for an accident or fire.
– Place the BBQ on an even, horizontal, secure, heat-resistant
and clean surface.
– Set up the BBQ with at least 1 m clearance from highly
flammable materials such as awnings, wooden patios or
furniture.
– Do not move the BBQ during use.
– Ignite the charcoal only in a sheltered location.
– Fill the BBQ with a max. 1.4kg of charcoal.
– Some foods produce flammable fats and juices. Clean the
BBQ regularly, preferably after each use.
– Only tip out the ash once the charcoal has completely burned
out and cooled down.
Danger Risk of burning and accidents!
This device is not intended for use by persons (incl.
children) with limited physical, sensory, or mental
capacities or lacking experience and/or lacking
knowledge.
– Such persons must be informed about the dangers of the
device and supervised by a person responsible for their safety.
– Any modifications to the product represent a large safety
risk and are forbidden. Do not undertake any unauthorised
interventions yourself.
In case of damages, repairs or other problems with the BBQ,
contact our service point or a professional in your area.
– Keep children and pets away from the device.
The BBQ, the charcoal, and the BBQ meat become very hot
during use. Any contact can result in serious burns.
– Keep sufficient distance from the hot parts, since any contact
can lead to severe burns.
– Always wear oven or BBQ gloves when grilling.
– Use only long-handled utensils with heat-resistant grips.
– Do not wear any clothing with wide sleeves.
– Use only dry lighters or special fluid lighters compliant with EN
1860-3 as firelighters.
– Let the BBQ cool down completely before cleaning and/or
storage.
Danger Risk of deflagration!
Flammable liquids that are poured on the embers
cause flash flames or deflagrations.
– Never use flammable liquids such as petrol or spirits.
– Nor put pieces of charcoal soaked in flammable liquid onto the
embers.
Danger Risk of poisoning!
When burning charcoal, barbecue briquettes, etc.,
carbon monoxide is formed. This gas is odourless and
can be fatal in closed spaces!
– Use the grill outdoors only!
Danger Health risk!
Do not use any decolourants or thinners to remove
stains. These are harmful to health and must not
come into contact with food.
Danger Risks to children!
While playing, children can become caught in the
packaging film and choke.
– Do not let children play with the packaging films.
– Make sure that children do not put any small assembly parts
into their mouths. They could swallow the parts and choke on
them.
Danger Risk of injury!
Both the BBQ and individual parts have some sharp
edges.
– Be careful with individual parts to prevent accidents and/or
injury during assembly and use. Wear protective gloves if
necessary.
– Do not set up the BBQ near entryways or high-traffic zones.
– Always exercise extreme caution while grilling. If distracted,
you can lose control of the device.
– Always be attentive to and aware of what you are doing. Do
not use this product if you are unfocussed or tired, or if you are
under the influence of drugs, alcohol, or medications. Just one
moment of carelessness during use of the product can lead to
serious injuries.
Attention Risk of injury!
During use, the screws can loosen slowly and impair
the BBQ’s stability.
– Check the stability of the screws prior to each use. If necessary,
tighten all of the screws again to ensure the BBQ is standing
securely.
Attention Risk of damage!
Do not use any strong or grinding solvents or abrasive
pads, since these can attack the surfaces and leave
behind scrape marks.
P160163_TEPRO_BUFFALO_3131UK_kombi_A4_20161017.indd 6 17/10/16 11:19 AM

7
t
Assembly
Preparation
Unpack BBQ
Unpack the BBQ and dispose of all packaging materials. Keep
the packaging materials out of the reach of children and dispose
of them according to regulations after BBQ assembly.
Danger Risk of injury!
Failure to follow these instructions can lead to
problems and risks while using the BBQ.
– Follow all of the assembly instructions listed here.
Required tools
1 x Phillips screwdriver
Assembling the BBQ
1. First read through the assembly instructions completely.
2. Allow yourself enough time for assembly and find an even
working space of two to three square meters.
3. Place the necessary tools within reach. Small parts such as
handles will probably be preassembled.
4. Two to three people are needed for the assembly.
Step 1
O
P
O1
First insert the rubber grommets supplied with the door handle
(O) into the door (P). Then screw down tightly the door handle
and the door cover rings (O1) with two Phillips screws 5/32 (2)
to the door.
Step 2
Screw the bottle opener (F1) with two Phillips screws 5/32 (2) to
the right side shelf assembly (F).
P160163_TEPRO_BUFFALO_3131UK_kombi_A4_20161017.indd 7 17/10/16 11:19 AM

8
t
Step 3
Place the bottom panel assembly (M) on a clean, even surface.
Step 4
Turn the bottom panel assembly around and screw down the
castors with locks (M2) tightly onto the left side, and the castors
with locks (M1) onto the right side of the the bottom panel
assembly (M) with four Phillips screws 1/4 (1) each.
Step 5
Screw the left side panel (Q) and the middle wall (H) to the
bottom panel assembly (M) using seven Phillips screws 1/4 (1).
Step 6
Connect the rear panel (S) with the bottom panel assembly (M).
Then connect the rear panel to the left side panel (Q) and the
middle wall (H). To do this, use nine Phillips screws 1/4 (1).
Step 7
Connect the right rear (L) and the right front cart leg (K) with the
bottom panel assembly (M). Then fasten the storage panel (J)
and the side beam (I). To do this, use 13 Phillips screws 1/4 (1).
P160163_TEPRO_BUFFALO_3131UK_kombi_A4_20161017.indd 8 17/10/16 11:19 AM

9
t
Step 8
Connect the front beam (P) with the left side panel (Q) and the
right front cart leg (K). Connect the rear beam (G) with the left
side panel (Q) and the right rear cart leg (L). To do this, use
nine Phillips screws 1/4 (1). Connect the bracket (P1) with the
front beam (P) and the middle wall (H). To do this, use four
Phillips screws 5/32 (2).
Step 9
Hook the door assembly (O).
Step 10
Connect the chimney assembly (D) with the right panel of the
rebox assembly (E). To do this, use 4 Phillips screws 1/4 (1).
Step 11
At least two strong and healthy persons are required to
complete this step, in order to lift the rebox assembly.
The rebox assembly with lid (E) weighs approx. 34 kg. It is
recommended that a third person is ready available to position
the cart properly under the rebox assembly, when the rebox
assembly is being placed onto the cart. Lift the rebox assembly
with lid (E) with 2 persons and place slowly and carefully onto
the cart. Fasten the rebox assembly using four Phillips screws
1/4 (1). Then turn the charcoal box handle (V) clockwise onto
the lever for height adjustment of the charcoal grid until it locks
in place.
P160163_TEPRO_BUFFALO_3131UK_kombi_A4_20161017.indd 9 17/10/16 11:19 AM

10
t
Step 12
Connect the right side shelf assembly (F) and the left side shelf
assembly (W) with the rebox assembly (E). Fasten the shelf
assemblies with ve Phillips screws 1/4 (1) each.
Step 13
Place the three ame tamers (C) onto the gas burner in the left
rebox. Put then the BBQ grid half + round grid (B + B1) into
the left and right reboxes. Then hook the two warming racks
(A) in the rear upper area of the reboxes.
Step 14
Hook the hook for grease bowl (S) under the reboxes of the
gas BBG. Hook the grease bowl (T) onto the hook.
Step 15
Loose and remove the battery compartment lid and insert
a 1.5 V R6/LR6/AA battery (not included!) into the battery
compartment. Observe correct polarity (-/+). The plus of the
battery must point outward. Also refer to the section "Inserting a
battery". Replace the lid and fasten it tightly.
P160163_TEPRO_BUFFALO_3131UK_kombi_A4_20161017.indd 10 17/10/16 11:19 AM

11
t
Step 16
First fasten the hooks (W3) to the side handle (W2). Then screw
the side handle (W2) and the side handle cover rings (W1) with
two Phillips screws 1/4 (1) to the left shelf assembly (W).
Step 17
The assembly is complete.
Important:
All screws must be tightly fastened.
Connecting the gas bottle
Regulator and Hose
These accessory parts are supplied with the gas BBQ.
Replacements are available at your BBQ distributor or an
authorised LPG gas supplier. Use only regulators and hoses
that are certified for LP gas with the pressure values mentioned.
The lifespan of the regulator is approximately 2 years. It is
recommended that the regulator be exchanged within 2 years
from the production date.
The use of an incorrect or defective regulator and gas hose is
dangerous. Before each use of the gas BBQ, check that the
correct parts are being used.
The gas hose used must conform to the regulations and provisions
of the country in which the BBQ is being used. The length of the
gas hose must not exceed 1.5 metres. Worn or damaged hoses
must be exchanged immediately. The hose must be connected
without twists or bends. Ensure that the gas hose is not bent
or constricted and that it does not come into contact with the gas
BBQ, with the exception of the hose connection.
Storing the BBQ
The gas BBQ must only be stored indoors, once the gas bottle
has been disconnected. If the BBQ is not being used for an
extended period of time, it should be covered with a protective
hood and stored in a dry and dust-free environment.
The gas bottle
A gas bottle is not supplied with this BBQ. The gas bottle must be
provided by the end user. Do not drop your gas bottle or handle
it roughly or inappropriately.
When the BBQ is not being used, the gas bottle must be
separated from the BBQ. Fit the gas bottle with its protective cap
once it has been disconnected from the BBQ. The gas bottle
must be stored separate from the BBQ.
The storage of gas bottles is not permitted in underground
spaces, in stair wells, passageways and thoroughfares of
buildings, or in their immediate vicinity. The valves must be fitted
with valve protection caps and lock nuts.
Gas bottles - including empty ones - must be stored upright.
Gas bottles must be stored outdoors in an upright position and
out of reach of children. The gas bottle must not be stored in
areas in which the temperature exceeds 50ºC. Do not store the
gas bottle nears flames or other flammable sources. Do not
smoke in the vicinity of gas bottles!
Connection to the BBQ
Place the gas bottle next to or behind the BBQ on the floor.
Do not in any case place the gas bottle on the support under the
grill.
Before the gas bottle is connected to the BBQ, you must ensure
that there is no dirt in the heads of the gas bottle, the regulator,
or the burner. Spiders and insects can get in there and thus block
the burner or the venturi tube at the opening. A blocked burner
can cause a fire underneath the BBQ. Clean blocked burner
openings using a sturdy pipe cleaner.
P160163_TEPRO_BUFFALO_3131UK_kombi_A4_20161017.indd 11 17/10/16 11:19 AM

12
t
Mounting the gas hose
•Depending on national regulations, there are two ways to
connect the gas hose to the grill. First take the protective cap
off the gas connection if present.
Method 1:
•Firmly screw one end of the gas hose onto the gas connection
(left-hand threading). Do not use an extra gasket!
•Tighten the gas hose union nut securely using a size
17 spanner; at the same time hold the gas connection in place
with pliers or a second size 17 spanner.
Method 2:
•Run a hose clamp of the right size a few centimetres over
the loose end of the gas hose. Then slide this end onto the
gas connection (wet the gas connection somewhat to facilitate
sliding onto the hose). Fix the connection with the hose clamp.
•Connect the other end of the gas hose with the pressure
regulator included.
Separate instruction manuals are included with the gas hose and
the pressure regulator. Follow these instructions very closely
when you connect the pressure regulator to the gas hose and
gas container (the figures may differ for the hose, pressure
regulator and gas container depending on the respective national
standards).
Lay the hose so that it is not kinked or twisted.
Warning!
Prior to use test all connections for gas leaks.
Always perform the test using soapy water. Never use an open
flame to detect leaks.
Checking for gas leaks
•Mix one part dishwashing liquid with 3 parts water. For testing,
approx. 50 ml of soapy water is needed.
•Make sure all temperature regulators are set to (off).
•Connect the regulator with the gas bottle and turn on the
burner using the left temperature regulator. Ensure that the
connections are securely made.
•Turn on the gas intake.
•Apply the soapy water to the hose and to all connections. If
bubbles appear, a leak is present.
•Fix the leak and then start the test again.
•Switch off the gas once the test has been concluded.
•If a leak is found and it cannot be repaired, do not attempt to
repair the leak further. In this case, contact a professional.
•Do not use the BBQ until the leak has been properly repaired.
Setting up the BBQ
Attention Risk of damage!
During use, the screws can loosen slowly and
impair the BBQ's stability.
– Check the stability of the screws prior to each use. If necessary,
tighten all of the screws again to ensure the BBQ is standing
securely.
•Before use, place the BBQ on a level, solid base located
outdoors.
•Do not in any case place the gas bottle on the support under
the grill.
•Push down the levers of the brake wheel on the left side to
secure the device against rolling away. Always secure the
BBQ against rolling away during grilling. Push the levers up to
release the wheels and move the BBQ.
Before grilling
•Wash off possible rough production residues using warm
water; in doing so, avoid the use of cleaning agents or
dishwashing liquid.
•Rub the BBQ grate by a cloth wetted with cooking or frying oil.
•Pre-firing
Before barbecuing for the first time, heat up the BBQ for a min.
30 minutes with a closed lid and high flame without food. The
heat cleans the internal parts and burns away the finishing
residues of coloured BBQ parts. In the process, odours and
some smoke may develop. However, this is harmless and only
lasts a short time. Ensure sufficient ventilation.
•Preheating
It is recommended that you preheat the BBQ before each use
for approx. 10-15 minutes with a closed lid.
Using the gas grill
Danger Risk of burning!
The grill and grilled foods can become very hot during
use and any contact with them may cause severe
burns.
– Keep away from hot parts as any contact can cause severe
burns. Do not touch the dark areas of the lid handle, because
the handle is not heat-insulated here. The dark areas are
getting strongly heated in the course of grilling. See the
following figure.
– Always wear kitchen or grilling gloves when grilling.
– Use long-handled grilling utensils with heat-resistant handles
only.
– Do not wear any clothing with wide sleeves.
Danger Risk of explosion!
Before lighting the grill, read the following instructions
on turning on/lighting as well as all warning and safety
instructions.
– Check the grill for cracks, cuts and other damages before use.
– Do not use the grill if the gas hose is damaged or porous.
– Open the grill lid before igniting the burner. Failure to do so
may result in an explosion causing severe physical injury or
death.
P160163_TEPRO_BUFFALO_3131UK_kombi_A4_20161017.indd 12 17/10/16 11:19 AM

13
t
Ignition system - lighting using the Piezo igniter
1. Open the grill lid before igniting the burner.
2. Turn all temperature knobs to (off).
3. Connect the regulator to the gas cylinder. Turn on the gas
supply by turning the regulator to On. Do not lean over the
grill surface.
4. To light the burner, push in the left knob and turn it slightly
left (high flame) while at the same time pressing the
Piezo igniter. Release the Piezo igniter once the burner is lit.
5. If the burner does not light within 5 seconds, turn the
regulator to off. Wait 5 minutes for any gas to dissipate
and then repeat the above steps. If the burner still does
not light, ignite the grill manually as described in the user
manual (see Ignite manually with matches).
6. The flame level can be set using the temperature knob
between (high flame) and (low flame).
7. The instructions for turning on and operating the main
burners also apply to the side/horizontal burners.
8. To turn off the grill, turn the regulator on the gas cylinder to
Off. Then turn the temperature knob on the grill to (off).
Ignite manually with matches
Danger Risk of burning!
Never lean over the grill surface with a match to light
the grill. Always light the grill from below.
1. Open the grill lid before igniting the burner.
2. Turn all temperature knobs to (off).
3. Connect the regulator to the gas cylinder. Turn on the gas
supply by turning the regulator to On. Do not lean over
the grill surface. Use soapy water to check for gas leaks
between the gas cylinder and the regulator.
4. Push in the left temperature knob and turn it counter
clockwise to .
5. Insert a lit, commercially-available extra long matchstick
from below through the large hole in the floor of the burner
unit near the burner.
6. Repeat this process for the second burner.
7. If the flame on the side/horizontal burner does not light,
turn the temperature knob to (off). Push in the left or right
temperature knob and turn it counter clockwise to . Use
an extra long matchstick.
8. Contact your retailer to troubleshoot any ignition problems
you might experience with the product.
Finishing grilling
Allow the grill to burn at the highest flame setting for 5 minutes
once your food is finished grilling. This eases cleaning by burning
away any reside left on the burner. Make sure that the lid is left
open during this step.
Turning off the grill
To turn off the grill, turn the regulator on the gas cylinder to Off.
Then turn the temperature knob on the grill to (off). Wait until
the grill has cooled down sufficiently before closing the lid.
Danger Risk of burning and accident!
If the burner does not ignite, first turn the temperature
knob clockwise to (off) and then turn the regulator
on the gas cylinder counter clockwise to Off.
P160163_TEPRO_BUFFALO_3131UK_kombi_A4_20161017.indd 13 17/10/16 11:19 AM

14
t
Using the charcoal grill
Danger Risk of burning!
The BBQ, the charcoal and BBQ meat become very
hot during use. Any contact can result in serious
burns.
– Keep sufficient distance from the hot parts, since any contact
can lead to severe burns.
– Always wear oven or BBQ gloves when grilling.
– Use only long-handled utensils with heat-resistant grips.
– Do not wear any clothing with wide sleeves.
– Use only dry lighters or special fluid lighters compliant with EN
1860-3 as firelighters.
Ignite manually with gas flame
1. Open the lid and take out the cooking grids (B) from right
firebox. The lid must be open when gas is ignited.
2. Layer maximum 1.4kg of charcoal in the middle of the
charcoal grid. Make sure that the charcoal is located within
the charcoal grid. Use the charcoal box handle (V) to set
the height of the charcoal grid onto the second position
from the bottom.
Refill flap for
charcoal
Ignition regulator
for gas flame
Fourfold height
adjustment of the
charcoal grid
Charcoal box
handle (V)
3. Press in the ignition regulator near the refill flap. Then press
in the ignition regulator again and turn it counter-clockwise
at the same time. In this way the flames will fire up.
Caution – Risk of Burning! Keep parts of the body and
items of clothing away from flames. Observe the section
Firing up with a match, items 4 to 8.
Ignite with matches
1. Open the lid and take out the cooking grids (B) from right
firebox.
2. Place 1-2 solid fire-lighters in the middle of the charcoal
grid. Pay attention to the manufacturer’s instructions on the
packaging. Light the fire-lighters with a match.
3. Layer maximum 1.4kg of charcoal on the charcoal grid
on top of the fire-lighters. Make sure that the charcoal is
located within the charcoal grid.
4. The BBQ must be warmed up for min. 30 minutes before the
first use, see section Before grilling.
5. As soon as the charcoal is glowing, spread it evenly over the
charcoal grate. To do this, use a suitable fireproof tool with a
long, fireproof handle.
6. Before putting the BBG grid onto the BBG, rub it with a bit
of cooking oil.
7. Only place the BBQ meat on the grate when the charcoal is
covered with a bright layer of ash.
8. Open the refill flap at the front to add charcoal.
Please note: The height of the charcoal grid can be adjusted. The
charcoal grid can be positioned at four different heights. Set the
desired height using the charcoal box handle (G). Always use
grill gloves when the BBQ is hot to avoid accidental contact with
hot parts.
Maintenance and cleaning
Your grill is made of high-quality materials.
Please note: Stainless steel changes colour at high temperatures!
This is not a defect, but rather a sign of quality!
Contrary to popular belief, stainless steel is not one hundred
percent safe from rust and corrosion and is thus not maintenance-
free. Even the highest-quality stainless steels require regular
cleaning with clean water and rubbing with cooking oil, in order
to prevent oxidation and corrosion.
Clean the grill after each use. To clean and maintain the surfaces,
please follow these instructions:
Danger Risk of burning!
Let the grill cool down completely before cleaning.
Danger Health hazard!
Do not use any paint solvents or thinners to remove
stains. Such liquids are hazardous to health and may
not come into contact with food.
Attention Risk of damage!
Do not use any strong or abrasive solvents or scouring
pads as such products attack the grill›s surfaces and
leave permanent markings.
Special notes for cleaning the gas grill
•Allow the grill to burn at the highest flame setting for 5 minutes
once your food is finished grilling. This prevents food residue
from building on the racks.
•Turn the regulator on the gas hose to Off before cleaning.
Cleaning the burner
•Turn the regulator on the gas bottle to the Off position. Then
set the temperature regulator on the BBQ to (off) and
disconnect the gas hose from the gas bottle.
•Ensure, that the grill has cooled down before proceeding.
•Remove the BBQ grates.
•Clean the burner with a soft brush or with pressurised air.
Then wipe it down with a cloth.
•Clean blocked openings with a sturdy pipe cleaner, a wire or
with the opened end of a paperclip.
P160163_TEPRO_BUFFALO_3131UK_kombi_A4_20161017.indd 14 17/10/16 11:19 AM

15
t
Cleaning the Ignition Head
•If it becomes difficult to ignite the flame, this may be due to
the fact that the tip of the ignition head is dirty. In this case it
needs to be cleaned. The ignition head tip is located next to
the burner opening.
•To ensure perfect functioning, food residues between the
ignition head tip and the burner must be removed. Use fine
sandpaper in order to clean the ignition head tip and the
burner edge.
•The ignition head tip should be approx. 4 - 6 mm away from
the burner edge. This is the ideal distance for reliable ignition.
Special notes for cleaning the charcoal grill
Danger Risk of burning!
Let the grill cool down completely before cleaning.
– Only tip out the ash when the fuel has completely burned out.
Danger Health risk!
Do not use any decolourants or thinners to remove
stains. These are harmful to health and must not
come into contact with food.
Attention Risk of damage!
Do not use any strong or grinding solvents or abrasive
pads, since these can attack the surfaces and leave
behind scrape marks.
•Let the fuel burn out completely after grilling. This eases the
cleaning effort by burning away excess fat and BBQ residues.
•Empty out the cold ash. It is very important that you remove
the ash before moisture combines with the cold ash. Ash
is saline and, in a moist condition, will attack the inside of
the ash collecting tray. Thus, over years the ash collecting
tray can sustain damage through rust.
General cleaning
Clean the BBQ after each use. To clean and maintain the
surfaces, please heed the following instructions:
•Remove the grill racks and clean them thoroughly with soapy
water. Rinse with clean water and dry thoroughly.
•Use a wet sponge to remove loose residue from the grill.
•If a grease layer has formed on the internal surface of the lid,
this can be cleaned off using a strong, hot soapy solution.
Then rinse with clean water and dry completely before using
the BBQ again.
Warning! Never use commercially available oven cleaners!
•Food residues on the base of the BBQ can be removed with
a brush, spatula, or cleaning sponge. Then wash again with
soapy water. Rinse with clean water and dry.
•Clean the internal and external surfaces using warm soapy
water.
•Use a soft, clean cloth for drying. Do not scratch the surfaces
when wiping them dry.
•Tighten all screws before every use to guarantee the stability
of your BBQ at all times.
•IMPORTANT: Always store the grill in adry place.
•If the gas BBQ is not being used, it should be covered with a
protective hood.
Care of grill surfaces and lid
IMPORTANT INFORMATION
Care and protection of stainless steel surfaces
Your grill was manufactured with stainless steel components.
All stainless steel products demand a certain degree of care and
protection to maintain their appearance. Contrary to popular
opinion, stainless steel is neither entirely safe from rust bloom
and corrosion nor entirely maintenance-free. Even the highest
quality stainless steel requires regular cleaning with clean water
to prevent oxidation and corrosion.
Modern style demands that your grill is outfitted with stainless
steel components and a brushed finish. This brushed finish is
achieved by a process that removes the mirror-like lustre of
stainless steel.
Stainless steel products with a brushed finish demand regular
cleaning and care to maintain their appearance. Without
appropriate care, your stainless steel product will be subject to
rust and corrosion.
Stainless steel is not a maintenance-free material.
Cleanliness and stainless steel go hand in hand.
After assembling your grill, we recommend applying a thin
layer of olive oil to all readily accessible stainless steel
surfaces with a clean cloth.
With another clean cloth, buff the olive oil into the surface until
you achieve a non-oily finish. This method of cleaning protects the
material against filth and other aggressive harmful substances
with a temporary, food-safe protective shield.
This film of olive oil also makes later polishing easier as well as
removing fingerprints, etc. Repeat this process from time to time
when you clean your grill.
IMPORTANT INFORMATION
Perhaps you have purchased a protective cover for your
grill. To protect your investment, we recommend using the grill
cover whenever the appliance is not in use. However, put on
the protective cover only once your grill has cooled down and
is clean and dry. It may be necessary to use a protective cover.
Caution! Placing a protective on your grill while it is warm, wet or
unclean may lead to heavy rusting.
For this reason, your grill should be cool, cleaned of surface
filth and thoroughly dried before you put on the cover. This
is especially important before long periods of disuse, i.e. during
winter storage.
Follow these maintenance and care tips carefully in order to
preserve the quality of your grill for a long time.
Take good care of your investment and it will be of great service
to you for many years to come.
P160163_TEPRO_BUFFALO_3131UK_kombi_A4_20161017.indd 15 17/10/16 11:20 AM

16
t
Troubleshooting
Problem Possible cause Proposed solution
Burner will not ignite – LPG cylinder is empty
– Defective regulator
– Burner is blocked
– Gas nozzle or hose is
blocked
– Electrode cable is loose or
detached from the electrode
or igniter unit
– Defective electrode or cable
– Defective ignition switch
– Replace with a full LPG
cylinde
– Replace or have regulator
checked
– Clean the burners
– Clean gas nozzle and
gas hose
– Reconnect cable
– Replace electrode or
cable
– Replace ignition switch
The burner will not
ignite using a match
– LPG cylinder is empty
– Defective regulator
– Burner is blocked
– Gas nozzle or hose is
blocked
– Replace with a full LPG
cylinder
– Replace or have regulator
checked
– Clean the burners
– Clean gas nozzle and
gas hose
Small flame or
flashback (flame in
combustion tube
or roaring noise is
audible)
– LPG cylinder is too small
– Burner is blocked
– Gas nozzle or hose is
blocked
– There is too much wind
– Use a larger gas cylinder
– Clean the burners
– Clean gas nozzle and
gas hose
– Set up the grill in an area
sheltered from the wind
Temperature knob is
hard to turn
– Gas valve is blocked – Replace gas valve
Disposal
The packaging is made of environmentally friendly
materials that you can dispose of at your local recycling
centre.
Do not throw away the grill with the household waste!
Dispose of it through a registered waste disposal service
or at your local waste disposal facility. Comply with all
applicable local legislation. If you have any questions,
contact your local waste disposal facility.
Batteries and rechargeable batteries
Do not dispose of batteries with the household waste.
As the end user, you are legally obligated to return used
batteries to a designated collection point or to your
retailer. This ensures that used batteries are disposed
of in an environmentally friendly fashion.
Batteries contain hazardous substances are marked
with the chemical symbols Cd for cadmium, Hg for
mercury and Pb for lead. Batteries are marked with the
icon shown above.
Declaration of conformity
This product complies with current national and European
guidelines. This is confirmed by the CE marking (all relevant
records are in the hands of the manufacturer).
Technical data
Product: Art. Nr. 3131UK,
Charcoal-Gas-Comi-Grill „Buffalo“
Weight:
Total dimensions:
Grill surface charcoal:
Grill surface gas:
Max. amount of fuel:
Main burner:
approx. 60.5kg
approx. 176 x 66 x 136 cm (BxTxH)
approx. 45.7 x 43.2 cm
1.4kg
3 stainless steel burners,
approx. 2.9 kW each
Total output: 8.7 kW
Rated heat input: 632 g/h
BBQ category: I3+ (28-30/37), GB
Gas type/Gas pressure: LPG
Butane 28-30 mbar
Propane 37 mbar
Nozzle main burner: 0.73 mm
Warranty
You have purchased a high-quality product. TEPRO GARTEN
GmbH provides a warranty for its products within the framework
of its warranty conditions under normal, recreational and non-
commercial use of 24 (twenty-four) months from the date of
purchase for all components covering defects and manufacturing
errors.
The warranty excludes all parts subject to wear and tear such as
grill racks, charcoal grates or burners as well as imperfections
and differences in colour of the enamel coating and paint
delamination caused by burnt grease, slight corrosion such as
rust bloom. All other costs incurred, such as required working
time, shipping, freight and packaging, shall be borne by the
buyer in the case of a warranty claim.
The distributor reserves the right to bear any incurred costs or to
charge the buyer.
The warranty does not include malfunction or user difficulties
resulting from wilful damage, misuse, modification, incorrect
use, careless use, wear and tear, improper assembly or poor
maintenance.
Service
Please contact our service point for assistance with technical
questions. This product was carefully manufactured and
packaged. Should you nevertheless have a complaint, our
employees are more than happy to assist.
The gas grill should be maintenanced by a professional once a
year.
Please contact us using the below email address (distributor) for
assistance with service questions.
Subject to technical modifications and typographical errors.
Distributing company
tepro Garten GmbH
Carl-Zeiss-Straße 8/4
D-63322 Rödermark, Germany
Web: www.tepro-gmbh.de
P160163_TEPRO_BUFFALO_3131UK_kombi_A4_20161017.indd 16 17/10/16 11:20 AM

17
t
Matching accessories (not included in the delivery scope)
Available over-the-counter and online.
Cast Iron Pan Insert
tepro Item Number 8573
– For inserting into the grate in the grate system
– Cast iron pan, approx. Ø 31.7 x 3.5 cm
P160163_TEPRO_BUFFALO_3131UK_kombi_A4_20161017.indd 17 17/10/16 11:20 AM

18
t
Pizza Stone Insert
tepro Item Number 8572
– For inserting into the grate in the grate system
– Pizza stone made of cordierite, approx. Ø 28.5 cm
Cast Iron Wok Insert
tepro Item Number 8580
– For inserting into the grate in the grate system
– Cast iron wok approx. Ø 35.3 × 10 cm
Further matching accessories (not included in the delivery scope)
Universal covering hood - extra large
tepro Item Number 8609
18
Passendes Zubehör (nicht im Lieferumfang enthalten)
Universal Abdeckhaube mittel
tepro Artikelnummer 8609
Grillbesteck 3-teilig
tepro Artikelnummer 8534
Grillspieße 4er-Set
tepro Artikelnummer 8535
– aus hochwertig, strapazierfähigem Polyestergewebe
300x250D
– mit wasserdichter PVB-Beschichtung
– widerstandsfähig gegen UV Strahlen
– seitliche Ventilationsöffnungen
– mit Befestigungsklettband
– passgenau
– Haubenmaße ca. 177,8x55,9x129,5 cm
– bestehend aus Gabel, Wender und Zange
– Wender mit Schneidvorrichtung und Flaschenöffner
– Edelstahl mit Kunststoffgriffen
– Länge: 42-45 cm
– mit Kunststoffgriff
– Länge: 45,5 cm
P140158_TEPRO_BUFFALO_3131_kombi_A4_20140804.indd 18 4/8/14 2:52 PM
– Made from high-quality, durable, polyester fabric 300 x 250D
– with water-repellent PVB coating
– resistant to UV radiation
– side vents
– with Velcro fastener
– accurately fitting
– Hood dimensions approx. 177,8x55,9x129,5 cm
P160163_TEPRO_BUFFALO_3131UK_kombi_A4_20161017.indd 18 17/10/16 11:20 AM

19
t
3-piece BBQ utensil set
tepro Item Number 8534
– consisting of fork, spatula, and tongs
– spatula with cutting device and bottle opener
– Stainless steel
– with plastic handles
– Length: 42-45 cm
BBQ skewers, 4-piece set
tepro Item Number 8535
– with plastic handles
– with meat sliders
– Length: 45.5 cm
Fish holder big
tepro Item Number 8522
– for one fish
– chrome plated
– insulated plastic handle
– lenght: 66 cm
Available over-the-counter and online.
P160163_TEPRO_BUFFALO_3131UK_kombi_A4_20161017.indd 19 17/10/16 11:20 AM

20
t
Bitte aufklappen
01.04.2010 13:38:13 Uhr
P160163_TEPRO_BUFFALO_3131UK_kombi_A4_20161017.indd 20 17/10/16 11:20 AM
This manual suits for next models
1
Table of contents
Other tepro Grill manuals

tepro
tepro KEY WEST 1065N User manual

tepro
tepro ABINGTON User manual

tepro
tepro CRANFORD User manual

tepro
tepro Danville User manual

tepro
tepro HIGHLAND User manual

tepro
tepro DETROIT User manual

tepro
tepro CRYSTAL User manual

tepro
tepro Flint User manual

tepro
tepro DETROIT User manual

tepro
tepro ELEKTROGRILL ODESSA User manual

tepro
tepro WACO User manual

tepro
tepro BELMONT User manual

tepro
tepro CARY User manual

tepro
tepro 1146 User manual

tepro
tepro Albertville User manual

tepro
tepro Louisville User manual

tepro
tepro WICHITA User manual

tepro
tepro HARTFORD User manual

tepro
tepro 3160UK User manual

tepro
tepro TORONTO 1061 User manual