Tervis ECHO 2 User manual

1 2
BATT.
MICRO
SWITCH
+ ALIM
GND
C/SIR
TAMPER
TAMPER
C/BATT
C/MANUT
1 2 3 4 5 6 7
P1
P2
Prodotto da:
ELSA S.p.A. - Direzione e stabilimento:
Zona Industriale - Terza Strada - 09032 Assemini (CA)
ITALY P.O. BOX 67 - Tel. 070/24.72.75 Telefax 070/24.70.02
COD. IS 00909.1
La ditta costruttrice declina ogni responsabilità per eventuali errori
di stampa contenuti nel presente libretto. Si riserva inoltre il diritto
di apportare le modifiche che si riterranno utili ai propri prodotti
senza comprometterne le caratteristiche essenziali.
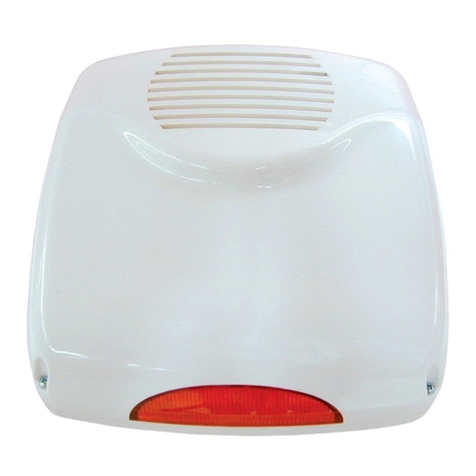
ECHO 2 Cod. 652020
SIRENA ELETTRONICA AUTOALIMENTATA
EXTERNAL ELECTRONIC SIREN
SIRENE ELECTRONIQUE EXTERIEURE AUTO-
ALIMENTEE

CARATTERISTICHE TECNICHE:
Tensione d'ingresso:
9 ÷ 15 V con protezione contro inversioni di polarità.
Tensione di funzionamento:
7 V con regolatore interno.
Assorbimento:
a riposo: 15 mA MAX / in suonata: 550 mA MAX.
Autoalimentazione:
accumulatore ricaricabile 6V nominali - 1,2 Ah
Frequenza di lavoro:
2200 ÷ 2400 Hz.
Livello di emissione:
115 dB a 1 m.
Segnaledicomando
(programmabile):
ditipoN.C.versonegativo/ditipoN.C.versopositivo.
Comando di manutenzione:
bloccoconnegativo
Segnalazioni:
- Manomissione: di tipo N.C. (0,5A MAX)
- Controllo batteria: di tipo N.C. verso negativo.
Temporizzazione della suonata:
4 minuti min.
Dimensioni:
17x 17x 6,5cm.
Peso:
1600 g. circa.
1) MONTAGGIO
Si farà riferimento alle figg. 1 e 2.
- Fissare a parete il basamento A interponendo gli anelli gomma B per impermeabi-
lizzare il fissaggio.
- Inserire il cavo nel foro C interponendo il passacavo D; si consiglia di sigillare con
gomma siliconica per impieghi all'esterno o in ambienti umidi.
- Effettuare i collegamenti alla morsettiera E.
- Allacciare la batteria F alla morsettiera, rispettando la polarità.
- Innestare il connettore H della tromba sullo zoccolo I e applicare il coperchio L.
- Bloccare il coperchio con le viti M interponendo i distanziali N.
2) COLLEGAMENTI
3) PREDISPOSIZIONI
P2 ON: temporizzazione esclusa
P2OFF: suonatatemporizzata (4minuti) incasodicomandopermanente sulmorsetto 3.
4) BATTERIA
Ilregolatore perla caricadella batteriainterna (6Vnominali -1,2 Ah)è incorporatonella
sirena. La protezione PTC da 1A fornisce la protezione contro inversioni di polarità.
Nel caso di inversioni di polarità della batteria, attendere alcuni secondi e ricollegarla
correttamente.
TECHNICAL CHARACTERISTICS:
Input voltage: 9 to 15 V protected against polarity reversal.
Working voltage: 7 V (by internal voltage regulator)
Current rating: stand-by: 15 mA MAX / sounding: 550 mA MAX.
Self-powering: 6V nom. - 1,2 Ah rechargeable battery
Operating frequency: 2200 to 2400 Hz.
Acoustic level: 115 dB at 1 m.
Control signal
(programmable): N.C.typetowardsnegative/N.C.typetowardspositive.
Maintenance control signal:blockbynegative
Signals: - anti-tampering: N.C. type (0,5A MAX)
-batterycontrol:N.C.typenegative.
Sound timing:4 minutes min.
Dimensions: 17 x 17 x 6,5 cm.
Weight: 1600 g. (approx.)
1) MOUNTING
refer to figures n. 1 and 2.
- The base A must be mounted on the wall placing washers B between the screws and
the base in order to assure waterproof mounting.
-Insert theconnectingcable inhole C,and passit throughwire guideD. Itisadvisable
tosealholeCwithsiliconeglue,especiallyifthesirenissetoutdoors,orinverydamp
places.
- Make connections to terminal strip E.
-ConnectthebatteryFtothecablesprovided;takecaretoabservethepolarities,and
place the battery inside the cabinet.
- Insert loudspeaker connector H in plug I and then put the cover L on.
- Fasten cover with screws M placing speacers N between the screws and the cover.
2) CONNECTIONS TO TERMINAL STRIP
3) PROGRAMMING
P2 ON: there is no alarm timing.
P2OFF:apermanentconditiononterminal3causesatimendalarmcycle(4minutesmin).
4) BATTERY
The regulator for internal battery charging (6V nom. - 1,2 Ah) is built into the siren. The
1A PTC protection provides reverse polarity protection. In case of battery reverse
polarity, wait a few second and reconnect in the correct way.
CARACTERISTIQUES TECHNIQUES:
Tension d'entrée: 9 à 15 V protection contre l'inversion de polarité.
Tension de travail: 7 V (avec réglage interne)
Consommation: au repos: 15 mA MAX / en service: 550 mA MAX.
Auto-alimentation: accumulateur rechargeable 6V nom. 1,2 Ah.
Fréquence de travail: 2200 à 2400 Hz.
Niveau d'émission sonore:115 dB à 1 m.
Signal de commande
(programmable): detypeN.F.versnégatif/detypeN.F.verspositif.
Commande de maintenance: blocage de la sonnerie quand reliée à négatif.
Signalisations: - auto-protection de type N.F. (0,5A MAX)
-controlebatterie: detype N.F.verslamasse.
Durée de la sonnerie:4 minutes min.
Dimensions: 17 x 17 x 6,5 cm.
Poids: 1600 g. (environ.)
1) MONTAGE
Se rapporter aux figures 1 et 2.
-FixerlabaseAàlaparoieninterposantlesrondellesisolantesBafind'impermeabiliser
le fixage.
- Introduire le câble dans le trou C en ayant soin d'interposer le guide-câble D; il est
conseillé de cacheter l'entrée du câble avec de la colle au sylicone surtout pour les
sirènes installées à l'extérieur ou dans des locaux humides.
- Effectuer les raccords au bornier E.
- Connecter le batterie aux câbles prévus à cet effet en ayant soin de bien respecter
la polarité.
- Introduire la fiche H du hautparleur dans la prise I et placer le couvre-boitier L.
- Bolquer le couvre-boitier à l'aide des vis M en interposant les rondelles N.
2) RACCORDS
3) PROGRAMMATIONS
P2 ON: temporisation de l'émission sonore exclue
P2 OFF: temporisation de l'émission sonore (4 minutes min.) en cas de commande
permanente sur la borne 3.
4) BATTERIE
Le régulateur pour le chargement de la batterie (6V nominaux - 1,2 Ah) est incorporé
dans ls sirène. La protection PTC d'1A prend en charge les inversions de polarité.
En cas d'inversions de polarité dans la batterie, attendre quelques secondes et la
reconnecter ensuite correctement.
BORNE DESCRIPTION
1 (+ ALIM)
2 (- ALIM) Entrée alimentation avec protection contre inversions de
polarité
3 C/SIR Commande sirène: programmable par le pontet P1
P1 ON:
- borne 3 reliée à positif: sirène bloquée
- borne 3 reliée à négatif ou ouverte: sirène en fonction
P1 OFF:
- borne 3 reliée à négatif: sirène bloquée
- borne 3 reliée à positif ou ouverte: sirène en fonction
4, 5, TAMPER Auto-protection de type N.F. (0,5A MAX). Il y aura ouverture
en cas d'enlèvement du couvre-boitier
6 (C/BATT) Controle batterie de type N.F. ver la masse. Il y aura
ouverture en cas où la batterie soit déchargée (- de 5,5V)
7 (C/MANUT.) Blocage de la sonnerie quand reliée à négatif
MORSETTO DESCRIZIONE
1 (+ ALIM)
2 (- ALIM) Morsetti alimentazione sirena con protezione contro
inversione di polarità
3 C/SIR Comando sirena programmabile tramite P1:
P1 ON:
- morsetto 3 connesso a positivo: sirena bloccata
- morsetto 3 connesso a negativo, oppure aperto: sirena in
funzione.
P1 OFF:
- morsetto 3 connesso a negativo: sirena bloccata
- morsetto 3 connesso a positivo, oppure aperto: sirena in
funzione
4, 5, TAMPER Manomissione: di tipo N.C. (0,5 A MAX) si avrà apertura in
caso di rimozione del coperchio.
6 (C/BATT) Uscita controllo batteria di tipo N.C. verso negativo; si avrà
l'apertura in caso di batteria scarica (al di sotto di 5,5 V).
7 (C/MANUT.) Comando di manutenzione: blocco della sirena quando
connesso a negativo.
TERMINAL DESCRIPTION
1 (+ ALIM)
2 (- ALIM) Supply connections terminals with protection against polarity
reversal
3 C/SIR Siren control signal programmable by P1:
STRAP P1 ON:
- terminal 3 connected to positive: the siren does not sound
- terminal 3 connected to negative, or open: the siren sounds
STRAP P1 OFF:
- terminal 3 connected to negative: the siren does not sound
- terminal 3 connected to positive, or open: the siren sounds
4, 5, TAMPER Terminals N.C. type (0,5A MAX) an opening occurs should
the cover be removed
6 (C/BATT) terminal N.C. type towards ground; there in an opening should
be the battery be descharged (below 5,5V)
7 (C/MANUT.) Inhibites the siren when connected to negative
This manual suits for next models
1
Other Tervis Security System manuals
