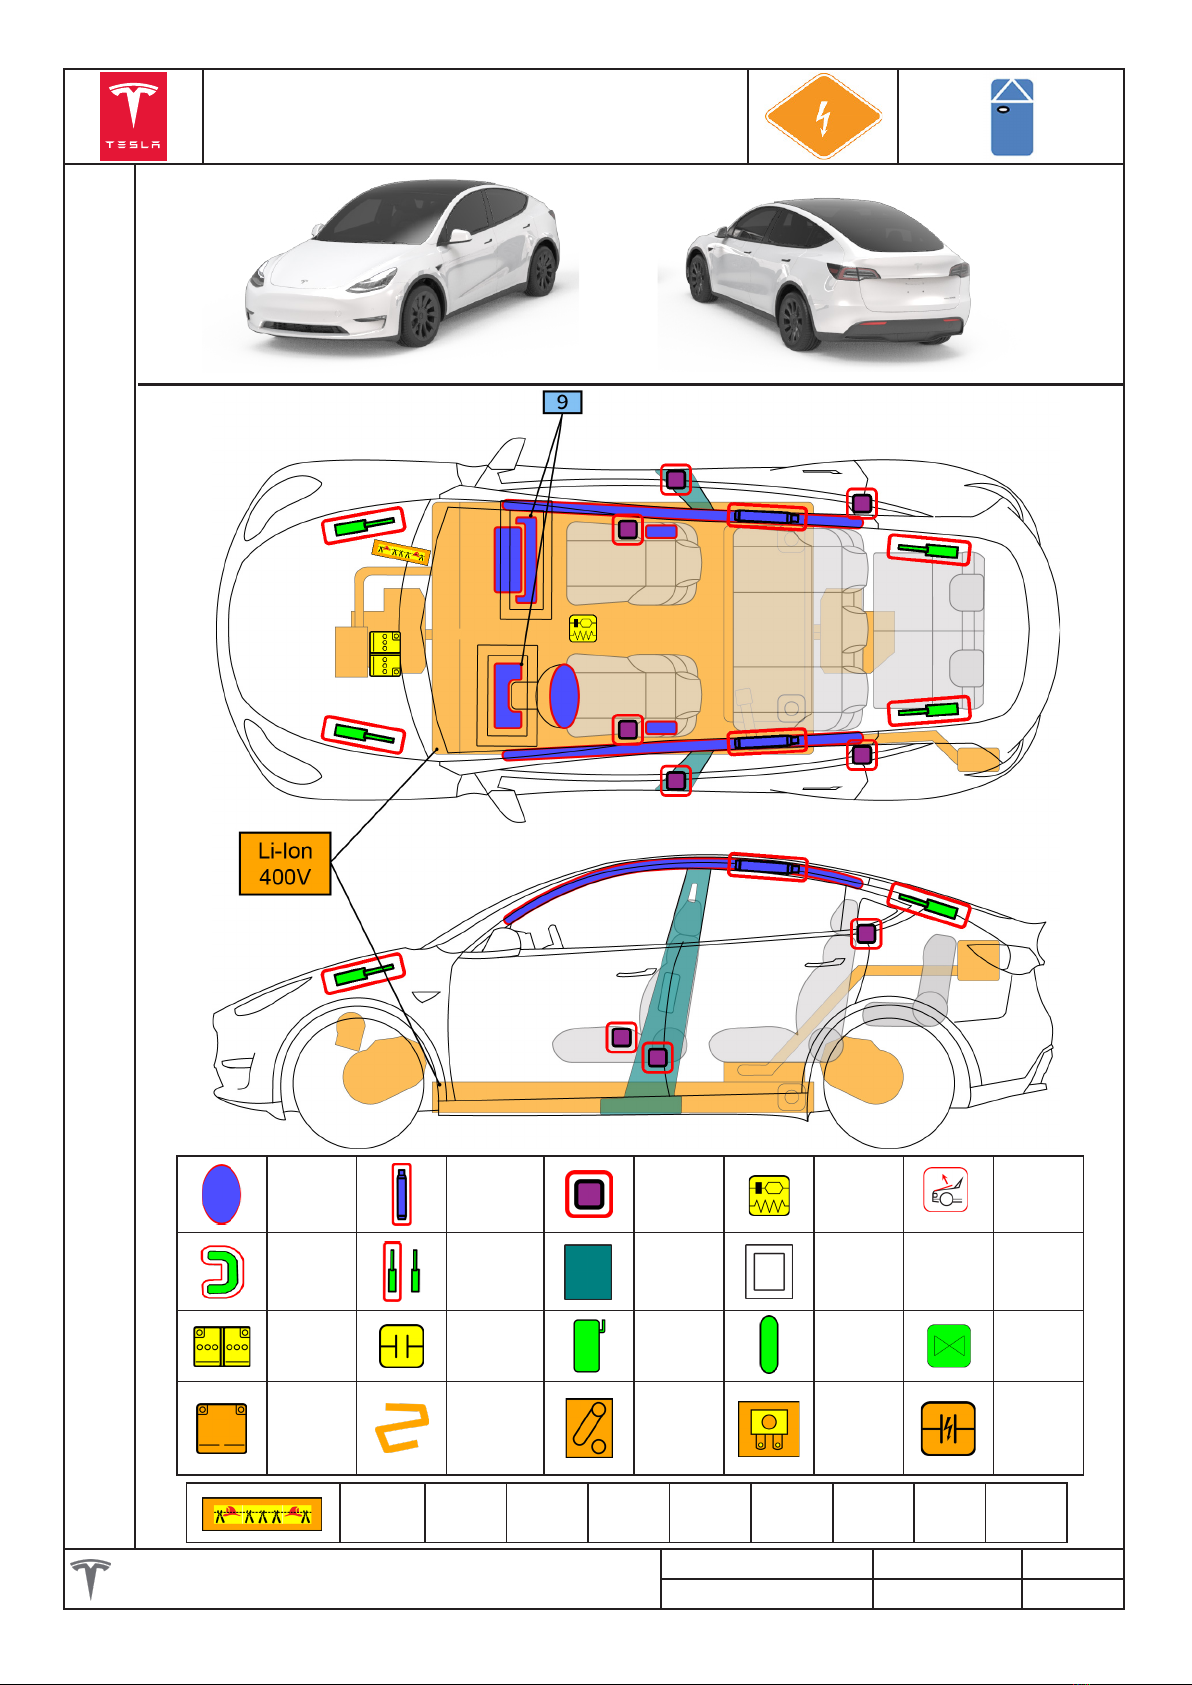
8
Model Y Emergency Response Guide
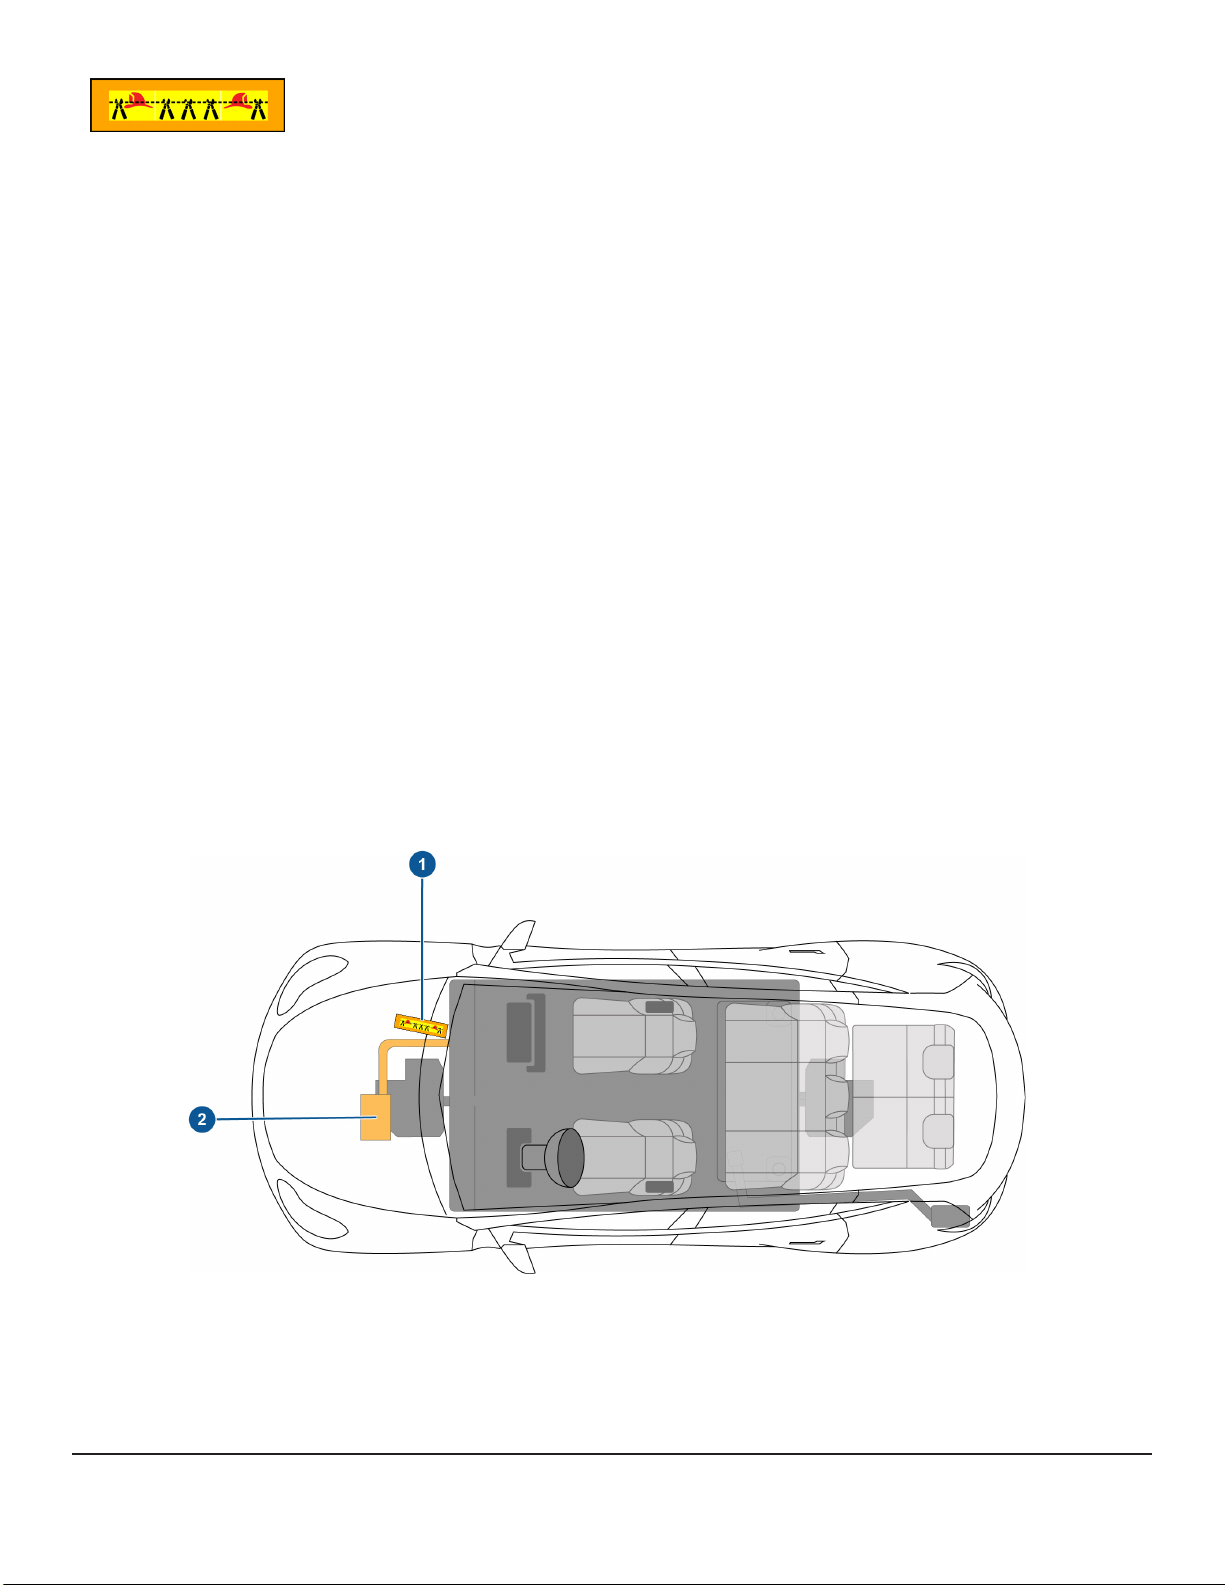
Cable Cut
When cut, the First Responder Loop disables 12V power going to the airbag circuit. Cutting
of the First Responder Loop also removes 12V power going to the high voltage contactors
inside the high voltage battery pack. Cutting the first responder loop does not disable the
12V battery system. The 12V battery negative cable must be cut in order to disable the 12V
battery system.
The First Responder Loop is located on the passenger-side of the vehicle for left-hand drive
vehicles. The First Responder Loop remains in the same location for right-hand drive vehicles.
The high voltage contactors are like a light switch. When “open” or in the “o” position, the
lights would be o in the room so the high voltage would be isolated to the battery pack.
When “closed” or in the “on” position, the lights would be on in the room so the high voltage
in the battery pack would be connected to the high voltage components. On Model Y
vehicles, those high voltage components include the rear drive unit, the front drive unit, and
the air conditioning compressor.
When the vehicle has been in an accident and the First Responder Loop has been cut, always
treat the pack and the high voltage components as if they are live, because the pack will still
have stored energy within the cells and it is not known if other high voltage
components have been damaged. Treat every orange cable and battery pack as if there is
high voltage in them. Never cut an orange high voltage cable or cut into the battery pack.
There is no way to instantaneously discharge the energy that is inside of the battery pack
when a vehicle is in an accident. There is stored energy in battery cells. Caution must be used
to not damage the battery pack in the case of vehicle extrication operations.
1. First Responder Cut Loop
2. 12V Battery