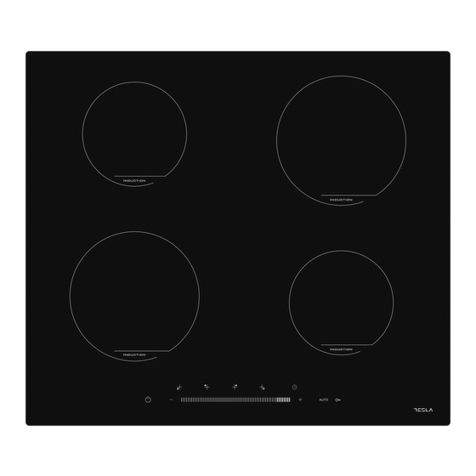
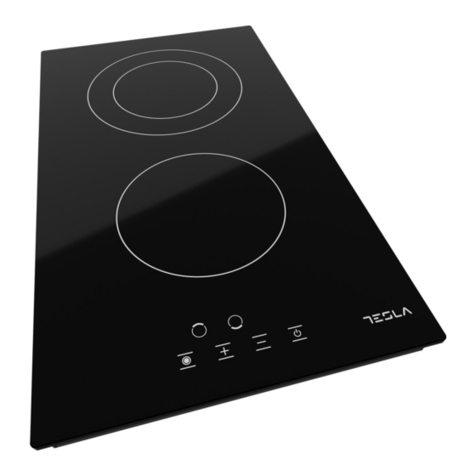
Tesla HV6410TB User manual

Product images are for illustrative purposes only and may differ from the actual product.
User Manual
CERAMIC
HOB
HV6410TB
ENG BiH/
CG BG GR HU SLOMK RO SRB


3
ENG
SAFETY WARNINGS
Your safety is important to us. Please read this
information before using your cooktop.
• The appliance is not to be used by persons
(including children) with reduced physical, sensory
or mental capabilities, or lack of experience
and knowledge, unless they have been given
supervision or instruction. Children being
supervised not to play with the appliance.
• WARNING: if the surface is cracked, switch off the
appliance to avoid the possibility of electric shock,
for hob surfaces of glass-ceramic or similar material
which protect live parts.
• WARNING: a steam cleaner is not be used
• That the appliance is not intended to be operated
by means of external timer or separated remote-
control system.
• Danger of fire: do not store items on the cooking
surfaces.
• CAUTION: the cooking process has to be
supervised. A short-term cooking process has to be
supervised continuously.
• WARNING: unattended cooking on a hob with fat
or oil can be dangerous and may result in a fire.
• If the supply cord is damaged, it must be replaced
by the manufacturer, its service agent or similarly
qualified persons in order to avoid a hazard.
• This appliance can be used by children aged from 8
years and above and persons with reduced physical,
sensory or mental capabilities or lack of experience
and knowledge if they have been given supervision
or instruction concerning use of the appliance in
a safe way and understand the hazards involved.
Children shall not play with the appliance. Cleaning
and user maintenance shall not be made by children
without supervision.
• WARNING: the appliance and its accessible parts
become hot during use.
• Care should be taken to avoid touching heating
elements.
• Children less than 8 years of age shall be kept away
unless continuously supervised.
• WARNING: unattended cooking on a hob with fat
or oil can be dangerous and may result in fire.
• NEVER try to extinguish a fire with water, but switch
off the appliance and then cover flame
• E.G. With a lid or a fire blanket.
• CAUTION: the cooking process has to be
supervised. A short-term cooking process has to be
supervised continuously.
• WARNING: danger of fire: do not store items on the
cooking surfaces.
• WARNING: use only hob guards designed by
the manufacturer of the cooking appliance or
indicated by the manufacturer of the appliance
in the instructions for use as suitable or hob
guards incorporated in the appliance. The use of
inappropriate guards can cause accidents.
• Power cord can’t accessible after installation
We recommend that you spend some time to read this Instruction / Installation Manual in order to fully understand
how to install correctly and operate it.
For installation, please read the installation section.
Read all the safety instructions carefully before use and keep this Instruction / Installation Manual for future reference.
Congratulations on the purchase of your new ceramic Hob.

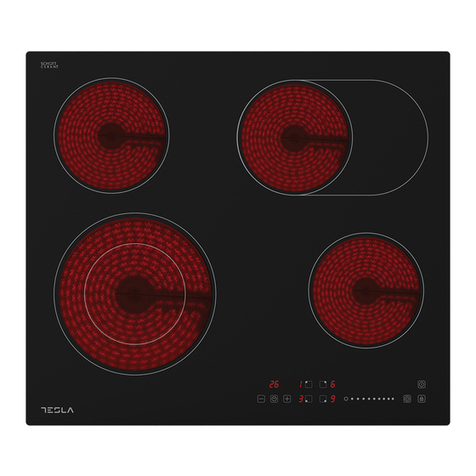
4
ENG
PRODUCT OVERVIEW
Top View Heating Zone Power
User interface
Heating Zone Power (230V~)
1200W
1150W/2300W
200W
1800W
TOTAL POWER 6500W
Reference Description
AZone select key
BON/OFF key
CPower regulating key (reduce)
Reference Description
DPower regulating key (increase)
EDual circuit key
Product functions
SPECIAL FUNCTIONS
• The ceramic hob caters for all kind of cooking, with its radiant heat cooking zones and its electronic touch
controls and multi-functions, making it the ideal choice for the modern family.
• The ceramic hob is extremely user-friendly, durable and safe.
Protection from over-heating
A sensor monitors the temperature in the cooking zones. When the temperature exceeds a safe level, the
cooking zone is automatically switched off.

5
ENG
• Read this guide, taking special note of the ‘Safety Warnings’ section.
• Remove any protective film that may still be on your Ceramic hob.
Before using your New Ceramic Hob
• The controls respond to touch, so you don’t need to apply any
pressure.
• Use the ball of your finger, not its tip.
• You will hear a beep each time a touch is registered.
• Make sure the controls are always clean, dry, and that there is
no object (e.g. a utensil or a cloth) covering them. Even a thin
film of water may make the controls difficult to operate.
Using the Touch Controls
Choosing the right Cookware
Do not use cookware with jagged edges or a curved base.
Make sure that the base of your pan is smooth, sits flat against the glass, and is the same size as the cooking zone.
Use pans whose diameter is as large as the graphic of the zone selected. Using a pot a slightly wider energy will be
used at its maximum efficiency. If you use smaller pot efficiency could be less than expected. Always centre your
pan on the cooking zone.
Residual heat indicator
Auto Shutdown Protection
Protection against unintended operation.
When the hob has been operating for some time, there will be some residual heat.The letter “H” appears to warn
you that it is too hot to touch the surface.
Auto shut down is a safety protection function for your ceramic hob. It shut down automatically if ever you forget to
turn off your cooking. The default working times for various power levels are shown in the below table:
If the electronic control detects a button being held down for approx 10 seconds it will switch off automatically. The
control sends out an audible error signal to warn the sensors have detected the presence of an object. The display
will indicate an error code ER03 if the hob is still hot. The display "H" and ER03 flash alternatively.
Power level 1~2 3~4 5 9
Default working timer (min) 360 300 240 90

6
ENG
Always lift pans off the ceramic hob – do not slide, or they may scratch the glass.
USING YOUR CERAMIC HOB
To start cooking
Using Child Lock Function
Using the Timer
When the ON/OFF key “ ” is pressed, all the indicators show “0.”
1. Select the cooking zone you wish to use by pressing the key (A). The “0” symbol selected will stay fully lit. All
other zone indicators will dim.
2. Select the power level by pressing the “+” key (D) “ “ or “-”key (C) “ “
3. The power level will start at 0. Pressing the “+” will count up the power levels from 0 to 9 in numerical order.
Pressing the “-”key will take the power straight from 9 to 0.
• If you don’t choose a heat setting within 20 seconds, the ceramic hob will automatically switch off. You will
need to start again at step 2.
• You can modify the heat setting at any time during cooking.
• You can lock the controls to prevent unintended use (for example children accidentally turning the cooking
zones on).
• When the controls are locked, all the controls except the OFF control are disabled.
To lock the controls
Simultaneously press the " " key and the furthest right zone selection key . The hob emits a beep and the
indicator will show “lo “.
To unlock the controls
1. Simultaneously press the " " key and the furthest right zone selection key again.
2. You can now start using your hob.
• You can set it to turn one cooking zone off after the set time is up.
• You can set the timer for up to 99 minutes.
1. Select the relevant cooking zone which is working by touching the zone select key (A).
2. Simultaneously press the " " key and the " " key on the right side of two indicators will show “00”.
3. Using the " " or " " buttons, you can realize the setting of timing from 1 to 99 minutes.
4. When the time is set, it will begin to count down immediately. The indicator will return to show power level
after 5 seconds. The red dot next to power level indicator will illuminate indicating that zone has set timer.
5. If you need to check the remaining time, you can operate step 1 and step 2 again.
6. When cooking timer expires, the corresponding cooking zone will be switch off automatically. Other cooking
zone will keep operating if they are turned on previously.

7
ENG
Using the Double Rings
Damaged power cables should be replaced by a competent person or qualified electrician.
For domestic use only.
Never place an empty pan on the hob as this will cause an error message to appear on the control
panel.
When a cooking zone has been on for a long time, the surface remains hot for some times afterwards
so do not touch the ceramic surface.
For sealed foods, please do not heat them before opening removing the lid so as to avoid any dangers
of explosion due to heating expansion.
If the surface of the hob is cracked, disconnect from power supply to avoid any possibility of electric
shocks.
Do not place rough or uneven pans on the hob, as they could damage the ceramic surface.
Avoid banging pots and pans down on the hob. The ceramic surface is tough but not unbreakable.
Do not put detergents or flammable materials beneath the hob.
Care
Warning
Always switch off the electricity supply before performing maintenance work.
In the event of a fault, contact customer services.
CARE AND MAINTENANCE
• You can set the double zone after the zone is working.
• You can set the zone working by double rings or single ring.
– The back left heating zone can be operated as two zone operations. It can be selected as full power
operation 2300W or 1150W operation when the back left heating zone is operating press to select full
power operation 2300W or 1150W operation.
– When the back left zone display show and alternately, this means that the back left heating zone is at full
power operation (2300W).
– When the back left zone display show and alternately, this means that the left heating zone is at 1150W
(inner ring) operation.

8
ENG
Appliance cleanliness
CAUTION
• Avoid rubbing with any abrasive or with the base of the pans, etc, as this will wear the markings on the
top of the ceramic hob over time.
• Clean the ceramic hob on a regular basis to prevent the build up of food residue.
• The appliance should be cleaned after use.
• The surface of the ceramic hob may be easily cleaned in the following way:
TROUBLE SHOOTING
Before calling the customer services, please check that the appliance is correctly connected, any of the following
cases are not covered by the guarantee
• Damage caused by improper use, storage or maintenance
• Damage caused by unauthorized disassembly and repair.
• Damage caused by misuse.
• Using the ceramic hob for commercial purposes.
If an abnormality comes up, the ceramic hob will enter the protective state automatically and display
corresponding protective codes:
Error Message Possible Cause What to do
ER03
Water or pot on the glass over the control Clean the user interface
ER21 The temperature inside the produce was
too high The produce must be stopped and cooling.
The above are the judgment and inspection of common failures.
Please do not disassemble the unit by yourself to avoid any dangers and damages to the ceramic hob and
please contact the supplier.
Type of dirt Cleaning method Cleaning materials
Lime scale Apply white vinegar to the surface,
then wipe it dry with soft cloth Special ceramic cleaner
Burnt-on stains Clean with damp cloth and dry it with a soft cloth Special ceramic cleaner
Light stains Clean with damp cloth and dry it with a soft cloth Cleaning sponge
Melted plastics Use a scraper suitable far ceramic glass to remove
residue Special ceramic cleaner
By means of a scraper immediately remove any aluminum fail bits, food spills,
grease splashes, sugar marks and other high sugar content food from the
surface in order to avoid damaging the hob. Subsequently clean the
surface with some towel and appropriate product, rinse with water and dry by
means of a clean cloth. Under no circumstance should sponges or abrasive
cloths be used; also avoid using aggressive chemical detergents such as oven
sprays and spot removers.

9
ENG
TECHNICAL SPECIFICATION
Weight and Dimensions are approximate. Because we continually strive to improve our products we may change
specifications and designs without prior notice.
Cooking Hob HV6410TB
Cooking Zones 4 Zones
Supply Voltage 220-240V~
Installed Electric Power 6500W(230V~)
Product Size LxWxH (mm) 590x520x50
Building-in Dimensions AxB (mm) 560x490
INSTALLATION
Cut out the work surface according to the sizes shown in the drawing.
For the purpose of installation and use, a minimum of 5 cm space shall be preserved around the hole.
Be sure the thickness of the work surface is at least 30 mm. Please select heat-resistant work surface material to
avoid larger deformation caused by the heat radiation from the hotplate.
As shown below:
Selection of installation equipment
L (mm) W (mm) H (mm) D (mm) A (mm) B (mm) X (mm)
590 520 50 46 560 490 50 min
SEAL

10
ENG
A (mm) B (mm) C (mm) D E
650 50 min 20 min Air intake Air exit
5mm
Before you install the hob, make sure that
• The work surface is square and level, and no structural members interfere with space requirements
• The work surface is made of a heat-resistant material
• If the hob is installed above an oven, the oven has a built-in cooling fan
• The installation will comply with all clearance requirements and applicable standards and regulations
• A suitable isolating switch providing full disconnection from the mains power supply is incorporated in the
permanent wiring, mounted and positioned to comply with the local wiring rules and regulations.
• The isolating switch must be of an approved type and provide a 3 mm air gap contact separation in all poles (or
in all active [phase] conductors if the local wiring rules allow for this variation of the requirements)
• The isolating switch will be easily accessible to the customer with the hob installed
• You consult local building authorities and by-laws if in doubt regarding installation
• You use heat-resistant and easy-to-clean finishes (such as ceramic tiles) for the wall surfaces surrounding the hob.
When you have installed the hob, make sure that
• The power supply cable is not accessible through cupboard doors or drawers
• There is adequate flow of fresh air from outside the cabinetry to the base of the hob
• If the hob is installed above a drawer or cupboard space, a thermal protection barrier is installed below the base
of the hob
• The isolating switch is easily accessible by the customer
Installation
Stretch out the supplied seal along the underside edge of the hob, ensuring the ends overlap.
Fig. 1 01
[04] x1
Under any circumstances, make sure the Ceramic cooker hob is well ventilated and the air inlet and outlet are not
blocked. Ensure the ceramic cooker hob is in good work state. As shown below
Note: The safety distance between the hotplate and the cupboard above the hotplate should be at least
650 mm.

11
ENG
Do not use adhesive to fix the ho b into the worktop.
once the seal is fitted position the hob into the cutout
in the worktop. Apply gentle downwards pressure onto
the hob to push it into the worktop ensuring a good
seal around the outer edge (fig. 3)
Fig. 2 Fig. 3
Cautions
1. The ceramic hotplate must be installed by qualified personnel or technicians. We have professionals at your
service. Please never conduct the operation by yourself.
2. The hob will not be installed directly above a dishwasher, fridge, freezer, washing machine or clothes dryer, as
the humidity may damage the hob electronics
3. The ceramic hotplate shall be installed such that better heat radiation can be ensured to enhance its reliability.
4. The wall and induced heating zone above the table surface shall withstand heat.
5. To avoid any damage, the sandwich layer and adhesive must be resistant to heat.
AII installation work must be carried out by a competent person or qualified
electrician. Before connecting the mains supply ensure that the mains voltage
corresponds to the voltage on the rating plate inside the cooker hood.
WARNING: THIS APPLIANCE MUST BE EARTHED.
Connecting the hob to the mains power supply
This hob must be connected to the mains power supply only by a suitably qualified person.
Before connecting the hob to the mains power supply, check that:
1. The domestic wiring system is suitable for the power drawn by the hob.
2. The voltage corresponds to the value given in the rating plate
3. The power supply cable sections can withstand the load specified on the rating plate.
To connect the hob to the mains power supply, do not use adapters, reducers, or branching devices, as
they can cause overheating and fire.
The power supply cable must not touch any hot parts and must be positioned so that its temperature will
not exceed 75˚C at any point.
Check with an electrician whether the domestic wiring system is suitable without alterations.
Any alterations must only be made by a qualified electrician.

12
ENG
DISPOSAL:
Do not dispose this product as unsorted
municipal waste. Collection of such
waste separately for special treatment
is necessary.
This appliance is labeled in compliance with European directive 2011/65/EU
for Waste Electrical and Electronic Equipment (WEEE). By ensuring that this
appliance is disposed of correctly, you will help prevent any possible damage to
the environment and to human health, which might otherwise be caused if it were
disposed of in the wrong way.
The symbol on the product indicates that it may not be treated as normal
household waste. It should be taken to a collection point for the recycling of
electrical and electronic goods.
This appliance requires specialist waste disposal. For further information
regarding the treatment, recover and recycling of this product please contact
your local council, your household waste disposal service, or the shop where you
purchased it.
For more detailed information about treatment, recovery and recycling of this
product, please contact your local city office, your household waste disposal
service or the shop where you purchased the product.
• If the cable is damaged or to be replaced, the operation must be carried out the by after-sale agent with
dedicated tools to avoid any accidents.
• If the appliance is being connected directly to the mains an omnipolar circuit-breaker must be installed with a
minimum opening of 3mm between contacts.
• The installer must ensure that the correct electrical connection has been made and that it is compliant with
safety regulations.
• The cable must not be bent or compressed.
• The cable must be checked regularly and replaced by authorised technicians only.
This appliance requires a 32 Amp Miniature Circuit Breaker.
This appliance is supplied with 3 core mains cable colored as follows:
Brown = L or Live
Blue = N or Neutral
Green and Yellow = E or Earth
Brown
Brown Black Grey
Blue
Blue
Green/Yellow
Green/Yellow

13
BIH/CG
SIGURNOSNA UPUTSTVA
Vaša sigurnost nam je važna. Molimo pročitajte ove
informacije prije korištenja ploče za kuhanje.
• Aparat ne smiju koristiti osobe (uključujući djecu)
sa smanjenim fizičkim, senzornim ili mentalnim
sposobnostima ili nedostatkom iskustva i znanja,
osim ako su pod nadzorom ili upute. Djeca pod
nadzorom ne trebaju da se igraju s uređajem.
• UPOZORENJE: Ako je površina napukla, isključite
uređaj kako biste izbjegli mogućnost strujnog udara,
za površine ploče za kuhanje od staklokeramike ili
sličnog materijala koji štite dijelove pod naponom.
• UPOZORENJE: parni čistač se ne koristi.
• Aparat nije predviđen za upravljanje pomoću
eksternog tajmera ili odvojenog sistema daljinskog
upravljanja.
• Opasnost od požara: Ne stavljajte predmete na
površine za kuhanje.
• OPREZ: Proces kuhanja mora biti pod nadzorom.
Kratkotrajni proces kuhanja mora se kontinuirano
nadzirati.
• UPOZORENJE: Kuhanje bez nadzora na ringli sa
masnoćom ili uljem može biti opasno i može dovesti
do požara.
• Ako je kabl za napajanje oštećen, mora ga zamijeniti
proizvođač, njegov serviser ili slično kvalifikovana
osoba kako bi se izbjegla opasnost.
• Ovaj uređaj mogu koristiti djeca starija od 8
godina i osobe sa smanjenim fizičkim, senzornim ili
mentalnim sposobnostima ili nedostatkom iskustva
i znanja ako su pod nadzorom ili imaju upute o
korištenju uređaja na siguran način i razumiju
opasnosti uključene ploče. Djeca se ne smiju igrati s
uređajem. Čišćenje i korisničko održavanje ne smiju
obavljati djeca bez nadzora.
• UPOZORENJE: Aparat i njegovi dostupni dijelovi
postaju vrući tokom upotrebe.
• Treba paziti da ne dodirnete grijaće elemente.
• Djecu mlađu od 8 godina treba držati podalje osim
bez stalnog nadzora.
• UPOZORENJE: Kuhanje bez nadzora na ringli sa
masnoćom ili uljem može biti opasno i može dovesti
do požara.
• NIKADA ne pokušavajte ugasiti vatru vodom,
već isključite uređaj, a zatim pokrijte plamen npr.
poklopcem ili protivpožarnim prekrivačem.
• OPREZ: Proces kuhanja mora biti pod nadzorom.
Kratkotrajni proces kuhanja mora se kontinuirano
nadzirati.
• UPOZORENJE: Opasnost od požara: ne ostavljajte
predmete na površinama za kuhanje.
• UPOZORENJE: Koristite samo štitnike za kuhanje
koje je dizajnirao proizvođač aparata za kuhanje
ili koje je proizvođač uređaja naveo u uputama
za upotrebu kao prikladne ili štitnike za kuhanje
ugrađene u uređaj. Upotreba neodgovarajućih
štitnika može uzrokovati nesreće.
• Kabl za napajanje nije dostupan nakon instalacije.
Preporučujemo vam da odvojite neko vrijeme čitajući ovo uputstvo za upotrebu / instalacijski priručnik kako biste u
potpunosti razumjeli kako je pravilno instalirati i koristiti.
Za instalaciju, pročitajte odjeljak o instalaciji.
Pažljivo pročitajte sva sigurnosna uputstva prije upotrebe i sačuvajte ovo uputstvo/priručnik za instalaciju za buduću
upotrebu.
Čestitamo na kupovini vaše nove keramičke ploče.

14
BIH/CG
PREGLED PROIZVODA
Pogled odozgo Snaga grijne zone
Korisnički interfejs
Grijna zona Snaga (230V~)
1200W
1150W/2300W
200W
1800W
UKUPNA
SNAGA 6500W
Uputa Opis
ATipka izbora zone
BON/OFF tipka
CTipka za regulaciju snage
(smanjenje)
Uputa Opis
DTipka za regulaciju snage
(povećanje)
EDvostruka tipka
Funkcije proizvoda
POSEBNE FUNKCIJE
• Keramička ploča za kuhanje služi za sve vrste kuhanja, sa svojim žarišnim zonama za kuhanje i elektronskim
kontrolama na dodir i multifunkcijama, što je čini idealnim izborom za modernu porodicu.
• Keramička ploča je izuzetno jednostavna za upotrebu, izdržljiva i sigurna.
Zaštita od pregrijavanja
Senzor prati temperaturu u zonama za kuhanje. Kada temperatura pređe bezbijedni nivo, zona za kuhanje se
automatski isključuje.

15
BIH/CG
• Pročitajte ovaj vodič, posebno obratite pažnju na odjeljak „Sigurnosna upozorenja“.
• Uklonite svu zaštitnu foliju koja još uvijek može biti na vašoj keramičkoj ploči.
Prije upotrebe vase nove keramičke ploče
• Kontrole reaguju na dodir, tako da ne morate vršiti nikakav
pritisak.
• Koristite jagodicu prsta, a ne njen vrh.
• Čut ćete bip svaki put kada se dodir registruje.
• Uvjerite se da su kontrole uvijek čiste, suhe i da ih ne prekriva
nijedan predmet (npr. pribor ili krpa). Čak i tanak sloj vode
može otežati rad kontrolama.
Korištenje kontrola na dodir
Odabir pravog posuđa
Nemojte koristiti posude za kuhanje sa naoštrenim ivicama ili zakrivljenim dnom.
Uvjerite se da je dno vaše posude glatko, da stoji ravno uz staklo i da je iste veličine kao i zona za kuhanje. Koristite
tave čiji je prečnik toliko velik koliko je prikazana grafika odabrane zone. Korištenjem lonca koristit će se nešto šira
energija uz maksimalnu efikasnost. Ako koristite manji lonac, efikasnost bi mogla biti manja od očekivane. Uvijek
centrirajte posudu na zonu za kuhanje.
Indikator preostale toplote
Zaštita automatskim isključivanjem
Zaštita od nenamjernog rada
Kada ploča za kuhanje radi neko vrijeme, pojavit će se malo preostale toplote. Slovo "H" upozorava da je previše
vruće da bi se dodirnula površina.
Automatsko isključivanje je sigurnosna zaštitna funkcija za vašu keramičku ploču. Automatski se gasi ako ikada
zaboravite da završite kuhanje. Zadana radna vremena za različite nivoe snage prikazana su u donjoj tabeli:
Ako elektronska kontrola otkrije da se dugme drži pritisnuto otprilike 10 sekundi, automatski će se isključiti.
Kontrola šalje zvučni signal greške kako bi upozorila da su senzori otkrili prisustvo objekta. Displej će prikazati kod
greške ER03 ako je ploča za kuhanje još vruća. Displej "H" i ER03 trepere naizmjenično.
Nivo snage 1~2 3~4 5 9
Zadano vrijeme tajmera (min) 360 300 240 90

16
BIH/CG
Uvijek podižite posude sa keramičke ploče za kuhanje – nemojte kliziti jer mogu izgrebati staklo.
UPOTREBA VAŠE KERAMIČKE PLOČE
Započinjanje kuhanja
Korištenje funkcije Child Lock
Korištenje tajmera
Kada je ON/OFF tipka “ ” pritisnuta, svi indikatori pokazuju “0.”
1. Odaberite zonu za kuhanje koju želite da koristite pritiskom na tipku (A). Odabrani simbol “0” će ostati
potpuno upaljen. Svi ostali indikatori zona će zatamniti.
2. Odaberite nivo snage pritiskom “+” tipke (D) “ “ ili “-” tipke (C) “ “
3. Nivo snage će početi od 0. Pritiskom na “+” će se izbrojati nivoi snage od 0 do 9 u numeričkom redoslijedu.
Pritiskom na tipku “-” snaga će se direktno prebaciti sa 9 na 0.
• Ako ne odaberete temperaturu u roku od 20 sekundi, keramička ploča će se automatski isključiti. Morat ćete
početi ponovo u koraku 2.
• Možete izmijeniti temperaturu u bilo kojem trenutku tokom kuhanja.
• Možete zaključati kontrole kako biste spriječili nenamjernu upotrebu (na primjer, djeca slučajno uključe zone za
kuhanje).
• Kada su kontrole zaključane, sve kontrole osim kontrole OFF su onemogućene.
Zaključavanje kontrola
Istovremeno pritisnite tipku " " i tipku za izbor krajnje desne zone . Ploča za kuhanje emituje zvučni signal i
indikator će pokazati „Lo ”.
Otključavanje kontrola
1. Istovremeno pritisnite tipku " " i tipku za izbor krajnje desne zone ponovo.
2. Možete započeti sa korištenjem ploče.
• Možete postaviti da isključite jednu zonu za kuhanje nakon isteka podešenog vremena.
• Tajmer možete podesiti do 99 minuta.
1. Odaberite odgovarajuću zonu za kuhanje koja radi dodirom na tipku za odabir zone (A).
2. Istovremeno pritisnite tipku " " i tipku " " na desnoj strani dva indikatora će pokazati “00”.
3. Upotrebom " " ili " " tipki ,možete realizovati podešavanje vremena od 1 do 99 minuta.
4. Kada je vrijeme postavljeno, odmah će početi odbrojavanje. Indikator će se vratiti da pokaže nivo snage nakon
5 sekundi. Crvena tačka pored indikatora nivoa snage će zasvijetliti pokazujući da je zona podesila tajmer.
5. Ako trebate provjeriti preostalo vrijeme, možete ponovo izvršiti korak 1 i korak 2.
6. Kada tajmer za kuhanje istekne, odgovarajuća zona za kuhanje će se automatski isključiti. Druge zone za
kuhanje će nastaviti da rade ako su prethodno bile uključene.

17
BIH/CG
Korištenje zone dvostrukog prstena
Oštećene kablove za napajanje treba da zamijeni stručna osoba ili kvalifikovani električar.
Samo za kućnu upotrebu.
Nikada ne stavljajte praznu posudu na ploču za kuhanje jer će se na kontrolnoj ploči pojaviti poruka o
grešci.
Kada je zona za kuhanje uključena duže vrijeme, površina ostaje vruća neko vrijeme nakon toga, stoga
nemojte dodirivati keramičku površinu.
Zatvorenu hranu nemojte je zagrijavati prije otvaranja i skidanja poklopca kako biste izbjegli bilo kakvu
opasnost od eksplozije zbog širenja zagrijavanja.
Ako je površina ploče za kuhanje napukla, isključite je iz napajanja kako biste izbjegli mogućnost
strujnog udara.
Ne stavljajte grube ili neravne posude na ploču za kuhanje, jer mogu oštetiti keramičku površinu.
Izbjegavajte lupanje lonaca i tava o ploču za kuhanje. Keramička površina je čvrsta, ali nije nelomljiva.
Ne stavljajte deterdžente ili zapaljive materijale ispod ploče za kuhanje.
Briga
Upozorenje
Prije izvođenja radova održavanja uvijek isključite dovod električne energije. U slučaju
kvara, obratite se korisničkoj službi.
BRIGA I ODRŽAVANJE
• Možete postaviti dvostruku zonu nakon što zona proradi.
• Možete podesiti zonu da radi pomoću dvostrukih ili pojedinačnih prstenova.
– Zadnja lijeva zona grijanja može raditi kao dvije zonske operacije. Može se odabrati kao rad pune snage
2300W ili 1150W kada radi stražnja lijeva zona grijanja pritisnite da odaberete rad pune snage 2300W ili
1150W.
– Kada zadnja lijeva zona displeja pokazuje i naizmjenično, ovo znači da je zadnja lijeva grijna zona na
punoj snazi (2300W).
– Kada zadnja lijeva zona displeja pokazuje i naizmjenično, ovo znači da je lijeva grijna zona na 1150W
(unutrašnji prsten) snage.

18
BIH/CG
Čistoća uređaja
Oprez
• Izbjegavajte trljanje bilo kakvim abrazivnim sredstvom ili dnom tave, itd., jer će to vremenom istrošiti
oznake na vrhu keramičke ploče.
• Redovno čistite keramičku ploču kako biste spriječili nakupljanje ostataka hrane.
• Aparat treba očistiti nakon upotrebe.
• Površina keramičke ploče može se lako očistiti na sljedeći način:
UKLANJANJE PROBLEMA
Prije nego pozovete korisničku podršku, provjerite da li je uređaj ispravno priključen, nijedan od sljedećih slučajeva
nije pokriven garancijom
• Oštećenja uzrokovana nepravilnim korištenjem, skladištenjem ili održavanjem
• Oštećenja uzrokovana neovlaštenim rastavljanjem i popravkom.
• Oštećenja uzrokovana pogrešnim korištenjem.
• Upotreba keramičke ploče za kuhanje u komercijalne svrhe.
Ako dođe do abnormalnosti, keramička ploča će automatski ući u zaštitno stanje i prikazati odgovarajuće zaštitne
kodove:
Poruka pogreške Mogući uzroci Šta uraditi
ER03
Voda ili lonac na staklu iznad kontrole Očistite korisnički interfejs
ER21 Temperatura unutar proizvoda bila je previsoka Proizvod se mora zaustaviti i ohladiti.
Gore navedeno su prosuđivanje i inspekcija uobičajenih kvarova.
Nemojte sami rastavljati jedinicu kako biste izbjegli bilo kakve opasnosti i oštećenja keramičke ploče za kuhanje i
obratite se dobavljaču.
Tip prljavštine Metoda čišćenja Sredstva za čišćenje
Kamenac Nanesite bijelo sirće na površinu, zatim ga osušite
mekanom krpom Specijalno sredstvo za keramiku
Zagorjele mrlje Očistite vlažnom krpom i osušite mekanom krpom Specijalno sredstvo za keramiku
Lake mrlje Očistite vlažnom krpom i osušite mekanom krpom Spužva za čišćenje
Istopljena
plastika
Za uklanjanje ostatka koristite strugač pogodan za
keramičko staklo Specijalno sredstvo za keramiku
Pomoću strugača odmah uklonite komadiće aluminijske folije, prosutu hranu,
prskanje masnoće, tragove šećera i drugu hranu sa visokim sadržajem šećera s
površine kako biste izbjegli oštećenje ploče za kuhanje. Zatim očistite površinu
peškirom i odgovarajućim proizvodom, isperite vodom i osušite čistom krpom.
Ni pod kojim okolnostima ne treba koristiti spužve ili abrazivne krpe; također
izbjegavajte korištenje agresivnih hemijskih deterdženata kao što su sprejevi za
pećnice i sredstva za uklanjanje mrlja.

19
BIH/CG
TEHNIČKE SPECIFIKACIJE
Težina i dimenzije su približne. Budući da kontinuirano nastojimo poboljšati naše proizvode, možemo promijeniti
specifikacije i dizajn bez prethodne najave.
Ploča za kuhanje HV6410TB
Zone kuhanja 4 zone
Napajanje 220-240V~
Instalirana električna snaga 6500W(230V~)
Dimenzije proizvoda L×W×H(mm) 590x520x50
Ugradbene dimenzije A×B (mm) 560x490
INSTALACIJA
Izrežite radnu površinu prema veličinama prikazanim na crtežu.
Za potrebe ugradnje i upotrebe potrebno je očuvati najmanje 5 cm proctora oko rupe.
Pazite da je debljina radne površine najmanje 30 mm. Molimo odaberite material radnje površine otporan na
toplotu kako biste izbjegli veće deformacije uzrokovane toplinskim zračenjem iz ringle. Kao što je prikazano u
nastavku:
Izbor opreme za instalaciju
L (mm) W (mm) H (mm) D (mm) A (mm) B (mm) X (mm)
590 520 50 46 560 490 50 min
SEAL

20
BIH/CG
A (mm) B (mm) C (mm) D E
650 50 min 20 min Ulaz zraka Izlaz zraka
5mm
Prije nego instalirate ploču, osigurajte
• da je radna površina kvadratna i ravna, i nijedan strukturalni element ne ometa prostorne zahtjeve
• da je radna površina od materijala otpornog na toplotu
• ako je ploča za kuhanje postavljena iznad pećnice, da pećnica ima ugrađen ventilator za hlađenje
• da instalacija bude u skladu sa svim zahtjevima za dopuštenje i primjenjivim standardima i propisima
• da je odgovarajući izolacioni prekidač koji omogućava potpuno isključenje iz mrežnog napajanja ugrađen u
trajno ožičenje, montiran i pozicioniran u skladu sa lokalnim pravilima i propisima o ožičenju.
Prekidač za izolaciju mora biti odobrenog tipa i osigurati razmak između kontakata zračnog raspora od 3 mm u
svim polovima (ili u svim aktivnim [faznim] vodičima ako lokalna pravila ožičenja dopuštaju daleko ovu varijaciju
zahtjeva)
• da izolacioni prekidač bude lako dostupan kupcu sa ugrađenom pločom za kuhanje
• da konsultujete lokalne građevinske vlasti i podzakonske akte ako ste u nedoumici u vezi sa instalacijom
• korištenje završnih slojeva otpornih na toplotu i lakih za čišćenje (kao što su keramičke pločice) daleko od zidnih
površina koje okružuju ploču za kuhanje.
Kada ste instalirali ploču, pobrinite se
• da kabl za napajanje nije dostupan kroz vrata ormara ili ladice
• da postoji adekvatan protok svježeg zraka izvan ormarića do osnove ploče za kuhanje
• ako je ploča za kuhanje postavljena iznad ladice ili ormarića, da se termo zaštitna barijera postavlja ispod dna
ploče za kuhanje
• da je izolacijski prekidač lako dostupan kupcu
Ispružite isporučenu traku duž donje ivice ploče za kuhanje, vodeći računa da se krajevi preklapaju.
Slika 1 01
[04] x1
U svakom slučaju, pobrinite se da keramička ploča za kuhanje ima dobru ventilaciju i da ulaz i izlaz zraka nisu
blokirani. Uvjerite se da je keramička ploča za kuhanje u ispravnom stanju. Kao što je prikazano ispod
Napomena: Sigurnosna udaljenost između ploče za kuhanje i ormarića iznad ploče za kuhanje treba biti
najmanje 650 mm.
Instalacija
Table of contents
Languages:
Other Tesla Hob manuals

Tesla
Tesla HI6400SB User manual

Tesla
Tesla HV6401TB User manual

Tesla
Tesla HV6400TB User manual

Tesla
Tesla HV3200SB User manual

Tesla
Tesla HV6410MX User manual

Tesla
Tesla HV3200TB User manual

Tesla
Tesla HM6220SX User manual

Tesla
Tesla HI6401SB User manual

Tesla
Tesla HI6300TB User manual

Tesla
Tesla HI3200SB User manual