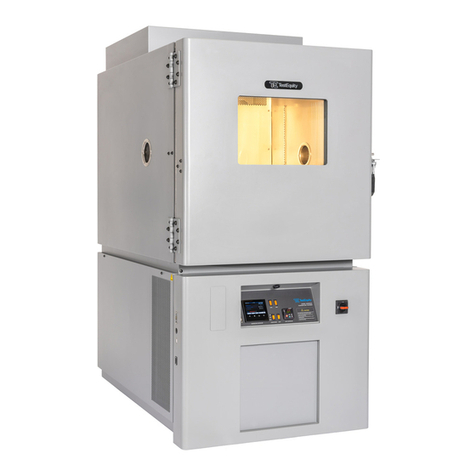
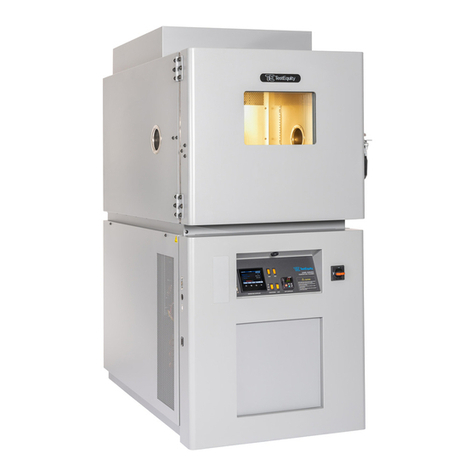
TestEquity 1007C Operation manual

Copyright © 1999-2015 TestEquity LLC Rev. 4.2, October 8, 2015
Model 1007C
Temperature Chamber
With F4 Controller and EZ-Zone Limit Controller
Serial Number 11157 and above
Operation and Service Manual
TestEquity LLC
6100 Condor Drive
Moorpark, CA 93021
Support: 877-512-3457 Toll Free
805-480-0638
Corporate: 800-732-3457
805-498-9933
http://www.testequity.com


Table of Contents
Chapter 1 – Safety Instructions________________________________________________ 1-1
Introduction ____________________________________________________________________1-1
Installation Safety Notices _________________________________________________________1-1
Operation Safety Notices __________________________________________________________1-2
Chapter 2 – Installation ______________________________________________________ 2-1
Uncrating_______________________________________________________________________2-1
Preparation For Use ______________________________________________________________2-1
Installation Location _____________________________________________________________2-2
Condensate Drain ________________________________________________________________2-2
Input Power Configuration ________________________________________________________2-3
Overview_____________________________________________________________________________ 2-3
Voltage and Phase Configuration __________________________________________________________ 2-4
Connection to the Power Source ____________________________________________________2-5
Chapter 3 – Operation _______________________________________________________ 3-1
Introduction ____________________________________________________________________3-1
Summary of Chamber Operation ___________________________________________________3-1
Front Panel Switches and Lights____________________________________________________3-2
Main Disconnect Switch _________________________________________________________________ 3-2
CONDITIONING Switch – ON Mode ______________________________________________________ 3-2
CONDITIONING Switch – EVENT 1 Mode _________________________________________________ 3-2
Light Switch __________________________________________________________________________ 3-3
Heat Light ____________________________________________________________________________ 3-3
Cool Light ____________________________________________________________________________ 3-3
Loading the Chamber ____________________________________________________________3-4
Port Plugs ____________________________________________________________________________ 3-4
Performance Considerations ______________________________________________________________ 3-5
Avoiding Moisture _____________________________________________________________________ 3-5
Internal Test Fixtures ___________________________________________________________________ 3-5
Chamber Relief Vent ___________________________________________________________________ 3-6
Chapter 4 - Temperature Controller ___________________________________________ 4-1
Introduction ____________________________________________________________________4-1
Security Features_______________________________________________________________________ 4-1
Temperature Controller Keys and Displays __________________________________________4-2
Main Page ______________________________________________________________________4-3
Static Set Point Control (Manual Operation) _________________________________________________ 4-3
System Enable Function _________________________________________________________________ 4-4
Profile Programming _____________________________________________________________4-5
Step Types____________________________________________________________________________ 4-5
How to Program a New Profile ____________________________________________________________ 4-7
Programming Hints _____________________________________________________________________ 4-8
Profile Key ___________________________________________________________________________ 4-8
How to Start a Profile ___________________________________________________________________ 4-8
How to Hold/Resume a Running Profile____________________________________________________ 4-10
How to Terminate a Running/Holding Profile _______________________________________________ 4-10
How to Delete or Re-Name a Profile ______________________________________________________ 4-10
How to Edit a Profile __________________________________________________________________ 4-11
Profile Examples ______________________________________________________________________ 4-12
Digital Event Outputs____________________________________________________________4-13
Digital Output Connections______________________________________________________________ 4-13
Event Board Option ___________________________________________________________________ 4-13
Operations Page ________________________________________________________________4-14
Setup Page _____________________________________________________________________4-14
Factory Page ___________________________________________________________________4-15

Table of Contents
Computer Interface _____________________________________________________________4-15
RS-232C ____________________________________________________________________________ 4-15
Common Modbus Registers _____________________________________________________________ 4-15
GPIB (optional)_______________________________________________________________________ 4-15
Ethernet (optional) ____________________________________________________________________ 4-15
Chapter 5 - Limit Controller __________________________________________________ 5-1
Introduction ____________________________________________________________________5-1
Limit Controller Keys and Displays ________________________________________________________ 5-2
How to Set the High and Low Temperature Safety Limits _______________________________________ 5-2
Resetting an Out of Limit Condition________________________________________________________ 5-2
Silencing the Audible Alarm______________________________________________________________ 5-2
Protecting an Energized Test Sample _______________________________________________________ 5-3
Chapter 6 – Purge ___________________________________________________________ 6-1
Introduction ____________________________________________________________________6-1
GN2 (Gaseous Nitrogen) Installation (Option TE-0031) ________________________________________ 6-1
Dry Air Installation (Option TE-0034) ______________________________________________________ 6-1
Purge Operation _______________________________________________________________________ 6-2
Chapter 7 – Frequently Asked Questions________________________________________ 7-1
Chapter 8 – Specifications ____________________________________________________ 8-1
Model 1007C Chamber Specifications _______________________________________________8-1
F4 Temperature Controller Specifications____________________________________________8-2
Chapter 9 – Maintenance _____________________________________________________ 9-1
Preventive Maintenance Intervals __________________________________________________9-1
Maintenance Procedures __________________________________________________________9-2
How to clean the chamber interior and exterior. _______________________________________________ 9-2
How to listen for abnormal noise or vibration. ________________________________________________ 9-2
How to inspect the door seal. _____________________________________________________________ 9-2
How to inspect the refrigeration machinery compartment. _______________________________________ 9-3
How to check the low-stage refrigerant charge. _______________________________________________ 9-3
How to check the high-stage refrigerant charge._______________________________________________ 9-3
How to verify the chamber performance. ____________________________________________________ 9-4
How to inspect the electrical compartment. __________________________________________________ 9-6
How to clean the condenser. ______________________________________________________________ 9-6
How to verify the calibration. _____________________________________________________________ 9-6
Theory of Operation______________________________________________________________9-7
Troubleshooting _________________________________________________________________9-9
Refrigeration System Charging Instructions _________________________________________9-11
R-404A High-Stage Charge _____________________________________________________________ 9-11
R-508B Low-Stage Charge ______________________________________________________________ 9-11
Recommended Spare Parts _______________________________________________________9-12
Major Electrical Parts __________________________________________________________________ 9-13
Major Refrigeration Parts _______________________________________________________________ 9-14
General Parts_________________________________________________________________________ 9-14
Series F4 Temperature Controller Setup Parameters _________________________________9-15
Series F4 Setup Parameters______________________________________________________________ 9-16
Series F4 Operations Parameters__________________________________________________________ 9-17
Series F4 Set Lockout Parameters_________________________________________________________ 9-17
EZ-Zone Limit Controller Setup Parameters ________________________________________9-18
Setup Menu __________________________________________________________________________ 9-18
Operations Menu______________________________________________________________________ 9-18
Chapter 10 - Warranty______________________________________________________ 10-1
Chapter 11 – Drawings______________________________________________________ 11-1

Chapter 1 – Safety
TestEquity 1007C Temperature Chamber Page 1-1
Chapter 1 – Safety Instructions
Introduction
Follow all CAUTION notices to prevent damage to the chamber or your test sample. Failure to
follow all CAUTION notices may void your warranty. CAUTION may also indicate a
potentially hazardous situation which, if not avoided, may result in minor or moderate personal
injury.
WARNING indicates a potentially hazardous situation which, if not avoided, could result in
death or serious injury.
The safety alert symbol !precedes a general CAUTION or WARNING statement.
The electrical hazard symbol 2precedes an electric shock hazard CAUTION or WARNING
statement.
Installation Safety Notices
!CAUTION: The minimum clearance you should allow for proper ventilation around the
chamber must be at least 12" from both the left and right side, and 24" from
the rear.
!CAUTION: This chamber is designed for operation in a conditioned laboratory
environment. Operation above 30°C (85°F) or below 16°C (60°F) ambient
room temperature is NOT recommended.
!CAUTION: The Input Voltage label on the back of the chamber indicates the input voltage
configuration as shipped from the factory. If the input voltage configuration is
changed, this label must be replaced to reflect the new configuration.
Replacement labels are available from TestEquity at no charge.
!CAUTION: This chamber must be properly configured for either 208 V or 230 V nominal
input. 208 V and 230 V are NOT the same. Do NOT guess! Do NOT assume
you have “220 V”. You must verify the exact type of electrical service you
have. If there is any doubt, you must consult with a qualified electrician who
is familiar with industrial plant wiring. In addition, the input line voltage
should be measured while the chamber is operating in the COOL mode to
ensure that the expected nominal voltage of either 208 V –5/+10% or 230 V
±10% is present. Operation below 198 V or greater than 253 V requires
internal transformers, which can be supplied for a nominal charge.
2CAUTION: This chamber should be connected to the AC power source by a qualified
electrician who is familiar with industrial plant wiring.

Chapter 1 – Safety
Page 1-2 TestEquity 1007C Temperature Chamber
Operation Safety Notices
!CAUTION: This chamber has a crankcase heater to protect the high-stage compressor. The
chamber must be connected to the power source AND the Main Disconnect
Switch must be ON for 3 hours prior to operating the chamber. Although it
may be safe to use the chamber immediately, this procedure ensures the
longest possible life for the high-stage compressor if the chamber has been
removed from the power source for more than 24 hours.
!CAUTION: The “Series F4 User’s Manual” is a general manual and is written by the
manufacturer, Watlow, for a wide variety of applications and configurations.
Not all features or functions are applicable. Only the capabilities of a model
F4SH-CKA0-01, as described on page A.7 of the “Series F4 User’s Manual”
are applicable. “Cascade Control” as described on page 3.6 of the “Series F4
User’s Manual” is not applicable in this configuration. The “Retransmit”
function is available as an option.
!CAUTION: The Series F4 “Alarm” functions are NOT used in the chamber’s safety
system and are NOT connected. TestEquity does NOT recommend using the
Series F4 alarm function as the main protection device. The independent
EZ-Zone Limit Controller functions as the main protection device.
!CAUTION: The Series F4 Temperature Controller has been properly configured by
TestEquity to match the chamber’s system requirements and to perform
optimally over a wide range of operating conditions. Improper modifications
to these setup values can result in erratic performance and unreliable
operation. Setup examples in the “Series F4 User’s Manual” are NOT
applicable to this chamber. Do not attempt to modify the setup values, unless
you thoroughly understand what you are doing. If there is any doubt, please
call TestEquity before proceeding.
!CAUTION: NEVER select “Full Defaults” in the Series F4 Controller’s Factory/Test
Menu. This will erase all the correct values which are documented in the
“Series F4 Temperature Controller Setup Parameters” section of this manual.
!CAUTION: The EZ-Zone Limit Controller has been properly configured by TestEquity to
match the chamber’s system requirements. Improper modifications to these
setup values can result in unreliable and unsafe operation. Do not attempt to
modify the setup values, unless you thoroughly understand what you are
doing. The correct values are documented in the “EZ-Zone Limit Controller
Setup Parameters” section of this manual.
!CAUTION: Always verify that the Limit Controller’s high and low limits are set to
temperatures that are appropriate for your test sample.

Chapter 1 – Safety
TestEquity 1007C Temperature Chamber Page 1-3
!CAUTION: If your test sample is energized, it may be capable of raising the workspace
temperature beyond safe limits. This could occur if your test sample exceeds
the live load rating of the chamber or if the chamber’s refrigeration system
fails. This chamber has a set of contacts that can be used to remove power to
your test sample if the Limit Controller’s temperature limits are exceeded.
!CAUTION: To prevent damage to your test sample and the chamber’s compressors, do not
exceed the live load rating of the chamber.
!WARNING: Do NOT put items in the chamber that could burn or explode at high
temperatures. This chamber uses open wire heating elements which generate
surface temperatures over 1000ºF. This is NOT an explosion-proof chamber.
!WARNING: Do NOT put items in the chamber which can emit corrosive vapors or
substances.
!WARNING: This chamber is NOT a curing oven. There are NO provisions for venting
fumes.
!WARNING: The chamber door must remain closed while the chamber is operating. If you
need to open the door while the chamber is operating, wear safety goggles to
prevent the high velocity airflow from blowing particles or objects into your
eyes.
!WARNING: This chamber operates at extreme temperatures. Avoid contact with air,
objects, and surfaces that are hot or cold to prevent severe burns or frostbite.
Protective gloves are recommended.


Chapter 2 – Installation
TestEquity 1007C Temperature Chamber Page 2-1
Chapter 2 – Installation
Uncrating
Inspect the shipping container for any signs of visible damage. Notify the carrier and TestEquity
immediately if there are signs of shipping damage.
The pallet is designed with ramps so the chamber can be rolled off without the need for a forklift
or pallet jack.
1. Cut the two metal bands that hold the packaging to the pallet.
2. Remove the top cover.
3. Remove the plastic fasteners that hold the outer box together and remove the outer box.
4. Locate the retainer in the front of the pallet. Remove the two screws, then remove the
retainer. Keep in mind that there is also Velcro that holds the retainer in place. Place the
retainer in the front of the pallet on the floor.
5. Locate the two ramps under the chamber and remove them.
6. Attach the ramps to the front of the pallet using the Velcro straps. The retainer will be under
the ramps and act as a support.
7. Carefully roll the chamber off the pallet, onto the ramps. This should be done with at least
two people.
Preparation For Use
1. Inspect the chamber for signs of shipping damage.
2. Read this entire manual.
3. Select a suitable location to install the chamber.
4. Verify the input voltage and phase configuration.
5. Connect to the power source.
6. Perform following the procedures as described in the Preventive Maintenance section:
a. Inspect the electrical compartment.
b. Inspect the refrigeration machinery compartment.
c. Check the low-stage refrigeration charge.
d. Check the high-stage refrigeration charge.
e. Verify the chamber performance.

Chapter 2 – Installation
Page 2-2 TestEquity 1007C Temperature Chamber
Installation Location
The chamber will produce a significant amount of heat during normal operation. Locate the
chamber in a room with adequate ventilation to prevent excessive heat build-up.
The chamber must be on a solid and level floor. Leveling legs are provided to lock the chamber
securely in place if desired.
Allow enough space around the chamber to permit serviceability and the removal of the service
access panels, which are located on each side and the rear.
!CAUTION: The minimum clearance you should allow for proper ventilation around the
chamber must be at least 12" from both the left and right side, and 24" from
the rear.
!CAUTION: This chamber is designed for operation in a conditioned laboratory
environment. Operation above 30°C (85°F) or below 16°C (60°F) ambient
room temperature is NOT recommended.
Condensate Drain
The chamber has a condensate drain connection on the rear of the chamber. This provides a way
to remove condensate that may accumulate in the chamber during low-to-high temperature
cycling or when the refrigeration system runs to maintain moderate temperatures. Any time the
ambient air is subjected to temperatures below the dew point, moisture will condense out of the
air. The effect is ice or frost during low temperature operation. When the chamber is heated
above 0°C, the ice or frost will turn into water.
The fitting accommodates a ½-inch male pipe thread. The chamber drain water is not under
pressure, and is fed by gravity. Therefore, it must empty into an open floor drain. Alternatively,
the chamber drain can empty into a condensate pump. You can purchase a condensate pump
from suppliers such as Grainger (www.grainger.com).

Chapter 2 – Installation
TestEquity 1007C Temperature Chamber Page 2-3
Input Power Configuration
Overview
This chamber is designed to be easily configured for operation from a Single Phase or Three
Phase power source, and either 208 V / 60 Hz or 230 V / 60 Hz. Other input voltages and 50 Hz
operation are available as special options, and are not covered in these instructions.
Your chamber was configured prior to shipment for the particular voltage that was specified at
time of order. These instructions should be used to verify the input voltage configuration prior to
installation, or to change the input voltage from one configuration to another.
!CAUTION: The Input Voltage label on the back of the chamber indicates the input voltage
configuration as shipped from the factory. If the input voltage configuration is
changed, this label must be replaced to reflect the new configuration.
Replacement labels are available from TestEquity at no charge.
!CAUTION: This chamber must be properly configured for either 208 V or 230 V nominal
input. 208 V and 230 V are NOT the same. Do NOT guess! Do NOT assume
you have “220 V”. You must verify the exact type of electrical service you
have. If there is any doubt, you must consult with a qualified electrician who
is familiar with industrial plant wiring. In addition, the input line voltage
should be measured while the chamber is operating in the COOL mode to
ensure that the expected nominal voltage of either 208 V –5/+10% or 230 V
±10% is present. Operation below 198 V or greater than 253 V requires
internal transformers, which can be supplied for a nominal charge.
Figure 2-1 – Location of Input Configuration Terminals on the Electrical Sub Panel
Disconnect
Switch
Terminal Strip
Control
Transformer
TR1
Terminal H3
Input
L1 L2 L3
T1 T2 T3
Ground
Lug
3 4
A
B
C
Power Distribution
Block

Chapter 2 – Installation
Page 2-4 TestEquity 1007C Temperature Chamber
Voltage and Phase Configuration
NOTE: Refer to Figure 2-1 on the previous page for the location of the input voltage
configuration terminals on the electrical subpanel that are described below. To access the
electrical subpanel, turn the Disconnect Switch to the OFF position. Remove the lower door
retaining screw located on the right side. Open the lower door.
230 V / 60 Hz Input Configuration
1. Locate the Control Transformer TR1. Wire number T1 must be connected to the 230 V
terminal 4 on Control Transformer TR1.
2. Locate the Terminal Strip. On the bottom of terminal H3 there must be only wire H3, NOT
H3A. Wire H3A must be capped off.
208 V / 60 Hz Input Configuration
1. Locate the Control Transformer TR1. Wire number T1 must be connected to the 208 V
terminal 3 on Control Transformer TR1.
2. Locate the Terminal Strip. On the bottom of terminal H3, there must be wire H3 and H3A.
Single Phase Configuration
1. Locate the Power Distribution Terminal Block. There must be a jumper between terminal C
and A (right side of terminal block). Wire D must connect to terminal B (left side of terminal
block).
2. The input power wires will be connected to L1 and L2 on the top of the Disconnect Switch.
Connect earth ground to the ground lug.
Three Phase Configuration
1. Locate the Power Distribution Terminal Block. Wire D must connect to Power Distribution
Block terminal A (left side of terminal block).
2. The input power wires will be connected to L1, L2, and L3 on the top of the Disconnect
Switch. Connect earth ground to the ground lug.
Figure 2-2 – Power Distribution Block Terminals on the Electrical Sub Panel
A
C
A
B
C
B
Single Phase
Three Phase
Wire D to terminal A
Wire D to terminal B

Chapter 2 – Installation
TestEquity 1007C Temperature Chamber Page 2-5
Connection to the Power Source
2CAUTION: This chamber should be connected to the AC power source by a qualified
electrician who is familiar with industrial plant wiring.
The Disconnect Switch on the front panel removes primary power to the entire chamber. All
branch circuits on the load side of the Disconnect Switch are individually protected. However,
your local electrical code may require a separate disconnect switch within sight of the chamber.
Input Wiring Preparation
1. Turn the Disconnect Switch to the OFF position.
2. Remove the lower door retaining screw located on the right side. Open the lower door.
3. Remove the chamber’s right side panel.
4. Ensure that the chamber is properly configured for Single Phase or Three Phase input as
described on the previous page.
5. Mount the input wire through the hole on the rear of the chamber, using an appropriate
bushing. An additional 4-feet of wire will be needed need to reach to the terminals on the
electrical subpanel. The wires will need to pass through the Input Access Hole. This hole is
located in the corner of the partition which separates the compressor compartment from the
electrical compartment. Three tie points are provided on the side of the chamber to secure the
input wiring with tie-wraps.
Three Phase Input
1. Locate the Disconnect Switch.
2. Connect the “Hot” input wires to terminals L1, L2 and L3 on the Main Disconnect Switch.
3. Connect the Ground wire (NOT A NEUTRAL) to the Ground terminal.
4. Put the chamber side panel back on and close the lower door.
Single Phase Input
1. Locate the Disconnect Switch.
2. Connect the “Hot” input wires to terminals L1 and L2 on the Main Disconnect Switch.
3. Connect the Ground wire (NOT A NEUTRAL) to the Ground terminal.
4. Put the chamber side panel back on and close the lower door.


Chapter 3 – Operation
TestEquity 1007C Temperature Chamber Page 3-1
Chapter 3 – Operation
Introduction
The Front Panel Switches control power to the chamber. The Front Panel Lights provide
indication of heat and cool functions.
The Limit Controller is a protection device. It turns the chamber OFF if the workspace
temperature exceeds either a high temperature or low temperature limit set point.
The Temperature Controller controls the temperature of the chamber. It can function as either a
single set point controller or as a programmable profile controller. The Temperature Controller
automatically turns the refrigeration system on or off based on the demand for cooling.
NOTE: If your chamber was ordered with the F4T Touch Screen Controller, see the
separate manual for that controller.
!CAUTION: This chamber has a crankcase heater to protect the high-stage compressor. The
chamber must be connected to the power source AND the Main Disconnect
Switch must be ON for 3 hours prior to operating the chamber. Although it
may be safe to use the chamber immediately, this procedure ensures the
longest possible life for the high-stage compressor if the chamber has been
removed from the power source for more than 24 hours.
Summary of Chamber Operation
1. Turn the Main Disconnect Switch ON.
2. Enter the appropriate high and low temperature safety limits on the Limit Controller.
3. Enter the desired temperature set point (or program) on the Temperature Controller.
4. Load your test sample in the chamber.
5. Turn the CONDITIONING Switch ON. Alternatively, turn the CONDITIONING Switch to
the EVENT 1 position and turn EVENT 1 on the F4 controller ON.

Chapter 3 – Operation
Page 3-2 TestEquity 1007C Temperature Chamber
Front Panel Switches and Lights
Main Disconnect Switch
The Main Disconnect Switch controls power to the entire chamber and provides a mechanical
safety interlock to the lower door.
In the ON position (clockwise) primary power is connected. The Temperature Controller, Limit
Controller, and (optional) Chart Recorder are always functional when the Main Disconnect
Switch is ON, regardless of the Master Switch position. The Main Disconnect Switch should be
left ON if the chamber is usually used on a daily basis.
In the OFF position (counter clockwise) primary power is disconnected. The Main Disconnect
Switch can be left OFF if the chamber is not used on a daily basis. It can also be locked in the
OFF position with a padlock. The knob has a red insert that can be pushed in at the top to reveal
the lock-hole.
!CAUTION: This chamber has a crankcase heater to protect the high-stage compressor. The
chamber must be connected to the power source AND the Main Disconnect
Switch must be ON for 3 hours prior to operating the chamber. Although it
may be safe to use the chamber immediately, this procedure ensures the
longest possible life for the high-stage compressor if the chamber has been
removed from the power source for more than 24 hours.
CONDITIONING Switch – ON Mode
The CONDITIONING Switch enables all chamber functions. When the CONDITIONING
Switch is OFF and the POWER Switch is ON, only the Temperature Controller and Limit
Controller is operational. When both the CONDITIONING and POWER Switches are ON, the
chamber’s temperature conditioning system will function to maintain the temperature set point.
The CONDITIONING Switch does NOT illuminate in any position.
CONDITIONING Switch – EVENT 1 Mode
When the CONDITIONING Switch is in the EVENT 1 position, you can enable and disable all
chamber functions through Event 1 (Digital Output 1) of the F4 Temperature Controller. When
the CONDITIONING Switch is in the EVENT 1 position and EVENT 1 is Off, all chamber
functions are disabled. If EVENT 1 is On, all chamber functions are enabled.
See page 4-4 for instructions on how to control the EVENT 1 in manual mode. In profile mode,
Event 1 is named CONDITION.
!CAUTION: Remember to set DigitalOut 1 (Event Output1) to On in static set
point mode when the chamber is to be operational. In this mode, the Modbus
register for Digital Output 1 is 2000.
!CAUTION: Remember to set CONDITION to On in the profile event prompt all
programmed steps when the chamber is to be operational.

Chapter 3 – Operation
TestEquity 1007C Temperature Chamber Page 3-3
Light Switch
The Light Switch controls the workspace light. The Light Switch illuminates when it is ON.
Heat Light
The Heat Light will illuminate when the Temperature Controller turns on the heater to maintain
the workspace temperature. The Heat Light will cycle on/off as the workspace temperature
approaches and reaches the temperature set point.
Cool Light
The Cool Light will illuminate when the Temperature Controller turns on the cooling valve to
maintain the workspace temperature. The Cool Light will cycle on/off as the workspace
temperature approaches and reaches the temperature set point.

Chapter 3 – Operation
Page 3-4 TestEquity 1007C Temperature Chamber
Loading the Chamber
!WARNING: Do NOT put items in the chamber that could burn or explode at high
temperatures. This chamber uses open wire heating elements which generate
surface temperatures over 1000ºF. This is NOT an explosion-proof chamber.
!WARNING: Do NOT put items in the chamber which can emit corrosive vapors or
substances.
!WARNING: This chamber is NOT a curing oven. There are NO provisions for venting
fumes.
!WARNING: The chamber door must remain closed while the chamber is operating. If you
need to open the door while the chamber is operating, wear safety goggles to
prevent the high velocity airflow from blowing particles or objects into your
eyes.
!WARNING: This chamber operates at extreme temperatures. Avoid contact with air,
objects, and surfaces that are hot or cold to prevent severe burns or frostbite.
Protective gloves are recommended.
!CAUTION: If your test sample is energized, it may be capable of raising the workspace
temperature beyond safe limits. This could occur if your test sample exceeds
the live load rating of the chamber or if the chamber’s refrigeration system
fails. This chamber has a set of contacts that can be used to remove power to
your test sample if the Limit Controller’s temperature limits are exceeded.
!CAUTION: To prevent damage to your test sample and the chamber’s compressors, do not
exceed the live load rating of the chamber.
Live Load Capacity for Model 1007C
Temp +23°C 0°C –40°C –55°C –65°C
Watts 1000 W 800 W 500 W 400 W 300 W
Port Plugs
Foam port plugs are provided with a gray silicone surface on one side. The port plug must be
inserted with the gray silicone surface facing the inside of the chamber. Port plugs should be
considered expendable and be replaced when they no longer provide a good seal.

Chapter 3 – Operation
TestEquity 1007C Temperature Chamber Page 3-5
Performance Considerations
The performance of all chambers is significantly affected by the characteristics of your test
sample. Factors include size, weight, material, shape, and power dissipation if energized.
The test sample should be placed in the chamber in a manner that allows for air circulation. The
air plenum is located on the back wall of the chamber, where air is sucked in from the bottom
and exits from the top. You should not place the test sample directly on the chamber floor. It
should be placed on the shelf. Multiple test samples should be distributed throughout the
chamber to ensure even airflow and minimize temperature gradients. If necessary, additional
shelves should be used to evenly distribute the load. Verify that the temperature gradients are
within acceptable limits, by measuring the chamber temperature at strategic points using a
multipoint thermocouple meter or data logger.
You may find that the temperature throughout the chamber is even, but always different from
what the temperature controller indicates. The correct way to adjust what the temperature
controller “displays” compared to what is measured at some point other than the controller’s
sensor is with the “Calibration Offset” parameter, NOT by recalibrating the controller.
Avoiding Moisture
Any time the ambient air is subjected to temperatures below the dew point, moisture will
condense out of the air. The effect is ice or frost during low temperature operation, or water
when maintaining over 0°C and cooling is required.
To avoid moisture condensation, make sure the port plugs are inserted at all times. Also, avoid
opening the chamber door while the chamber is operating at temperatures below room ambient.
When a low temperature test is completed, warm the chamber to at least room ambient before
opening the chamber door and before removing your test sample.
Internal Test Fixtures
Some applications require internal fixtures to support test samples and provide a convenient
method of connecting wires and sensors. Fixtures must be designed to minimize their impact on
chamber functionality and performance.
Fixtures should be designed for easy removal to permit maintenance and cleaning of the
chamber. The chamber liner should never be drilled or screwed into. This will compromise the
integrity of the liner and permit moisture migration due to condensation into the insulation,
which will eventually impact performance and lead to premature rusting of the outer cabinet.
Fixtures should be constructed of stainless steel. This also applies to all screws and fasteners. All
welds should be passivated. To prevent rust and corrosion, never use iron or mild steel even if it
is painted or plated. Aluminum may be used. However, since the specific heat of aluminum is
double that of steel, it represents a greater load and will have more impact on the chamber
performance.
Make sure that all connectors, wiring, pc boards, and auxiliary components can withstand the
temperature extremes that they will be subjected to. In some cases, these components may not be
able to last after repeated tests and should be considered expendable.

Chapter 3 – Operation
Page 3-6 TestEquity 1007C Temperature Chamber
Chamber Relief Vent
A relief vent is located on the top of the chamber. It will vent the chamber workspace if there is a
positive or negative pressure condition. A positive pressure can result if the chamber door is
opened at high temperature and then closed. A positive pressure can also occur if the optional
Dry Air Purge or GN2 Purge system is operational. A negative pressure can result if the chamber
door is opened at low temperature and then closed. The vent body can become hot or cold
depending on the workspace condition. The vent assembly has a drip pan to catch any
condensate that may occur.
This manual suits for next models
1
Table of contents
Other TestEquity Laboratory Equipment manuals