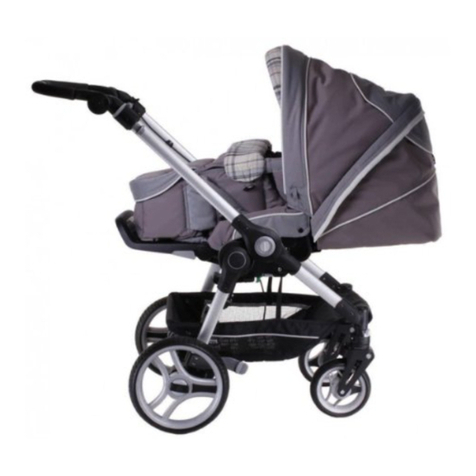
teutonia BeYou V3 User manual

Haftungshinweis:
Wir garantieren nicht für die Aktualität, Richtigkeit und Vollständigkeit der zu Verfügung gestellten Informationen und Daten. Wir behalten uns das Recht vor
Veränderungen der dargestellten Informationen vorzunehmen. Die Bilder und Darstellung der Farben ist nicht verbindlich und kann vom Original abweichen.
für die Kleinsten
BeYou V3
für die Kleinsten
Bedienungsanleitung
operating instructions
mode d’emploi
käyttöohje
brunksanvisning
gebruiksaanwijzing
brugsanvisning
brunksanvisning
istruzioni per l’uso
manual de instrucciones
návod k obsluze
instrukcja obsługi
Návod na použitie
Lietošanas instrukcija
Instrukcija
Instruction manual 10/14
Newell Poland Services Sp. Z.o.o.
Plac Andersa 7
61-894 Poznan, Poland
www.teutonia.com
1914228

Sprachen/languages
Deutsch . . . . . . . . . . . . . . . . . . . . . . . . . . . . . . . . . . . . . . . . . . . . . . . . . . . . . . . 3–8
English . . . . . . . . . . . . . . . . . . . . . . . . . . . . . . . . . . . . . . . . . . . . . . . . . . . . . . . . 9–14
Français . . . . . . . . . . . . . . . . . . . . . . . . . . . . . . . . . . . . . . . . . . . . . . . . . . . . . . . 15–22
Suomenkielinen . . . . . . . . . . . . . . . . . . . . . . . . . . . . . . . . . . . . . . . . . . . . . . . . . 23–28
Svensk . . . . . . . . . . . . . . . . . . . . . . . . . . . . . . . . . . . . . . . . . . . . . . . . . . . . . . . . 29–34
Nederlands. . . . . . . . . . . . . . . . . . . . . . . . . . . . . . . . . . . . . . . . . . . . . . . . . . . . . 35–42
Dansk . . . . . . . . . . . . . . . . . . . . . . . . . . . . . . . . . . . . . . . . . . . . . . . . . . . . . . . . . 43–50
Norsk . . . . . . . . . . . . . . . . . . . . . . . . . . . . . . . . . . . . . . . . . . . . . . . . . . . . . . . . . 51–56
Italiano . . . . . . . . . . . . . . . . . . . . . . . . . . . . . . . . . . . . . . . . . . . . . . . . . . . . . . . . 57–64
Español. . . . . . . . . . . . . . . . . . . . . . . . . . . . . . . . . . . . . . . . . . . . . . . . . . . . . . . . 65–72
усск . . . . . . . . . . . . . . . . . . . . . . . . . . . . . . . . . . . . . . . . . . . . . . . . . . . . . . . 73–80
Česky . . . . . . . . . . . . . . . . . . . . . . . . . . . . . . . . . . . . . . . . . . . . . . . . . . . . . . . . . 81–86
Polski . . . . . . . . . . . . . . . . . . . . . . . . . . . . . . . . . . . . . . . . . . . . . . . . . . . . . . . . . 87–94
Slovakian . . . . . . . . . . . . . . . . . . . . . . . . . . . . . . . . . . . . . . . . . . . . . . . . . . . . . . 95–102
Latvian . . . . . . . . . . . . . . . . . . . . . . . . . . . . . . . . . . . . . . . . . . . . . . . . . . . . . . . . 103–108
Lithuanian. . . . . . . . . . . . . . . . . . . . . . . . . . . . . . . . . . . . . . . . . . . . . . . . . . . . . . 109–114
Estonian . . . . . . . . . . . . . . . . . . . . . . . . . . . . . . . . . . . . . . . . . . . . . . . . . . . . . . . 115–121
Rundum Sorglos Garantie/Go Carefree Guarantee. . . . . . . . . . . . . . . . . . . . . . 122–129
Übergabe-Check/Handover form . . . . . . . . . . . . . . . . . . . . . . . . . . . . . . . . . . . 130–131
Kompatibilitätsübersicht/Overview Compatibility . . . . . . . . . . . . . . . . . . . . . . 132
D
INT
F
FIN
S
NL
DK
N
I
E
PL
RUS
CZ
SK
LV
LT
EST
Technische Änderungen vorbehalten.
We reserve the right to make changes that promote technical changes.
Réservation sur des modifications techniques.
Oikeus teknisiin muutoksiin pidätetään.
Teutonia förbehåller sig rätten till tekniska förändringar.
Technische wijzigingen voorbehouden.
Vi forbeholder os retten til tekniske ændringer.
Med forbehold om tekniske endringer.
Salvo modifiche tecniche.
Nos reservamos el derecho a realizar modificaciones técnicas.
о с ск сос.
Technické zmíny vyhrazeny.
Zastrzegamy sobie prawo do technicznych zmian.
Vyhradzujeme si právo na zmeny dané technickými zmenami.
Mēs paturam tiesības izmainīt tehnisko specifikāciju īpašības.
Mes pasiliekame teise daryti pakeitimus, kurie skatina techninius pokycius
Jätame õiguse teha tehnilises osas muudatusi.
DIN EN 1888: 2012
www.tuv.com
ID 0000024302

WICHTIG: Die Anleitung für spätere Rückfragen
aufbewahren.
teutonia-Produkte verbinden bewährte handwerkliche
Verarbeitung und technische Innovationen mit modi-
schem Design. Der Name teutonia steht für Qualität,
die höchsten Ansprüchen gerecht wird. Das teutonia-
Logo mit dem Regenbogen garantiert Ihnen, dass es
sich um ein Original-teutonia-Modell handelt. Lesen
Sie vor Inbetriebnahme diese Anleitung sorgfältig
durch (speziell unsere
Sicherheitshinweise) und he-
ben Sie sie für spätere Zwecke und Rückfragen auf
.
Wenn Sie diese Hinweise nicht beachten, kann die
Sicherheit Ihres Kindes beeinträchtigt werden.
Wir sind sicher, dass Sie mit diesem Produkt eine
gute Wahl getroffen haben und sich Ihr Kind in einem
teutonia-Wagen gut aufgehoben fühlt. Sollten Sie den-
noch Grund zur Beanstandung haben, so wenden Sie
sich bitte an Ihren Fachhändler.
Ihr teutonia-Team
Allgemeines
Das Produkt ist in einem Temperaturbereich von –20 °C
bis +60 °C (–4 °F bis +140 °F) getestet worden. Trotz
vieler positiver Eigenschaften unserer Materialien wie
Luftdurchlässigkeit etc. reagieren viele Textilien auf
intensive Sonneneinstrahlung sehr sensibel. Die Erfah-
rung der vergangenen Zeit lehrte uns, dass die Sonnen-
strahlen mittlerweile derart aggressiv sind, dass wir von
teutonia ein Abstellen des Kinderwagens im Schatten
empfehlen müssen. Meiden Sie längere Aufenthalte in
praller Sonne, und die frischen Farben Ihres Wagens
bleiben Ihnen länger erhalten. Zwischen den einzel-
nen Fertigungspartien lassen sich Farbunterschiede
nicht immer vermeiden. Diesbezügliche Reklamationen
können leider nicht anerkannt werden. Bitte haben Sie
Verständnis dafür dass unsachgemäße Behandlung,
eventuelle Regenränder oder Farbunterschiede im Stoff,
wie oben beschrieben keine berechtigte Reklamation
darstellen.
Regelmäßige Pflege aller Metallteile, spe-
ziell der Chromteile und insbesondere nach Aufent-
halten am Meer, am Wagen ist notwendig, um die
hochwertige Optik zu erhalten.
Dazu sind handelsüb-
liche Pflegemittel ausreichend. Die Achsenden müssen
in Abständen von ca. 4 Wochen gesäubert und leicht
geölt werden.
Allgemeine Sicherheitshinweise
ACHTUNG:
Sie sind für die Sicherheit Ihres Kindes ver-
antwortlich. Die Sicherheit Ihres Kindes
könnte beeinträchtigt werden, wenn Sie
diese Hinweise nicht befolgen. Dennoch
können nicht alle möglicherweise ein-
tretenden Bedingungen und unvorherseh-
baren Situationen abgedeckt werden. Ver-
nunft, Vorsicht und Umsicht sind Faktoren,
die dieses Produkt nicht mitbringen kann;
sie werden bei der Person vorausgesetzt,
die den Wagen benutzt. Die Person, die
den Wagen und zugehöriges Zubehör be-
nutzt, sollte sämtliche Instruktionen ver-
stehen. Sie sollten jeder Person, die den
Wagen und zugehöriges Zubehör benutzt,
die Bedienung des Wagens erklären. Wenn
Anleitungen unverständlich und nähere Er-
klärungen erforderlich sind oder wenn Sie
weitere Fragen haben, setzen Sie sich mit
einem autorisierten teutonia-Fachhändler
in Verbindung.
●WARNUNG: Lassen Sie Ihr Kind nie un-
beaufsichtigt.
●WARNUNG: Schnallen Sie Ihr Kind gene-
rell an.
●WARNUNG: Vergewissern Sie sich vor
dem Gebrauch, dass alle Verriegelungen
geschlossen sind.
●WARNUNG: Um Verletzungen zu vermei-
den, stellen Sie sicher, dass sich Ihr Kind
fernhält, wenn Sie den Wagen auseinan-
der- oder zusammenfalten.
●WARNUNG: Lassen Sie Ihr Kind nicht mit
diesem Produkt spielen.
●WARNUNG: Vergewissern Sie sich vor
dem Gebrauch, dass die Befestigungs-
einrichtungen des Kinderwagenoberteils,
bzw. der Sitzeinheit korrekt eingerastet
sind.
●WARNUNG: Dieses Produkt ist nicht ge-
eignet zum Joggen, Laufen oder Skaten.
3

●WARNUNG: Sämtliche am Schieber und/
oder an der Rückseite der Rückenlehne
und/oder an den Seiten des Wagens ange-
brachte Lasten beeinträchtigen die Stand-
sicherheit des Wagens.
Weitere wichtige Sicherheitshinweise
●teutonia übernimmt keine Garantie für die
Sicherheit dieses Produktes, wenn Ersatz-
oder Zubehörteile verwendet werden, die
nicht von teutonia produziert oder zuge-
lassen sind. Falls solche Ersatz- oder Zu-
behörteile verwendet werden, erlöschen
unverzüglich die Garantieansprüche.
Abstellen des Wagens
Achtung: Die Bereifung kann unter Umständen zur
Verfärbung des Bodenbelags führen.
Fremdkörper (z. B. Steinchen) in den Reifen müssen
entfernt werden um eine eventuelle Beschädigung von
Bodenbelägen zu vermeiden. Extreme Hitze, insbeson-
dere
direkter Kontakt mit heißen Oberflächen (z. B.
im Sommer
im Auto) kann bei Hohlkammer-Reifen zu
dauerhaften Deformierungen führen.
Diesbezügliche Reklamationen bzw. Regressansprü-
che werden nicht anerkannt.
Reinigen der Stoffteile
Bei kleineren Flecken nehmen Sie bitte ein feuchtes
Tuch und klares Wasser und reinigen vorsichtig die
betreffende Stelle. Bitte vermeiden Sie (besonders
bei dunklen Stoffen) ein starkes Reiben. Alle ab-
nehmbaren Stoffteile können Sie normalerweise mit
einem Feinwaschmittel (ohne optische Aufheller) in
der Waschmaschine bei 30°C/85°F (Schonwasch-
gang) waschen. Siehe gesonderte Pflegeanleitung am
Stoffteil.
Regenpelerine
Bei Regen muss rechtzeitig die Regenpelerine über
den ganzen Wagen gespannt werden.
Achtung: Die Regenpelerine ist kein Spielzeug! Bitte
lassen Sie Ihr Kind nie unbeaufsichtigt. Für eine
optimale Belüftung des Wagens empfehlen wir, die
Regenpelerine nur für die Dauer des Regenschauers
aufzuspannen. Verwenden Sie die Regenhaube nie
auf einem Kindersportwagen, einer Tragetasche oder
einem Auto-Kindersitz ohne Verdeck.
Abziehen des Verdeckbezuges
Vor dem Waschen müssen die beiden Verdeckbügel
aus dem Bezug entfernt werden.
Lösen Sie die Schraube mit Hilfe eines Schrauben-
drehers und entfernen den Druckknopf. Ziehen Sie
nun die Verdeckbügel aus dem Gelenk und aus dem
Verdeckbezug. Nach dem Waschen montieren Sie in
umgekehrter Reihenfolge.
Achten Sie darauf, dass dabei die Verdeckbügel je-
weils in die beiden abgenähten Führungen eingescho-
ben werden. Die Vorder- und Hinterbügel dürfen nicht
vertauscht werden.
Aufstellen des Gestells
Transportsicherung (4) betätigen und Wagen am
Schwenkschieber (5) aufklappen bis er hörbar in abge-
bildeter Position (6) einrastet.
WARNUNG:
Vergewissern Sie sich vor Gebrauch, dass
alle Verriegelungen geschlossen sind.
Zusammenklappen des Gestells
– Schieber (5) in abgebildete Position schwenken.
– An beiden Seiten des Schiebers (5) die Verriegelung
(8) des Klappmechanismus in Pfeilrichtung schieben,
der Kinderwagen kann zusammengeklappt werden.
– Schieber (5) nach unten bewegen, bis die Falt-
sicherung (4) einrastet.
Montage und Demontage der Räder
4

Abziehen des Verdeckbezuges
Vor dem Waschen müssen die beiden Verdeckbügel
aus dem Bezug entfernt werden.
Lösen Sie die Schraube mit Hilfe eines Schrauben-
drehers und entfernen den Druckknopf. Ziehen Sie
nun die Verdeckbügel aus dem Gelenk und aus dem
Verdeckbezug. Nach dem Waschen montieren Sie in
umgekehrter Reihenfolge.
Achten Sie darauf, dass dabei die Verdeckbügel je-
weils in die beiden abgenähten Führungen eingescho-
ben werden. Die Vorder- und Hinterbügel dürfen nicht
vertauscht werden.
Aufstellen des Gestells
Transportsicherung (4) betätigen und Wagen am
Schwenkschieber (5) aufklappen bis er hörbar in abge-
bildeter Position (6) einrastet.
WARNUNG:
Vergewissern Sie sich vor Gebrauch, dass
alle Verriegelungen geschlossen sind.
Zusammenklappen des Gestells
– Schieber (5) in abgebildete Position schwenken.
– An beiden Seiten des Schiebers (5) die Verriegelung
(8) des Klappmechanismus in Pfeilrichtung schieben,
der Kinderwagen kann zusammengeklappt werden.
– Schieber (5) nach unten bewegen, bis die Falt-
sicherung (4) einrastet.
Montage und Demontage der Räder
Hinterräder:
Um die Hinterräder abzunehmen:
- Drücken Sie die Entriegelung (7) und ziehen Sie das
Rad von der Achse.
Zur Montage schieben Sie das Rad auf die Achse.
Kontrollieren Sie durch Ziehen, ob das Rad korrekt
arretiert ist.
Vorderräder:
Zum Abnehmen drücken Sie die Entriegelung (10) und
ziehen Sie die Schwenkachse aus der Aufnahme.
Zur Montage schieben Sie die Schwenkachse in die
Aufnahme. Kontrollieren Sie durch Ziehen, ob das Rad
korrekt arretiert ist.
Montage der Räder
5

6
Das Oberteil befindet sich im gesicherten Zustand,
wenn das rote Feld im Auslösehebel nicht mehr
sichtbar ist. Zum Abnehmen des Oberteils drücken
Sie zunächst den Sicherungshebel (3) nach oben
und dann den Auslösehebel (4) nach unten bis der
Hebel arretiert. (rotes Feld erscheint). Danach ziehen
Danach ziehen Sie das Oberteil aus den Schlitzen und
nehmen es ab.
Handhabung des Verdecks
Stecken Sie die Einsteckteile der Verdeckgelenke in
die entsprechenden Öffnungen in der Armlehne bzw.
an der Tragetasche.
Achtung: Befestigen Sie unbedingt die Druckknöpfe
am hinteren Verdeckende an der Rückseite der
Rückenlehne, da das Verdeck so als Herausfallschutz
fungiert.
Zum Abnehmen des Verdecks lösen Sie ggf. die Druck-
knöpfe an der Rückseite der Rückenlehne, drücken
Sie die Entriegelungsknöpfe an den Einsteckteilen der
Verdeckgelenke und ziehen Sie die Gelenke aus den
Öffnungen. Zur Belüftung können Sie den Reißver-
schluss am Kopfende des Verdecks öffnen.
Verstellen der Rückenlehne
Arretierung der Rückenleh-
ne nach oben ziehen um
die Neigung zu verstellen (4
Sitz-Liegepositionen + Falt-
position ganz vorne).
Verstellung der Fußstütze
Fußkastenarretierung drücken und
gedrückt halten, der Fußkasten
kann in 3 verschiedenen Positio-
nen eingestellt werden.
Handhabung des 5-Punkt-Gurts
Verwendung des 5-Punkt-Gurtes
Sie können den Schultergurt in 3 Positionen anbrin-
gen.
Betätigen der Feststellbremse
Feststellbremse betätigen
Bremshebel (12) in Pfeilrichtung bis zum Einrasten
drehen, ein roter Ring (11) wird sichtbar, die Feststell-
bremse ist betätigt.
Feststellbremse lösen
Entriegelungsknopf (13) betätigen und Bremshebel
(12) wieder in die abgebildete Position bewegen, die
Feststellbremse ist gelöst.
Ergänzung zur Feststellbremse
Sollten Sie eine Veränderung der Feststellwirkung
bemerken, dann lösen Sie zunächst die Kontermutter
um
Einstellungen an der Stellschraube vornehmen zu
können
(heraus drehen). Anschließend die Kontermut-
ter wieder fixieren.
Aufsetzen und Abnehmen des Sportwagen- bzw.
sitzes bzw. der Tragetasche (Oberteil)
43
1
22
1
Setzen Sie das Oberteil (Sportwagensitz bzw. Trage-
tasche) so auf das Kinderwagengestell, dass der seit-
liche Bügel 1des Oberteils auf jeder Seite des Ge-
stells in die vorgesehenen Schlitze 2einrastet und
schieben Sie dabei das Oberteil bis zum Anschlag. Die
Arretierungen schließen dann automatisch. („Klicken“
der Arretierungen muss erfolgen.)
WARNUNG:
Es ist vor Gebrauch zu prüfen, dass der Sport-
wagensitz, bzw. die Tragetasche korrekt ein-
gerastet ist.
Schwenkrad
Schwenkrad gelöst Schwenkrad festgestellt
Wegen des größeren Fahrkomforts empfehlen wir, die
Räder im Fahrbetrieb nicht festzustellen.
Sitzbezug
Der Sitzbezug kann vollständig vom Sitz entfernt wer-
den um gewaschen zu werden. Um dies zu tun, lösen
Sie die Druckknöpfe am Sitz.
Achtung: Beim Wiederaufziehen des Bezuges, ziehen
Sie die Enden des 5-Punkt-Gurtes durch die passen-
den Öffnungen ohne sie zu verdrehen.
Höhenverstellbarer, klappbarer Schieber
Halten Sie die Verstellknöp-
fe auf beiden Seiten einge-
drückt und verändern Sie
die Höhe des Schiebers in
die gewünschte Position.
Schieber schwenken
Beidseitig am Schwenkschieber die Sicherung (15)
in Pfeilrichtung ziehen und gezogen halten, der
Schwenkschieber kann in die jeweils andere Position
geschwenkt werden.
ACHTUNG Verletzungsgefahr durch Einklemmen!
Achten Sie darauf, dass während des Schwenkvor-
ganges nichts (Kind!) eingeklemmt werden kann.

7
Verwenden Sie immer die Position am dichtesten zum
Kind. Um den Gurt zu öffnen, drücken Sie die Mitte
des Verschlusses. Um die Gurte zu verstellen, ziehen
Sie an den freien Enden der Gurte.
Verstellen der Gurte
Schutzbügel
Stecken Sie die Einsteckteile des Schutzbügels durch
die Schlitze im Sitzbezug in die darunterliegenden Auf-
nahmen in den Armlehnen. Achten Sie darauf, dass
der Schutzbügel auf beiden Seiten einrastet. Zum Ab-
nehmen drücken Sie die Entriegelungsknöpfe an den
Einsteckteilen. Um das Ein- und Aussteigen Ihres Kin-
des zu erleichtern, reicht es aus, eine Seite des Bü-
gels zu lösen und hochzuklappen.
RÄDERINFORMATION
Zu unseren Lufträdern möchten wir noch auf folgende
Punkte hinweisen:
1. Der optimale Fahrkomfort wird erreicht, wenn das
Rad mit einem Luftdruck von 1,5 – 2 bar (22 –
29 psi) gefüllt ist. Ein geringerer Luftdruck führt zu
überdurchschnittlichem Verschleiß der Schläuche.
Achtung: Bitte beachten Sie auf alle Fälle den auf den
Reifen angegebenen maximalen Fülldruck, der, bedingt
durch das kleine Füllvolumen recht schnell erreicht
sein
kann. Eine Überschreitung kann unter Umständen
Unfälle
und Verletzungen zur Folge haben.
2. Falls das Rad einmal repariert bzw. geflickt werden
muss, so ist dieses entweder mit einem handels-
üblichen Fahrradflickzeug oder auch mit einem Pan-
nenspray (wie
z. B. für Mountain Bikes, Mopeds, etc.
erhältlich) möglich.
Das Oberteil befindet sich im gesicherten Zustand,
wenn das rote Feld im Auslösehebel nicht mehr
sichtbar ist. Zum Abnehmen des Oberteils drücken
Sie zunächst den Sicherungshebel (3) nach oben
und dann den Auslösehebel (4) nach unten bis der
Hebel arretiert. (rotes Feld erscheint). Danach ziehen
Danach ziehen Sie das Oberteil aus den Schlitzen und
nehmen es ab.
Handhabung des Verdecks
Stecken Sie die Einsteckteile der Verdeckgelenke in
die entsprechenden Öffnungen in der Armlehne bzw.
an der Tragetasche.
Achtung: Befestigen Sie unbedingt die Druckknöpfe
am hinteren Verdeckende an der Rückseite der
Rückenlehne, da das Verdeck so als Herausfallschutz
fungiert.
Zum Abnehmen des Verdecks lösen Sie ggf. die Druck-
knöpfe an der Rückseite der Rückenlehne, drücken
Sie die Entriegelungsknöpfe an den Einsteckteilen der
Verdeckgelenke und ziehen Sie die Gelenke aus den
Öffnungen. Zur Belüftung können Sie den Reißver-
schluss am Kopfende des Verdecks öffnen.
Verstellen der Rückenlehne
Arretierung der Rückenleh-
ne nach oben ziehen um
die Neigung zu verstellen (4
Sitz-Liegepositionen + Falt-
position ganz vorne).
Verstellung der Fußstütze
Fußkastenarretierung drücken und
gedrückt halten, der Fußkasten
kann in 3 verschiedenen Positio-
nen eingestellt werden.
Handhabung des 5-Punkt-Gurts
Verwendung des 5-Punkt-Gurtes
Sie können den Schultergurt in 3 Positionen anbrin-
gen.
Betätigen der Feststellbremse
Feststellbremse betätigen
Bremshebel (12) in Pfeilrichtung bis zum Einrasten
drehen, ein roter Ring (11) wird sichtbar, die Feststell-
bremse ist betätigt.
Feststellbremse lösen
Entriegelungsknopf (13) betätigen und Bremshebel
(12) wieder in die abgebildete Position bewegen, die
Feststellbremse ist gelöst.
Ergänzung zur Feststellbremse
Sollten Sie eine Veränderung der Feststellwirkung
bemerken, dann lösen Sie zunächst die Kontermutter
um
Einstellungen an der Stellschraube vornehmen zu
können
(heraus drehen). Anschließend die Kontermut-
ter wieder fixieren.
Aufsetzen und Abnehmen des Sportwagen- bzw.
sitzes bzw. der Tragetasche (Oberteil)
43
1
22
1
Setzen Sie das Oberteil (Sportwagensitz bzw. Trage-
tasche) so auf das Kinderwagengestell, dass der seit-
liche Bügel 1des Oberteils auf jeder Seite des Ge-
stells in die vorgesehenen Schlitze 2einrastet und
schieben Sie dabei das Oberteil bis zum Anschlag. Die
Arretierungen schließen dann automatisch. („Klicken“
der Arretierungen muss erfolgen.)
WARNUNG:
Es ist vor Gebrauch zu prüfen, dass der Sport-
wagensitz, bzw. die Tragetasche korrekt ein-
gerastet ist.

8
IMPORTANT: Keep these instructions for future
reference.
teutonia products combine traditional workmanship
and technical innovations with fashionable design.
teutonia stands for quality that meets most stringent
requirements. The teutonia logo with the rainbow is
your guarantee that this is a genuine teutonia model.
Read the instructions carefully before use (especially
our safety notes) and keep them handy for future ref-
erence. Your child’s safety may be affected if you do
not follow these instructions. We are convinced that
by selecting this product you have made a good choice
and your child will be safe in a teutonia stroller/pram.
Please contact your dealer should you nevertheless
have reason for complaint.
Your teutonia team
General
The product has been tested in a temperature range of
-20° C to +60° C (-4 °F to +140 °F). Besides the many
positive
properties of our materials such as air perme-
ability, etc., many fabrics are very sensitive to intensive
solar radiation. Past experience has shown us that
the rays of the sun are now so aggressive that we at
teutonia have to recommend that you park the pram
in the shade. Avoid exposing it to direct sunlight, and
the fresh colours on your buggy will be preserved for
longer. Colours may vary. No complaints may be made
in this regard. Please note that improper handling, pos-
sible water rings, or differences in colour (as described
above) do not justify a complaint. Regular care of all
metal parts, particularly the chrome parts and espe-
cially after trips to the sea, is necessary on the pram
to maintain a quality appearance. Commercially avail-
able treatment products are sufficient for this. The
axles must be cleaned and lightly oiled approximately
every 4 weeks.
Einstellung des Geradeauslaufes
Schirmaufnahme am Wagen
Die Demontage und Montage des Mantels erfolgt am
besten mit zwei Montierhebeln, die serienmäßig jedem
guten Flickzeug beiliegen. Im Bedarfsfall ist das Rad
durch Ihren Fachhändler an uns einzuschicken.
Besonderheiten der Modellvarianten
Modelle mit Verzögerungs-
bremse:
Die Verzögerungsbremse
betätigen Sie an dem
Bremsgriff am Schieber.
Die Bremswirkung kann mit
Hilfe der Einstellschraube
am Bremshebel des Wagens eingestellt werden.
Hinweis: Die Bremse soll nur zum behutsamen Ver-
zögern, keinesfalls zum Blockieren der Räder führen.
Achtung: Bei evtl. Nachbestellungen der Hinterräder
ist unbedingt auf die Verzögerungsbremse hinzuwei-
sen, da diese Bremse eine spezielle Bremsscheibe
erfordert.
Eine falsche Bremsscheibe setzt die Funktion der
Feststellbremse außer Kraft!
Wartung:
- Die Einstellung der Bremse kann zum einen oben am
Handhebel vorgenommen werden, indem die Kon-
termutter gelöst und die Stellschraube weiter raus
gedreht wird. Das erhöht die Bremswirkung.
- Sollte die Bremswirkung unterschiedlich sein, kann
die weitere Einstellung an der Stellschraube unter
den Bremsgehäusen rechts und links neben den Rä-
dern vorgenommen werden. Kippen Sie den Kinder-
wagen auf weichem Untergrund vornüber. Unter den
Bremsgehäusen befinden sich die Stellschrauben
zur Justierung der Bremsbacken.
- Die Stellschraube kann mit einem 8mm-Gabel-
schlüssel gedreht werden. Das Rausdrehen der Stell-
schraube erhöht die Bremswirkung. Die Einstellung
ist so vorzunehmen, dass die Bremswirkung an
beiden Rädern gleich ist.

IMPORTANT: Keep these instructions for future
reference.
teutonia products combine traditional workmanship
and technical innovations with fashionable design.
teutonia stands for quality that meets most stringent
requirements. The teutonia logo with the rainbow is
your guarantee that this is a genuine teutonia model.
Read the instructions carefully before use (especially
our safety notes) and keep them handy for future ref-
erence. Your child’s safety may be affected if you do
not follow these instructions. We are convinced that
by selecting this product you have made a good choice
and your child will be safe in a teutonia stroller/pram.
Please contact your dealer should you nevertheless
have reason for complaint.
Your teutonia team
General
The product has been tested in a temperature range of
-20° C to +60° C (-4 °F to +140 °F). Besides the many
positive
properties of our materials such as air perme-
ability, etc., many fabrics are very sensitive to intensive
solar radiation. Past experience has shown us that
the rays of the sun are now so aggressive that we at
teutonia have to recommend that you park the pram
in the shade. Avoid exposing it to direct sunlight, and
the fresh colours on your buggy will be preserved for
longer. Colours may vary. No complaints may be made
in this regard. Please note that improper handling, pos-
sible water rings, or differences in colour (as described
above) do not justify a complaint. Regular care of all
metal parts, particularly the chrome parts and espe-
cially after trips to the sea, is necessary on the pram
to maintain a quality appearance. Commercially avail-
able treatment products are sufficient for this. The
axles must be cleaned and lightly oiled approximately
every 4 weeks.
General Safety Notes
ATTENTION:
You are responsible for the safety of your
child. Not complying with these notes
may put the safety of your child at risk.
Nevertheless, all possibly occurring condi-
tions and unforeseeable situations cannot
be covered. Common sense, caution and
vigilance are factors this product cannot
provide; they are taken for granted in per-
sons using the stroller/pram. The person
using the stroller/pram and its appropriate
accessories should understand all instruc-
tions. You should explain the operation of
the stroller/pram to all persons using it
and its appropriate accessories. Consult
an authorised teutonia dealer if any of
the instructions are incomprehensible and
more detailed explanations are required,
or if you have further queries.
●WARNING: Never leave your child
unattended.
●WARNING: Always use the restraint sys-
tem.
●WARNING: Ensure that all the locking
devices are engaged before use.
●WARNING: To avoid injury ensure that
your child is kept away when unfolding
and folding this product.
●WARNING: Do not let your child play with
this product.
●WARNING: Check that the pram body or
seat unit attachment devices are correctly
engaged before use.
●WARNING: This product is not suitable for
running and skating.
●WARNING: Any load attached to the han-
dle and/or on the back of the backrest
and/or on the sides of the stroller/pram
will affect the stability of the product.
9
Einstellung des Geradeauslaufes
Schirmaufnahme am Wagen

Additional important safety notes
●teutonia does not warrant the safety of
the current product in case of use of ac-
cessories and spare parts that are not
produced or approved by teutonia. In case
of use of such accessories and spare
parts the warranty will expire with immedi-
ate effect.
●This pram is intended for only one child.
●The seat or the carry-cot may not be used
in the car.
●The pushchair seat is designed for a child
from birth up to 15 kg.
●Carry-cots, prams and sports buggies may
be used only for transport and are not a
substitute for a cot or a cradle.
●Always park the stroller/pram out of the
reach of children and do not allow chil-
dren to play in or with the stroller/pram.
●Please never park the stroller/pram with-
out first applying the brakes. Make sure
that the brakes have locked properly.
●The brakes should always be applied
when you sit or lift your child in and out of
the stroller/pram.
●Always avoid parking on slopes.
●When using public transport take special
care to ensure the stroller/pram stands
firmly and safely.
●Wheel the stroller/pram slowly and gently
up and down steps.
●Never place objects on the folding top.
●The shopping net can be loaded to a
maximum of 5 kg (11 lbs). Please always
place heavy objects in the centre of the
shopping basket.
●When unfolding and folding the chassis
make sure that you do not pinch yourself
or others.
●Make sure that no locks disengage while
carrying the stroller/pram over obstacles
(e.g. steps).
●When adjusting the stroller/pram make
sure that your child is clear of moveable
parts.
●The stroller/pram can be damaged or
destroyed by overloading, improper fold-
ing or use of unapproved accessories.
●The foot rest is not suitable for transport-
ing heavy loads or a second child.
●Before using the stroller/pram for the first
time: please remove the labels or tags
that DO NOT refer to safety instructions
or notes.
●Never use the foot rest or the safety bar
to lift or carry the stroller/pram.
●For babies up to an age of 6 month we
recommend only to use the backrest in its
lowest position.
Parking the pram/buggy
Attention: Under certain circumstances, the wheels
may cause discolouration of floor surfaces.
Foreign bodies (e.g. little stones) in the wheels must
be removed to prevent any potential damage to floor
surfaces. Extreme heat, in particular direct contact
with hot surfaces (e.g. in the car in summer) can lead
to permanent deformations on hollow cavity tyres.
Related complaints or claims for compensation will not
be recognized.
Cleaning the textile parts
To remove small stains, use a cloth dampened with clear
water and carefully clean the spot. Avoid brisk rubbing
(especially on dark fabrics). Normally, all removable
fabric parts can be washed in the washing machine
with a fine fabric detergent (no brightening agents) at
30 °C/85 °F (gentle cycle). Please check separate
care labels on the fabric parts.
Rain Cover
In rainy weather fit the rain cover over the entire
stroller/pram before it starts to rain.
Caution: The rain cover is not a toy! Never leave your
child unsupervised. For the best possible ventilation
of the stroller/pram we recommend using the rain
cover only for the duration of the rain shower. Do not
use raincover on a pushchair, carrycot, or carseat not
fitted with a hood
Removing the hood cover
Before washing, both hood bars must be removed
from the cover.
Loosen the screw with a screwdriver and remove the
snap. Now pull the cover bar out of the joint and out of
the hood cover. After washing, reassemble in reverse
order.
Make sure that each cover bar is pushed into one of
the stitched guides. The front and back bars must not
be mixed up.
Unfolding the chassis
Disengage the transport lock (4) and use the swiveling
handlebar (5) to unfold the pushchair until it audibly
clicks into the depicted position (6).
WARNING: Ensure that all the locking de-
vices are engaged before use.
Collapsing the chassis
– Swivel the handlebar (5) into the depicted position.
– On both sides of the handlebar (5), push the lock
(8) of the folding mechanism in arrow direction; now
the pushchair can be folded.
10

●The stroller/pram can be damaged or
destroyed by overloading, improper fold-
ing or use of unapproved accessories.
●The foot rest is not suitable for transport-
ing heavy loads or a second child.
●Before using the stroller/pram for the first
time: please remove the labels or tags
that DO NOT refer to safety instructions
or notes.
●Never use the foot rest or the safety bar
to lift or carry the stroller/pram.
●For babies up to an age of 6 month we
recommend only to use the backrest in its
lowest position.
Parking the pram/buggy
Attention: Under certain circumstances, the wheels
may cause discolouration of floor surfaces.
Foreign bodies (e.g. little stones) in the wheels must
be removed to prevent any potential damage to floor
surfaces. Extreme heat, in particular direct contact
with hot surfaces (e.g. in the car in summer) can lead
to permanent deformations on hollow cavity tyres.
Related complaints or claims for compensation will not
be recognized.
Cleaning the textile parts
To remove small stains, use a cloth dampened with clear
water and carefully clean the spot. Avoid brisk rubbing
(especially on dark fabrics). Normally, all removable
fabric parts can be washed in the washing machine
with a fine fabric detergent (no brightening agents) at
30 °C/85 °F (gentle cycle). Please check separate
care labels on the fabric parts.
Rain Cover
In rainy weather fit the rain cover over the entire
stroller/pram before it starts to rain.
Caution: The rain cover is not a toy! Never leave your
child unsupervised. For the best possible ventilation
of the stroller/pram we recommend using the rain
cover only for the duration of the rain shower. Do not
use raincover on a pushchair, carrycot, or carseat not
fitted with a hood
Removing the hood cover
Before washing, both hood bars must be removed
from the cover.
Loosen the screw with a screwdriver and remove the
snap. Now pull the cover bar out of the joint and out of
the hood cover. After washing, reassemble in reverse
order.
Make sure that each cover bar is pushed into one of
the stitched guides. The front and back bars must not
be mixed up.
Unfolding the chassis
Disengage the transport lock (4) and use the swiveling
handlebar (5) to unfold the pushchair until it audibly
clicks into the depicted position (6).
WARNING: Ensure that all the locking de-
vices are engaged before use.
Collapsing the chassis
– Swivel the handlebar (5) into the depicted position.
– On both sides of the handlebar (5), push the lock
(8) of the folding mechanism in arrow direction; now
the pushchair can be folded.
– Push the handlebar (5) downwards, until the folding
lock (4) engages.
Mounting and removing the wheels
Rear wheels:
To detach the rear wheel:
– Press the locking (7) and pull the wheel off the axle.
To attach push the wheel onto the axel.
Check that the wheel is proparly locked by pulling!
Front wheels:
To detach press the locking (10) and pull the steering
axle out. To attach, push the axel into place.
Check that the wheel is proparly locked by pulling!
11

Assembling the wheels
Swivel wheel
Swivel wheel unlocked Swivel wheel locked
We recommend that you do not lock the wheels while
moving as this will give a more comfortable ride.
Seat cover
The seat cover can be removed completely from the
seat unit for washing. Simply open the snaps on the
seat unit.
Attention: When mounting the seat cover, thread the
ends of the 5-point restraint back through the relevant
openings without twisting the straps.
Height adjustable, collapsible handlebar
Press and hold the adjust-
ment buttons on both sides
and adjust the height of the
handlebar to the desired
position.
Swiveling the handlebar
Pull and hold the arrester on the swiveling handlebar
(15) in arrow direction; the swiveling handlebar can
now be moved to the other of the two positions.
ATTENTION Danger of injury! Make sure that noth-
ing (the child!) gets caught in the mechanism while
swiveling the handlebar.
Activating the parking brake
Activating the parking brake
Turn the brake lever (12) in arrow direction until it
locks, a red ring (11) becomes visible, the parking
brake is engaged.
Releasing the parking brake
Press the release button (13) and move the brake
lever (12)back to the depicted position; the parking
brake is disengaged.
Supplement to the parking brake
If you should notice a change to the braking action,
loosen
the lock nut first in order to be able to imple-
ment settings on the adjusting screw (unscrew). Then
re-attach the lock nut.
Attaching and removing the seat or carry-cot
(upper section)
43
1
22
1
Place the upper section (sports buggy seat or carry-cot)
onto the pram chassis in such a way that the lateral
bars 1of the upper section click into the slots provid-
ed 2on each side of the chassis and push the upper
section in as far as it will go. The locks then close
automatically. (The locks must „click“ into place.)
WARNING:
Check that the pram body or seat unit attach-
ment devices are correctly engaged before use.
The upper section is secure if the red field in the re-
lease lever is no longer visible. To remove the upper
section press the safety lever (3) up and then the
release lever (4) down until the lever locks. (red field
appears). Then pull the upper section out of the slots
and remove it.
How to use the hood
Push the insert pieces for the hood joints into the
corresponding openings on the armrest or on the
carry-cot.
Attention: You must secure the press studs on the
back end of the cover onto the rear of the backrest
as the cover is also used as a protection against
falling out.
If you need to remove the hood, undo the press studs
on the rear of the backrest; press the release buttons
on the insert pieces of the hood joints and pull the
joints out of the openings. You can open the zip at the
top of the hood for ventilation.
Adjusting the back rest
Pull up on the arrester of
the back rest to change its
inclination angle (4 seating
and prostrate positions +
folding position all the way
forward).
Adjusting the foot rest
Press and hold the foot rest ar-
rester there are three positions
available for the foot rest.
12

Swiveling the handlebar
Pull and hold the arrester on the swiveling handlebar
(15) in arrow direction; the swiveling handlebar can
now be moved to the other of the two positions.
ATTENTION Danger of injury! Make sure that noth-
ing (the child!) gets caught in the mechanism while
swiveling the handlebar.
Activating the parking brake
Activating the parking brake
Turn the brake lever (12) in arrow direction until it
locks, a red ring (11) becomes visible, the parking
brake is engaged.
Releasing the parking brake
Press the release button (13) and move the brake
lever (12)back to the depicted position; the parking
brake is disengaged.
Supplement to the parking brake
If you should notice a change to the braking action,
loosen
the lock nut first in order to be able to imple-
ment settings on the adjusting screw (unscrew). Then
re-attach the lock nut.
Attaching and removing the seat or carry-cot
(upper section)
43
1
22
1
Place the upper section (sports buggy seat or carry-cot)
onto the pram chassis in such a way that the lateral
bars 1of the upper section click into the slots provid-
ed 2on each side of the chassis and push the upper
section in as far as it will go. The locks then close
automatically. (The locks must „click“ into place.)
WARNING:
Check that the pram body or seat unit attach-
ment devices are correctly engaged before use.
The upper section is secure if the red field in the re-
lease lever is no longer visible. To remove the upper
section press the safety lever (3) up and then the
release lever (4) down until the lever locks. (red field
appears). Then pull the upper section out of the slots
and remove it.
How to use the hood
Push the insert pieces for the hood joints into the
corresponding openings on the armrest or on the
carry-cot.
Attention: You must secure the press studs on the
back end of the cover onto the rear of the backrest
as the cover is also used as a protection against
falling out.
If you need to remove the hood, undo the press studs
on the rear of the backrest; press the release buttons
on the insert pieces of the hood joints and pull the
joints out of the openings. You can open the zip at the
top of the hood for ventilation.
Adjusting the back rest
Pull up on the arrester of
the back rest to change its
inclination angle (4 seating
and prostrate positions +
folding position all the way
forward).
Adjusting the foot rest
Press and hold the foot rest ar-
rester there are three positions
available for the foot rest.
Using the 5-point harness
You can position the shoulder harnesses at 3 levels.
Always use the position closest to the shoulder level
of your child. To open the harness press the central
button on the buckle. To adjust the shoulder/ weist
harness pull the free ends of the strap.
Adjusting the restraints
Safety bar
Push the insert pieces on the safety bar through the
slots in the seat cover into the receptacles beneath,
which are located in the armrests. Make sure that the
safety bar has clicked into place on both sides. To re-
move it, press the release buttons on the insert piec-
es. In order to make it easier for your child to get in
and out, it suffices to release and fold up one side of
the bar.
13

Important : conserver ce mode d‘emploi pour
consultation ultérieure !
Les produits teutonia sont le résultat d’une fabrication
artisanale éprouvée alliée à des innovations tech-
niques dotées d’un design à la mode. Le nom teutonia
est synonyme d’une qualité qui répond aux exigences
les plus élevées. Le logo teutonia avec l’arc-en-ciel
vous certifie qu’il s’agit d’un modèle teutonia original.
Lisez attentivement ce mode d’emploi en entier avant
la mise en service (en particulier nos consignes de
sécurité) et conservez-le en vue d’un usage ultérieur
et comme complément d’information.
Vous pouvez vous procurer auprès de votre revendeur
des petits kits permettant de réparer d’éventuelles
détériorations de la peinture du châssis. Si vous avez
toutefois un motif de réclamation, veuillez-vous adres-
ser à votre revendeur spécialisé.
L’équipe teutonia
Généralités
Le produit a été testé dans une plage de tempéra-
tures de –20° C à +60° C. Outre les nombreuses
caractéristiques positives de nos matériaux, comme
la perméabilité à l’air, etc., de nombreux tissus sont
très sensibles à l’ensoleillement intensif. L’expé-
rience passée nous a appris que le rayonnement
solaire est devenu si agressif que teutonia se voit
contraint de recommander de ranger la voiture d’en-
fant à l’ombre.
Éviter une exposition prolongée en
plein soleil pour garder le plus longtemps possible
l‘éclat des couleurs de votre voiture pour enfants.
Les couleurs des pièces peuvent légèrement varier se-
lon les départements de fabrication, dû à un traitement
inapproprié, à d’éventuelles particules d’eau ou à des
différences de teinte du matériau. Cela ne peut faire en
aucun cas l’objet d’une réclamation.
En règle générale,
l’entretien des piècesmétalliques, en particuliercelles
en chrome, est indispensable pour préserver l’aspect
esthétique de la poussette, notamment au contact de
l’air de la mer.
Les produits d’entretien vendus dans le
commerce sont suffisants. Les pièces métalliques
doivent être nettoyées toutes les 4 semaines environ
et légèrement graissées.
WHEEL INFORMATION
We should like to mention a few points regarding our
pneumatic tyres:
1. Transport is most comfortable if the tire pressure is
1.5 – 2 bar (22 – 29 psi). If the tire pressure is lower,
there will be disproportionate wear on the tubes.
Caution: Always observe the maximum inflation pres-
sure stated on the tyres, which is reached quickly due
to the small volume.
Exceeding the pressure may cause accidents or in-
juries.
2. If the inner tube needs to be repaired or patched,
use either a common bicycle repair kit or a puncture
spray (e.g. as used for mountain bikes, mopeds, etc.).
To remove the tyre, use the two repair levers that are
always included in any good bicycle repair kit. If neces-
sary, send the wheel to us via your dealer.
Special features of the model variations
Models with deceleration
brake:
You are able to control the
deceleration brake using
the brake on the handlebar.
The braking action can be
fine-tuned using the ad-
justment screw on the brake lever.
Note: The brake should only be used to slow the
wheels, not to block them.
Warning: When reordering rear wheels, please ensure
that the supplier is aware of the deceleration brake as
the brake requires a special brake disc. The foot brake
will not function if the wrong brake disc is used!
Maintenance:
- The brake pads can wear out during use and the
brake needs maintenance. The setting of the brake
can be done on the brake lever when the lock nut is
loosened and the adjusting bolt is unscrewed.
- If the left and right braking effect differs, tilt over the
stroller on soft ground and adjust the bolt under the
brake housings near the wheels.
- The bolt can be screwed and unscrewed by using an
8mm jaw wrench. Unscrewing the bolt increases the
braking effect. The setting has to be made so that
the braking effect is the same on both wheels.
Adjusting the straight-running stability
Shade holder on pram
14

Important : conserver ce mode d‘emploi pour
consultation ultérieure !
Les produits teutonia sont le résultat d’une fabrication
artisanale éprouvée alliée à des innovations tech-
niques dotées d’un design à la mode. Le nom teutonia
est synonyme d’une qualité qui répond aux exigences
les plus élevées. Le logo teutonia avec l’arc-en-ciel
vous certifie qu’il s’agit d’un modèle teutonia original.
Lisez attentivement ce mode d’emploi en entier avant
la mise en service (en particulier nos consignes de
sécurité) et conservez-le en vue d’un usage ultérieur
et comme complément d’information.
Vous pouvez vous procurer auprès de votre revendeur
des petits kits permettant de réparer d’éventuelles
détériorations de la peinture du châssis. Si vous avez
toutefois un motif de réclamation, veuillez-vous adres-
ser à votre revendeur spécialisé.
L’équipe teutonia
Généralités
Le produit a été testé dans une plage de tempéra-
tures de –20° C à +60° C. Outre les nombreuses
caractéristiques positives de nos matériaux, comme
la perméabilité à l’air, etc., de nombreux tissus sont
très sensibles à l’ensoleillement intensif. L’expé-
rience passée nous a appris que le rayonnement
solaire est devenu si agressif que teutonia se voit
contraint de recommander de ranger la voiture d’en-
fant à l’ombre.
Éviter une exposition prolongée en
plein soleil pour garder le plus longtemps possible
l‘éclat des couleurs de votre voiture pour enfants.
Les couleurs des pièces peuvent légèrement varier se-
lon les départements de fabrication, dû à un traitement
inapproprié, à d’éventuelles particules d’eau ou à des
différences de teinte du matériau. Cela ne peut faire en
aucun cas l’objet d’une réclamation.
En règle générale,
l’entretien des piècesmétalliques, en particuliercelles
en chrome, est indispensable pour préserver l’aspect
esthétique de la poussette, notamment au contact de
l’air de la mer.
Les produits d’entretien vendus dans le
commerce sont suffisants. Les pièces métalliques
doivent être nettoyées toutes les 4 semaines environ
et légèrement graissées.
Consignes générales de sécurité
ATTENTION :
Vous êtes responsable de la sécurité
de votre enfant. Le non-respect de ces
consignes peut nuire à la sécurité de
votre enfant. Néanmoins, il est impossible
de se prémunir contre toutes les condi-
tions risquant de survenir et les situations
imprévisibles. Le bon sens, la précaution
et la prudence ne sont pas des propriétés
intrinsèques de ce produit et sont donc
requises de la part de la personne qui uti-
lise la poussette. L’utilisateur de la pous-
sette et des accessoires correspondants,
doit comprendre toutes les instructions.
Elle devrait expliquer le fonctionnement
de celle-ci à toute personne utilisant la
poussette et les accessoires correspon-
dants. Si certaines instructions ne sont
pas claires et que de plus amples expli-
cations s’avèrent nécessaires ou si vous
avez d’autres questions, veuillez contacter
un revendeur teutonia agréé.
●AVERTISSEMENT : Ne jamais laisser
votre enfant sans surveillance.
●AVERTISSEMENT : Toujours attacher
votre enfant.
●AVERTISSEMENT : Avant l’utilisation,
veuillez vous assurer que tous les ver-
rouillages soient fermés.
●AVERTISSEMENT : Afin d‘éviter les bles-
sures, veuillez vous assurer que votre en-
fant ne se trouve pas à proximité lorsque
vous dépliez ou repliez la poussette.
●AVERTISSEMENT : Ne laissez pas votre
enfant jouer avec la poussette.
●AVERTISSEMENT : Assurez-vous, avant
chaque utilisation, que tous les disposi-
tifs de fixation de la partie supérieure de
la poussette ou du siège soient correcte-
ment enclenchés.
●AVERTISSEMENT : Ce produit n‘a pas
été conçu pour la course, le footing ou le
patin à roulettes.
15
Adjusting the straight-running stability
Shade holder on pram

●AVERTISSEMENT : Toute charge fixée à
la poignée, à l‘arrière du siège ou sur les
côtés de la poussette ou du landau nuit
à la stabilité du produit.
Autres consignes de sécurité
●teutonia ne garantit pas la sécurité du
produit en cas d‘utilisation d‘accessoires
et de pièces détachées que teutonia
n‘aurait pas produits ni agréés. En cas
d‘utilisation de tels accessoires et pièces
détachées, la garantie prendrait fin immé-
diatement.
●Cette poussette est prévue uniquement
pour un enfant.
●L‘unité de siège ou la nacelle ne doivent
pas être utilisées dans une voiture.
●Le siège de la poussette est conçu pour
al.ler de la naissance jusqu‘à 15 kg.
●Les nacelles ou les landaus et les pous-
settes ne doivent être utilisés que pour
le transport et ne peuvent en aucun cas
remplacer un lit ou un berceau.
●Toujours garer la poussette hors de la
portée des enfants et ne les autorisez
pas à jouer avec ou dans celle-ci.
●Assurez-vous de ne jamais stationner la
poussette sans avoir préalablement blo-
qué le frein. Assurez-vous également que
le frein soit bien enclenché.
●Les freins doivent toujours être serrés
lorsque vous enlevez votre enfant de la
poussette ou que vous l‘installer dedans.
●Vous devez toujours éviter de garer la
poussette en pente.
●Veillez particulièrement à bien stabiliser
la poussette lorsque vous prenez les
transports en commun.
●Faîtes rouler la poussette lentement et en
douceur lorsque vous montez ou descen-
dez les marches d‘escaliers.
●Ne jamais poser d’objets sur la capote.
●La charge maximale du filet à provisions
est de 5 kg (11 lb). Toujours placer les
objets lourds au centre du panier à pro-
visions.
●Veillez à ne pas vous blesser ou blesser
quelqu‘un d‘autre, lorsque vous pliez ou
dépliez le châssis.
●Lorsque vous portez la poussette au-des-
sus d’obstacles (escaliers, p. ex.), veillez
à ce qu’aucun des dispositifs de blocage
ne soit déverrouillé.
●Lorsque vous effectuez les réglages, veil-
lez à ce que votre enfant ne se trouve pas
à proximité des pièces mobiles.
●Une charge trop lourde, un pliage incor-
rect ou l’utilisation d’accessoires non
autorisés par le fabricant peuvent détério-
rer ou endommager la poussette.
●Le repose-pied ne doit pas être utilisé
pour transporter des charges ou un deu-
xième enfant.
●Avant la première utilisation de la pous-
sette : veuillez ôter les autocollants et
étiquettes ne se rapportant PAS à des
consignes de sécurité.
●Ne jamais utiliser le repose-pieds ou
l’arceau de protection pour soulever et/
ou porter la poussette.
●Jusqu‘à 6 mois, il est conseillé de tou-
jours placer le dossier dans la position la
plus basse.
Arrêt de la voiture
Attention: le pneu peut parfois décollorer le revête-
ment de sol.
Les corps étrangers (p.ex. les petites pierres) dans les
roues doivent être enlevés afin d’éviter un eventuel
endommagement des revêtements de sol. Une cha-
leur intense, en particulier le contact direct avec des
surfaces très chaudes (par ex. en été dans la voiture)
peut entraîner des déformations permanentes des
pneus mi-pleins.
Les réclamations et/ou recours relatifs à cela ne
seront pas admis.
Nettoyage des parties en tissu
Pour les petites taches, nettoyez précautionneuse-
ment les endroits concernés avec un chiffon humide
et de
l’eau claire. Évitez de frotter trop fortement (en
particulier
pour les tissus sombres). Normalement
vous pouvez laver en machine à 30°C (programme
pour textiles délicats) toutes les parties amovibles
en tissu avec une lessive pour textiles délicats (sans
agent blanchissant optique). Voyez instruction d’entre-
tien fixée à la partie de tissu.
Pèlerine anti-pluie
En cas de pluie, étendre à temps la pèlerine anti-pluie
sur toute la voiture d’enfant.
Attention: la pèlerine anti-pluie n’est pas un jouet ! Ne
laissez jamais votre enfant sans surveillance. Pour une
aération optimale de la voiture d’enfant, nous recom-
mandons d’étendre la pèlerine anti-pluie seulement
durant l’averse. N’utilisez pas l’habillage pluie sur une
poussette, une nacelle ou un siège auto sans capote.
Retrait du couvre-capote
Avant le lavage, les deux arceaux doivent être enlevés
de l’enveloppe.
Desserrer la vis à l’aide d’un tournevis et enlever le
bouton-poussoir. Enlever maintenant les arceaux de la
jointure et du couvre-capote. Après le lavage monter
dans l’ordre inverse.
Ce faisant, veiller à ce que les arceaux soient glissés
dans les deux guides décousus. Les arceaux avant et
arrière ne doivent pas être intervertis.
16

●Veillez à ne pas vous blesser ou blesser
quelqu‘un d‘autre, lorsque vous pliez ou
dépliez le châssis.
●Lorsque vous portez la poussette au-des-
sus d’obstacles (escaliers, p. ex.), veillez
à ce qu’aucun des dispositifs de blocage
ne soit déverrouillé.
●Lorsque vous effectuez les réglages, veil-
lez à ce que votre enfant ne se trouve pas
à proximité des pièces mobiles.
●Une charge trop lourde, un pliage incor-
rect ou l’utilisation d’accessoires non
autorisés par le fabricant peuvent détério-
rer ou endommager la poussette.
●Le repose-pied ne doit pas être utilisé
pour transporter des charges ou un deu-
xième enfant.
●Avant la première utilisation de la pous-
sette : veuillez ôter les autocollants et
étiquettes ne se rapportant PAS à des
consignes de sécurité.
●Ne jamais utiliser le repose-pieds ou
l’arceau de protection pour soulever et/
ou porter la poussette.
●Jusqu‘à 6 mois, il est conseillé de tou-
jours placer le dossier dans la position la
plus basse.
Arrêt de la voiture
Attention: le pneu peut parfois décollorer le revête-
ment de sol.
Les corps étrangers (p.ex. les petites pierres) dans les
roues doivent être enlevés afin d’éviter un eventuel
endommagement des revêtements de sol. Une cha-
leur intense, en particulier le contact direct avec des
surfaces très chaudes (par ex. en été dans la voiture)
peut entraîner des déformations permanentes des
pneus mi-pleins.
Les réclamations et/ou recours relatifs à cela ne
seront pas admis.
Nettoyage des parties en tissu
Pour les petites taches, nettoyez précautionneuse-
ment les endroits concernés avec un chiffon humide
et de
l’eau claire. Évitez de frotter trop fortement (en
particulier
pour les tissus sombres). Normalement
vous pouvez laver en machine à 30°C (programme
pour textiles délicats) toutes les parties amovibles
en tissu avec une lessive pour textiles délicats (sans
agent blanchissant optique). Voyez instruction d’entre-
tien fixée à la partie de tissu.
Pèlerine anti-pluie
En cas de pluie, étendre à temps la pèlerine anti-pluie
sur toute la voiture d’enfant.
Attention: la pèlerine anti-pluie n’est pas un jouet ! Ne
laissez jamais votre enfant sans surveillance. Pour une
aération optimale de la voiture d’enfant, nous recom-
mandons d’étendre la pèlerine anti-pluie seulement
durant l’averse. N’utilisez pas l’habillage pluie sur une
poussette, une nacelle ou un siège auto sans capote.
Retrait du couvre-capote
Avant le lavage, les deux arceaux doivent être enlevés
de l’enveloppe.
Desserrer la vis à l’aide d’un tournevis et enlever le
bouton-poussoir. Enlever maintenant les arceaux de la
jointure et du couvre-capote. Après le lavage monter
dans l’ordre inverse.
Ce faisant, veiller à ce que les arceaux soient glissés
dans les deux guides décousus. Les arceaux avant et
arrière ne doivent pas être intervertis.
Montage du châssis
Actionner la fixation de transport (4) et replier la pous-
sette au niveau de son guidon réversible (5) jusqu’à
ce qu’il s’encliquette de manière audible dans la posi-
tion illustrée (6).
AVERTISSEMENT :Assurez-
vous avant l’uti-
lisation que tous les dispositifs de verrouil-
lage sont fermés.
Pliage du châssis
– Faire pivoter le coulisseau (5) dans la position
illustrée.
– Des deux côtés du coulisseau (5) pousser le ver-
rouillage (8) du mécanisme de pliage dans le sens
de la flèche, la poussette peut alors être repliée.
– Pousser le coulisseau (5) vers le bas jusqu’à ce que
la sécurité de pliage (4) s’encliquette.
17

Montage et démontage des roues
Roues arrière
Pour démonter la roue arrière :
– pressez le dispositif de verrouillage (7) et tirez la
roue hors de l‘essieu.
Pour la remonter, poussez la roue sur l‘essieu.
Tirez la roue pour vous assurer qu‘elle est bien ver-
rouillée !
Roues avant
Pour le démontage, pressez le dispositif de verrouil-
lage (10) et sortez l‘essieu directeur.
Pour le remontage, remettez l‘essieu en place en
poussant. Tirez la roue pour vous assurer qu‘elle est
bien verrouillée !
Montage des roues
Roue pivotante
Roue pivotante débloquée Roue pivotante bloquéet
En raison du grand confort, nous recommandons de
ne pas bloquer les roues durant le roulage.
Housse de siège
La housse du siège est totalement amovible et peut
être lavée. Pour la retirer, appuyer sur les boutons
pression du siège.
Attention: lors de la mise en place de la housse, faire
passer l‘extrémité du harnais 5 points dans les ouver-
tures correspondantes sans la tordre.
Coulisseau rabattable et réglable en hauteur
Maintenir les boutons de
réglage enfoncés des deux
côtés et modifier la hauteur
du coulisseau dans la posi-
tion souhaitée.
Faire pivoter le coulisseau
Tirer la sécurité (15) dans le sens de la flèche des
deux côtés du guidon réversible et la maintenir tirée,
le guidon réversible peut être pivoté dans l’autre posi-
tion respective.
ATTENTION Risque de blessure par coincement ! Veil-
ler à ce que rien (surtout pas un enfant !) ne puisse
se coincer pendant l’opération de pivotement.
18

Montage des roues
Roue pivotante
Roue pivotante débloquée Roue pivotante bloquéet
En raison du grand confort, nous recommandons de
ne pas bloquer les roues durant le roulage.
Housse de siège
La housse du siège est totalement amovible et peut
être lavée. Pour la retirer, appuyer sur les boutons
pression du siège.
Attention: lors de la mise en place de la housse, faire
passer l‘extrémité du harnais 5 points dans les ouver-
tures correspondantes sans la tordre.
Coulisseau rabattable et réglable en hauteur
Maintenir les boutons de
réglage enfoncés des deux
côtés et modifier la hauteur
du coulisseau dans la posi-
tion souhaitée.
Faire pivoter le coulisseau
Tirer la sécurité (15) dans le sens de la flèche des
deux côtés du guidon réversible et la maintenir tirée,
le guidon réversible peut être pivoté dans l’autre posi-
tion respective.
ATTENTION Risque de blessure par coincement ! Veil-
ler à ce que rien (surtout pas un enfant !) ne puisse
se coincer pendant l’opération de pivotement.
Actionnement du frein de maintien
Actionner le frein de maintien
Tourner le levier de frein (12) dans le sens de la
flèche jusqu’à ce qu’il s’encliquette, un anneau rouge
(11) apparaît ce qui indique que le frein de maintien
est serré.
Desserrer le frein de maintien
Actionner le bouton de déverrouillage (13) et déplacer
à nouveau le levier de frein (12) dans la position illus-
trée, le levier de maintien est alors desserré.
Complément au frein de stationnement
Si vous deviez remarquer une modification de l’effet
du
frein de stationnement, alors desserrez d’abord le
contre-
écrou afin d’effectuer les réglages sur la vis
(desserrer). Ensuite refixer le contre-écrou.
19

Réglage du harnais
Arceau de sécurité
Introduisez les parties repliables de l’arceau de sécu-
rité par les rainures de la garniture de siège dans les
guides sous-jacents dans les accoudoirs. Veillez à ce
que l’arceau de sécurité s’encliquète des deux côtés.
Afin d’enlever appuyez sur les boutons de déverrouil-
lage sur les parties repliables. Afin de faciliter la mon-
tée et la
descente de voiture de votre enfant, il suffit
de desserrer
un côté de l’arceau et de relever.
Apposer et enlever le siège de la poussette sport
ou la nacelle (partie supérieure)
43
1
22
1
Posez la partie supérieure (siège de poussette sport
ou nacelle) sur le châssis de la poussette de telle
sorte que la barre latérale 1de la partie supérieure
s’encliquète de chaque côté dans les rainures prévues
2et ce faisant, poussez la partie supérieure jusqu’à
butée. Les verrouillages se ferment alors automatique-
ment. (Les verrouillages doivent émettre un «clic»)
AVERTISSEMENT:
Avant l’utilisation, vérifiez que le siège de la
poussette sport ou la nacelle soit encliqueté
correctement. La partie supérieure est sécurisée,
lorsque le champ rouge dans le levier de blocage
n’est plus visible. Afin d’enlever la partie supérieure,
appuyez d’abord sur le levier de sécurité (3) vers le
haut et ensuite sur le levier de blocage (4) vers le
bas, jusqu’à ce que le levier s’arrête. (un champ rouge
apparaît). Retirez ensuite la partie supérieure des rai-
nures et enlevez la.
Maniement de la capote
Mettre les parties repliables du corps de la capote
dans les ouvertures correspondantes dans l’accoudoir
et/ou. sur le sac cabas.
Attention: Fixer absolument les boutons-poussoirs à
l’arrière du pied de la capote au dos du dossier, étant
donné que la capote fonctionne comme une protec-
tion anti-chute. Afin d’enlever la capote, dévisser, au
besoin, les boutons-poussoirs à l’arrière du dossier,
appuyez sur les boutons de déverrouillage sur les
parties repliables du corps de la capote et enlever les
jointures des ouvertures. Afin d’aérer, vous pouvez
ouvrir la fermeture à glissière sur le nez de la capote.
Réglage du dossier de siège
Tirer vers le haut le disposi-
tif de blocage du dossier de
siège pour régler l’inclinai-
son (4 positions allongée/
assise + position repliée
complètement vers l’avant).
Réglage du repose-pieds
Appuyer sur le dispositif d’arrêt du
repose-pieds et le maintenir enfon-
cé. Le repose-pieds peut être réglé
dans 3 positions différentes.
Utilisation du harnais de sécurité 5 points
Trois hauteurs de réglage sont disponibles pour les
ceintures épaulières. Toujours choisir la position la
plus proche de la hauteur de l‘épaule de l‘enfant.
Pour ouvrir le harnais, appuyer sur le bouton situé au
centre de la boucle.
Pour régler le harnais au niveau de l‘épaule et de la
taille, tirer sur les extrémités libres de la sangle.
20
Table of contents
Languages:
Other teutonia Baby Carrier manuals
Popular Baby Carrier manuals by other brands
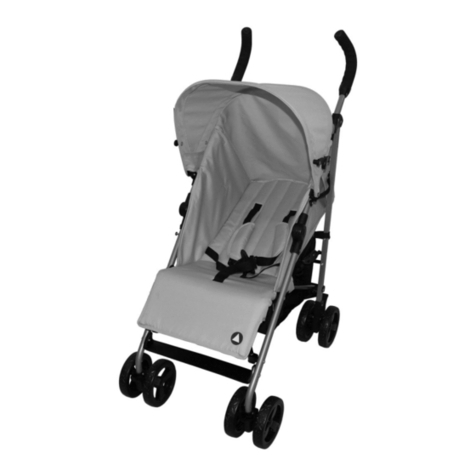
topmark
topmark MIKA T7006 Instructions for use
Baby Jogger
Baby Jogger Citi Mini Assembly instructions

Fisher-Price
Fisher-Price 402/8332 Assembly and user instructions

Love Radius
Love Radius Basic instruction manual

Fisher-Price
Fisher-Price GVG46 owner's manual

Fisher-Price
Fisher-Price GWV90 owner's manual


