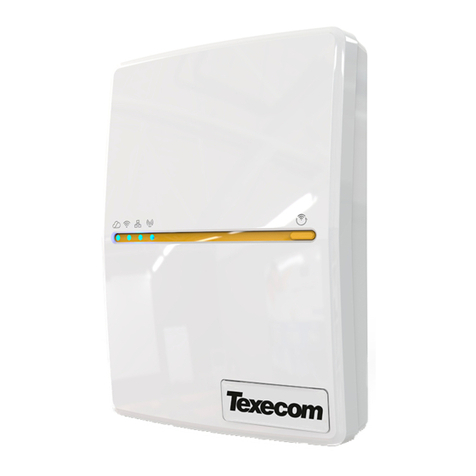
Texecom SmartCom User manual

Texecom SmartCom
Installation guide
INS760EN-7

11-03-2022
• PCR01577 changes implemented for BRE
• Compliance information added.
• Removed V1 App references and configuration
Added detail on connecting systems to the Texecom Cloud
Added detail on connecting V2 App
• Updated managed networks ports list table. Removed IP addresses and published host names only. Added broker5 to the list.
• Updated to put back ref to V1 app as V2 is not launched yet.
• Updated LED section
• Updated managed networks port information table in section 6.3

INS760EN-7 3/91
Content
1.0 Introduction 4 ............................................................................................................................
2.0 System Requirements 4 ...........................................................................................................
2.1 Hardware Requirements 5 ......................................................................................................
2.2 Network Requirements 7 ........................................................................................................
3.0 Texecom Connect System 7 .....................................................................................................
3.1 Texecom Connect Components 9 ...........................................................................................
4.0 SmartCom Opening & Identification 11 .................................................................................
4.1 Removal from mounting tamper 14 .......................................................................................
5.0 Installation Steps 16 .................................................................................................................
6.0 Connecting to the panel 26 ......................................................................................................
6.1 Ethernet Connection 28 ..........................................................................................................
6.2 Wifi Connection 29 .................................................................................................................
6.3 Router Setup & Ports 32 .........................................................................................................
6.4 SmartCom Default Procedure 35 ............................................................................................
7.0 Programming The Panel 36 ......................................................................................................
7.1 Com Port Setup & UDL Password 37 .......................................................................................
7.2 Configure Panel for Texecom Connect 40 ..............................................................................
7.3 Generating an App Code 42 ...................................................................................................
8.0 Connecting to the Texecom Cloud 43 .....................................................................................
9.0 Enabling the Connect App 61 ..................................................................................................
10.0 Connect Devices 62 .................................................................................................................
6.4 Substitution and Information Security 62 ...............................................................................
11.0 Compliance Information 64 ....................................................................................................
11.1 Availability monitoring 64 .....................................................................................................
12.0 Specifications 67 .....................................................................................................................
13.0 Appendix A 70 ..........................................................................................................................
14.0 Appendix B 78 ..........................................................................................................................
15.0 Appendix C 84 ..........................................................................................................................

INS760EN-7 4/91
1.0 Introduction
The Texecom SmartCom creates a new generation of simple connectivity for
customers. With the emergence of cloud technologies Texecom has introduced the
SmartCom to take the Premier Elite product line into the future and enable
customers to transition their systems.
The SmartCom is simple to connect to the Texecom Cloud by generating an App
code.
The SmartCom supports the Texecom Cloud service and the Texecom Connect
app.
Texecom Monitor
Texecom Monitor enables communication to selected ARC's to provide alarm
signalling based on the requirements of EN50131-1, EN50136-2 and EN50131-10.
Care should be taken when installing systems using Texecom Monitor to ensure
the following requirements are met.
Wi-Fi is not permitted1.
Ethernet connections must use screened cable2.
The antenna lead must be less than 3mtrs long3.
CIE congfiguration should be left at factory settings for Grade 2 or Grade 3. 4.
Note:Failure to observe the above will render the SPT non compliant to EN50136-2
and EN50131-10
2.0 System Requirements
To setup a Texecom Connect™ system you will need the following as a bare
minimum:
A Texecom Premier Elite security system with V4 or later firmware installed

INS760EN-7 5/91
Texecom Connect App for iOS or Android
SSID & Password for the Network if you intend to connect by WiFi.
A Texecom Connect SmartCom (CEL0001 Ethernet & WiFi)
A laptop or PC with Wintex installed. (When the panel firmware needs to be
upgraded, Texecom Cloud Services may be used for firmware >V5.00)
In addition if the system will be using any Ricochet® enabled devices the wireless
receiver should be V3.0.6 or later.
Peripheral products may also be used to enhance the user experience. Some of
these are traditional security devices such as wireless PIR’s with added
functionality such as Light and Temperature reading capability.
Other products designed for specific Home & Building Automation tasks such as
the Texecom Connect SmartPlug may also be added to the system. These devices
can be added at the time of installation, or if the functionality is enabled may be
added and removed as required by the Master User.
2.1 Hardware Requirements
The following hardware is compatible with the Texecom Connect App.
Premier Elite Control Panel (live-front, polymer or metal)
Premier Elite 12,12-W, 24-W, 48-W (discontinued, but may be flash upgraded,
see Appendix A)
Premier Elite 24
Premier Elite 48
Premier Elite 64-W
Premier Elite 88
Premier Elite 168
Premier Elite 640
Premier Elite 8/32XP-W (for wireless devices - not required on -W panels)
Communication Module
Texecom Connect SmartCom
CEL-0001 SmartCom (WiFi and Ethernet)

INS760EN-7 6/91
Security Devices
Texecom Connect Devices
Texecom Connect SmartPlug
GFA-0001 UK
GFA-0002 EU
IP or WiFi Cameras (optional)
USB-Com (only required if connecting either Flasher or Wintex to your panel)
Firmware / Software Versions
The following firmware and software versions are required to fully use Texecom
Connect App.
Premier Elite Control Panel Firmware* V4.00 >
*The control panel firmware can be upgraded using the Premier Elite Flasher
Interface. See Appendix A.
Premier Elite 8/32XP-W Firmware V3.06 >
Wintex V6.2.5 > This may be downloaded from the "Software & Peripherals" page
in the "Products" section of the Texecom website (www.texe.com)
Ricochet Monitor V2.18.6 >
IMPORTANT - The firmware in the Premier Elite 8 & 32XP-W (or equivalent -W
panel) cannot be upgraded in the field. Changing the expander or panel to one that
contains expander firmware V3.06> will:-
Display temperature and light levels from Ricochet enabled devices.
Eliminate delays in response time from Texecom Connect SmartPlug when
the SmartPlug is moved from it’s initial location to a new one in the property.
Unfortunately, if you already have devices on a wireless system with an earlier
version of expander firmware, the only choice will be to re-learn all of the devices
onto a new expander if you want the features detailed above.

INS760EN-7 7/91
2.2 Network Requirements
Texecom Connect needs to be able to communicate with the outside world so that
push notifications can be sent to the users device; and so that commands from the
device can be sent to the system.
To enable these requirements for WiFi you will need access to the users network
SSID & password, which must have a router or router/modem. Modem only
systems are not supported.
Texecom Connect will only function on networks with DHCP enabled.
Texecom Connect SmartCom operates at 2.4 GHz supporting 802.11b/802.11g &
802.11n wireless technology.
Note: 5GHz networks are not supported.
3.0 Texecom Connect System
The Texecom Connect App is reliant on an existing Texecom security system in
order for it to work. Below is an overview of the full Texecom Connect system, so
you can understand the full ecosystem.
Note: The Texecom connect app is a supplementary feature and not considered
part of the graded ATS
Note: screened Ethernet cable should be used in all installations.

INS760EN-7 8/91

INS760EN-7 9/91
3.1 Texecom Connect Components
Premier Elite V4 Firmware
The Texecom Connect SmartCom, App and API all require Premier Elite control
panels to run V4 firmware or above. Any legacy Premier Elite control panel can be
flash upgraded to the latest firmware. Texecom regularly releases firmware
upgrades to enhance performance and provide additional features.
Texecom Connect SmartCom
The Texecom Connect SmartCom is an intelligent communicator that facilitates the
Texecom Connect experience by connecting any Premier Elite (not 640) control
panel to a cloud via a local area network connection.
The Texecom Connect SmartCom communicates using outbound connections,
removing the need to open any router ports, which ensures simplicity of
installation and maximum security.
As such, any installation that has an internet or mobile data connection can
reliably use Texecom Connect with the addition of the Texecom Connect
SmartCom.

INS760EN-7 10/91
Texecom Connect App V2
Texecom Connect puts users in control of their security systems. Available on
Android or iOS, the Texecom Connect app allows users to control Premier Elite
security systems directly from their compatible smartphone or tablet device.
Texecom Connect V2 is a new version of the Texecom Connect app. Featuring the
same intuitive user interface, Texecom Connect V2 now allows professional
installers to manage their portfolio of app users directly from their Texecom Cloud
account.
Featuring a timeline for direct access to events, direct control over home
automation devices, recipes to create home automation effects and pre-set system
modes, push notifications of system events and direct camera control.
Texecom Connect SmartPlug
Take control over your powered devices and control any mains-powered device
remotely with the SmartPlug. This Ricochet enabled wireless plug sits between a
wall socket and the power plug of a device, and is controlled via the Texecom

INS760EN-7 11/91
Connect app
4.0 SmartCom Opening & Identification
The Premier Elite SmartCom is an advanced intelligent communicator compatible
with all Premier Elite control panels with V4.00 (Ethernet & WiFi) or later firmware
installed. (Some features are only available with V5.00 and above.)
The SmartCom is remotely upgradable enabling new features and functions to be
delivered to the device over the air, reducing the need for site visits. In the case of
V5 panels and V2.00 Smartcom it is also possible to remotely upgrade the control
panel via the Texecom Cloud.
SmartCom enables remote panel connections from Wintex, and the Connect App
without requiring router port forwarding.
By default the SmartCom obtains its IP address by DHCP which must be enabled on
the router. It is possible to utilise a static IP address, this is detailed in section 6.1
Ethernet Connection

INS760EN-7 12/91
SmartCom V3.0 LED Functionality
SmartCom V3.0 has new LED functionality to ensure consistency between the
SmartCom and the upcoming SmartCom 4G.
With SmartCom V3.0 the Power LED has been replaced with a Mobile Comms
status LED, a feature of the upcoming SmartCom 4G
The Power LED was unnecessary as at least one other SmartCom LED is always
active, indicating power to the unit
Principle differences
The POWER LED is replaced by a Mobile Comms LED (only used on SmartCom4G)
The power up sequence for Version 3.00.xx product is a little different, With added
features the Smartcom takes slightly longer to initialise. An approximate sequence
is outlined below.
If in doubt just be patient!
Time (sec) LED Display Actions
At power up No LED's are lit
+00:15 Cloud LED flashes
continuously
+00:30 Cloud LED goes out
LES's will remain off
+00:30
Wait 30 seconds after
Cloud LED goes out
Enable Wifi AP mode-
Press & hold (10s)

INS760EN-7 13/91
+00:10 WiFi LED Flashes
Open wifi search on
mobile
Find SmartCom Host
AP
Enter SmartCom
passphrase from label
Select Home wifi
network and enter
password
+00:05 WiFi LED goes off
+00:05 WiFi LED goes solid
+00:15 WiFi LED fast continuos flash Generate App code
from panel
+00:15 Cloud LED and then WiFi LED
solid
LED Indications
The Cloud LED will be on solid when connected to our servers and all
information is correct to enable bi-directional communication.
The LAN or WiFi LED will be on solid when connected to the network.
The Lan LED will be illuminated when connected by ethernet cable.
V2 The Power LED should be on solid
V3 the light will not illuminate.
If the Cloud LED is flashing, please check that the system is configured
correctly. If symptoms persist and the light does not go solid please contact
Tech Support.
When a firmware upgrade is taking place all LED’s may flash sporadically,
this is normal.
For further infomration on the status of LED's pleae see Appendix C

INS760EN-7 14/91
4.1 Removal from mounting tamper
The removal from mounting tamper should be used for all installations. Ensure a suitable sized
screw and fixing is used for the substrate where the device is mounted. Forced removal of the
device from the mounting surface will cause the plastic to be break and cause a tamper
condition.
Note: The plastic housings rear tamper breakout is sacrificial and cannot be reinstated.

INS760EN-7 15/91

INS760EN-7 16/91
5.0 Installation Steps
Installation of the Texecom Connect App follows the normal process of generating
an App Code and entering this into the Connect App. This can still be achieved in
the Cloud by selecting App visibility only.
From November 2020 the Texecom Connect App will be upgraded to Version 2.
From November 2020 you will need a Texecom Cloud Services Account. You can
sign up for this here at https://cloud.texe.com for free
If you already have a Texecom Cloud account, then you can still use and provide
the Texecom Connect app for free. You just need to add the Premier Elite system
to the Cloud service first. You can do this for free by selecting the Connect V2 App
Visbility option.
The following diagram shows the process
Adding a panel
Upgrading a V1 site

INS760EN-7 17/91
Step 2: Generate app code
Step by Step adding a panel.

INS760EN-7 18/91
Add site to Texecom Cloud (mobile or desktop, mobile shown and can be reached
at https://cloud.texe.com/mobile/.)

INS760EN-7 19/91
Connect panel to site

INS760EN-7 20/91
Select service plan
Note: app management is free of charge, whereas System & V2 app management
are chargeable at the normal texecom cloud per panel rate.
Other manuals for SmartCom
1
Table of contents
Other Texecom Network Hardware manuals
Popular Network Hardware manuals by other brands
Cisco
Cisco Cisco ASA Series Cli configuration guide

Motorola
Motorola PMP 58430 user manual
ADC
ADC PG-FlexPlus AMU-912 manual
Moxa Technologies
Moxa Technologies NPort W2150A-W4 Series user manual

Cabletron Systems
Cabletron Systems KBU64 Rackmount user manual
Cypress Semiconductor
Cypress Semiconductor Nine-Output 3.3V Buffer CY2309NZ manual
