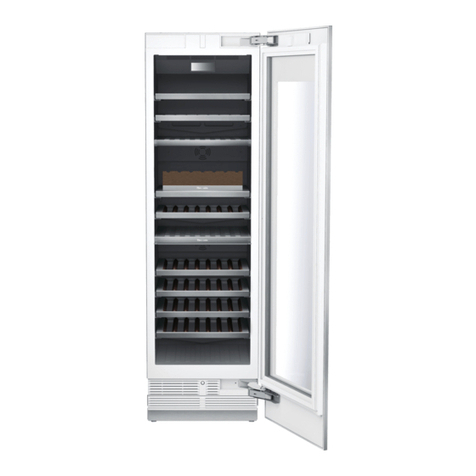
Thermador T24UW800 User manual

1 | Page
Model/Modele/Modelo
T24UW820RS
T24UW820
LS
T24UW810RS
T24UW810LS
T24UW800RP
T24UW800LP
Glass Door Wine Reserve
Cellier avec porte en verre
Enfriador de vinos
con puerta de
vidrio
USE & CARE GUIDE
GUIDE
D’UTILISATION
ET D’ENTRETIEN
MANUAL DE USO
Y CUIDADO

2 | Page
Table of Contents
Welcome to Your THERMADOR
Under-Counter Appliance
Safety …………………………………………4
- Definition
- Before you switch ON the appliance
- Technical safety
- Important information when using the
appliance
- Children in the household
- General regulations
Information concerning disposal ………..5
- Disposal of packaging
- Disposal of your old appliance
Installing the appliance ……………………5
- Transporting
- Installation location
Ventilation ……………………………………5
Getting to know your appliance ………….6
Getting started with your appliance ….....7
- Touch control
- Switching the appliance on
- Setting the temperature
- Controlling the cabinet lighting
- Special functions:
- Sabbath Mode
- Fahrenheit / Celsius Display
- Off Mode
Toe-Kick & Stainless applique …………... 9
Cleaning the appliance …………………….10
- Proceed as follows:
- Cleaning behind the Toe-kick
Odors ………………………………………….11
Light (LED) ………………………………….11
Tips for saving energy ……………………11
Operating noises …………………………..11
- Normal noises
- Preventing noises
Troubleshooting ……………………………12
BSH Home Appliances Corporation
1901 Main Street, Irvine, CA.
Questions?
1-800-735-4328
www.thermador.com
We look forward to hearing from you!

3 | Page
Welcome
To Your Thermador® Under-counter Appliance
Thank you and congratulations on your recent THERMADOR purchase! Whether you are a
dedicated chef or simply a connoisseur of the art of cooking, owning a THERMADOR kitchen is the
ultimate expression of personal style, good taste, and an appreciation for the complete culinary
experience. Our award-winning products have been empowering culinary enthusiasts for more
than eleven decades.
Before you begin using your new THERMADOR product, please take a moment to review the Use
and Care Guide. You will find the answers to all of your questions as well as some very important
safety information. Pay special attention to the Important Safety Instructions located at the
beginning of this guide. Your THERMADOR product is ready and waiting to be used for your next
gourmet creation!
Our products are handcrafted with the highest quality authentic materials to ensure reliable service.
In the unlikely event that you have a service question, please have your model and serial numbers
of your product available when calling for technical service. You can find this information in the
name plate of the appliance located inside the cabinet, opposite to the hinge.
We realize that you have made a considerable investment in your kitchen and thank you again for
choosing THERMADOR. Please feel free to share your kitchen photos and remodeling stories with
us. Follow us on Twitter or post your kitchen photos to Facebook. We would love to hear from
you!

4 | Page
Safety
Important Safety Instructions
Read and save these instructions
Definition
WARNING:
This indicates that death or serious injury
may result due to non-observance of this
warning.
CAUTION:
This indicates that minor or moderately
severe injury may result due to non-
observance of this warning.
WARNING: To reduce the risk of fire, electric
shock, or injury when using your appliance, follow
these basic precautions:
Before you switch ON the appliance
Please read the operating and installation instructions
carefully. They contain important information on how
to install, use and maintain the appliance.
The manufacturer is not responsible if you fail to
comply with the instructions and warnings. Retain all
documents for subsequent use or for the next owner.
Technical safety
If the power cord of this appliance is damaged, it must
be replaced by an authorized servicer. Improper
installation and repairs may put the user at
considerable risk. Repairs must be performed by an
authorized servicer.
Only original parts supplied by the manufacturer
should be used. Only original parts satisfy safety
requirements.
The appliance comes with a UL registered 3-wire
power cord.
Never sever or remove the third (ground) conductor
from the power cord.
The appliance requires a 3-pole socket. The socket
should be connected by an electrician only.
Where there is a 2-pole standard wall socket, it is the
responsibility of the customer to have this socket
replaced with a correctly grounded 3-pole wall socket.
Do not use any adapter plugs.
Important information when using the
appliance
Never use electrical appliances inside the
appliance (e.g. heater, electric ice maker, etc.).
Risk of explosion!
Never use a steam cleaner to defrost or clean the
appliance! The steam may penetrate electrical
parts and cause a short–circuit. Risk of electric
shock!
Do not use pointed and sharp–edged implements
to remove frost or layers of ice. You could damage
sensitive internal components, including the
refrigerant tubes. Leaking refrigerant may ignite or
cause eye injuries.
Do not store products which contain flammable
propellants (e.g. spray cans) or explosive
substances in the appliance. Risk of explosion!
Do not stand on or lean heavily against the base
of appliance, door, shelves etc.
Before defrosting and cleaning the appliance, pull
out the mains plug or switch off the fuse. Do not
pull out the mains plug by tugging the cable.
Switch the appliance off prior to cleaning.
Bottles which contain a high percentage of alcohol
must be sealed and stored in an upright position.
Keep plastic parts and the refrigerator seal free of
oil and grease. Otherwise, parts and the
refrigerator seal will become porous.
Never cover or block the ventilation openings for
the appliance.
Children should not be allowed to use the
appliance unless supervised by an adult.
Children in the household
Keep children away from packaging and its
parts. Danger of suffocation from folding cartons
and cling wrap!
Do not allow children to play with the appliance!
General regulations
The appliance is designed exclusively for the storage
of wine.
This appliance is intended for use in the home and
the home environment.
The refrigeration circuit has been checked for leaks.
State of California Proposition 65 Warnings:
WARNING: This product contains one or more
chemicals known to the State of California to
cause cancer.
WARNING: This product contains one or more
chemicals known to the State of California to
cause birth defects or other reproductive harm.

5 | Page
Information concerning disposal
Disposal of packaging
The packaging protects your appliance from
damage during transit. All utilized materials are
environmentally safe and recyclable. Please help us
by disposing of the packaging in an environmentally
friendly manner. Please ask your dealer or your local
authority about current means of disposal.
Disposal of your old appliance
Old appliances are not worthless rubbish! Valuable
raw materials can be reclaimed by recycling old
appliances.
WARNING:
1. Pull out the power plug.
2. Cut off the power cord and discard with the power
plug.
3. Remove the door from the appliance.
4. Do not allow children to play with the appliance
once it has spent its useful life. Danger of
suffocation!
Refrigerators contain refrigerant and gases in the
insulation. Refrigerant and gases must be recycled by
professionals. Ensure that tubing of the refrigerant
circuit is not damaged prior to proper disposal.
Installing the appliance
For detailed installation instructions, please refer
to the Installation Guide provided with the
appliance.
Have a technician install and connect the appliance
according to the enclosed installation instructions.
NOTE: For detailed installation instructions, relevant
measurements and information, please, see the
Installation Guide provided with this appliance.
WARNING:
Do not install this appliance:
- Outdoors
- In an environment with dripping water
- In rooms where there is a risk of frost
Transporting
The appliance is heavy and must be handled with
caution during transportation and installation.
Because of the weight and dimensions of the
appliance, at least two persons are necessary to move
the appliance into position securely and avoid injuries
to people or damage to the appliance.
Installation location
A dry, well ventilated room is suitable as an
installation location. The installation location should
not be exposed to direct sunlight and not placed near
a heat source, e.g. a cooker, radiator, etc.
If installation next to a heat source is unavoidable, use
a suitable insulating plate or observe the following
minimum distance from the heat source:
To electric or gas oven/range 1¼” (3 cm).
To an oil or coal-fired cooker 1113/16” (30cm).
The floor of the installation location must not give
way; if required, reinforce floor. The appliance must be
upright to function correctly.
Ventilation
The refrigeration unit is ventilated only at the Toe-
Kick in the base. Never cover that area or place
anything in front of it. Otherwise the refrigeration
cooling performance will be affected and the unit must
work harder increasing power consumption.
Additionally, make certain all 4 leveling legs are
extended (unit height approximately ”), so that
WKHUHis sufficient airflow underneath the appliance.
Adjust all 4 legs to extend the appliance
height by approximately 1/2 inch.

6 | Page
Getting to know your appliance
THERMADOR under-counter Wine Reserve units can
be freestanding or built-in and are available in a number
of configurations.
These operating instructions are general for all models;
the diagrams may differ.
EXTERIOR
INTERIOR
1. Cabinet
2. Stainless Steel Door with window
3. Handle (Pro Style or Master Style)
4. Full depth cantilever shelves (5 shelves; 7
bottles each shelve)
5. Separator and touch controls
6. Bottom shelf (1 shelf; 6 bottles)
7. Toe-kick applique
8. Leveling legs (x4)
NOTE: Overlay model does not includes the stainless
door nor the handle.
WARNING
To avoid the appliance tilting due to unbalanced
overweight do not pull out all the Wine Racks at the
same time. Always push the Wine Rack into the
cabinet before pull out another Wine Rack.
1
2
3
4
5
6
7
8
1
4
5
7
8

7 | Page
Getting started with your appliance
Touch control
A. ALARM
When the door has been left open for 3 minutes or
longer, an audible alarm sound is triggered in addition
to a flashing blue LED indicator light above the ALARM
button. Press the button once to temporarily disengage
the ALARM, or close the open door.
• Press and hold the ALARM button for 3 seconds to
disengage permanently the door-open ALARM
function. The key-press will sound once, confirming
the ALARM function has been disengaged.
• Press and hold ALARM for 3 seconds to reengage
the door-open ALARM function.
NOTE: The ALARM function will not operate when the
unit is in Sabbath mode. See the Sabbath Mode
section of Special Functions.
• There are other situations when the ALARM will
sound. See the Troubleshooting section on pg. 13
B. LOCK
• Press and hold the LOCK button for 3 seconds,
LOCK LED will light up and all buttons will be blocked.
To disengage, press and hold the LOCK button for 3
seconds or until LOCK LED light goes off.
C. LIGHT
Light location is hidden/recessed in ceiling and under
mullion. There are 4 adjustable light settings: no light
(no LED light on control), low (1 LED lite on control),
medium (2 LED lite) and high (3 LED lite on control).
When the door is open, the interior lights automatically
adjust to the maximum intensity (high); lights return to
the selected intensity when the door is closed.
When the lights are already set on high, there will not
be a difference of intensity when the door is open.
D. DISPLAY PANELS
The temperatures are shown in the display panel. The
upper level is for white wines and the lower level is for
red wines. By default, the temperatures sets 46°F for
the upper compartment and 58°F for the lower
compartment.
When the temperature is adjusted, the control panel
flashes the new set-point temperature for 5 seconds,
then reverts to a continuous display of actual
temperatures.
Temperatures in upper and lower compartment are
related and adjust automatically to keep the best
cooling ratio for your red and white wines.
E. SELECTION BUTTONS
The temperature setting is adjusted using the selection
buttons, see chapter “Setting the temperature” for
details.
• Press COOLER (-) to lower the set temperature.
• Press WARMER (+) to raise the set temperature.
Switching the appliance on
The appliance begins to cool when plugged in.
WARNING:
Follow the instructions and recommendations in the
“Connecting the appliance” section in the
Installation Guide for a correct and safe use of your
Wine Reserve.
CAUTION:
Keep hands and fingers away from front and rear
openings of the Wine Reserve door when closing. Risk
of injury to hands or fingers may occur.
Never allow children to climb on or play with the Wine
Reserve door.
Setting the temperature
By default, the temperature set in your Wine Reserve
is: 46°F for the upper compartment and 58°F for the
lower compartment; these are the temperatures
recommended but you can adjust the temperature as
your like.
Temperatures in upper and lower compartment are
related and adjust automatically to keep the best
cooling ratio for your red and white wines.
A
B
C
D
E

8 | Page
To set a new temperature press the Selection Buttons
COOLER (-) or WARMER (+).
The temperatures will increase or decrease together by
one degree every time the Selection Button is pressed.
The temperature can be displayed in degrees Celsius
(°C) or degrees Fahrenheit (°F). The factory setting is
degrees Fahrenheit (°F).
Temperature Ranges
Wine Reserve upper: 40º to 52º
Wine Reserve lower: 52º to 64º
*Suggested upper temp.:46º
*Suggested lower temp.: 58º
The correct serving temperature is crucial for the taste
and therefore your enjoyment of the wine.
We recommend serving wine at the following drinking
temperature.
Type of Wine
Categories
Temp.
Rich, intense,
spicy warm
Reds
Bordeaux, Shiraz,
Rhone wines
64°F
Cabernet Sauvignon,
Burgundy
63°F
Medium to
Lighter bodied
Reds
Rioja, Pinot Noir
62°F
Chianti, Zinfadel
59°F
Madeira, Chinon
57°F
Juicy, fruity
Reds
Young Spanish,
Portuguese wines
54°F
Full
-
bodied/oaked
Whites
White Burgundy
52°F
Medium to
lighter bodied
Whites
Chardonnay, Australian
Semillon
50°F
Chablis, Sauvignon
Blanc
48°F
Sweet and
Sparkling
wines
Sauternes,
Muscat/Moscato
47°F
Champagne, Cava, Asti
43°F
Controlling the cabinet lighting
The interior cabinet light settings can be controlled
using the LIGHT button on the CONTROL PANEL.
The luminosity level will increase by one unit
(displayed as one LED light over the LIGHT button)
every time the button is pressed. When the level is
already in “High”(3 LED lite), the next press will reset
the level to “None” and no LED light will be displayed.
When the door is opened, the interior light will
automatically illuminate to its maximum intensity (High
level) independently of the setting on the control.
When the door is closed, the interior light will adjust
back to the setting indicated above the LIGHT button
as per following table:
If the LIGHT preset is “None”, the interior lights will turn
on only when the door be opened and will dim off again
when the door be closed.
These light level settings can be used to conveniently
display the contents of the Wine Reserve even when
the door is closed.
The factory default for closed-door light level setting is
“Medium”.
• Press the LIGHT button repeatedly to cycle between
the level settings.
• The interior lighting will temporarily adjust to the
selected setting for a few seconds. This provides a
visual sample of the selected level, before returning to
the open-door (maximum) lighting level.
LIGHT setting
Closed-Door
Cabinet Light Level
None
Low
Medium
High
(same level as when
door is opened)

9 | Page
Special functions
The following special functions can be selected or
displayed:
Sabbath Mode
The Sabbath Mode is designed for those users whose
religious observances requires the turning off of lights
or for travelers who will be absent from home.
When Sabbath mode is activated, the following
settings are switched off:
xAcoustic signal when a button is pressed.
xInterior light.
xBackground illumination of the display panel.
Activating:
1. Press and hold the LOCK and COOLER buttons
simultaneously for 3 seconds to engage the Sabbath
mode. The temperature settings used prior to engaging
the Sabbath mode are maintained.
2. The key-press sounds once, and the DISPLAY
PANEL will change to continuously display the
following characters:
The display will not change, even if the door is
closed, as long as the unit remains in Sabbath mode.
NOTE: The Sabbath mode will remain active if the unit
is restarted after a power loss.
Deactivating:
1. Press and hold the LOCK and COOLER buttons
simultaneously for 3 seconds.
2. All buttons, displays, lights and alarms will again
become functional.
Fahrenheit / Celsius Display
1. Press and hold the LIGHT and WARMER buttons
simultaneously for 3 seconds in order to switch
between degrees Fahrenheit (°F) and degrees Celsius
(°C) for the temperature control and display.
2. The factory setting is degrees Fahrenheit. When
switching to degrees Celsius (°C), the display panel will
show the following characters for a few seconds, and
the key press will sound once:
Repeat the same process to show the temperature
back in degrees Fahrenheit.
When switching back to Fahrenheit, the following
characters will be displayed:
3. The display will then indicate the previously set
temperature, adjusted to either the Celsius or
Fahrenheit scale.
Off Mode
Off mode deactivates all functional elements of the
unit.
Activating:
1. Press and hold the LOCK and WARMER buttons
simultaneously for 3 seconds to engage the OFF
mode.
2. The key-press sounds once and the display panel
will change to continuously display the following
characters:
3. Repeat the same process to disengage the Off
mode and activate all functional elements again.
Toe-Kick & Stainless applique
The stainless steel applique on the Toe-Kick can be
removed and leave only the black panel behind if
desired.
The Toe-Kick itself can be removed for service or
cleaning (see “Cleaning behind the Toe-Kick” in the
next section).
1. Remove the stainless steel applique and Toe-Kick
by unscrewing and removing the two front screws with
a Philips screwdriver.
2. Once the stainless steel applique is removed, you
can remove the Toe-Kick by simply pulling it out of the
left and right mounting brackets.
Front screws

10 | Page
3. To reattach the Toe-Kick, slide over the left and right
mounting brackets, such that bottom tabs of the Toe-
Kick rest on top of the bracket bases. This will allow
the Toe-Kick and mounting bracket screw holes to
align.
4. If the black Toe-Kick alone is desired, reinsert the
two front screws through the Toe-Kick screw holes and
into the mounting brackets. Gently tighten with a
Philips screwdriver. Take care not to over-tighten the
screws.
If the stainless steel appearance is desired, then place
the stainless steel applique over the Toe-Kick and align
the applique holes with the Toe-Kick holes before
reinserting and tightening the screws.
Cleaning the appliance
WARNING:
Never clean the appliance with a steam cleaner!
CAUTION:
• Do not use abrasive or acidic cleaning agents and
solvents.
• Do not use scouring or abrasive sponges. The
metallic surfaces could corrode.
• Never clean the wine racks in the dishwasher. The
parts may be damaged.
Proceed as follows:
1. Before cleaning: switch the appliance off. For
instructions, see “Off Mode” section on the “Special
Functions” page.
2. Clean the appliance, and the wine racks with a soft
cloth, lukewarm water and a little pH neutral detergent.
CAUTION:
When rinsing the cabinet, water must not enter the
interior light recess located on the upper side of the
interior cabinet, or spill out from the bottom of the
cabinet.
3. Wipe the door seals with clear water only and then
wipe dry thoroughly.
4. Switch the appliance back on.
Cleaning behind the Toe-Kick
1. Before cleaning: switch the appliance off.
2. Remove the Toe-Kick. See “Toe-Kick & Stainless
applique” section on the previous page.
WARNING:
Do not remove the electrical box cover behind the
Toe-Kick. Risk of electric shock!
3. Use a vacuum cleaner with an extended attachment
to clean the accessible areas when they are dusty or
dirty.
4. Replace the Toe-Kick.
5. Switch the appliance on.
Bottom tabs
Bracket bases
Front screws

11 | Page
Odors
If you experience unpleasant odors:
1. Switch the appliance off.
2. Take all wine out of the appliance.
3. Clean the interior. See “Cleaning the appliance”.
4. Clean all bottles.
5. Switch the appliance on again.
6. Check whether the formation of odors is still
occurring after 24 hours.
Light (LED)
Your appliance features a maintenance-free LED light
located at the top of the interior cabinet and under the
mullion. This light must be repaired by authorized
technicians only.
Tips for saving energy
• Install the appliance in a dry, well ventilated room.
The appliance should not be installed in direct sunlight
or near a heat source (e.g. radiator, cooker).
If required, use an insulating plate.
• Do not block the ventilation openings in the
appliance.
• Open the appliance door as briefly as possible.
Operating noises
Normal noises
Droning: Motors are running (e.g. refrigeration units,
fan).
Bubbling, humming or gurgling noises: Refrigerant
is flowing through the tubing.
Clicking: Motor, switches or solenoid valves are
switching On/Off.
Preventing noises
Be sure the appliance is leveled
Please align the appliance with a spirit level. Use the
height-adjustable feet.
Bottles or containers are touching each other
Move the bottles or containers slightly away from each
other.

12 | Page
Troubleshooting
Be sure to check these items first:
xIs there a power outage in the area?
xIs the household fuse blown or the circuit breaker
tripped?
xIs the appliance properly connected to the electrical
supply?
Many problems can be resolved without the need for a
service call. See the following list as a reference of
possible solutions of simple problems.
Symptom
Possible Cause
Potential Remedy
A
ppliance is not cooling.
A
ppliance has been switched off.
Ch
eck display to make sure the unit i
s
no
t switched off. If
display reads “OFF”,
simultaneously press
and hold LOCK
and WARMER
to return to operating
mode.
The
compressor is constantly
running
or running too much.
A
ppliance opened frequently.
Do
not open the appliance
un
necessarily.
T
he ventilation openings have been
co
vered.
Re
move obstacles at the ventilation
open
ings
located at the base of the unit
and in the refrigerator interiors.
A large amount of product, or warm
product was placed into the appliance.
The
compressor will run more than
norma
l until the product cools. The
more that is added, the longer the motor
will run.
Excessively warm environment
.
Avoid placing the unit in direct sunlight,
or near a heat source. If the appliance is
in an unusually warm environment, the
compressor will run more.
Leveling legs are not extended.
Extend the leg height to improve air
circulation. This will reduce the amount
of time the
compressor needs to run.
Door gasket is not sealing.
Inspect the condition of the gasket. If
damaged, cold air can esc
ape the
cabinet and cause the
compressor
to
run more than normal.
Products and beverages in the unit
are too cold
.
T
emperature has been set too low.
I
ncrease the temperature. See “Setti
ng
th
e temperature”.
Product placed too close to ventilation
holes
.
Rearrange the
bottles
, so that nothing
obstructs the interior ventilation holes.

13 | Page
T
he interior light (LED) does not
w
ork.
The unit is set to Sabbath mode.
Disengage
Sabbath mode. See
“
Special Functions” section.
There are unpleasant odors coming
fro
m the appliance.
Some bottles may not be correctly
closed or the content of some bottle
may be spilled.
Cl
ean the appliance. Be sure all the
bottles are correctly closed.
(
See chapter “Odors”).
Di
splay indicates “HI”
and the alarm
is sounding.
T
emperature is too warm inside the
r
efrigerator because the door has bee
n
le
ft open for an excessive amount of
time.
Press the alarm button once to
temporarily
deactivate the ALARM
soun
d and LED indicator.
Close the do
or, and allow the unit to
cool.
Data Rating Label
The data rating label shows the model and serial number of your appliance. It is located in the interior of the cabinet, at
the opposite side of the hinge.
Service Information
For handy reference, copy the information in the form below from the data rating plate located in the interior of the
cabinet, at the opposite side of the hinge. Keep your invoice for Warranty validation.
Model Number_____________________________________
Serial Number_____________________________________
Date of Purchase___________________________________
Dealer’s Name_____________________________________
Dealer’s Phone Number______________________________
Service Center’s Name______________________________
Service Center’s Phone Number_______________________

1ϰ| Page
Table des matières
Bienvenue! Voici votre appareil
encastrable sous le comptoir
THERMADOR
Sécurité ………………………………………….1
- Définition
- Avant de mettre l’appareil en marche
- Sécurité technique
- Renseignements importants sur l’utilisation
de l’appareil
- Les enfants et l’appareil
- Règles générales
Conseils pour la mise aux rebuts .………….
- Mise aux rebuts de l’emballage
- Mise aux rebuts de l’ancien appareil
Installation de l’appareil .…….……………….
- Transport
- Lieu d’installation
Aération ………………………………………….
Présentation de l’appareil ………..…………..
Mise en service de l’appareil ……………......
- Bouton de commande
- Mise en marche de l’appareil
- Réglage de la température
- Commande de l’éclairage du meuble
- Fonctions spéciales :
- Mode Sabbat
- Affichage en degrés Fahrenheit / Celsius
- Mode arrêt
Applique en acier inoxydable de bandeau
de socle ………………………………………....2
Nettoyage de l’appareil ..……………………..2
- Procédure
- Nettoyage derrière le bandeau de socle
Odeurs …………………………………………..2
Éclairage (DEL) ..…………………………….2
Conseils pour économiser l’énergie ..…..2
Bruits de fonctionnement ..………………..2
- Bruits normaux
- Éviter la génération de bruits
Dépannage .……..……………………………2
BSH Home Appliances Corporation
1901 Main Street, Irvine, CA.
Vous avez des
questions ?
1-800-735-4328
www.thermador.com
N’hésitez pas à communiquer avec nous !

1ϱ| Page
Bienvenue
Voici votre appareil encastrable sous le comptoir Thermador®
Nous vous remercions d’avoir acheté cet appareil THERMADOR! Que vous soyez un chef dédié
ou simplement un connaisseur de l’art culinaire, l’achat d’un appareil THERMADOR pour la cuisine
constitue une expression de votre style personnel, votre bon goût et une appréciation de
l’expérience culinaire globale. Les passionnés de l’art culinaire utilisent nos produits primés depuis
plus de onze décennies.
Avant de commencer à utiliser votre nouvel appareil THERMADOR, veuillez prendre quelques
instants pour lire le guide d’utilisation et d’entretien. Vous y trouverez des réponses à toutes vos
questions ainsi que d’importants renseignements sur la sécurité. Portez une attention particulière
aux renseignements sur la sécurité au début de ce guide. Votre appareil THERMADOR est prêt à
utiliser pour votre prochaine création gastronomique.
Nos produits sont fabriqués à la main avec des matériaux de la plus haute qualité afin d’assurer un
service fiable. Dans l’éventualité peu probable où vous auriez une question concernant un
problème technique, veuillez avoir à portée de main les numéros de série et de modèle de
l’appareil lorsque vous appelez le service technique. Ces renseignements se trouvent sur la plaque
signalétique de l’appareil à l’intérieur du meuble, du côté opposé à la charnière.
Nous sommes conscients que vous avez investi beaucoup de temps et d’argent dans votre
cuisine, et vous remercions d’avoir choisi THERMADOR. N’hésitez pas à nous faire parvenir des
photos et des histoires de rénovation de votre cuisine. Suivez-nous sur Twitter ou publiez les
photos de votre cuisine sur Facebook. Nous attendons vos messages!

1ϲ| Page
Sécurité
Importantes consignes de sécurité
Lire et conserver ces consignes
Définition
MISE EN GARDE:
Ceci signifie qu’un danger de mort ou de
blessure grave peut surgir si cette mise en
garde n’est pas respectée.
ATTENTION:
Ceci signifie qu’un risque de blessures
légères à moyennement graves peut surgir si
cette mise en garde n’est pas respectée.
MISE EN GARDE: Pour atténuer le risque
d’incendie, d’électrocution ou de blessure pendant
l’utilisation de l’appareil, veuillez prendre les
précautions suivantes :
Avant de mettre l’appareil en marche
Veuillez lire attentivement les consignes d’installation
et d’utilisation, car elles contiennent des
renseignements importants concernant l’installation,
l’utilisation et l’entretien de l’appareil.
Sécurité technique
Si le cordon d’alimentation électrique de cet appareil a
été endommagé, il doit être remplacé par un
prestataire de service après-vente agréé. Les
installations et réparations inadéquates peuvent
engendrer des risques considérables pour l’utilisateur.
Les réparations doivent être effectuées par un
prestataire de service après-vente agréé.
Il ne faut utiliser que les pièces d’origine du fabricant.
Seules les pièces d’origine répondent aux exigences
de sécurité.
L’appareil est livré équipé d’un cordon d’alimentation à
trois fils homologué UL.
Il ne faut en aucun cas couper le troisième fil (de terre)
du cordon d’alimentation.
L’appareil requiert une prise à trois pôles. Le
branchement de la prise est une opération
exclusivement réservée à un électricien qualifié.
Lorsqu’une fiche mâle standard bipolaire est
disponible, il incombe au client de la remplacer par
une fiche mâle tripolaire adéquatement reliée à la
terre. N'utilisez pas de connecteur adaptateur.
Renseignements importants sur l’utilisation
de l’appareil
N’utilisez pas d’appareils électriques à l’intérieur de
l’appareil (p. ex., appareils de chauffage, machine à
glaçons, etc.). Risque d’explosion !
Ne décongelez et ne nettoyez jamais l’appareil
avec un nettoyeur à vapeur ! La vapeur risque
d’atteindre des pièces électriques et de provoquer
un court-circuit. Risque d’électrocution !
Pour détacher le givre ou les couches de glace,
n’utilisez jamais d’objets pointus ou présentant des
arêtes vives. Vous risqueriez d’endommager les
tubulures dans lesquelles circule le produit
réfrigérant. Le fluide réfrigérant peut s’enflammer
en jaillissant ou provoquer des blessures aux yeux.
Ne stockez dans l’appareil ni produits contenant des
gaz propulseurs inflammables (p. ex., bombes
aérosols) ni produits explosifs. Risque d’explosion !
Ne vous servez pas abusivement des socles, rails
télescopiques, portes, etc. comme marchepieds ou
pour vous appuyer.
Avant de décongeler et nettoyer, débranchez la
fiche mâle de la prise de courant ou ramenez le
disjoncteur en position éteinte. Pour débrancher, ne
saisissez que la fiche mâle, pas le cordon
d’alimentation.
Ne conservez les bouteilles de boissons fortement
alcoolisées qu’hermétiquement fermées et à la
verticale.
L’huile et la graisse ne doivent pas entrer en
contact avec les parties en matières plastiques et le
joint de porte. Sinon, les pièces en plastique et le
joint de porte deviendront poreux.
Ne recouvrez et n’obstruez jamais les orifices
d’entrée et de sortie d’air affectées à l’appareil.
Ne permettez jamais aux enfants d’utiliser l’appareil
en l’absence d’un adulte.
Les enfants et l’appareil
Ne confiez jamais l’emballage et ses pièces
constitutives aux enfants. Ils risquent de s’étouffer
avec les cartons pliants et les feuilles de plastique !
Ne laissez pas les enfants jouer avec l’appareil !
Mises en garde sur la Proposition 65 de l’État de
la Californie :
MISE EN GARDE: Ce produit renferme un ou
plusieurs produits chimiques reconnus par l’État de la
Californie comme étant cancérigènes.
MISE EN GARDE: Ce produit renferme un ou
plusieurs produits chimiques reconnus par l’État de la
Californie comme étant la cause de déficiences
congénitales ou autres anomalies de la reproduction.

ϭϳ | Page
Règles générales
Cet appareil est exclusivement destiné à stocker du vin.
Cet appareil est destiné à un usage domestique dans
un foyer privé, et à l’environnement domestique.
Le circuit frigorifique a subi un contrôle d’étanchéité.
Conseils pour la mise aux rebuts
Mise aux rebuts de l’emballage
L’emballage protège votre appareil contre les dégâts
qu’il pourrait subir en cours de transport. Tous les
matériaux qui le constituent sont compatibles avec
l’environnement et recyclables. Aidez-nous en éliminant
l’emballage dans le respect de l’environnement. Pour
savoir comment vous débarrasser de l’emballage,
veuillez consulter votre revendeur ou les autorités
locales.
Mise aux rebuts de l’ancien appareil
Les appareils usagés ne sont pas des déchets sans
valeur! Leur élimination dans le respect de
l’environnement permet d’en récupérer de précieuses
matières premières.
MISE EN GARDE:
1. Débranchez la fiche de la prise de courant.
2. Sectionnez le cordon d’alimentation puis le jeter
avec la fiche.
3. Retirer la porte de l’appareil.
4. Ne permettez pas aux enfants de jouer avec
l’appareil lorsqu’il ne sert plus. Risque d’asphyxie !
Les appareils frigorifiques contiennent des fluides
frigorigènes et des gaz isolants qui nécessitent une
mise aux rebuts adéquate. Veillez à ce que les tuyaux
du circuit frigorifique de votre appareil ne soient pas
endommagés jusqu’à son élimination dans les règles
de l’art.
Installation de l’appareil
Pour obtenir des consignes d’installation
détaillées, consultez le guide d’installation fourni
avec cet appareil.
Demandez à un technicien d’installer et de raccorder
l’appareil conformément aux consignes d’installation
ci-jointes.
REMARQUE : Pour obtenir des consignes
d’installation détaillées, des mesures et des
renseignements pertinents, consultez le guide
d’installation fourni avec cet appareil.
MISE EN GARDE:
N’installez pas cet appareil :
- À l’extérieur
- Dans un environnement où de l’eau dégoutte
- Dans des locaux à risque de gel
Transport
L’appareil est lourd. Lors du transport et de l’installation,
sécuriser l'appareil !
Comme l'appareil est lourd et encombrant, au moins
deux personnes sont nécessaires pour mettre en place
l'appareil tout en réduisant le risque de blessure ou
d'endommagement de l'appareil.
Lieu d’installation
Un local sec et aérable convient comme lieu
d’installation. Il faudrait que le lieu d’installation ne soit
pas directement exposé aux rayons solaires et pas à
proximité d’une source de chaleur (cuisinière,
radiateur, etc.). Si l’installation à côté d’une source de
chaleur est inévitable, veuillez utiliser un panneau
isolant approprié ou respecter les écarts minimums
suivants par rapport à la source de chaleur :
Par rapport aux cuisinières électriques ou à gaz
1 ¼ po (3 cm).
Par rapport à un appareil de chauffage à l’huile ou
au charbon 11 13/16 po (30 cm).
Sur l’emplacement, le sol ne doit pas s’affaisser.
Renforcez-le le cas échéant. L’appareil doit reposer à la
verticale pour fonctionner correctement.
Aération
L’air destiné à l’unité de réfrigération rentre et sort par la
grille d’aération située dans le socle. Ne recouvrez en
aucun cas la grille d’aération et ne placez rien devant.
Sinon, le groupe frigorifique se trouverait sollicité plus
fortement, ce qui augmenterait la consommation de
courant.
En outre, assurez-vous que les quatre pieds de
nivellement sont étendus (la hauteur de l’appareil est
d’environ po) afin que le débit d’air soit suffisant
sous l’appareil.
Ajustez les quatre pieds pour allonger la
hauteur de l’appareil d’environ ½ po.

ϭϴ | Page
Présentation de l’appareil
Les celliers THERMADOR peuvent être autonomes ou
encastrés, et sont disponibles en plusieurs
configurations.
Ces consignes d’utilisation conviennent à tous les
modèles, mais les schémas peuvent différer.
EXTÉRIEUR
INTÉRIEUR
1. Meuble
2. Porte en acier inoxydable avec fenêtre
3. Poignée (style professionnel ou maître)
4. Clayettes en porte-à-faux pleine profondeur (5
clayettes, 7 bouteille sur chaque clayette)
5. Séparateur et boutons de commande
6. Clayette inférieure (1 clayette; 6 bouteilles)
7. Applique de bandeau de socle
8. Pieds de nivellement (4)
REMARQUE : Le modèle avec revêtement ne
comprend pas de porte en acier inoxydable ou de
poignée.
MISE EN GARDE
Pour éviter que l’appareil ne bascule en raison d’une
mauvaise répartition du poids, ne pas tirer tous les
porte-bouteilles de vin en même temps. Poussez
toujours le porte-bouteilles dans le meuble avant d’en
tirer un autre hors de celui-ci.
1
2
3
4
5
6
7
8
1
4
5
7
8

ϭϵ | Page
Mise en service de l’appareil
Boutons de commande
A. ALARME
Lorsque la porte demeure ouverte pendant 3 minutes
ou plus, une alarme retentit et un voyant DEL bleu
clignote au-dessus du bouton ALARM (alarme).
Appuyez une fois sur ce bouton pour désactiver
temporairement l’alarme ou fermez la porte.
• Appuyez sur le bouton ALARM et maintenez-le
enfoncé pendant 3 secondes afin de désactiver la
fonction d’alarme en cas de porte ouverte. Un son sera
émis afin de confirmer que la fonction d’alarme a été
désactivée.
• Appuyez sur le bouton ALARM et maintenez-le
enfoncé pendant 3 secondes pour réactiver la fonction
d’alarme en cas de porte ouverte.
REMARQUE : La fonction d’alarme n’est pas activée
lorsque l’appareil est en mode Sabbat. Pour en savoir
davantage sur le mode Sabbat, consultez la rubrique
des Fonctions spéciales.
• L’alarme peut retentir dans d’autres situations.
Consultez la rubrique Dépannage à la page 27.
B. VERROUILLAGE
• Appuyez sur le bouton LOCK (verrouillage) et
maintenez-le enfoncé pendant 3 secondes. Le voyant
DEL LOCK s’allumera et tous les boutons seront
verrouillés. Pour désactiver le verrouillage, appuyez
sur le bouton LOCK et maintenez-le enfoncé pendant
3 secondes ou jusqu’à ce que le voyant DEL LOCK
s’éteigne.
C. LUMIÈRE
La lumière est cachée/encastrée dans le plafond et
sous le meneau. La lumière peut être réglée de quatre
façons différentes : éteinte (pas de voyant DEL sur le
panneau de commande), faible (1 voyant DEL),
moyenne (2 voyants DEL) et forte (3 voyants DEL).
Lorsque la porte est ouverte, les lumières intérieures
s’ajustent automatiquement à l’intensité maximum
(forte); les lumières retournent à l’intensité choisie
lorsque la poste est fermée. Lorsque les lumières sont
déjà réglées à forte intensité, l’intensité sera la même
lorsque la porte est ouverte.
D. PANNEAUX D’AFFICHAGE
Les températures sont indiquées sur le panneau
d’affichage. Le niveau supérieur concerne les vins
blancs et le niveau inférieur concerne les vins rouges.
Par défaut, la température du compartiment supérieur
est réglée à 46 oF et celle du compartiment inférieur
est réglée à 58 oF.
Lorsque la température est réglée, le chiffre de la
température clignote pendant 5 secondes sur le
panneau de commande, avant de retourner à
l’affichage constant des températures réelles.
Les températures du compartiment supérieur et du
compartiment inférieur sont liées, et se règlent
automatiquement afin de maintenir le ratio de
refroidissement idéal pour les vins blancs et rouges.
E. BOUTONS DE SÉLECTION
La température est réglée à l’aide des boutons de
sélection. Pour de plus amples détails, consultez la
rubrique « Réglage de la température ».
• Appuyez sur COOLER (-) pour diminuer la
température.
• Appuyez sur WARMER (+) pour élever la
température.
Mise en marche de l’appareil
L’appareil commence à refroidir après avoir été mis
sous tension.
MISE EN GARDE:
Suivez les consignes et conseils énoncés dans la
rubrique « Branchement de l’appareil » du Guide
d’installation pour utiliser le cellier correctement et en
toute sécurité.
ATTENTION:
Lors de la fermeture, éloignez les mains et les doigts
des orifices avant et arrière de la porte du cellier.
Risque de blessures aux mains et aux doigts. Ne
permettez jamais aux enfants de grimper sur la porte
du cellier, ou de jouer avec elle.
A B C D E

2Ϭ| Page
Réglage de la température
Par défaut, la température du cellier est réglée à 46 oF
dans le compartiment supérieur et à 58 oF dans le
compartiment inférieur. Ce sont les températures
recommandées, mais vous pouvez régler la
température comme bon vous semble.
Les températures du compartiment supérieur et du
compartiment inférieur sont liées, et se règlent
automatiquement afin de maintenir le ratio de
refroidissement idéal pour les vins blancs et rouges.
Pour modifier la température, appuyez sur les boutons
de sélection COOLER (-) ou WARMER (+).
Les températures augmenteront ou diminueront d’un
degré chaque fois que vous appuyez sur le bouton de
sélection. La température peut être affichée en degrés
Celsius (oC) ou en degrés Fahrenheit (oF). Le réglage
par défaut en usine est (oF) Fahrenheit.
Plages de température
Compartiment supérieur du cellier : 40o à 52o
Compartiment supérieur du cellier : 52o à 64o
*Température supérieure suggérée : 46o
*Température inférieure suggérée : 58º
La bonne température à laquelle vous servirez les vins
décide de leur goût, donc du plaisir de leur
dégustation.
Nous recommandons de servir les vins ci-après aux
températures suivantes.
Type de vin Catégories Temp.
Rouge chaud
épicé, intense,
riche
Bordeaux, Shiraz,
Rhône 64°F
Cabernet Sauvignon,
Bourgogne 63°F
Rouge moyen
à lége
Rioja, Pinot Noir 62°F
Chianti, Zinfadel 59°F
Madeira, Chinon 57°F
Rouge juteux,
fruité
Jeunes vins espagnols,
portugais 54°F
Blanc
corsé/boisé Bourgogne blanc 52°F
Blanc moyen à
léger
Chardonnay, Sémillon
australien 50°F
Chablis, Sauvignon
blanc 48°F
Vin mousseux
et sucré
Sauternes,
Muscat/Moscato 47°F
Champagne, Cava, Asti 43°F
Commande de l’éclairage du meuble
La lumière intérieure du meuble peut être réglée à
l’aide du bouton LIGHT (lumière) sur le PANNEAU DE
COMMANDE. L’intensité augmente d’un cran (affiché
avec le voyant DEL au-dessus du bouton LIGHT)
chaque fois que vous appuyez sur le bouton. Lorsque
l’intensité est déjà « forte » (3 voyants DEL), l’intensité
deviendra « nulle » la prochaine fois que vous
appuierez sur le bouton, et aucun voyant DEL ne sera
affiché. Lorsque la porte est ouverte, la lumière
intérieure s’allumera automatiquement à son intensité
maximum (High) sans égard au réglage. Lorsque la
porte est fermée, la lumière intérieure s’ajustera au
réglage indiqué au-dessus du bouton LIGHT selon le
tableau suivant :
Si le réglage de l’intensité de la lumière est « Nulle »,
les lumières intérieures s’allumeront uniquement
lorsque la poste est ouverte, et diminueront d’intensité
lorsque la porte est fermée.
Ces réglages d’intensité de la lumière peuvent être
utilisés pour exposer le contenu du cellier même
lorsque la porte est fermée.
Le réglage par défaut en usine de l’intensité lorsque la
porte est fermée est « Moyenne ».
• Appuyez sur le bouton LIGHT plusieurs fois pour
passer d’un niveau à l’autre.
• L’éclairage intérieur s’ajustera temporairement au
réglage sélectionné pendant quelques secondes. Cela
permet de visualiser le résultat du niveau sélectionné
avant de retourner au niveau d’éclairage (maximum)
de la porte ouverte.
Réglage de la
LUMIÈRE
Niveau d’intensité de
l’éclairage du meuble
lorsque la porte est
fermée
Nulle
Faible
Moyenne
Élevée
(même intensité que lorsque
la porte est ouverte)
This manual suits for next models
6
Table of contents
Languages:
Other Thermador Kitchen Appliance manuals
Thermador
Thermador SGS Series User manual

Thermador
Thermador Pro Harmony PA30GLBH User manual

Thermador
Thermador Pro P24 User manual

Thermador
Thermador T36BT910NS User manual
Thermador
Thermador T18IW902SP User manual

Thermador
Thermador T24IW905SP User manual

Thermador
Thermador T18IW900SP User manual

Thermador
Thermador Professional Series User manual

Thermador
Thermador PRD364JDGC User manual