manuals.online logo
Brands
  1. Home
  2. •
  3. Brands
  4. •
  5. THERMEx
  6. •
  7. Water Heater
  8. •
  9. THERMEx STREAM 350 User manual

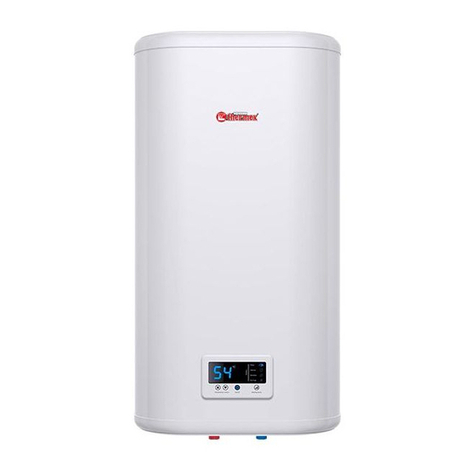
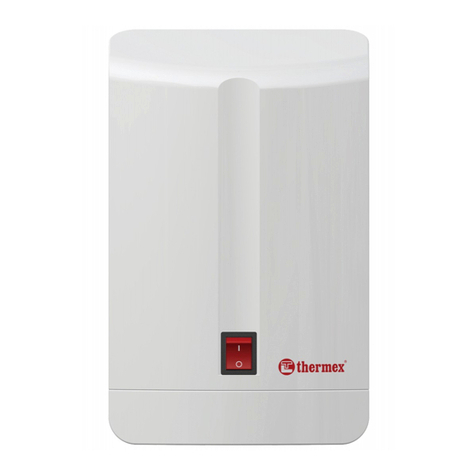
THERMEx STREAM 350 User manual

BEFORE USING THE WATER HEATER FOR THE
FIRST TIME, READ THIS USER`S MANUAL
THROUGHLY!
DEAR USER!
We congratulate you for purchasing of the instantaneous water heater
«THERMEX STREAM».
Before choosing the concrete model of electric water heater, consult qualified
electrician about technical possibilities of connection the electric water heater to
your electric grid.
This manual covers the following models: THERMEX 350
STREAM, THERMEX 500 STREAM and THERMEX 700
STREAM.
The full name of the water heater could be found in the section
«Manufacturer's warranty» and in the identification table on the water heater
housing.
1. DESCRIPTION
Instantaneous electric water heater THERMEX STREAM (EWH) is
determined for hot water production for everyday necessities. EWH should be
exploited in the area with room temperature maintained.
2. MAIN TECHNICAL CHARACTERISTICS
350
STREAM 500
STREAM 700
STREAM
Voltage, V 220 ± 10%
Frequency, Hz 50 ± 1%
Power, kW 3.5 5.0 7.0
Power modes , kW 3.5 2.0 + 3.0 3.5 + 3.5
Casing Splash proof
Power cord with plug Yes No No
Weight, kg, not more 2 2 2
Working pressure
Minimum water pressure, MPa 0.05
Maximum water pressure, MPa 0.6
3. DELIVERY SET
1. Instantaneous water heater – 1 piece.
2. User`s manual – 1 piece.
3. According to concrete delivery, delivery set includes:
- kitchen set (spout, insulating plates);
- or shower set (shower head, shower head bracket, hose, insulating plates);
- or combined set (spout, adapter, shower head, shower head bracket, hose,
insulating plates) – 1 piece.
4. Packing – 1 piece.
4. DESCRIPTION AND OPERATING PRINCIPLE
Water is heated immediately, when flowing through the copper cylinder. All
heating elements are placed inside the copper cylinder (Figure 4).
Figure 4: 1- cold water inlet; 2 - hot water outlet; 3 – fixation holes; 4 – heat
protector; 5 - copper cylinder with heating elements; 6 - connecting block;7 -
pressure-sensing device; 8 - cable clamp; 9 - switch.
The temperature adjustment in the outlet is performed by the regulation of its
flow.
On the diagram (Figure 3) the dependence between the temperature
difference in the inlet and outlet and the volume of water flow is shown.
The cold tap water temperature may alternate significantly within the year
from 5°C to 20°C. It means that at the same EWH outlet water temperature in
winter will be less than in summer. For the optimal flow, there are two shower
spraying modes. One mode is designed for using EWH in winter, another – in
summer.
After the water was supplied to EWH and the minimum allowable pressure
(0.05MPa) was set, pressure sensor will automatically switch on thermoelectric
heating elements, which will be indicated by the light of the power-on button. If
the water pressure in the inlet becomes lower than minimally allowable, pressure
sensor will automatically switch off the heating elements, the lights will go out,
the heating will stop.
Another security device is the heat protector, installed on the copper cylinder.
It disconnects EWH from the power grid in case of the water overheat (which is
not considered as the defect). After water cooling EWH will be automatically
switched on.
Figure 3
5. SAFETY RULES
Power cords, safety valves and switching systems must correspond to the
capacity of the EWH.
Children should not be allowed to play with EWH. The EWH Is not
designed to be operated by people (including children) with physical, tactile
or mental disorders, as well as people who cannot use the EWH, unless it is
made under control and according to the Instructions of people responsible
for the EWH security.
GROUND CONNECTION OF THE WATER HEATER IS
NECESSARY!!
DO NOT:
-leave the plugged in EWH unattended;
-switch EWH, before installing it on the wall vertically and filling it with
water;
-plug the appliance In and out with wet hands;
-use the spare parts, which were not recommended by the water heater
manufacturer;
-use water with impurities : sand, corrosion, sludge;
-close the EWH hot water discharge and connect to it to any kinds of
isolation valves;
-switch EWH with the frozen water inside.
6. INSTALLATION AND OPERATION RULES
Installation works must be performed by qualified specialists.
During installation the following sequence of actions is recommended:
а) Wall mounting of the water heater;
b) Connection to the water mainline;
c) Connection to the electric grid.
6.1. Wall Mounting
The EWH is installed on the wall vertically according to the shower nozzle or
drain length as well as the attaching point of the shower nozzle supporting arm.
Possible variants of the EWH Installation are given In Figure 1.
During installation the EWH must be installed in such a way that the water
spray doesn’t ingress its housing.
Put EWH on the wall using 2 screws (not included into set). Before putting on
the wall:
-put down the upper cover of EWH (loosen the screws on the sideboards);
-mark hole locations on the back cover, do the holes in the wall and fix the
EWH bottom in-place. Install the upper cover afterwards.
6.2. Connection to the water mainline
Connection diagram is given in Figure 2.
Figure 2: 1 – water heater (EWH); 2- cold water inlet pipe; 3- hot water outlet
pipe; 4 – spout; 5 – adapter; 6 – hose; 7 – shower nozzle; 8- cut-off valve; 9-
cold water main; 10 – shower nozzle bracket; 11- flow controller (tap).
Hook up the flow controller (11) (not included into set), which ensures the
smooth adjustment of water supply, to the cold water inlet (2) – left pipe of
EWH marked “Inlet”. Connect the flow controller (11) to the cold water inlet (2),
using the copper pipe with 10-15 mm diameter or flexible connector. For to
ensure long life of the water heater, use water purifying filter.
When torqueing connections on the EWH, it is necessary to hold the inlet (2)
and outlet adapters (3) using the crescent wrench in order not to damage the
internal connections of the metal parts of the water heater.
Connect the shower nozzle (7) using long flexible hose (6) or spout (4) with
the hot water outlet (3) – right pipe EWH marked “Outlet”. For to connect to the
hot water outlet (3) both shower nozzle (7) with flexible hose (6) and spout (4) at
the same time use the adapter (5).
When connected, supply water to the EWH (1). Shut down the flow controller
(11) after EWH is filled with water.
It is forbidden to put any isolation valves, which could bar free water
flow, on the outlet.
It is forbidden to use the connecting pipes, which were used previously.
6.3. Connection to the electric grid.
In order to connect the EWH of the models THERMEX 500 STREAM and
THERMEX 700 STREAM to the electric grid it is necessary to put down the
upper cover of the water heater and connect the conductive electric cable to the
terminal block on the EWH housing as follows: (6, Figure 4) according to
electric scheme : L – “phase”, N – “null”, E – “earth”.
For connection we recommend to use a three-core cable (not delivered) with
sectional area of each core not less than 4 mm2 (for models THERMEX 500
STREAM иTHERMEX 700 STREAM). Before starting the electric wiring
Installation It Is necessary to cut off power from the power supply net to which
the EWH Is connected. Firstly, the cable Is connected to the EWH and then to
the switch. In order to disconnect the EWH from the power supply net one
should use a two-pole switch with plug fuse, with gap between the disengaged
contacts not less than 3 mm at all poles, 30A for THERMEX 500 STREAM and
40A for THERMEX 700 STREAM (not included into the delivery set). Before
putting the EWH into operation it is necessary to fix the cover.
The EWH model THERMEX 350 STREAM has an integrated plugged cable.
In order to connect the given model to the electric grid it is enough to put the
cable plug into the socket, which must have an earth connector and bear capacity
of 3.5 KW. If plugged cable of the THERMEX 350 STREAM model is
damaged, on order to avoid the danger, it should be replaced by the manufacturer
or by his agent or by any other qualified person. The socket must be located in
the place without water ingress. The electric wiring, security and switchgears
must stand current load not less than 30A for THERMEX 500 STREAM, not
less than 40A for THERMEX 700 STREAM and not less than 20A for
THERMEX 350 STREAM.
It is forbidden to use water heater without grounding!
7. OPERATION
Switch on the EWH power supply inserting the power cord plug into the
socket or switching on the multipolar switch.
Softly turn the cold water supply tap handle (11, Figure 2). Press the network
switch button on the front plate. In this case the light indication of the network
switch button will switch on (9, Figure 4).
Wait for 15-20 sec until the outlet water temperature becomes stable. If the
EWH outlet water is very cold, reduce the water supply, if very hot - it is
necessary to increase the water supply.
The two-button EWH models have different power modes. For THERMEX
500 STREAM the left button stands for the 2.0 kW mode; the right - for 3.0 kW,
totally - for 5.0 kW. For THERMEX 700 STREAM both buttons separately
correspond to 3.5 kW, totally - to 7.0 kW. The user may choose any suitable
power mode.
After use of the EWH turn the water heater off by pressing the network
switch button/buttons. The water heating will stop; the light indicators will go
out. With the cork cut off the cold water supply to the EWH.
If you are not going to use electric water heater in a short term, pull power
cord plug out of the socket (THERMEX 350 STREAM) or switch off the
multipolar switch (THERMEX 500 STREAM, THERMEX 700 STREAM).
8. TECHNICAL MAINTENANCE.
Keep the EWH surface safe from damages, blows und influence of active
solvents.
Wipe the dirty EWH surfaces with soft damp cloth moistured in soapy water. Do
not use here any abrasive or chemically active detergents.
Rub the sprinkle shower and kitchen nozzles from the dirt regularly.
All works for the EWH maintenance must be done after it was disconnected
from the electrical network.
9. UTILIZATION
Provided that the Installation, operation and maintenance rules are observed
and the consumed water quality complies with the current standards, the
manufacturer sets the 3 years service life time of the EWH.
All water heater components consist of materials which In case of
necessity allow ecologically sustainable utilization to be carried out
according to norms and rules of the buyer’s country of residence and
where the EWH is being used.
The manufacturer has the right to introduce changes into the design and
characteristics of the water heater without preliminary notification.
MANUFACTURER GUARANTEE
The manufacturer sets the water heater guarantee period for 2 years.
The guarantee period starts from the EWH date of sale. In case the date of
sale on the shop stamp is absent or has been corrected the guarantee period starts
from the date of the water heater production mentioned on the nameplate on the
appliance housing. The serial number consists of 13 numbers. 3rd and 4th
numbers of the serial number – year of production, 5th and 6th – month of
production, 7th and 8th - day of production.
The claims during the guarantee period shall be accepted only in the presence
of this manual with marks of the sales company and the nameplate on the EWH
housing.
The guarantee covers only the water heater used. The guarantee for
installation and putting into operation is provided by the installation company.
Repairs or replacement of the components and accessories during the
guarantee period shall not prologue the total EWH guarantee period.
The warranty obligations cease to be in force in case:
-if user violates protective measures and Installation, connection,
operation and maintenance rules stated In this manual;
-mechanical damages due to negligent storage, transport and installation;
-damages due to water freezing;
-premature wearing of the EWH and choking due to the use of the water
with mechanical and chemical impurities (it is necessary to use the filter);
-when EWH is used for the commercial purposes.
All the models of instantaneous water heater THERMEX STREAM are ISO
certified and conform to the requirements of GOST R 52161.2.35-2008, GOST
R 51318.14.1- 2006.
Certificate of conformity ROSS RU.XП28.B18575; TC RU C-
RU.AB87.B.00005.
Manufacturer: "EDISSON Со", INN 7810252827, 187000, Russia, 44,
Moskovskoe Shosse, Tosno, Leningrad Region.
Contact Manufacturer`s service center concerning claims, warranty and after
sales service:
In other regions contact the store and customer care department ,indicated by
the seller, concerning claims, warranty and after sales services:
SALE NOTE
Model ________________ Serial number _______________________
Selling Date of sale dd/mm/yyyy ________________________
Seller: __________________________________________
Signature ____________________ Stamp
The water heater is fully packaged. I do not have any complains about the
configuration. I have received the user`s guide with the necessary notes. I
acknowledged the rules of operation and accept the warranty terms and
conditions.
Buyer's Signature: __________________________________

This manual suits for next models

2

Other THERMEx Water Heater manuals

THERMEx GIRO 50 User manual

THERMEx

THERMEx GIRO 50 User manual

THERMEx Trent User manual

THERMEx

THERMEx Trent User manual

THERMEx Combi Inox IRP 150V User manual

THERMEx

THERMEx Combi Inox IRP 150V User manual

THERMEx Thermo 30 V Slim User manual

THERMEx

THERMEx Thermo 30 V Slim User manual

THERMEx Eterna Series User manual

THERMEx

THERMEx Eterna Series User manual

THERMEx Nobel N 10 O User manual

THERMEx

THERMEx Nobel N 10 O User manual

THERMEx ER Series User manual

THERMEx

THERMEx ER Series User manual

THERMEx Nova 50 Series User manual

THERMEx

THERMEx Nova 50 Series User manual

THERMEx Thermo 30 V Slim User manual

THERMEx

THERMEx Thermo 30 V Slim User manual

THERMEx Vision 30 V User manual

THERMEx

THERMEx Vision 30 V User manual

THERMEx H 10 O User manual

THERMEx

THERMEx H 10 O User manual

THERMEx PRAKTIK Series User manual

THERMEx

THERMEx PRAKTIK Series User manual

THERMEx ID 30 V (smart) User manual

THERMEx

THERMEx ID 30 V (smart) User manual

THERMEx IF 30 User manual

THERMEx

THERMEx IF 30 User manual

THERMEx CHAMPION Silverheat Series User manual

THERMEx

THERMEx CHAMPION Silverheat Series User manual

THERMEx ERT 50 User manual

THERMEx

THERMEx ERT 50 User manual

THERMEx IF 30 V (pro) User manual

THERMEx

THERMEx IF 30 V (pro) User manual

THERMEx Nobel Series User manual

THERMEx

THERMEx Nobel Series User manual

THERMEx IF 30 (smart) User manual

THERMEx

THERMEx IF 30 (smart) User manual

THERMEx SYSTEM Series User manual

THERMEx

THERMEx SYSTEM Series User manual

THERMEx SafeDry Pro Series User manual

THERMEx

THERMEx SafeDry Pro Series User manual

THERMEx ES 30 V User manual

THERMEx

THERMEx ES 30 V User manual

THERMEx ER 50 V User manual

THERMEx

THERMEx ER 50 V User manual

THERMEx ISP 30 V User manual

THERMEx

THERMEx ISP 30 V User manual

Popular Water Heater manuals by other brands

Mex CUBE 35E instruction manual

Mex

Mex CUBE 35E instruction manual

Takagi T-M50 Installation manual and owner's guide

Takagi

Takagi T-M50 Installation manual and owner's guide

Webasto Thermo Top E installation instructions

Webasto

Webasto Thermo Top E installation instructions

Kenmore 153.313340 owner's manual

Kenmore

Kenmore 153.313340 owner's manual

Bradford White RE250LN6-1NCWW Installation/operation instruction manual

Bradford White

Bradford White RE250LN6-1NCWW Installation/operation instruction manual

Airxcel Aqua-Hot Reporter 400 Series installation manual

Airxcel

Airxcel Aqua-Hot Reporter 400 Series installation manual

Dražice OKC 300 NTR/1MPa Operation and installation manual

Dražice

Dražice OKC 300 NTR/1MPa Operation and installation manual

Regulus RDC 200Z Installation and operation manual

Regulus

Regulus RDC 200Z Installation and operation manual

STIEBEL ELTRON SH 30 S Operating and installation instructions

STIEBEL ELTRON

STIEBEL ELTRON SH 30 S Operating and installation instructions

Rinnai TANKLESS WATER HEATER V53E Operation and installation manual

Rinnai

Rinnai TANKLESS WATER HEATER V53E Operation and installation manual

Wolf SPU-2 Assembly instructions

Wolf

Wolf SPU-2 Assembly instructions

Grant MonoWave Series Installation, servicing and user instructions

Grant

Grant MonoWave Series Installation, servicing and user instructions

Calorex ELEVA 4 KW Installation, maintenance and operation manual

Calorex

Calorex ELEVA 4 KW Installation, maintenance and operation manual

Beretta IDRABALCONY 11 installer and user manual

Beretta

Beretta IDRABALCONY 11 installer and user manual

EemaX PA018208T2T Installation guide and owner's manual

EemaX

EemaX PA018208T2T Installation guide and owner's manual

Rheem 199,000 Btu/hr user manual

Rheem

Rheem 199,000 Btu/hr user manual

andrews WHX42 Installation guide, operation and maintenance manual

andrews

andrews WHX42 Installation guide, operation and maintenance manual

Nofer SB150N User and installation manual

Nofer

Nofer SB150N User and installation manual

manuals.online logo
manuals.online logoBrands
  • About & Mission
  • Contact us
  • Privacy Policy
  • Terms and Conditions

Copyright 2025 Manuals.Online. All Rights Reserved.