Thermolab Sartorius MC5 User manual

Liquid Handling
Application Notebook
Tips on how to pipette

2

3
Contents
Pipetting terms ........................................................................................................ 4
Types of pipettes ..................................................................................................... 4
General guidelines and pipetting techniques .......................................................... 7
Recommendations for pipetting different compounds ......................................... 10
Pipetting guidelines for selected compounds ....................................................... 11
Pre enting cross-contamination ............................................................................ 14
Finntip Filter tests .................................................................................................. 15
The plastics of arious Finntips ............................................................................. 15
Troubleshooting .................................................................................................... 16
Calibrating your pipettes ....................................................................................... 17
Formulas for calculating results ............................................................................ 21
Con ersion tables .................................................................................................. 23
Ensuring optimum performance ........................................................................... 24
Factors affecting the accuracy of air displacement pipettes ................................. 26
Maintenance of your Finnpipette .......................................................................... 27
Autocla ing ........................................................................................................... 27
UV resistance ........................................................................................................ 27
General guidelines for decontaminating Pipettes
when Working with Different Liquids .................................................................... 28
Chemical compatibility of plastics ......................................................................... 29
Frequently asked questions .................................................................................. 31
Making your lab work lighter ................................................................................. 34
Finnpipette Warranty Policy ................................................................................... 35

4
Pipetting terms
Aspirate - to draw up the sample
Dispense - to deli er the sample
Blow-out - to empty the tip completely
Calibration check - checking the difference between the dispensed olume
and the selected olume
Ad ustment - altering the pipette so that the dispensed olume is within the
specifications
Types of pipettes
Although Thermo Labsystems supplies pipettes for all application needs, most lab-
oratories are equipped with two types of pipettes.
Air displacement pipettes are meant for general use with aqueous solutions.
Positi e displacement pipettes are used for high iscosity and olatile liquids.
Both types of pipettes ha e a piston that mo es in a cylinder or in a capillary. In
air displacement pipettes, a certain olume of air remains between the piston and
the liquid. In positi e displacement pipetting, the piston is in direct contact with
the liquid.
Air displacement pipetting
Air displacement pipetting, used for standard pipetting applications, is highly accu-
rate. Howe er, conditions such as atmospheric pressure as well as the specific
gra ity and iscosity of the solution may ha e an effect on the performance of air
displacement pipettes.
• Finnpipettes for air displacement pipetting:
Finnpipette Digital, Finnpipette Colour, Finnpipette Fixed Volume,
Finnpipette BioControl, Finnpipette Multistepper, Finnpipette Varichannel
• Finntips for air displacement pipetting:
Finntip (standard), Finntip Filter, Finntip BioCon, Finntip Multisteppper,
Finntip Band 4, Finntip Wide

5
How does an air displacement pipette work?
1. The piston mo es to the appropriate position when the olume is set.
2. When the operating button is pressed to the first stop, the piston expels the
same olume of air as indicated on the olume setting.
3. After immersing the tip into the liquid, the operating button is released.
This creates a partial acuum and the specified olume of liquid is aspirated
into the tip.
4. When the operating button is pressed to the first stop again, the air dispenses
the liquid. To empty the tip completely the operating button is pressed to the
second stop (blow out).
2.
4.
1.
3.

6
Positive displacement pipetting
Positi e displacement pipetting is used for applications like PCR and other DNA
amplification techniques. The microsyringe tips used in positi e displacement pi-
pettes are disposable. This helps to a oid sample-to-sample cross-contamination
(also known as sample carry-o er), and contamination due to the aerosol effect.
• Finnpipettes for positive displacement pipetting:
Finnpipette Stepper, Finnpipette PDP
• Finntips for positive displacement pipetting:
Finntip Stepper, Finntip PDP
How does a positive displacement pipette work?
1. The piston mo es to the appropriate position when the olume is set.
2. When the operating button is pressed to the first stop, the piston descends
to the tip opening.
3. After the tip is immersed into the liquid, the operating button is released.
The plunger is then raised and a partial acuum is created. This causes
the liquid to enter the tip.
4. When the operating button is pressed again, the piston descends, expelling
the liquid from the tip.
1. 2. 3. 4.

7
General guidelines
and pipetting techniques
General guidelines
- Check your pipette at the beginning of your working day for dust and dirt on
the outside. If needed, wipe with 70% ethanol.
- Set the olume within the range specified for the pipette.
- Hold the pipette so the ‘grippy finger rest’ rests on your index finger.
- To maximise accuracy, the pipette, tip and liquid should be at the same
temperature.
- Check that you are using tips recommended by the manufacturer. To ensure
accuracy, use only high-quality tips made from contamination-free
polypropylene.
- Tips are designed for single use. They should not be cleaned for reuse as their
metrological characteristics will no longer be reliable.
- Pre-rinsing (three - fi e times) the tip with the liquid to be pipetted impro es
accuracy, especially when using positi e displacement tips.
- A oid turning the pipette on its side when there is liquid in the tip. Liquid might
go to the interior of the pipette and contaminate the pipette.
- A oid contamination to or from fingers by using the tip ejector.
- Always store pipettes in an upright position when not in use. Finnpipette
stands are ideal for this purpose.
- Check calibration regularly, depending on the frequency of use and on the
application, but at least once a year. If used daily, a three-month inter al is
recommended. Follow the instructions for recalibration in the instruction
manual (see also page 17).

8
Forward pipetting
1. Press the operating button to the first stop.
2. Dip the tip into the solution to a depth of 1 cm, and slowly release the
operating button. Wait 1-2 seconds and withdraw the tip from the liquid,
touching it against the edge of the reser oir to remo e excess liquid.
3. Dispense the liquid into the recei ing essel by gently pressing the operating
button to the first stop. After one second, press the operating button to the
second stop. This action will empty the tip. Remo e the tip from the essel,
sliding it up the wall of the essel.
4. Release the operating button to the ready position.
Reverse pipetting
The re erse technique is used for pipetting solutions with a high iscosity or a ten-
dency to foam. This method is also recommended for dispensing small olumes.
Re erse pipetting is only possible with air displacement pipettes.
1. Press the operating button to the second stop.
2. Dip the tip into the solution to a depth of 1 cm, and slowly release the
operating button. This action will fill the tip with a olume that is larger than
the set olume. Wait 1-2 seconds and withdraw the tip from the liquid, touching
it against the edge of the reser oir to remo e excess liquid.
3. Dispense the liquid into the recei ing essel by pressing the operating button
gently and steadily to the first stop. This olume is equal to the set olume.
Hold the button in this position. Some liquid will remain in the tip, and this
should not be dispensed.
4. The liquid remaining in the tip can be pipetted back into the original solution or
disposed together with the tip.
5. Release the operating button to the ready position.
Ready position 1 2 3 4
First stop
Second stop
Ready position 1 2 3 4 5
First stop
Second stop

9
Repetitive pipetting
This technique is intended for repeated pipetting of the same olume.
1. Press the operating button to the second stop.
2. Dip the tip into the solution to a depth of 1 cm, and slowly release the
operating button. Withdraw the tip from the liquid, touching it against the edge
of the reser oir to remo e excess liquid.
3. Dispense the liquid into the recei ing essel by gently pressing the operating
button to the first stop. Hold the button in this position. Some liquid will remain
in the tip, and this should not be dispensed.
4. Continue pipetting by repeating steps 2 and 3.
Pipetting whole blood
Use forward technique steps 1 and 2 to fill the tip with blood (do not prerinse the
tip). Wipe the tip carefully with a dry clean cloth.
1. Dip the tip into the blood and press the operating button to the first stop.
Make sure the tip is sufficiently below the surface.
2. Release the operating button slowly to the ready position. This action will fill
the tip with blood. Do not remo e the tip from the solution.
3. Press the operating button to the first stop and release slowly. Repeat this
process until the interior wall of the tip is clear.
4. Press the operating button to the second stop and completely empty the tip.
Remo e the tip by sliding it along the wall of the essel.
5. Release the operating button to the ready position.
Ready position 1 2 3 4
First stop
Second stop
Ready position 1 2 3 4 5 6
First stop
Second stop

10
Recommendations for pipetting
different compounds
Solution/compound
Aqueous solution
Viscous solution
Volatile compounds
Nucleotide solutions
Radioactive compounds
Acid/alkalis
Toxic samples
Examples
Buffers, diluted salt solutions
Protein and nucleic acid solutions,
glycerol, T een 20/40/60/80
Methanol, hexane
Genomic DNA, PCR products
14
Carbonate,
3
H-thymidine
H
2
SO
4
, HCl, NaOH
Pipette
Air displacement
Air displacement
Positive displacement
Positive displacement
Air displacement
Air displacement
Positive displacement
Air displacement
Positive displacement
Air displacement
Positive displacement
Tip
Standard
Standard or ide orifice
Positive displacement
Positive displacement
Filter
Filter or ide orifice
Positive displacement
Filter
Positive displacement
Filter
Positive displacement
Pipetting
technique
For ard
Reverse
For ard
For ard
For ard
For ard
Comments
Pipette slo ly to avoid bubble formation.
Pipette rapidly to avoid evaporation. Carbon filter tips
prevent vapor going into the pipette very effectively
For genomic DNA ide orifice tips can be used to
eliminate mechanical shearing.

11
Pipetting guidelines for selected
compounds
Body Fluids
Whole Blood
Pipette + tip combination:
Choose an air displacement pipette and a standard or wide orifice tip.
Technique:
Use the whole blood pipetting technique. Re erse pipetting should be used if high
accuracy is needed.
Notice:
Some blood can remain in the tip and on the outer surface. Wipe the tip against
the edge of the essel to remo e excess liquid outside the tip before dispensing.
Serum
Pipette + tip combination:
Choose an air displacement pipette and a standard or wide orifice tip.
Technique:
Use the whole blood pipetting technique. Re erse pipetting should be used if high
accuracy is needed.
Notice:
Residual serum can sometimes be found on the outer surface of the tip. Wipe the
tip against the edge of the essel to remo e excess liquid outside the tip before
dispensing.
Oily fluids
Glycerol
Pipette + tip combination:
Choose an air displacement pipette and a standard or wide orifice tip.
Technique:
For high accuracy of performance, use the re erse pipetting technique.
Notice:
Oily fluids are difficult to pipette because of formation of air bubbles. Filling must
be done ery slowly to pre ent air bubbles. Wipe the tip against the edge of the

12
essel to remo e excess liquid outside the tip before dispensing. The use of a pos-
iti e displacement pipette and tip is also useful for pipetting glycerol.
Tween 20, 10% solution
Pipette + tip combination:
Choose an air displacement pipette and a standard or wide orifice tip.
Technique:
Use the re erse pipetting technique.
Notice:
Tween has a ery high iscosity; to make pipetting easier, it should be diluted to a
10% solution. In any case pipetting will not be accurate; some liquid will stay in-
side the tip. Aspiration and dispensing should be done slowly. The use of a posi-
ti e displacement pipette and tip is also ad isable for pipetting Tween 20.
Bronidox L, 10% (preservative)
Pipette + tip combination:
Choose an air displacement pipette and a standard or wide orifice tip
Technique:
Use the re erse pipetting technique.
Notice:
Bronidox L is ery iscose; the aspiration and dispensing should be done slowly or
a positi e displacement pipette and tip should be used.
Salt solutions
10 x PBS, 0.1M
NaCl, 3M
Pipette + tip combination:
Choose an air displacement pipette and a standard tip.
Technique:
Use the forward pipetting technique. Prewetting of the tip before aspiration in-
creases accuracy.

13
Concentrated acids and bases
H2SO4
Pipette + tip combination:
Choose an air displacement pipette and a filter tip.
Technique:
Use the forward pipetting technique.
NaOH
Pipette + tip combination:
Choose an air displacement pipette and a filter tip.
Technique:
Use the forward pipetting technique.
Notice:
Some acids or bases aporise easily (e.g. trifluoroacetic acid). Do the pipetting
quite rapidly to minimise apour formation.
Nucleic acids
DNA & RNA solutions
Pipette + tip combination:
Choose an air displacement pipette and a filter tip or a positi e displacement
pipette and tip.
Technique:
Use the forward pipetting technique
Notice:
For genomic DNA wide orifice tips can be used to eliminate mechanical shearing.
Volatile compounds
Pipette + tip combination:
Choose an air displacement pipette and filter tip or positi e displacement
pipette and tip.
Technique:
Use the forward pipetting technique.

14
Notice:
1. To get accurate results, calibrate the pipette with the olatile compound you
want to pipette. If you use air displacement pipettes, aspirate and dispense the
liquid a few times keeping the tip in the liquid. By doing so, the air inside the
pipette will be saturated with apour of the olatile compound.
2. Pipette rapidly to a oid e aporation when using air displacement pipettes.
3. It is recommended to use positi e displacement pipettes for highly olatile
compounds, since the built-in piston tip is in direct contact with the liquid.
Preventing cross-contamination
Pipette-to-sample
A contaminated pipette or contaminated tips can cause contamination of samples.
Pre ention:
• Use sterilised tips or sterilised filter tips and if possible autocla e the pipette.
• Change the tip after pipetting of each sample.
Sample-to-pipette
Samples or aerosols from samples can enter the cone of the pipette.
Pre ention:
• Keep the pipette ertical when pipetting in order to pre ent liquid from running
into the pipette body.
• Release the push-button slowly.
• To a oid aerosol contamination, use filter tips or use a positi e displacement
pipette and tips.
• Store the pipette ertically.
Sample-to-sample (carry-over)
The remains of sample A can mix with next sample B inside the tip and may cause
a false test result.
Pre ention:
• Change the tip after each sample.
• If you suspect that your pipette is contaminated, autocla e or clean your pipette
(see “Maintenance of your Finnpipette” and “Autocla ing”, page 27).

15
Finntip Filter tests
Acid test
• 35% and 5% trifluoroacetic acid (TFA) was used as test liquid.
• Finntip Filters pre ented acids apours of a 35% TFA solution of coming
through the filter.
• When pipetting a 5% solution of TFA using a standard tip, no apour came into
the interior of the pipette.
DNA test
• DNA aerosols with sample concentrations of 20, 50 and 100 µg µl-1 were blown
onto the filters.
• Finntip Filters pre ented DNA aerosol of these concentrations coming through
filter into the interior of the pipette.
The plastics of various Finntips
PE=Polyethylene Autoclavable (121°C,20 min)
PP=polypropylene
Finntip Racks
Standard tips - Finntips
®
Finntip Filters
Tip
Filter
Finntip PDP
Piston
Tip
Temperatures reater than 121°C dama e piston
Finntip Stepper
Piston
Tip

16
Troubleshooting
Finnpipette
®
Digital
Problem Possible cause Solution
Leakage Tip incorrectly attached. Attach tips firmly, keeping pipette vertical and
pressing pipette evenly to rack. Do not bang.
Wrong tip size or shape. Check that the size and shape are correct.
Pipette incorrectly assembled after Check the assembly according
taking apart. to the instructions.
Foreign bodies bet een the piston, Clean tip cone module; attach ne tips.
0-ring and tip cone.
Insufficient amount of grease on Clean and grease 0-ring and tip cone;
cylinder and 0-ring. apply grease.
Damaged 0-ring. Change the 0-ring.
Inaccurate Incorrect operation. Follo instuctions carefully.
dispensing
Pipette incorrectly assembled Reassemble according to the instructions.
after disassembling.
Un anted substances inside the pipette. Clean the interior of the pipette.
Calibration altered; caused by
misuse, for example:
• Faulty calibration - High viscosity Recalibrate according to the instructions.
fluids may require recalibration
• Uneven dispensing Recalibrate ith the liquids in question.
Make sure that temperatures of tip
and liquids used are the same.
Aseptic Contaminated tips. Autoclave at 121°C for 20 minutes,
working orking ith gloves.
Finnpipette
®
BioControl
Problem Possible cause Solution
Leakage Tip incorrectly attached. Attach tips firmly.
Foreign bodies bet een Clean and grease 0-ring and tip cone.
the piston, 0-ring and tip cone. Use silicon grease.
Insufficient amount of grease Clean and grease 0-ring and tip cone.
on cylinder and 0-ring. Use silicon grease.
Damaged 0-ring. Change the O-ring.
Inaccurate Incorrect operation. Follo instructions carefully.
dispensing Tips attached incorrectly. Attach tips firmly.
Calibration altered Recalibrate.
possibly by misuse.
Inappropriate calibration. Recalibrate.
High viscosity liquids may
require recalibration.
isplay is Battery is discharged. Mount the pipette in the recharge stand, and
blank make sure that the light beside the display is on.
Po er is OFF. Move the pipette slightly.
CALIBRATE Pipette is in reset mode. Lock the latch and select the module.
text on the pipette Press the dual stop trigger to the
won’t operate second stop.
Pipette won’t Tip cone module is Release the latch, attach module firmly
operate improperly attached. to the pipette and lock the latch;
press trigger to the second stop.
Module does Ne module. Close the latch ithout the module. Accept
not engage the volume range. Drive the coupler out of the
pipette and keep pressing the trigger. Open
the latch and push the module in the pipette
a fe times. Release the trigger and try again.

17
Calibrating your pipettes
Calibration of Pipettes
Calibration of pipettes officially means determining the difference between the dis-
pensed olume and the selected olume. Adjustment means altering the pipette
so that the dispensed olume is within certain specifications.
All Finnpipettes are factory calibrated and adjusted to gi e the olumes as spec-
ified with distilled or deionised water. During factory calibration, performance is
checked with fi e different weighings at both the maximum olumes of the range
and at the minimum or 10% of the maximum olume, whiche er is higher. Finnpi-
pettes are designed to permit recalibration and adjustment for different tempera-
tures and arious iscous liquids.
Pipette calibration standards
The most common standards concerning pipette calibration are in a state of
change. The German DIN 12650 is most commonly used in Europe, but a new er-
sion of the international standard ISO 8655 is coming in the near future, which will
be a further de elopment of DIN 12650. The latest drafts of both standards specify
the gra imetric test method for accuracy, precision and permitted errors. The spec-
ifications of all Finnpipettes conform to both DIN 12650 and ISO 8655 standards.
Calibration of Pipettes in a Quality System
The main objecti e of pipette calibration in a quality system is to ensure that meas-
urements are made with the intended accuracy. Very often error limits are taken
from the manufacturer’s specifications, while far less accuracy is required to per-
form the work. If these limits are not easily obtained, or ary, another option is to
set the limits according to accepted standards (DIN 12650 or ISO 8655). Howe er
if the laboratory work requires the highest accuracy, the manufacturer’s limits
should be used. Basically e ery user should define their own limits, according to
the application used and the ambient conditions.
Finnpipette Calibration Software is a Windows-based program designed for cal-
ibrating Finnpipettes and pipettes of any other brand.
To use the calibration software, simply install it according to the instructions.
Set the en ironmental conditions and start the calibration. Follow the on-screen
menus to complete the procedure. Once the settings are entered, the program cal-
culates the mean olume, accuracy and precision of the pipetted olume based on
up to 15 separate weighings. When using Sartorius or Precisa balances, the pro-
gram can be linked directly to the balance. The ad anced Finnpipette Calibration
Software automatically generates complete documents with passed/failed marks
depending on the limits in use for the quality system.

18
Device requirements and test conditions
Balance:
The scale graduation alue of the balance should be chosen according to the se-
lected pipette olume.
Volume range Readable graduation Sartorius model (example)
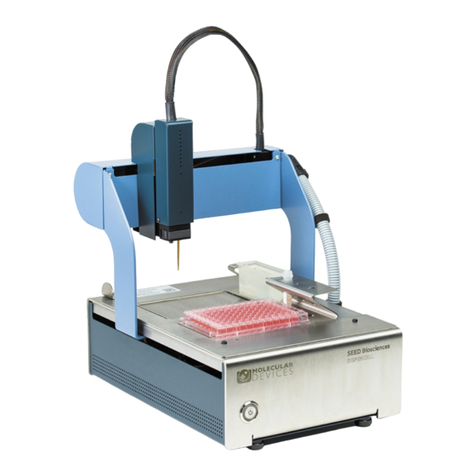
Under 10 µl 0.001 mg Sartorius MC5
10 - 100 µl 0.01 mg Sartorius MC210
Abo e 100 µl 0.1 mg Sartorius MC210
Note:
Check the calibration of your balance regularly using known weights.
Test liquid:
Water, distilled or deionised, “Grade 3”, conforming to ISO 3696. The test water is
held in the calibration room for at least 2 hours before calibration to reach equilibri-
um with the test room conditions.
Test room:
Tests are performed in a draught-free room at a constant (± 0.5°C) temperature of 20°C
to 25°C. Relati e humidity must be abo e 55%. Especially with olumes under 50 µl,
the air humidity should be as high as possible to reduce the e aporation loss effect.
- The pipette, the water and the air in the test room should be at the same
temperature.
- A new tip should be pre-wetted 3 to 5 times to impro e the accuracy.
- Always pipette water from a reser oir, do not take it back from the balance.
- Check the calibration regularly, depending on the frequency of use and on the
application, but at least once a year. If used daily, a three-month inter al is
recommended.
Procedures to check calibration:
Perform the calibration check using the pipetting technique you use in your appli-
cations.
Manual single channel pipettes
- The pipette is held in the calibration room for at least 2 hours before calibration
to reach equilibrium with the test room conditions.
- The pipette is checked at the maximum olume (nominal olume) and at the
minimum olume or 10% of the maximum olume, whiche er is higher.
For example, Finnpipette 0.5 - 10 µl is tested at 10 µl and 1 µl.
- A series of ten pipettings is performed with both olumes.
- Calculate the accuracy and precision using the formulas below. If the calculated
results are within the limits gi en in the Instructions-for-use booklet, the pipette
calibration is correct. If not, the pipette has to be adjusted (see page 19) with
the lower olume and checked again.

19
Manual multichannel pipettes
- The pipette is held in the calibration room for at least 2 hours before calibration
to reach equilibrium with the test room conditions.
- The pipette is checked at the maximum olume (nominal olume) and at the
minimum olume or 10% of the maximum olume, whiche er is higher.
For example, Finnpipette 0.5 - 10 µl is tested at 10 µl and 1 µl.
- Both olumes are tested with the two end channels.
- A series of ten pipettings is performed with both olumes.
- Calculate the accuracy and precision using the formulas below. If the calculated
results are within the limits gi en in the Instructions-for-use booklet, the pipette
calibration is correct. If not, the pipette has to be adjusted with the lower
olume (see below) and both end channels ha e to be checked again.
Finnpipette BioControl single channel module
- The pipette is held in the calibration room for at least 2 hours before calibration
to reach equilibrium with the test room conditions.
- Use the Finnpipette BioControl calibration software that comes with
the pipette.
- The pipette is checked at the maximum olume (nominal olume) and at the
lower calibration olume, which can be found from the Instructions-for-use
booklet or from the Finnpipette BioControl calibration software.
- A series of ten pipettings is performed with both olumes.
- Calculate the accuracy and precision of both series using the formulas below
and compare to the limits gi en in the “Checking the calibration” chapter in the
Instructions-for-use booklet. If the calculated results are within the selected
limits, the pipette calibration is correct. If not, adjust the pipette as
described below.
Finnpipette BioControl multichannel module
- The pipette is held in the calibration room for at least 2 hours before calibration
to reach equilibrium with the test room conditions.
- The pipette is checked at the maximum olume (nominal olume) and at the
lower calibration olume, which can be found from the Instructions-for-use
booklet or from the Finnpipette BioControl calibration software.
- Both olumes are tested with the two end channels.
- A series of ten pipettings is performed with both olumes.
- Calculate the accuracy and precision of both series using the formulas below
and compare to the limits gi en in the “Checking the calibration” chapter in the
Instructions-for-use booklet. If the calculated results are within the selected
limits, the pipette calibration is correct. If not, adjust the pipette as
described below.
Procedures to ad ust the pipette:
Manual single channel pipettes
- The adjustment is done at the lower olume.
- Place the ser ice tool that comes with the pipette into the openings of the

20
calibration nut at the top of the handle.
- Turn the ser ice tool clockwise to increase the olume or counter clockwise to
decrease the olume.
- After the adjustment, check the calibration as described abo e.
Manual multichannel pipettes
- The adjustment is done at the lower olume with one of the middle channels.
- Place the ser ice tool that comes with the pipette into the openings of the
calibration nut at the top of the handle.
- Turn the ser ice tool clockwise to increase the olume or counter clockwise to
decrease the olume.
- After the adjustment, check the calibration as described abo e.
Finnpipette BioControl single channel module
- Adjustment is done in the calibration mode. To change the current calibration,
do as follows:
1. Start the calibration software that comes with the pipette.
2. Choose the olume range.
3. Enter the mean olume of the ten pipettings performed with both olumes
(done in the calibration check) to the fields.
4. Take the pipette and determine the alues of the HK- and PK-factors: push
down the MODE-button and keep it down and then push the + and -
buttons as well. CALIBRATE text is now blinking, push SET to accept. The
current HK-factor is now blinking followed by the PK-factor. Note: These
factors ha e different alues depending on the module, so please check
that you choose the right module.
5. Enter these factors to the OLD FACTORS fields of the calibration software.
6. To get the new factors, click the CALCULATE button. The new factors will
be displayed.
- Alternati ely the Finnpipette Calibration Software may be used to determine the
new HK- and PK-factors.
- Take the pipette again and change the HK- and PK-factors with + and - buttons,
then accept the new alues by pushing the SET button.
- After the adjustment, check the calibration as described abo e. When using the
Finnpipette Calibration Software, continue according to the on-screen menus
after entering the new alues for HK- and PK-factors to the handle unit.
Finnpipette BioControl multichannel module
- Adjustment is done in the calibration mode. To change the current calibration,
do as follows:
1. Start the calibration software that comes with the pipette.
2. Choose the olume range.
3. Enter the mean olume of the ten pipettings performed with both olumes
(done in the calibration check) to the fields.
4. Take the pipette and determine the alues of the HK- and PK-factors: push
down the MODE-button and keep it down and then push the + and -
buttons as well. CALIBRATE text is now blinking, push SET to accept. The
current HK-factor is now blinking followed by the PK-factor. Note: These
This manual suits for next models
1
Table of contents

