Thermopatch NL-28 User manual

NL-28
thermopatch.com
NL-28
V. 1.0 ENG
Jan2015
User manual
CATTENTION!
All persons involved in installation, commissioning,
operation, maintenance and repair of this product
should be made available to these instructions.

thermopatch.com
Manual NL-28 / mn_ENG_V1.0 original
2
V. 1.0 ENG
Jan2015
Copyrights
© 2016, Thermopatch bv, Almere, The Netherlands.
No part of this publication may be reproduced by any means
without the prior written permission of Thermopatch bv,
The Netherlands.
Thermopatch and the Thermopatch logo, Thermoseal and
Thermocrest are registered trademarks of Thermopatch.

thermopatch.com
Manual NL-28 / mn_ENG_V1.0 original
3
V. 1.0 ENG
Jan2015
Introduction
Dear User,
Welcome to the growing group of Thermopatch users. Your
purchase has been manufactured with the utmost care
to ensure that you benet as long as possible from your
Thermopatch product.
The products by Thermopatch are designed with special
attention to your convenience. Should you discover any fault
or damage upon receipt of this product, please contact your
local Thermopatch vendor.
The manual has been prepared in accordance with NEN 5509
and in conformity with the Machinery Directive 2006/42/EC.
This user manual is intended not only for all users of the
machine, but also for those who install and maintain the
NL-28. The goal is to familiarize you with the operation,
to provide for safe working instructions and guidelines for
periodical maintenance.
CATTENTION!
In order to make safe and optimal use of the NL-28, it is important to take note of and
understand the contents of this manual.

thermopatch.com
Manual NL-28 / mn_ENG_V1.0 original
4
V. 1.0 ENG
Jan2015
Contents
Copyrights 2
Introduction 3
Contents 4
DECLARATION OF CONFORMITY 5
1. General description 6
1.1 Delivery 6
1.2 Conditions of warranty 6
2. Intended use 7
3. Technical specications 8
3.1 Specifications of the NL-28 8
4. Overview of safety tips and warnings 9
4.1 Safety tips and warnings 9
5. Transport and storage 10
5.1 Transport 10
6. Operating instruction 11
6.1 Installation 11
6.2 Operating the NL-28 12
6.3 Using ‘DRY’ Mode (Optional) 13
6.4 Using the control panel 13
6.5 Press time and temperature settings 14
6.6 Pressure Adjustment 17
7. Assembly and installation 18
7.1 Installation 18
8. Maintenance instructions 19
8.1 Maintenance 19
9. Technical annexes 20
Parts list 01 20
Trouble shooting 21
Drawing 01 22
Drawing 02 23
10. End of life 24

thermopatch.com
Manual NL-28 / mn_ENG_V1.0 original
5
V. 1.0 ENG
Jan2015
DECLARATION OF CONFORMITY
We,
Thermopatch B.V.
Draaibrugweg 14
1332 Almere
The Netherlands
herewith declare, on our own responsibility, that the
machinery:
Thermopatch NL-28,
which this declaration refers to, is in accordance with the
conditions of the following Directive(s):
2006/42/EG (Machinery directive)
2014/35/EG (EMC directive)
The Netherlands, Almere, 01-04-2016
Jan Bausch,
Director

thermopatch.com
Manual NL-28 / mn_ENG_V1.0 original
6
V. 1.0 ENG
Jan2015
1. General description
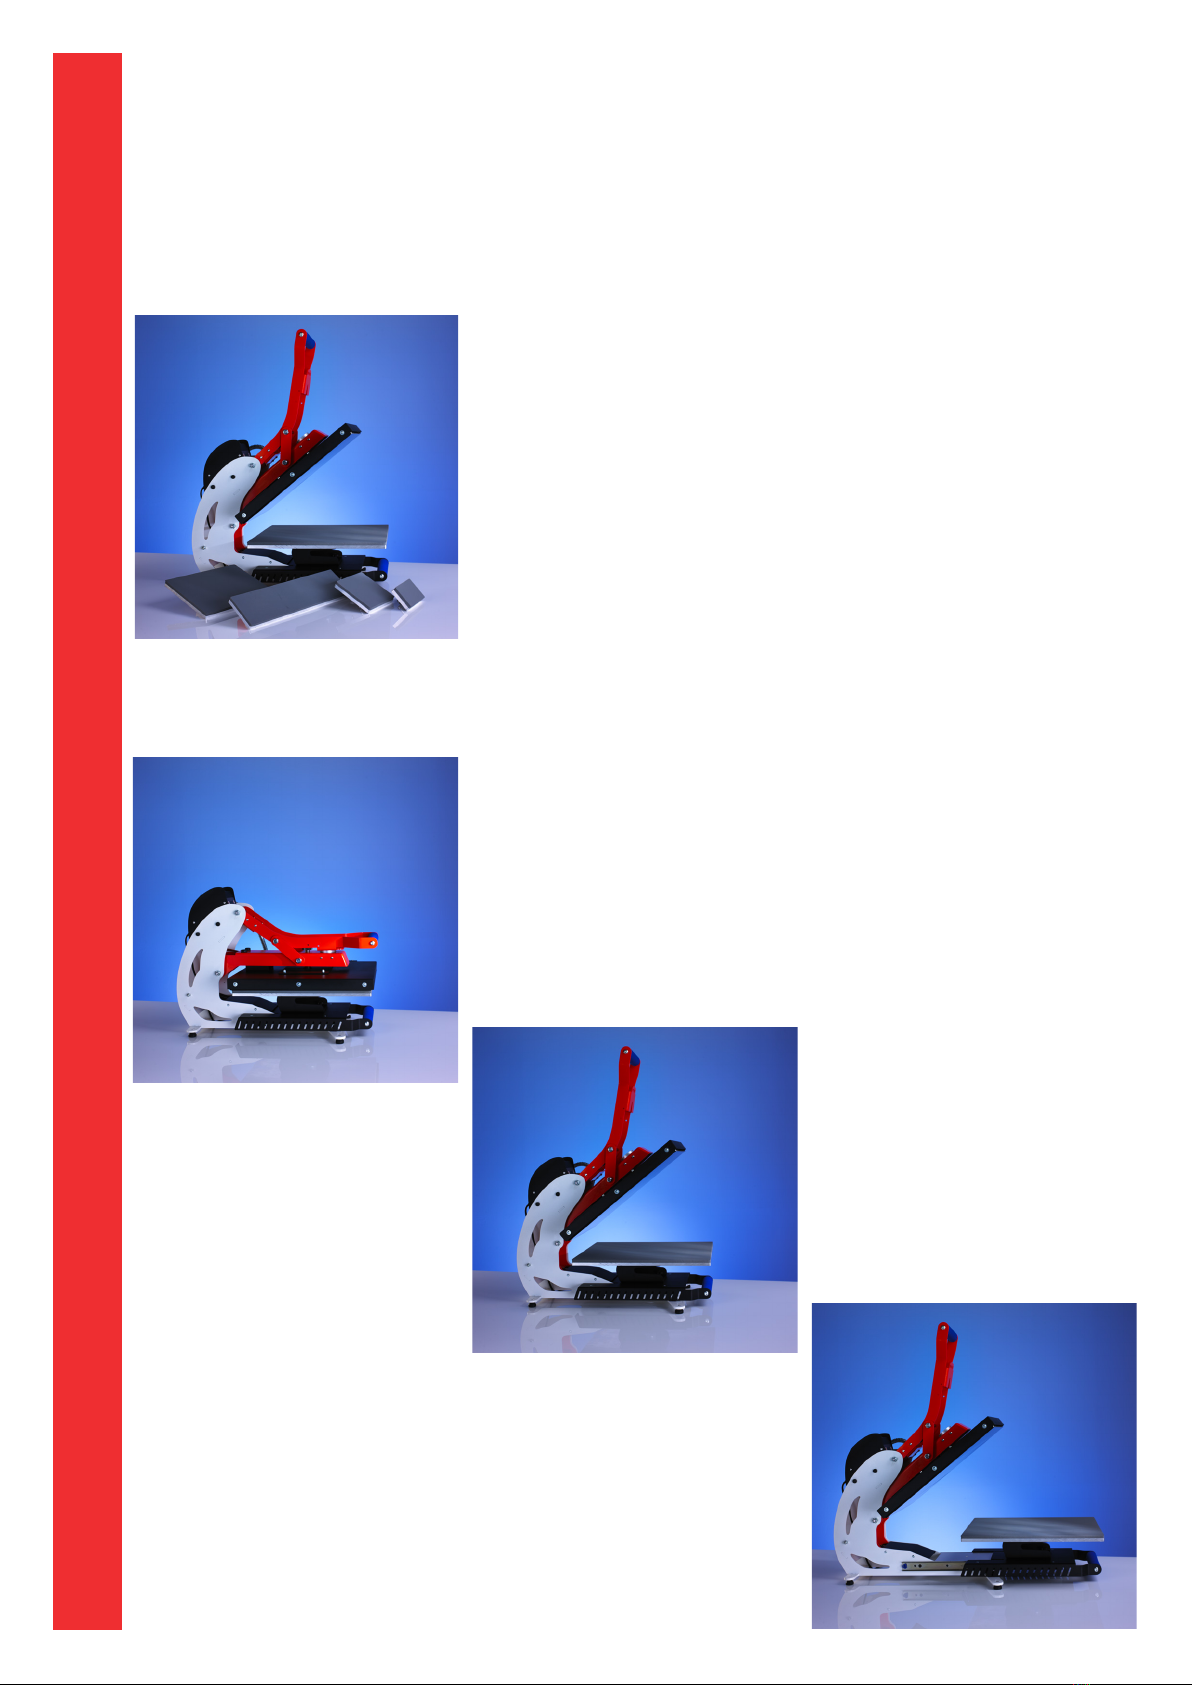
The NL-28 is a practical and universal heat seal press with a
sliding and reversible sealing pad for optimal use.
Textile labels, company emblems, repair patches, transfers,
in short all Thermopatch materials for marking and repair are
easily and permanently pressed on all types of fabric.
1.1 Delivery
The NL-28 is mounted onto a pallet and covered with a
plywood box.
The following articles are included:
• NL-28 heat seal machine
• Power cord
• Manual on CD-ROM
• CE Declaration of Conformity in the manual on the CD
If one of these articles should be missing or faulty, please
contact your Thermopatch supplier.
1.2 Conditions of warranty
Thermopatch points to its warranty and product liability
conditions as laid down in our conditions of sales. These can
be obtained at your Thermopatch supplier.

thermopatch.com
Manual NL-28 / mn_ENG_V1.0 original
7
V. 1.0 ENG
Jan2015
2. Intended use
The NL-28 is a heat seal machine that is intended for the
application of heat seal transfers but also repair patches, heat
seal emblems and labels. In short, all Thermopatch marking
and mending materials can be applied with the NL-28.
WARNING!
Any use other than described above can be dangerous and cause damage and thus qualies
as ‘misuse’ which excludes Thermopatch bv from any liability.

thermopatch.com
Manual NL-28 / mn_ENG_V1.0 original
8
V. 1.0 ENG
Jan2015
3. Technical specications
3.1 Specifications of the NL-28
Power 2500 Watts
Power supply 230 Volt 50/60 Hz
Operating temperature 180 °C
Temperature range 0-220 °C
Press Time range 0-9 min. 30 sec.
Thermoregulator accurate up to +/- 10%
Adjustable pressure range 0-450 g/cm²
Machine height (closed) 570 mm
Machine height (open) 969 mm
Machine width 439 mm
Machine depth 830 mm
Machine depth (lower platen forward) 1020 mm
Gross weight, including packaging 75 kg
Net weight 57 kg
Size sealing pads, size 400 x 500 mm
Fuses 11.0 Ampere
A-weighted noise level <70 dB (A)

thermopatch.com
Manual NL-28 / mn_ENG_V1.0 original
9
V. 1.0 ENG
Jan2015
4. Overview of safety tips and warnings
4.1 Safety tips and warnings
CATTENTION!
Make sure you are informed about the contents of this manual before starting to work with
the NL-28. This ensures an optimal and safe use of the machine.
CATTENTION!
Always turn the power o (unplug it) when you need to carry out maintenance work or when
cleaning the machine.
CATTENTION!
Take care that there is enough space around the machine. Cables and connections must not
get pinched. Although the heat radiation of the press is low, there should be
enough space for cooling down.
CATTENTION!
Avoid contact with the the heating
element.
CATTENTION!
Pull the fabrics tight around the press pad and ensure that your hands are away from
the sealing pad before operating the machine.
WARNING!
Hot surface
WARNING!
Electric tension

thermopatch.com
Manual NL-28 / mn_ENG_V1.0 original
10
V. 1.0 ENG
Jan2015
5. Transport and storage
5.1 Transport
When the machine needs to be moved, Thermopatch advises
to use the original packaging.
• For carrying the press, ensure that the press is cold
and move the press by holding the two plates (top and
bottom) at the same time (closed press).
• Ensure that the screw designated for «Transport security»
is in place to secure the platens for carrying.
5.2 Storage
When the machine needs to be stored, Thermopatch advises
to use the original packaging. The machine should be stored
on a pallet, o the oor, in dry conditions.

thermopatch.com
Manual NL-28 / mn_ENG_V1.0 original
11
V. 1.0 ENG
Jan2015
6. Operating instruction
6.1 Installation
Unpacking
• Remove the press from its packaging.
• Place the machine on its operating location.
• For carrying the press, ensure that the press is cold
and move the press by holding the two plates (top and
bottom) at the same time (closed press).
• Remove the screw labelled « Transport security » before
opening the press.
• Plug the machine into the electrical mains (230 Volt
grounded / 50 - 60 Hertz).
Control Panel
(1) Electromagnet
Clamping
Handle
(2)
Heating platen
(4)
Silicone rubber
Sliding plate
handle (5)
180° Reversable lower
platen (6)
Pressure
Adjustement
wheel
(3)
Sliding plate
(7)

thermopatch.com
Manual NL-28 / mn_ENG_V1.0 original
12
V. 1.0 ENG
Jan2015
Choosing the working direction with the reversible
lower plate
This press is standard equipped with a reversible lower plate
(180 °), allowing you to put a T-shirt or other garment either
from the front or the back of the plate.
To reverse the direction of the support:
• Loosen and remove both knobs between the support
and the lower plate,
• Reverse the support,
• Replace and tighten both knobs again under the lower
plate
6.2 Operating the NL-28
• Switch on the press by pressing the power switch located
at the rear.
• Adjust set point temperature (See 6.5.1.b).
• Adjust sealing time (See 6.5.1.a).
• If desired, set the preheating time (See 6.5.2)
• Adjust the pressure (according to the type of transfer)
(See 6.6).
• Place the garment on the lower plate.
• Place the transfer.
• Once the heating plate has reached the desired
temperature, close the machine with the handle.
• When the machine is closed, the timer starts running.
• At the end of the sealing time, the press will open
automatically.
• If you want to interrupt the cycle, you can do it by
pushing the stop button located on the control panel: the
press will then open automatically within 2 seconds (see
6.5.3).
• Use the handle (See number (5) page 11) to slide the
lower plate forward and backward.

thermopatch.com
Manual NL-28 / mn_ENG_V1.0 original
13
V. 1.0 ENG
Jan2015
6.3 Using ‘DRY’ Mode (Optional)
Optionally, the press is available with the « DRY » function,
which ensure a contactless approach for the drying of direct
printing.
• Adjust set point temperature (See 6.5.1.b).
• Adjust drying time (See 6.5.1.a - Same procedure as for
the pressing time).
• Put the garment on the lower plate.
• Once the heating plate has reached the desired
temperature, gently lower it, using the handle until the
heating plate is locked to the lower plate, but without
contact.
• When the plate is locked, the timer starts.
• At the end of the countdown, the press will open
automatically.
6.4 Using the control panel
NL-28 control panel
The temperature and time are shown on the display.
Preheating
control LED (1)
Temperature
control LED (2)
Program
selection
Programmed
cycles SAVE
Parts Counter Stop cycle
Preheating Time and
Temperature
setting
Time
control LED (3)
Time and Temperature
DECREASE
Time and Temperature
INCREASE

thermopatch.com
Manual NL-28 / mn_ENG_V1.0 original
14
V. 1.0 ENG
Jan2015
6.5 Press time and temperature settings
1.Pressing time and temperature settings
a)Pressing time
• Press TIME/TEMPERATURE key : the LED (3) lights and
indicates that you can set the pressing time.
• The default value is set to 15 seconds.
• You can change this value with the INCREASE key or
the DECREASE key.
• Conrm the desired value by pressing again on the TIME/
TEMPERATURE key.
• Now, you can adjust the set point temperature.
b)Temperature
After setting the pressing time, the LED (2) lights and
indicates that you can adjust the set point temperature.
• The default value is set to 180° C.
• You can change this value by pressing the INCREASE
key or the DECREASE key.
• Conrm the desired value by pressing again on the TIME/
TEMPERATURE key.
• Now, the press is ready to work.
2. Preheating cycle
The press is provided with a secondary timer for preheating.
This function allows you preheat the textile before installing
the transfer.
a) Preheating time setting
• Pressing PREHEATING key, The LED (1) lights.
• You can change the value with the INCREASE key or
the DECREASE key.
• Conrm the value by pressing again on the PREHEATING
key.
• If the value is 0 (default value), the preheating cycle will
not be performed.

thermopatch.com
Manual NL-28 / mn_ENG_V1.0 original
15
V. 1.0 ENG
Jan2015
b) Operation
• Place the textile without transfer on the lower silicone
rubber plate.
• Lower the heating plate: the secondary counter starts and
the LED (1) lights.
• At the end of the countdown, the buzzer rings and the
press open automatically.
• Install the transfer on the textile and lower the heating
plate.
• The main counter starts and the LED (3) lights.
• At the end of the countdown, the press opens
automatically.
CATTENTION!
The preheating temperature is the same as the set point temperature
3. Stop Cycle
At any time, you can stop the cycle by pressing the STOP
CYCLE key.
The press opens automatically and the countdown stops.
4. Storing programmed cycles
You can store up to 3 programs with dierent set points on
this press.
1. Preheating time
2. Pressing time
3. Temperature
• For storing the last set points used, press the SAVE
key during 3 seconds.
• The display lights up with the program name to be
recorded (First Pr1).
• Choose the program name you want to be recorded by
repeated pressing of the SAVE key: Pr1->Pr2 ->Pr3
->Pr1…
• Press during 3 seconds on the SAVE key to save the
program.
• The buzzer indicates the storing of the program was
succesful.
• The default value for the 3 programs Pr1 to Pr3 is :
1. 180° C. for the temperature
2. 15 seconds for the pressing time
3. 0 second for the preheating time

thermopatch.com
Manual NL-28 / mn_ENG_V1.0 original
16
V. 1.0 ENG
Jan2015
5. Selecting a programmed cycle
To select a recorded program, press on the PROG key:
the screen displays the last program used.
Press the key until the display of the desired program.
• Keep the PROG key pressed for 3 seconds to conrm
your storage.
• The buzzer sound indicates the storage is succesful.
• The temperature set point, the preheating time and the
pressing time according to the selected program will be
loaded automatically.
6. Parts counter
The press has 2 parts counters :
1. An erasable counter, with a possible reset
2. A main counter, without reset.
a) Erasable counter
• Press one time on COUNTER key: the screen displays
during 5 seconds the number of cycles performed with
success since the last reset.
• Pressing the key for 3 seconds will reset the counter.
b) General counter
• Press 2 times on COUNTER key: the screen displays
the total number of cycles performed, into hundreds of
pressing (Example: 230 indicates 23000 parts).
Reset is not possible.
After 3 seconds, the screen returns to the normal display.
7. Error messages
Message on the screen Due to Eect
Er1 Temperature probe default Heating relay o
Err Card probe default Heating relay o
Col Keyboard connection alarm Relay o

thermopatch.com
Manual NL-28 / mn_ENG_V1.0 original
17
V. 1.0 ENG
Jan2015
8. Power safe function
The press has an energy saving program, allowing to main-
tain a set point temperature after a dened time without use.
The default value is >> DISABLED<<
Contact your dealer for activation of this function.
6.6 Pressure Adjustment
The pressure is obtained by decreasing the gap beween the
upper hot platen and the lower cold platen.
CATTENTION!
This function can only be programmed by qualied sta: contact your dealer
• Loosen the nut to unsecure the pressure adjustment
wheel.
• Turn the wheel on the top of the heating plate: clockwise
to increase the pressure,
• counter clockwise to decrease the pressure.
• Tighten the nut back to lock and secure the pressure ad-
justment wheel.
Pressure
Adjustment
wheel
Electromagnet
Heating Plate

thermopatch.com
Manual NL-28 / mn_ENG_V1.0 original
18
V. 1.0 ENG
Jan2015
7. Assembly and installation
7.1 Installation
Unpacking
• Remove the NL-28 from its packaging.
• Place the machine on its operating location.
• Before carrying the press, ensure that the press is cold
and move the press by holding the two plates (top and
bottom) at the same time (closed press).
• Remove the screw labelled « Transport security » before
opening the press.
• Plug the machine into the electric mains(230 Volt +
Ground / 50 or 60 Hertz)
Choosing the working direction with the reversible
lower plate
This press is standard equipped with a reversible lower plate
(180 °), allowing you to put a garment either from the front
or the back of the plate.
To reverse the direction of the support:
• Loosen and remove both knobs between the support
and the lower plate,
• Reverse the support,
• Replace and tighten both knobs again under the lower
plate

thermopatch.com
Manual NL-28 / mn_ENG_V1.0 original
19
V. 1.0 ENG
Jan2015
8. Maintenance instructions
8.1 Maintenance
• Every day:
Clean the heating plate with a dry cloth. (See number 4 page
22)
• Depending on use:
Change the silicon rubber (see drawing on page 22) as soon
as it is damaged or if it has lost its properties.
CATTENTION!
• Switch o the machine and disconnect from the electrical power
• Make sure the NL-28 has cooled down enough before starting maintenance or repairs.

thermopatch.com
Manual NL-28 / mn_ENG_V1.0 original
20
V. 1.0 ENG
Jan2015
TP Code Description Quantity
SPA28-103 MAIN BOARD 1
SPA27-003 HEAT RELAY 1
SPA28-102 HEATING ELEMENT MICA 400x450 2500W 1
SPA3X-024 SENSOR 1
SPA27-002 MICROSWITCH WITH TONGUE 1
SPA33-002/A SILICONE RUBBER 400x500 mm 1
SPA27-006 GAS SPRING 1
SPA3X-004 ELECTROMAGNET 230V 7W 1
SPA3X-003 Fuse 16 A SLOW 2
SPA28-100 SET OF FOUR LOWER PLATENS 1
SPA28-101 NOMEX PROTECTION COVER 40 X 50 CM 1
In this chapter you will nd the parts list, a drawing and a
wiring diagram.
9. Technical annexes
Parts list 01
Other manuals for NL-28
1
Table of contents
Other Thermopatch Kitchen Appliance manuals