Installation guide Installation guideBarrel Nº60 Barrel Nº60
BARRELS BARRELS
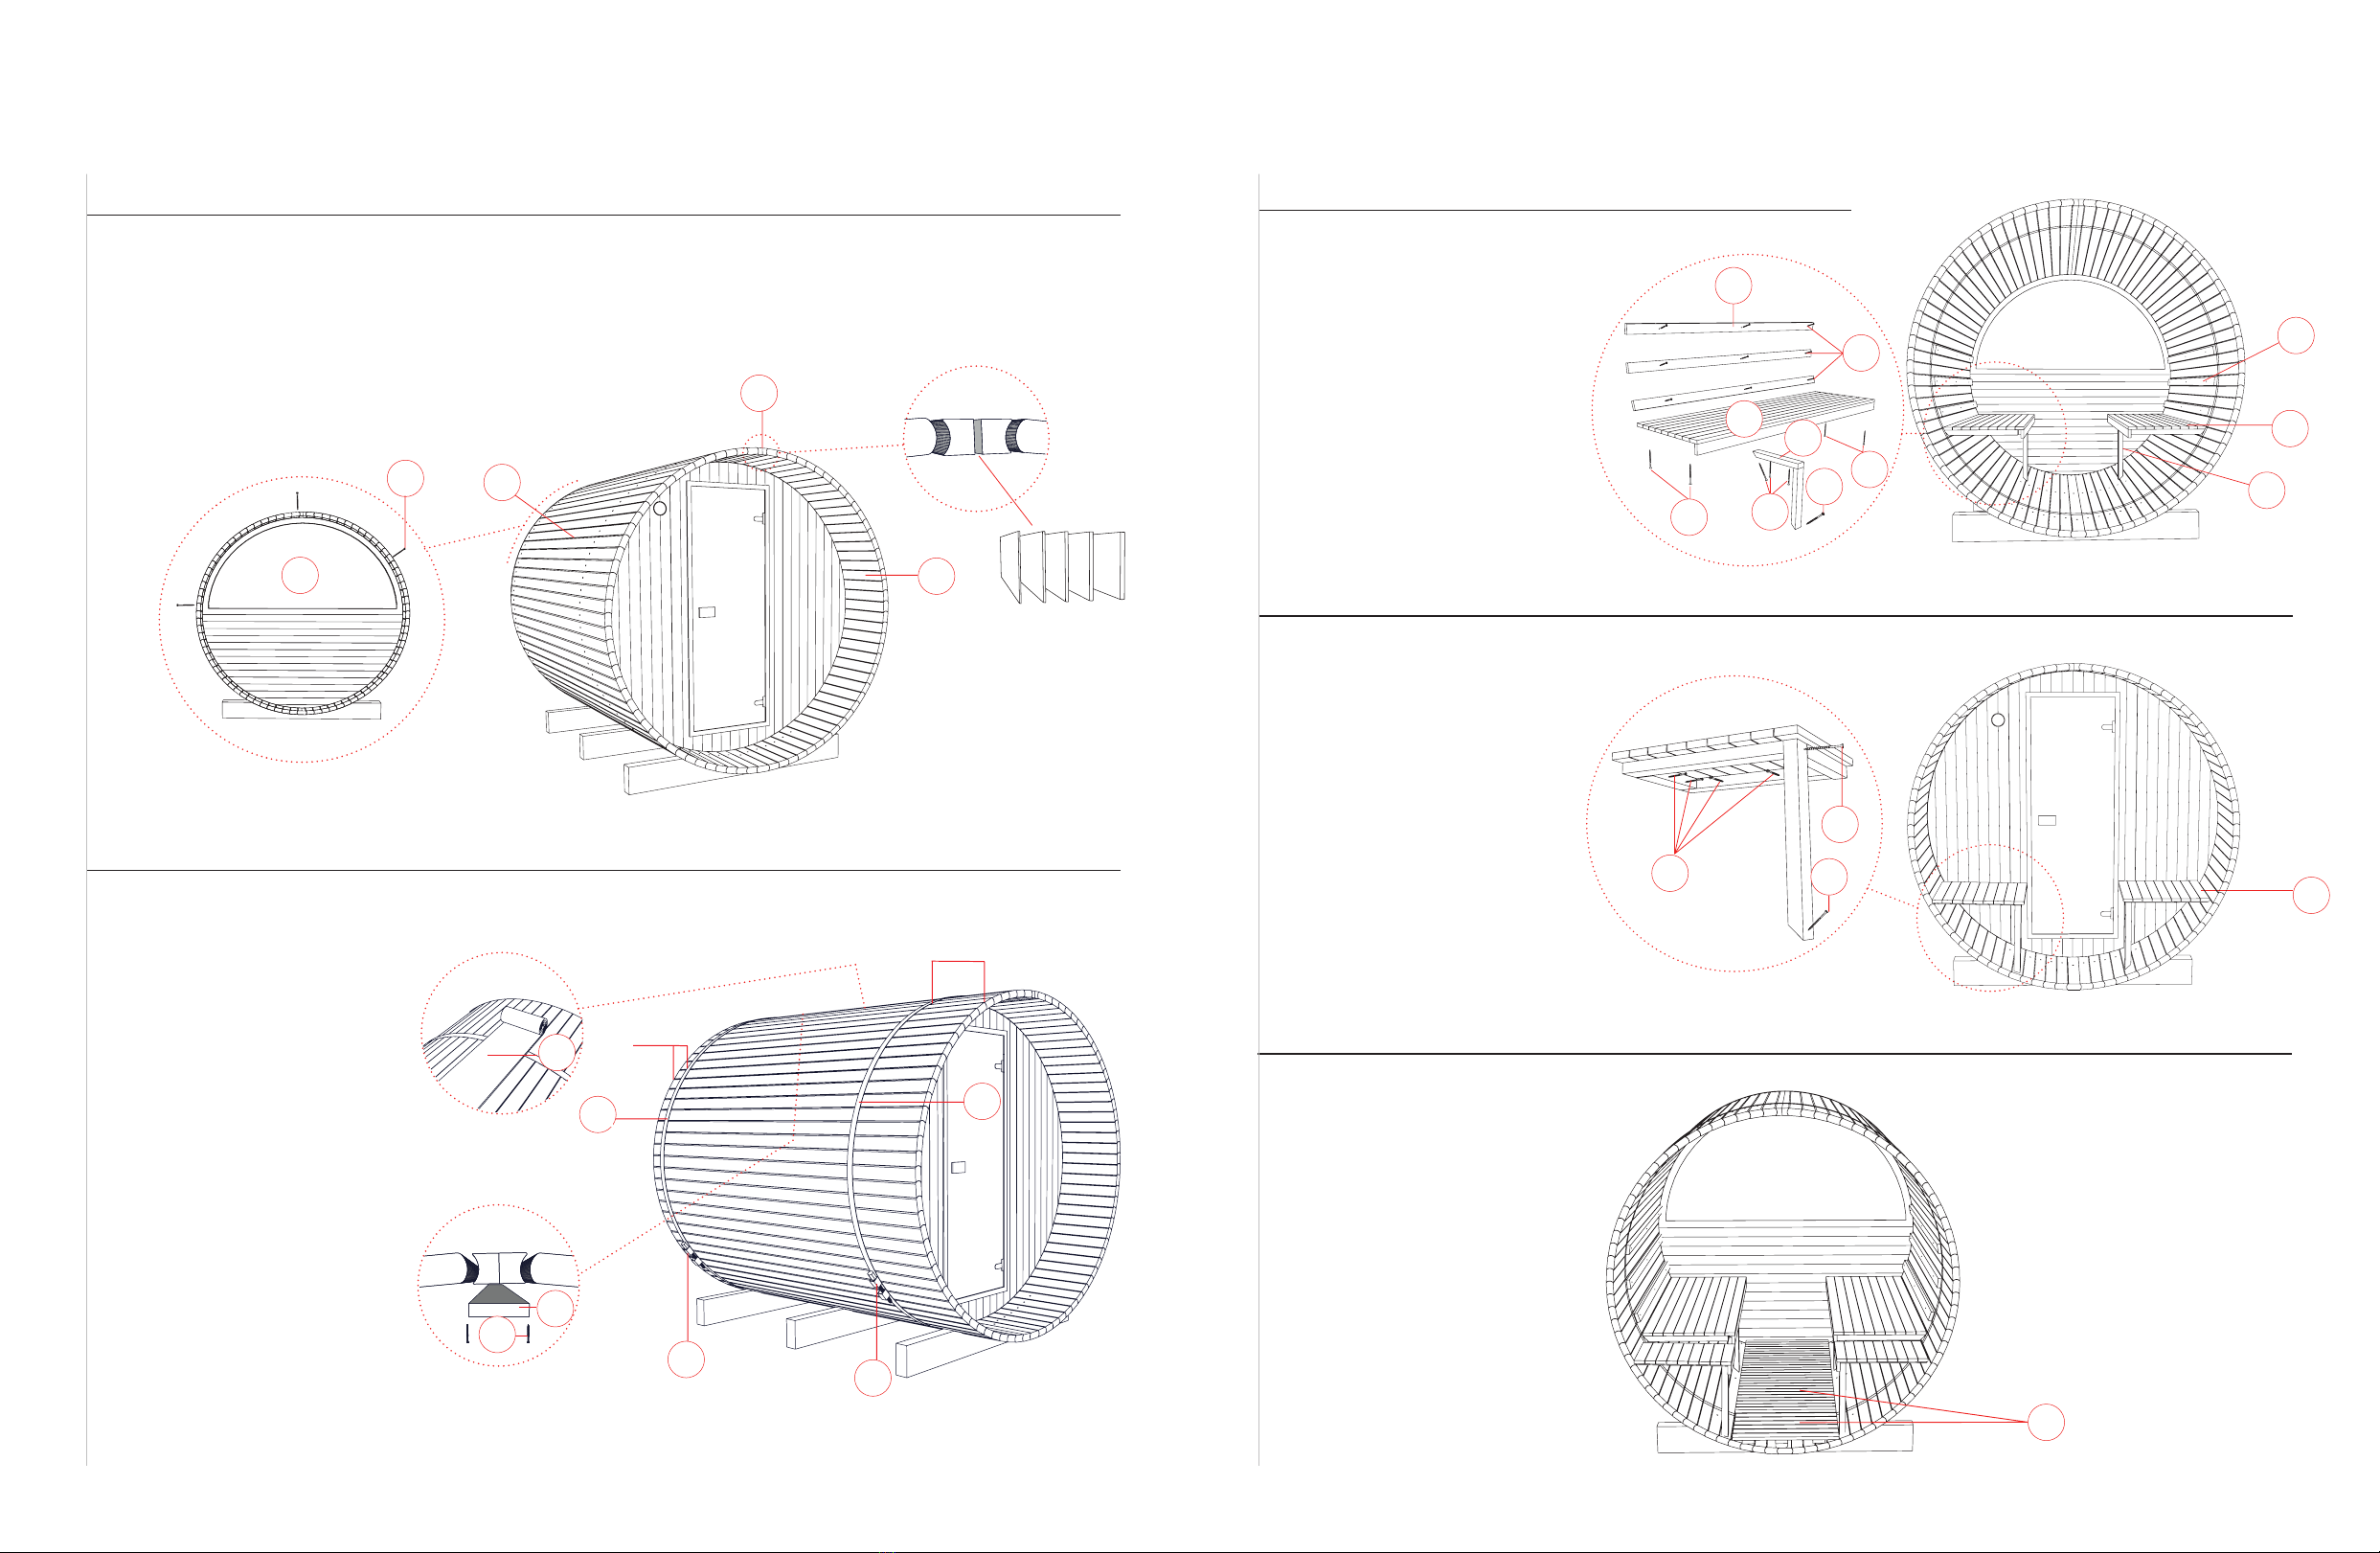
STEP SEVEN
Measure steel bands (I) to ensure
correct length of 276,” +/- 1/2” is
acceptable.
Install steel bands (I) by wrapping
bands around barrel prior to
Place steel bands evenly around
barrel, covering screw heads.
Measure from steel band to barrel
edge to ensure the steel band is
even.
Cover roof with roof tape.
Rub and smooth with pressure to
ensure adhesion.
Install interior aspen roof trim (O)
with 4.0 x 50 (P1) stainless steel
screws.
STEP EIGHT
on wall mounts using stainless steel
screws 4.2 x 70 (N1).
Hold the seat and leg assembly tight
sure the bench seat is level from
front to back. This will ensure proper
chosen height using stainless steel
screw 4.0 x 50 (P1).
STEP TEN
Wire raceways (V) and flooring
duckboards (L) can be used for wiring
needed for chosen stove
STEP NINE
Install porch benches (K),
using screws 4.2 x 70 (N)
and 5.0 x 100 (X).
Hold the seat and leg
assembly tight to the sauna
sure the bench seat is level
from front to back. This will
ensure proper placement.
STEP SIX
staves (C, C1) tightly on both sides of
the sauna using rubber mallet, while
with 4.2 x 70 screws and rear window
panel with 4.0 x 50 screws to prevent
glass breakage.
stave (H).
WARNING!
C
H
R
I
O
P1
I
L
K
X
N
N
P1
N1
N1
N1
N1
C1
P
E1
19-11/16´´
3-15/16´´


