manuals.online logo
Brands
  1. Home
  2. •
  3. Brands
  4. •
  5. abi
  6. •
  7. Plumbing Product
  8. •
  9. abi GOOSENECK 11941 User manual

abi GOOSENECK 11941 User manual

GO O S ENE CK S W IVEL WAL L MO UNTED S P O UT
Dis cla imer: P ro d u c ts in th is ma n u a l mu s t by la w b e in s talled b y licen s ed an d reg is tered tra d es p eo p le in a cco rd a n ce w ith th e releva n t stan d a rds . A B I a n d th e ma n u fa ctu rer/d is trib u to r
res erve t h e rig h t to va ry s p ecif ic a tio n s o r d elete mo d els fro m t h eir ra n g e w ith o u t prio r n o tif ic a t io n . Dimen s io n s a re n o min a l mea s u remen ts o n ly. Th e in f o rmatio n lis ted is co rrect at th e time
o f p u b lica tio n , h o w ever A B I a n d th e man u f a c tu rer/d is trib u to r ta kes n o res p o n s ib ility fo r p rin tin g erro rs. C o p yrig h t © A B I I n terio rs 2 02 2 Pty Ltd
SPECIFICATIONS
RECOMMENDED USE Domestic
MATERIAL Solid Brass
TEMPERATURE RATING Maximum continuous working temperature 75°C
If the water temperature exceeds 75°C,an approved tempering
valve must be fitted
PRESSURE RATING Recommended minimum working pressure 150kPa
Recommended maximum working pressure 500kPa
Hot and cold water inlet pressure should be equal
SUITABLE HOT WATER UNITS Storage tank: Yes
Continuous Flow: Yes
Gravity Feed: Not suitable
STANDARDS WELS 5 Star, 6L/min, T36815
AS/NZS 3718:2005
WM-022852
Using the allen key, loosen the grub screw.
NOTE: If your spout is positioned close to the bench or has taps close by - you may not be able to twist it on with the gooseneck
spout attached - below are the steps to install your spout without hitting any obstacles.
Make sure the grub screw is loosened
enough to release the spout. Release spout
by pulling apart from the base.
This step is only necessary
2
Rotate the body onto the water outlet (1/2
inch nipple) with teflon tape and firmly
tighten.
3Insert the gooseneck back into the body
and tighten the grub screw.
Note: Apply water based lubricant to the
O-ring
4
NOTE: If your spout is positioned close to the bench or had taps
close by - you may not be able to twist it on with the gooseneck
spout attached - below are the steps to install your spout with-
out hitting any obstacles.
DO NOT use cream
cleaners or bleach
These substances are
abrasive
Regularly clean with
mild liquid detergent
or soap and water
DO NOT use cleaning
pads with abrasive
surfaces as this may
scratch the material
INSTALLATION GUIDE
Note: This product must be installed by a licensed plumber. This
is a general installation guide - there are many factors that are
involved that can alter the installation method. All work carried
out must comply and be according to AS/NZS 3500.

Other abi Plumbing Product manuals

abi VESI 13543 User manual

abi

abi VESI 13543 User manual

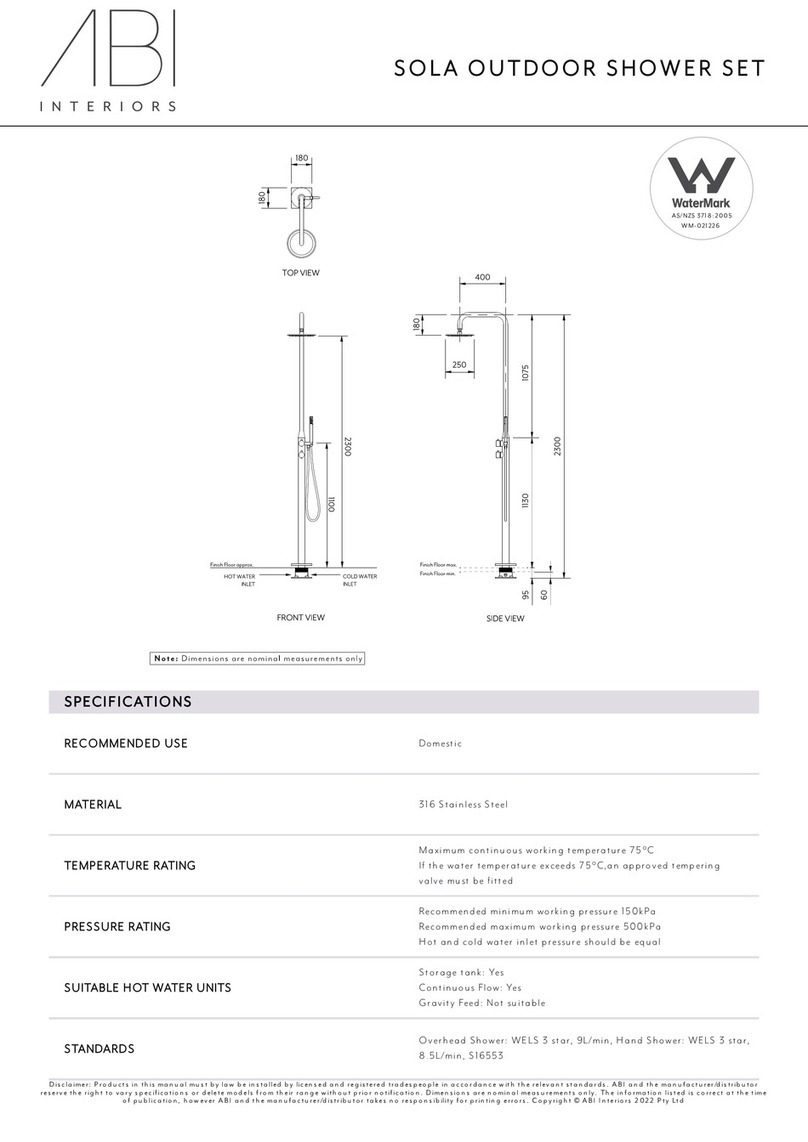
abi SOLA OUTDOOR SHOWER SET User manual
abi

abi SOLA OUTDOOR SHOWER SET User manual

abi PIXI TILE INSERT User manual

abi

abi PIXI TILE INSERT User manual

abi DAVIS 12979 User manual

abi

abi DAVIS 12979 User manual

abi 10463 User manual

abi

abi 10463 User manual

abi KINGSLEY 14629 User manual

abi

abi KINGSLEY 14629 User manual

abi 14404 User manual

abi

abi 14404 User manual

abi SOLA User manual

abi

abi SOLA User manual

abi ELYSIAN 10429 User manual

abi

abi ELYSIAN 10429 User manual

abi EDEN 12163 User manual

abi

abi EDEN 12163 User manual

abi ATLEY 12996 User manual

abi

abi ATLEY 12996 User manual

abi SILO 11753 User manual

abi

abi SILO 11753 User manual

abi ELYSIAN 11958 User manual

abi

abi ELYSIAN 11958 User manual

Popular Plumbing Product manuals by other brands

Sterling C826S installation instructions

Sterling

Sterling C826S installation instructions

Hans Grohe Axor Uno2 38040 1 Series Installation/User Instructions/Warranty

Hans Grohe

Hans Grohe Axor Uno2 38040 1 Series Installation/User Instructions/Warranty

Hans Grohe AXOR Citterio 39143 1 Series Installation/User Instructions/Warranty

Hans Grohe

Hans Grohe AXOR Citterio 39143 1 Series Installation/User Instructions/Warranty

Hans Grohe Hose Pull-out Set 06438 0 Series Installation/User Instructions/Warranty

Hans Grohe

Hans Grohe Hose Pull-out Set 06438 0 Series Installation/User Instructions/Warranty

Hans Grohe Axor Massaud 18112000 Instructions for use/assembly instructions

Hans Grohe

Hans Grohe Axor Massaud 18112000 Instructions for use/assembly instructions

Kohler Stillness 954T-4 installation instructions

Kohler

Kohler Stillness 954T-4 installation instructions

Hans Grohe Aktiva A8 28547 Series manual

Hans Grohe

Hans Grohe Aktiva A8 28547 Series manual

Soligo rubi BARISTA RBA91CACC Installation, Specifications, Maintenance

Soligo

Soligo rubi BARISTA RBA91CACC Installation, Specifications, Maintenance

Kohler K-2286 Installation and care guide

Kohler

Kohler K-2286 Installation and care guide

Jacuzzi XYZ+ 100x70 Installation & maintenance

Jacuzzi

Jacuzzi XYZ+ 100x70 Installation & maintenance

Zip Celsius HydroTap G4 range user guide

Zip

Zip Celsius HydroTap G4 range user guide

Anzzi SD-AZ03-01 Installation & Care Guide

Anzzi

Anzzi SD-AZ03-01 Installation & Care Guide

Bradley Aerada 1100 Series installation instructions

Bradley

Bradley Aerada 1100 Series installation instructions

Taymor 06-8834S installation instructions

Taymor

Taymor 06-8834S installation instructions

Moen MOSAIC S1300 installation guide

Moen

Moen MOSAIC S1300 installation guide

miseno MNO2113RU installation instructions

miseno

miseno MNO2113RU installation instructions

VADO Axces IRLO AX-IRO-130+K-CP Installation & user manual

VADO

VADO Axces IRLO AX-IRO-130+K-CP Installation & user manual

Grohe 36 322 installation instructions

Grohe

Grohe 36 322 installation instructions

manuals.online logo
manuals.online logoBrands
  • About & Mission
  • Contact us
  • Privacy Policy
  • Terms and Conditions

Copyright 2025 Manuals.Online. All Rights Reserved.