ThermTec Hunt Series User manual

Thermal Clip-On
Hunt Series
User Manual
Series


Legal Information
About this Manual
COPYRIGHT © 2023 ThermTec Technology Co., Ltd. ALL RIGHTS RESERVED.
The Manual includes instructions for using and managing the product, pictures, charts, images and all other informa-
tion hereinafter are for explanation and description only. The information contained in the Manual is subject to
change, without notice due to firmware updates or other reasons. Please find the latest version of this Manual at the
ThermTec website (https://www.thermeyetec.com).
Please use this Manual with the guidance and assistance of professionals trained in supporting the product.
Trademarks
Disclaimer
and other ThermTec's trademarks and logos are the properties of ThermTec in various jurisdictions.
Other trademarks and logos mentioned are the properties of their respective owners.
To the maximum extent permitted by applicable law, this Manual and the product described, with its hardware,
software and firmware, are provided "As is" and "With all faults and errors". ThermTec makes no warranties, express
or implied, including without limitation, merchantability, satisfactory quality, or fitness for a particular purpose. The
use of the product by you is at your own risk. In no event will ThermTec be liable to you for any special, consequential,
incidental, or indirect damages, including, among others, damages for loss of business profits, business interruption,
or loss of data, corruption of systems, or loss of documentation, whether based on breach of contract, tort (including
negligence), product liability, or otherwise, in connection with the use of the product, even if ThermTec has been
advised of the possibility of such damages or loss.

You acknowledge that the nature of the internet provides for inherent security risks, and ThermTec shall not take any
responsibilities for abnormal operation, privacy leakage or other damages resulting from cyber-attack, hacker attack,
virus infection, or other internet security risks; however, ThermTec will provide timely technical support if required.
You agree to use this product in compliance with all applicable laws, and you are solely responsible for ensuring that
your use conforms to the applicable law. Especially, you are responsible, for using this product in a manner that does
not infringe on the rights of third parties, including without limitation, rights of publicity, intellectual property rights,
or data protection and other privacy rights. You shall not use this product for any prohibited end-uses, including the
development or production of weapons of mass destruction, the development or production of chemical or biological
weapons, any activities in the context related to any nuclear explosive or unsafe nuclear fuel-cycle, or in support of
human rights abuses.
In the event of any conflicts between this manual and the applicable law, the latter prevails.

Content
SAFETY INFORMATION
REGULATORY INFORMATION
1. DESCRIPTION
2. FEATURES
3. SPECIFICATIONS
4. PACKING LIST
5. COMPONENTS AND CONTROLS
5.1 Appearance of Hunt
5.2 Description of Controls
5.3 Menu/Status Bar Icons
6. OPERATION GUIDE
6.1 Installation
6.2 Power On/Off
6.3 Image Correction
6.4 Standby Mode
6.5 Lens Focus Adjustment
06
08
09
09
10
11
12
12
13
14
15
15
17
17
17
17
18
18
18
19
19
19
20
29
31
33
33
35
36
37
37
37
6.6 Pseudo Color Switch
6.7 Target Outline Mode
6.8 UI Zooming
6.9 AI Rangefinder
6.10 OLED Brightness Adjustment
6.11 OSD Function
7. MAIN MENU
8. ZEROING
9. CAPTURING AND RECORDING
10. MEMORY ACCESS
11. HOTSPOT FUNCTION
12. REMOTE CONTROL
13. DOWNLOAD “SMART THERMAL” APP
14. TECHNICAL INSPECTION
15. MAINTENANCE
16. FIRMWARE UPGRADE

SAFETY INFORMATION
Environmental influences
Notes: Never point the lens of the device directly at intense heat sources such as the sun or laser equipment. The
objective lens and eyepiece can function as a burning glass and damage the interior components.
Risk of swallowing
Safety instructions for use
Caution: Do not place this device in the hands of small children. Incorrect handling can cause small parts to come
loose which may be swallowed.
- Do not expose the device to fire or high temperatures.
- The battery capacity decreases when operated in a cold ambient temperature. This is not a fault and occurs for
technical reasons.
- Always store the device in a dry, well-ventilated space. For prolonged storage, remove the batteries.
- Do not expose your device to extreme temperatures lower than - 20°C and higher than + 50°C.
- The product shall only be connected to a USB Type C interface.
- If the device has been damaged or the battery is defective, send the device to our after-sales service for repair.
User information on the disposal of electrical and electronic devices (private
households)
The WEEE symbol on products and/or accompanying documents indicates that used electrical and electronic prod-
ucts must not be mixed with ordinary household waste. For proper treatment, recovery and recycling, take these prod-
ucts to the appropriate collection points where they will be accepted without charge. In some countries, it may also be
possible to return these products to your local retailer when you purchase a corresponding new product. The proper
06

For business customers within the European Union
Please contact your dealer or supplier regarding the disposal of electrical and electronic devices from which could
provide you with further information.
Information on disposal in other countries outside of the European Union
This symbol is only applicable in the European Union. Please contact your local authority or dealer if you wish to
dispose of this product and ask for a disposal option.
Intended use
The device is intended for displaying heat signatures during nature observation, remote hunting observations and for
civil use. This device is not a toy for children.
Use the device only as described in this instruction manual. The manufacturer and the dealer accept no liability for
damages which arise due to non-intended or incorrect use.
Function test
- Before use, please ensure that your device has no visible damage.
- Test to see if the device displays a clear, undisturbed image.
- Check that the settings for the thermal imaging camera are correct. See the notes in the Operation section .
disposal of this product serves to protect the environment and prevents possible harmful effects on human beings
and their surroundings, which may arise as a result of incorrect handling of waste.
More detailed information on your nearest collection point is available from your local authority. In accordance with
state legislation, penalties may be imposed for the improper disposal of this type of waste.
07

REGULATORY INFORMATION
This product and - if applicable - the supplied accessories too are marked with "CE" and comply therefore with
the applicable harmonized European standards listed under the Directive 2014/53/EU(RED), Directive
2014/30/EU(EMC), Directive 2014/35/EU(LVD), Directive 2011/65/EU(RoHS).
This product and - if applicable - the supplied accessories too are marked with “UKCA” and comply therefore
with the following directives: Radio Equipment Regulations 2017, Electromagnetic Compatibility Regulations
2016, Electrical Equipment (Satety) Regulations 2016, the Restriction of the Use of Certain Hazardous
Substances in Electrical and Electronic Equipment Regulations 2012.
This product and - if applicable - the supplied accessories too are marked with “RoHS”and comply therefore
the requirements of Directive 2011/65/EU on the restriction of the use of certain hazardous substances in
electrical and electronic equipment (“RoHS recast” or “RoHS 2”).
2012/19/EU (WEEE directive): Products marked with this symbol cannot be disposed of as unsorted municipal
waste in the European Union. For proper recycling, return this product to your local supplier upon the
purchase of equivalent new equipment, or dispose of it at designated collection points. For more information
see: www.recyclethis.info.
Directive 2006/66/EC and its amendment 2013/56/EU (Battery Directive): This product contains a battery that
cannot be disposed of as unsorted municipal waste in the European Union. See the product documenta-
tion for specific battery information. The battery is marked with this symbol, which may include lettering to
indicate cadmium (Cd), lead (Pb), or mercury (Hg). For proper recycling, return the battery to your supplier or
to a designated collection point. For more information see:www.recyclethis.info.
08

1.DESCRIPTION
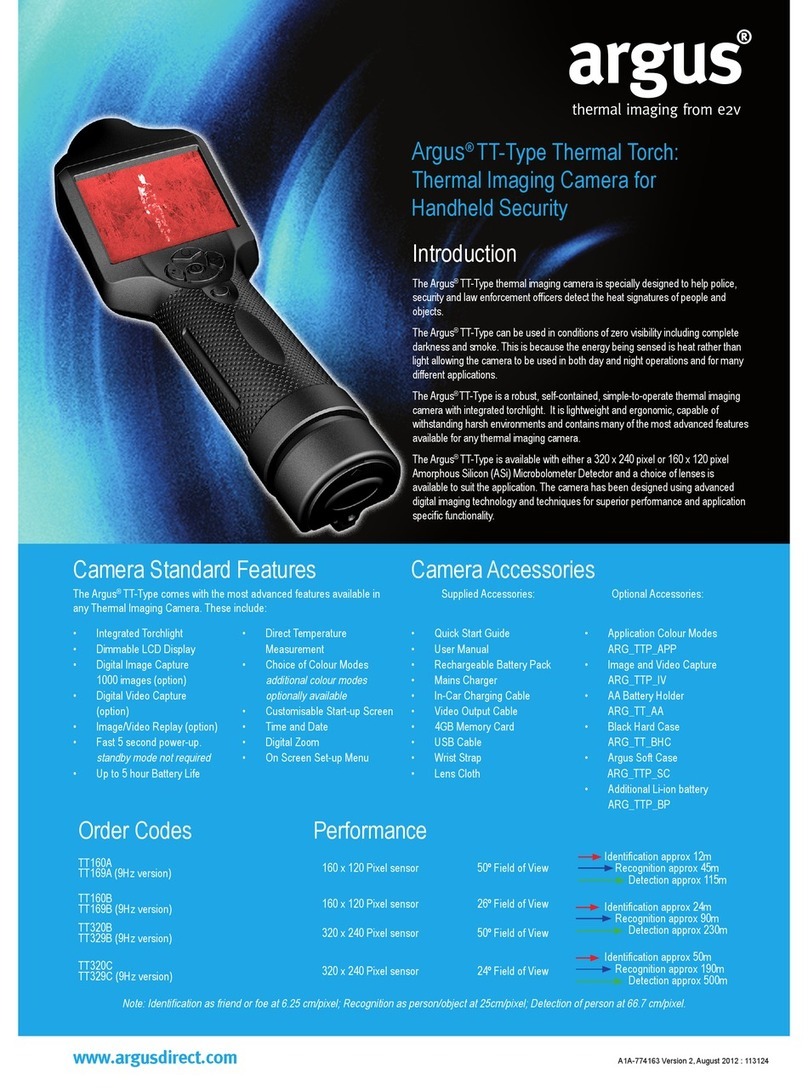
The Hunt Series Thermal Clip-On featuring high thermal sensitivity ensures perfect detail recognition even in the
hardest weather conditions when the object and background are with minimal temperature difference. Except that,
using Hunt series thermal clip-on includes several benefits over night hunting with traditional optics or even the night
vision devices. Attaching the Hunt series to a day scope delivers the same level of comforts of shooting with the day
scope you are accustomed to, including your existing reticle and eye relief. The Hunt series thermal clip-on even
allows you to continue utilizing variable magnifications of your day scope.
2.FEATURES
Quick mounting and removal of attachment;
12μm thermal imaging detector, NETD≤20mk;
1024*768 resolution with 0.39-inch OLED display;
No re-zeroing required and quick attachment to day optics;
Magnesium alloy housing;
Lightweight and compact design;
Wireless remote control;
Automatic object detection and distance measurement;
APP connection via Wi-Fi supported;
Various pseudo colors and target outline mode;
Audio and recoil-activated video supported;
Combination of shutter correction and shutterless technology;
Up to 7h continuous working for lithium battery;
IP67 rated protection;
HUNT335
HUNT650
09

Microbolometer
3.SPECIFICATIONS
Notes:
1. The actual operating time depends on the intensity of using Wi-Fi, video
recorder, and AI rangefinder.
2. Improvements may be made to the design and software of this product
to enhance its useful features. The specifications of the device may be
improved without prior notice.
Type
Resolution
Pixel pitch
NETD
Spectral range
Frame rate
Detection range
Type
Resolution, pixel
Display size
AMOLED
1024x768
0.39 inch
Image correction
USB interface
Via shutter
Type-C
Photo/video playback
Built-in memory
Yes
64GB
Objective lens
Field of view
35mm
7.5°x5.7°
50mm
8.8°x 7.0°
Model Hunt335
Optics
Display
Video Recorder
Battery
Type C
Wi-Fi
Bluetooth
Built-in battery
Data transfer, battery charging
Yes
Yes, Remote control
Interface
Environment
Function
Hunt650
Recommended magnification
of the day scope
Digital zoom
12µm
≤20mk
8-14µm
50HZ
384x288 640x512
1,800m 2,600m
1-8X
X1
Dimension, mm 125(L)x65(W)x77(H) 129(L)x70(W)x77(H)
7h 6h
6,000J
Uncooled
1-10X
Max. recoil power
on rifled weapon
Body material
Connection thread
Operating temperature
IP rating
Weight, g
Magnesium alloy
M52×0.75
-20- +50℃
IP67
400
10

4.PACKING LIST
Hunt clip-on (x1)
Wrench (x1)
Remote control (x1)
Lens cloth (x1)
USB cable (x1)
User manual (x1)
11

5. COMPONENTS AND CONTROLS
1. Eyepiece
2. M52*0.75 connection thread
3. Eyepiece bayonet-type ring
4. AI rangefinder/ UI zooming/Down button
5. Capture/Record/Menu button
6. Pseudo color switch/Target outline mode/Up button
7. Lens focus knob
8. Lens cover
9. Objective lens
10. Power/Image correction button
11. Type-C port
5.1 Appearance of Hunt
⑧
⑦⑥⑤④
③
①
②
The WEEE symbol on products and/or accompanying documents indicates that used electrical and electronic prod-
ucts must not be mixed with ordinary household waste. For proper treatment, recovery and recycling, take these prod-
ucts to the appropriate collection points where they will be accepted without charge. In some countries, it may also be
possible to return these products to your local retailer when you purchase a corresponding new product. The proper
10
11
⑨
12

5.2 Description of Controls
Short press
Standby mode
/
Wake up device
Power on/off Image
correction
Capture Record Enter
main menu
Switch pseudo
colors
Target outline
mode UI zooming
OLED brightness
adjustment OSD on/off AI rangefinder
on/off
Standby mode
/
Wake up device
Power on/off Image
correction
Confirm Exit
Up N/A
N/A
Down N/A
N/A
N/A
Icon
Before entering the main menu
Press and
hold-on Double click Short pressIcon
After entering the main menu
Press and
hold-on Double click
13

Image set
Battery power
Zero profile
Zeroing
Hotspot/Bluetooth
File
Blind Pixel
OLED
Recoil-Activated Video (RAV)
Time and Date
Language
Correction
System Setting
Hotspot Indicator
AI Rangefinder
Remote Control
Image Capturing/Video Recording
MIC
5.3 Menu/Status Bar Icons
14

6.OPERATION GUIDE
The Hunt series has been designed for long-term use. To ensure sustainable performance, please adhere to the following:
Hunt as an attachment is designed to use both in the nighttime and daytime under inclement weather (fog, smog, rain, etc.).
To mount it on a day scope, please follow the below instructions:
Before use make sure that you have mounted and adjusted the device according to the section “Operation Guide”.
Store with the lens cap on in the carrying case.
Switch off the device after use.
The device is designed for use in various operating temperatures. However, if it has been brought indoors from cold
temperatures, do not turn it on for 2 to 3 hours. This will prevent external optical surfaces from condensation.
To ensure reliable performance, it is recommended to carry out regular technical inspections of the device.
Please make sure that the day scope is zeroed before installation.
Measure the outer diameter of the lens of your day scope.
Select an appropriate adapter with the internal thread M52*0.75 and an insert of the required diameter depending on the
outer diameter of your day scope’s objective lens.
Install the insert into the adapter all the way in.
Install firmly the adapter with the insert onto the objective lens of your day scope.
Check that the adapter firmly fits the objective lens.
6.1 Installation
WARNINGS
Attempts to disassemble or repair the device will void the warranty!
15

Notes:
1. The actual operating time depends on the intensity of using Wi-Fi, video
recorder, and AI rangefinder.
2. Improvements may be made to the design and software of this product
to enhance its useful features. The specifications of the device may be
improved without prior notice.
Day Scope Adapter
If you see there is a clearance, please:
- Loosen the locking screw with the hex-nut wrench (which depends on the adapter you used).
- Tighten the screw with hex-nut wrench with a clamping force necessary to ensure that the adapter fits tightly the
objective lens.
- Tighten the locking screw.
Mount the Hunt onto the adapter, and tighten the eyepiece bayonet-type ring counter clockwise to lock Hunt.
After installation, if the center of Hunt’s display is not aligned with the center of your day scope:
- Loosen the locking screw with the hex-nut wrench.
16

Long press the power button for 3s to power on/off the Hunt.
6.2 Power On/Off
Double click the power button for image correction. Please
refer to the “Correction” section for detailed guidance of image
correction.
6.3 Image Correction
Short press the power button to standby the device for power
saving, and press the power button again to wake it up.
6.4 Standby Mode
Open the lens cover, rotate the lens focus knob to focus on the
object being observed.
6.5 Lens Focus Adjustment
17

Long press to turn on/off the Target Outline Mode.
6.6 Pseudo Color Switch
Short press to change the pseudo colors. There are totally six
pseudo colors (white hot, black hot, red hot, green, golden, violet)
for user choice.
6.7 Target Outline Mode
Double click to zoom in/out the UI icons to be well suited to
the variable magnifications of your day optics.
6.8 UI Zooming
White
Red
GoldenBlack
Green Violet
18

Short press to adjust the OLED brightness level to make the image
brighter or dimmer. There are 1-10 brightness levels for selection.
AI rangefinder function is used to check the distance of the target.
Double click to turn on/off the AI rangefinder function. You will see
distance information on the display after activating this function.
6.10 OLED Brightness Adjustment
Long press to turn on/off the OSD function. Video recording
includes the menu on the screen after turning on the OSD function.
6.11 OSD Function
6.9 AI Rangefinder
19

7.MAIN MENU
On the home screen, double click the menu button “ M ” to enter the main menu interface.
In the main menu, short press the “+ / -” button to switch the menu options.
Short press the menu button “M” to adjust the parameters of present option.
Press and hold the down menu button “M” for 3 seconds to exit to the home screen.
Short press the Menu button “M” to save.
Double click the menu button “M” to enter
the main menu.
Select the Image Set option with the “+ / -”
button. Short press the menu button “M” to
enter Image Set.
The icon will be turned into blue when Image
set is selected.
Set the parameters including Sharpness,
Contrast, Brightness and Denoise as needed.
These parameters are ranged from 1-10.
Main Menu function descriptions
Turn Image set on/off
Image Set
14:04P1
Image Set/Brihghtness
55 5 5
20
This manual suits for next models
2
Table of contents
Other ThermTec Thermal Camera manuals

