Thetford C260 Series User manual

EUROPEAN HEADQUARTERS
Thetford B.V.
P.O. Box 169
4870 AD Etten-Leur
the Netherlands
T +31 76 504 22 00
F +31 76 504 23 00
FRANCE
Thetford S.A.R.L.
Parc BUROPLUS / Bâtiment 6
18, Boulevard de la Paix
CS 80008
95895 Cergy Pontoise Cedex
France
T +33 1 30 37 58 23
F not available
SCANDINAVIA
Thetford Scandinavia
Bangatan 6
521 43 Falköping
Sverige
T +46 31 336 35 80
F not available
Copyright 2012-2023 Thetford B.V. All rights reserved.
93084/0623-V03
UNITED KINGDOM
Thetford Ltd.
Unit 6
Brookfi elds Way
Manvers, Rotherham
S63 5DL, England
United Kingdom
T +44 844 997 1960
F +44 844 997 1961
ITALY
Thetford Italy c/o Tecma s.r.l.
Via Flaminia
Loc. Castel delle Formiche
05030 Otricoli (TR)
Italia
T +39 0744 709071
F +39 0744 719833
AUSTRALIA
Thetford Australia Pty. Ltd.
130-132 Freight Drive
Somerton VIC 3062
Australia
T +61 3 9358 0700
F not available
www.thetford.com.au
GERMANY
Thetford GmbH
Schallbruch 14
D-42781 Haan
Deutschland
T +49 2129 94250
F +49 2129 942525
SPAIN AND PORTUGAL
Mercè Grau Solà
Agente para España y Portugal
C/Castellet, 36 bxs 2a
08800-Vilanova i la Geltrú
Barcelona
España
T +34 (9) 3815 4389
F not available
CHINA
Thetford China
Rm. 1207, Coastal Building
(East Block)
Haide 3rd Road, Nanshan District
Shenzhen, 518054
China
T +86 755 8627 1393
F +86 755 8627 1673
www.thetford.cn
www.thetford.com
INSTALLATION MANUAL
C260 SERIES
ELECTRIC VENTILATOR
IM-AM_C260-Electric-Ventilator_93084-0623-V03_cove.indd 1IM-AM_C260-Electric-Ventilator_93084-0623-V03_cove.indd 1 01/06/2023 14:10:2401/06/2023 14:10:24

3
EN
ORIGINAL INSTALLATION MANUAL
Introduction
This Electric Ventilator is designed for a Thetford C260
Cassette Toilet. Thetford recommends that this Electric
Ventilator be installed by an official dealer or Service Centre.
Thetford is not liable for any loss and/or damage caused
directly or indirectly by use of this Thetford product. Read the
information and instructions carefully and follow them strictly
to install this product safely and correctly. Our policy is one
of continuous development and improvement. Specifications
and illustrations may change subsequent to publication.
For the latest version of this manual please visit
www.thetford.com
Working priciple
By activating the function on the
control panel, the Electric
Ventilator automatically filters
smells from the waste-holding
tank - odourless - to the outside
of the vehicle.
For more information on how
to use this option on your toilet,
read the C260 user manual.
Before installation
Make sure it is possible to drill a hole in the floor.
This installation instruction depicts a standard model
toilet (S-version). Your toilet may therefore vary slightly
from the pictures in the instruction.
Tools required: electric drill • 85 mm drill • screwdriver
- Phillips head no. 2 • tie wraps • safety goggles • ear
protectors • marker • butyl sealant
Warranty
For our warranty clause, please refer to the conditions
mentioned on www.thetford.com
FR
MANUEL D'INSTALLATION
Introduction
Ce Kit de Ventilation est conçu pour les toilettes à cassette
Thetford C260. Thetford vous recommande de faire installer
le Kit de Ventilation par un concessionnaire ou un centre
de service agréé. Thetford ne peut être tenu responsable
de toute perte et/ou dommages causés directement ou
indirectement par l'utilisation de ce produit Thetford. Lisez
aenvement et suivez scrupuleusement les informaons et
les instrucons, an d’installer ce produit correctement et en
toute sécurité. Nous appliquons une polique d’amélioraon
et de développement connus. Les spécicaons et les
illustraons peuvent être modiées après publicaon.
Pour la dernière version de ce manuel, consultez le site
www.thetford.com
Principe de fonctionnement
En activant la fonction sur le
panneau de commande, le
ventilateur électrique filtre
automatiquement les odeurs du
réservoir à matières - sans odeur
- vers l'extérieur du véhicule.
Pour plus d'informations sur
l'utilisation de cette option sur
vos toilettes, lisez le manuel d'utilisation du C260.
Avant l'installation
Avant de commencer l'installation de ce Kit de
Ventilation, veuillez vérifier également la possibilité de
percer un trou dans le plancher de votre véhicule.
Ces instructions d'installation décrivent un modèle
standard de toilettes (version S), par conséquent, votre
toilette risque de varier légèrement par rapport aux images
des instructions.
Outils nécessaires : perceuse électrique • foret de
85 mm • tournevis cruciforme n°2 • serres câbles •
lunettes de protection • protections auditives • marqueur •
pâte d'étanchéité à base de caoutchouc
Garantie
Veuillez consulter les conditions de notre clause de garantie
sur www.thetford.com
DE
INSTALLATIONSHANDBUCH
Einführung
Dieser elektrische Ventilator ist für die Thetford
Cassettentoilette C260 geeignet. Thetford empfiehlt, diesen
elektrischen Ventilator von einem offiziellen Fachhändler oder
einer Thetford Service Station einbauen zu lassen. Thetford
haftet nicht für Verluste und/oder Schäden, welche direkt
oder indirekt aus der Benutzung dieses Thetford-Produkts
entstehen.Lesen Sie die Informationen und Anweisungen
sorgfältig durch und befolgen Sie sie genau, um dieses
Produkt sicher und sachgerecht zu installieren. Wir lassen
uns durch das Prinzip der kontinuierlichen Entwicklung und
Verbesserung leiten. Spezifikationen und Illustrationen
können sich nach der Veröffentlichung ändern.
Die aktuelle Version dieses Benutzerhandbuchs finden
Sie auf www.thetford.com
IM-AM_C260-Electric-Ventilator_93084-0623.indd 3IM-AM_C260-Electric-Ventilator_93084-0623.indd 3 01/06/2023 14:25:1401/06/2023 14:25:14

4
Funktion
Durch Aktivierung der Funktion
am Bedienfeld filtert der
elektrische Ventilator
automatisch Gerüche aus dem
Fäkalientank – geruchlos – nach
außen aus dem Fahrzeug.
Weitere Informationen zur
Verwendung dieser Option auf
Ihrer Toilette finden Sie im Benutzerhandbuch des C260.
Vor der Installation
Prüfen Sie auch die Möglichkeit, ein Loch in den Boden
zu bohren, bevor Sie mit dem Einbau dieses elektrischen
Ventilators beginnen.
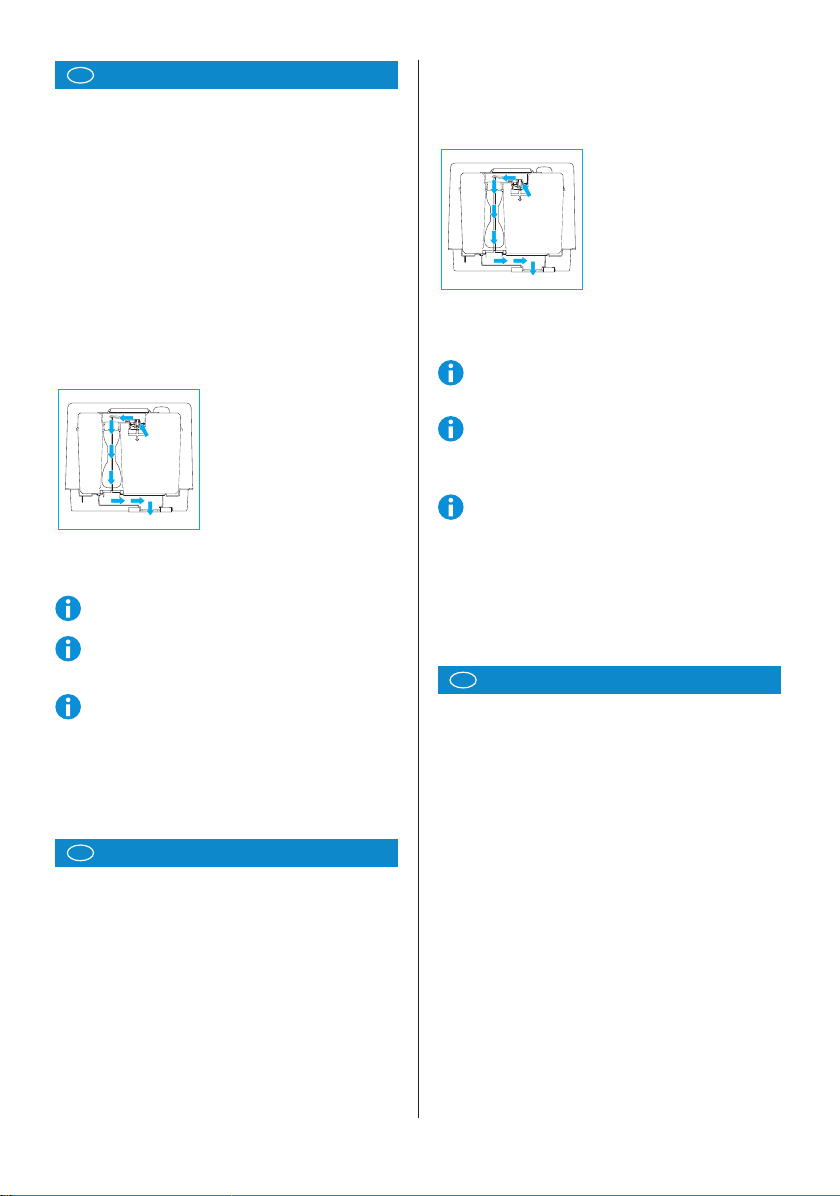
In dieser Einbauanleitung ist eine Toilette des
Standardmodells (S-Version) abgebildet, Ihre Toilette
kann daher leicht von den Bildern in der Anleitung abweichen.
Benötigte Werkzeuge: Bohrmaschine • 85-mm-Bohrer
• Kreuzschlitzschraubendreher Nr. 2 • Kabelbinder
• Schutzbrille • Ohrenschützer • Markierungsstift • Butyl-
Dichtungsmittel
Garantie
Unsere Garantiebedingungen finden Sie auf
www.thetford.com
NL
INSTALLATIE HANDLEIDING
Inleiding
Deze Elektrische Ventilator is speciaal ontworpen voor
een Thetford C260 Cassettetoilet. Thetford raadt u aan
deze Elektrische Ventilator door een officiële dealer of
Service Centrum te laten installeren. Thetford is niet
aansprakelijk voor ieder verlies en/of schade direct of indirect
voortkomend uit het gebruik van de Elektrische Ventilator.
Lees de informatie en instructies zorgvuldig door en volg
alle instructies nauwkeurig op om de koelkast veilig en juist
te installeren. Wij streven naar voortdurende ontwikkeling
en verbetering. Specificaties en afbeeldingen kunnen na
publicatie worden gewijzigd.
Ga voor de meest recente versie van de handleiding naar
www.thetford.com
Werkend principe
Door de functie op het
bedieningspaneel te activeren,
filtert de Elektrische Ventilator
automatisch nare geurtjes van de
afvaltank, geurloos, naar buiten.
Zie de gebruikers-handleiding van
de C260 voor meer informatie
over het gebruik van deze optie
op uw toilet.
Voor installatie
Zorg ervoor dat het mogelijk is om een gat in de vloer te
boren.
De instructie toont een standaard
model toilet (s-versie)
en daarom kunnen de afbeel
dingen licht afwijken ten
opzichte van uw toilet.
Benodigd gereedschap: Boormachine • 85 mm boor •
schroevendraaier • kruiskopschroevendraaier nr. 2
(PH2) • tie wraps • veiligheidsbril • gehoorbescherming
• markeerstift • butylkit
Garantie
Ga voor onze garantievoorwaarden naar www.thetford.com
ES
MANUAL DE INSTALACIÓN
Introducción
Este Ventilador Eléctrico ha sido diseñado para el inodoro
Cassette C260 de Thetford. Thetford recomienda que este
Ventilador Eléctrico sea instalado por un distribuidor oficial o
por un Centro de servicio. Thetford no se hace responsable
por las pérdidas y/o daños causados directa o indirectamente
por el uso de este producto Thetford. Lea atentamente
la información y las instrucciones y sígalas estrictamente
para instalar este producto de forma segura y correcta.
Nuestra política es de desarrollo y mejora continua. Las
especificaciones e ilustraciones pueden cambiar después de
la publicación.
Visite www.thetford.com para obtener la última versión del
manual
Principio de funcionamiento
Al activar la función en el panel
de control, el Ventilador Eléctrico
filtra automáticamente los olores
del tanque de residuos - sin olor
- hacia el exterior del vehículo.
Para obtener más información
sobre cómo usar esta opción en
su inodoro, lea el manual del
usuario C260.
Antes de la instalación
Antes de iniciar la instalación de este Ventilador
Eléctrico, también tenga presente sobre la posibilidad
de realizar un orificio en el suelo.
Estas instrucciones de instalación se refieren a un
inodoro de modelo estándar (versión S), por lo tanto su
inodoro podría diferir ligeramente del que se muestra en las
imágenes de las instrucciones.
Herramientas necesarias: talador eléctrico • broca de
85 mm • destornillador - cabeza Phillips no. 2 • bridas •
gafas de seguridad • protectores de oídos • marcador •
sellador a base de butilo
IM-AM_C260-Electric-Ventilator_93084-0623.indd 4IM-AM_C260-Electric-Ventilator_93084-0623.indd 4 05/06/2023 15:45:2605/06/2023 15:45:26

5
Garantía
Para conocer nuestra cláusula de garantía, consulte las
condiciones mencionadas en www.thetford.com
IT
MANUALE DI INSTALLAZIONE
Introduzione
Questo sistema elettrica di ventilazione è stato realizzato
per l’uso con toilette a cassetta C260 Thetford consiglia
di far installare il sistema elettrico di ventilazione da un
rivenditore ufficiale o da un Centro assistenza. Thetford
non è responsabile di eventuali perdite e/o danni causati,
direttamente o indirettamente, dall’uso di questo prodotto
Thetford.Leggere attentamente le informazioni e le istruzioni e
seguirle rigorosamente per installare questo prodotto in modo
sicuro e corretto. La nostra politica è di continuo sviluppo
e miglioramento. Le specifiche e le illustrazioni possono
cambiare dopo la pubblicazione.
Per l'ultima versione di questo manuale, visitare
www.thetford.com
Principio di funzionamento
Attivando la funzione sul quadro
comandi, l'Elettroventilatore filtra
automaticamente gli odori dal
serbatoio di scarico - inodore
- verso l'esterno del veicolo. Per
ulteriori informazioni su come
utilizzare questa opzione sulla tua
toilette, leggi il manuale utente
C260.
Prima dell'installazione
Prima di installare il sistema elettrico di ventilazione,
valutare anche la possibilità di effettuare un foro nel
pavimento.
Queste istruzioni per l’installazione fanno riferimento ad
un modello di toilette standard (versione S), pertanto la
vostra toilette potrebbe variare leggermente dalle immagini
contenute nelle istruzioni.
Attrezzi necessari: trapano elettrico • punta da 85 mm •
cacciavite - testa a croce n. 2 • fascette stringicavo •
occhialini di sicurezza • protezione per le orecchie •
pennarello • sigillante butilico
Garanzia
Per la nostra clausola di garanzia, fare riferimento alle
condizioni menzionate su www.thetford.com.
SE
MONTERINGSANVISNING
Inledning
Denna Elektriska Fläkt är utvecklad för Thetfords
kassettoaletter C260. Thetford rekommenderar att
denna elektriska fläkt installeras av en återförsäljare eller
servicecenter. Thetford är inte ansvarigt för förluster och/eller
skador orsakade direkt eller indirekt av användning av denna
Thetford-produkt. Läs informationen och instruktionerna
noggrant och följ dem strikt för att installera denna produkt
säkert och korrekt. Vår policy är ständig utveckling och
förbättring. Specifikationer och illustrationer kan ändras efter
publicering.
För den senaste versionen av denna manual, besök
www.thetford.com
Arbetsprincip
Genom att aktivera funktionen på
kontrollpanelen filtrerar den
elektriska Ventilatorn automatiskt
bort lukter från avfallstanken -
luktfritt - till utsidan av fordonet.
För mer information om hur du
använder det här alternativet på
din toalett, läs C260
användarmanual.
Före installation
Kontrollera också möjligheten att borra ett hål i golvet
innan du börjar installera den Elektriska Fläkten.
Denna installations instruktion visar en toalett av
standardmodell (S-versionen), därför kan din toalett
vara lite annorlunda än bilderna i instruktionerna.
Nödvändiga verktyg: elektrisk borr • 85 mm borr •
skruvmejsel - stjärnmejsel nr. 2 • buntband •
skyddsglasögon • hörselskydd • markeringspenna •
butyltätning
Garanti
För vår garantiklausul, se villkoren som nämns på
www.thetford.com
IM-AM_C260-Electric-Ventilator_93084-0623.indd 5IM-AM_C260-Electric-Ventilator_93084-0623.indd 5 05/06/2023 15:45:2605/06/2023 15:45:26

6
Look on the serial label for the product code before installaon. Parts of this code (bold printed in the example) will be used
as a reference during installaon.
Consultez l'équee pour obtenir le code du produit avant l'installaon. Des pares de ce code (imprimées en gras dans
l'exemple) seront ulisées comme référence pendant l'installaon.
Schauen Sie vor dem Einbau auf dem Typenschild nach dem Produktcode. Teile dieses Codes (im Beispiel fe gedruckt)
dienen beim Einbau als Referenz.
Bekijk eerst de productcode op het typeplaatje, voordat u start met de installae. In dit document wordt regelmag
verwezen naar delen van deze code, zoals dikgedrukt aangegeven in het voorbeeld.
Localice la equeta del número de serie para obtener el código de producto antes de la instalación.
Parte de este código
(impresa en negrita en el ejemplo) será usada como referencia durante la instalación.
Controllare l’echea ed individuare il codice prodoo prima dell’installazione. Par di questo codice (in grasseo
nell’esempio) vengono usate come referenza durante l’installazione.
Tia på produktkoden på ekeen med serienummer före installaonen. Delar av denna kod (med fetsl i exemplet)
används som referens under installaonen.
≤ 07/2013
C26X- xXXxxxx01x
C26X- xXXxxxx09x
C26X- xXXxxxx10x
C263- x20xxxxXXx
C262- x19xxxxXXx
≥ 08/2013
C26XXXX- xxxxxxxx01
C26XXXX- xxxxxxxx09
C26XXXX- xxxxxxxx10
C263S- xxxxxxxxXX
C262CWE- xxxxxxxxXX
BEFORE INSTALLATION
EN
FR
DE
NL
ES
IT
SE
IM-AM_C260-Electric-Ventilator_93084-0623.indd 6IM-AM_C260-Electric-Ventilator_93084-0623.indd 6 05/06/2023 15:45:2605/06/2023 15:45:26

7
MOUNTING STEPS
Unscrew the housing. Raise slightly and lay it down.
Handle with care, the wiring connection is short.
Dévissez le support. Levez-le doucement, puis couchez-le.
Manipulez avec précaution, le câble est court.
Schrauben Sie das Gehäuse ab. Heben Sie es leicht an und
legen Sie es ab. Seien Sie vorsichtig, die Anschlusskabel sind
kurz.
Schroef de behuizing los. Til deze iets op en leg neer
Doe dit voorzichtig, de aangesloten bedrading is kort.
Desatornille la carcasa. Levante ligeramente y deje sobre el
suelo. Manipule con cuidado, la conexión del cable es
corta.
Togliere le vi dell’alloggiamento. Sollevare leggermente ed
abbassarlo. Maneggiare con cura, il cavo elettrico è corto.
Skruva loss höljet. Ly en liten bit och lägg ner det.
Hantera försiktigt, kabelanslutningen är kort.
Only applicable for
Applicable uniquement pour
Nur für
Enkel van toepassing op
Sólo aplica para
Si applica solo per
Gäller endast för
C26XXXX - xxxxxxxx01 + C26XXXX - xxxxxxxx09
EN
FR
DE
NL
ES
IT
SE
1
Remove the printed circuit board. Place the connectors to the
same corresponding posion on the new printed circuit board.
Avoid touching the surface of the printed circuit board.
Ôtez le circuit imprimé. Placez les connecteurs à la même
posion sur le nouveau circuit imprimé. Évitez de toucher
la surface du circuit imprimé.
Nehmen Sie die Plane heraus. Schließen Sie die Steck-
verbinder an die gleichen Posionen auf der neuen Plane an.
Vermeiden Sie es, die Oberfläche der Platine zu berühren.
Neem de printplaat uit. Sluit de connectoren aan op dezelfde
posie van de nieuwe printplaat. Raak het oppervlak van de
nieuwe printplaat niet aan.
Quite el tablero de circuitos impreso. Coloque los conectores
en la misma posición correspondiente al nuevo tablero de
circuitos impreso. Evite tocar la superficie del tablero de
circuitos impreso.
Rimuovere il circuito stampato. Posizionare i conneori nella
stessa posizione sul nuovo circuito stampato. Evitare di
toccare la superficie del circuito stampato.
Ta ut kretskortet. Placera anslutningarna i samma motsvarande
posion på det nya kretskortet. Ta inte på kretskortets yta.
2
Only applicable for
Applicable uniquement pour
Nur für
Enkel van toepassing op
Sólo aplica para
Si applica solo per
Gäller endast för
C26XXXX - xxxxxxxx01 + C26XXXX - xxxxxxxx09
IM-AM_C260-Electric-Ventilator_93084-0623.indd 7IM-AM_C260-Electric-Ventilator_93084-0623.indd 7 05/06/2023 15:45:2705/06/2023 15:45:27

8
Place in the new printed circuit board and screw the housing
back into place.
Placez le nouveau circuit imprimé et vissez le support dans
son emplacement.
Setzen Sie die neue Plane ein und schrauben Sie das
Gehäuse wieder fest.
Plaats de nieuwe printplaat terug en schroef de behuizing
vast.
Coloque el nuevo tablero de circuitos impreso y atornille la
carcasa nuevamente en su sio.
Posizionare il nuovo circuito stampato e serrare nuovamente
in posizione l’alloggiamento.
Sä i det nya kretskortet och skruva fast höljet igen.
Only applicable for
Applicable uniquement pour
Nur für
Enkel van toepassing op
Sólo aplica para
Si applica solo per
Gäller endast för
C26XXXX - xxxxxxxx01 + C26XXXX - xxxxxxxx09
EN
FR
DE
NL
ES
IT
SE
Empty the ush-water tank and unscrew the water ll door.
Videz le réservoir d'eau propre et dévissez la trappe de
remplissage d’eau.
Leeren Sie den Spülwassertank und schrauben Sie die
Wassereinfüllklappe ab.
Leeg de watertank en schroef het deurtje voor het watervullen
los.
Vacíe la cisterna de agua y destornille la tapa de llenado de
agua.
Svuotare il serbatoio dello sciacquone e togliere le vi dello
sportello per rabboccare l’acqua.
Töm spolvaentanken och skruva loss luckan för
vaenpåfyllning.
4
Only applicable for
Applicable uniquement pour
Nur für
Enkel van toepassing op
Sólo aplica para
Si applica solo per
Gäller endast för
C26XXXX - xxxxxxxx01 + C26XXXX - xxxxxxxx09
3
IM-AM_C260-Electric-Ventilator_93084-0623.indd 8IM-AM_C260-Electric-Ventilator_93084-0623.indd 8 05/06/2023 15:45:2705/06/2023 15:45:27

9
Unscrew the toilet from the wall.
Dévissez la toilee de la paroi.
Schrauben Sie die Toilee von der Wand ab.
Schroef het toilet los van de muur.
Destornille el inodoro de la pared.
Togliere le vi che ssano la toilee alla parete.
Skruva loss toaleen från väggen.
Only applicable for
Applicable uniquement pour
Nur für
Enkel van toepassing op
Sólo aplica para
Si applica solo per
Gäller endast för
C263S - xxxxxxxxXX
EN
FR
DE
NL
ES
IT
SE
Unscrew the hose clamp and disconnect the water supply
tube.
Dévissez le collier de serrage et déconnectez le tube
d'alimentaon d’eau.
Lösen Sie die Schlauchschelle und trennen Sie den
Wasserzulaufschlauch.
Schroef de slangenklem los en ontkoppel de waterslang.
Destornille la abrazadera y desconecte el tubo de suministro
de agua.
Allentare le vi che bloccano il tubo di ssaggio e scollegare
il tubo di distribuzione dell’acqua.
Lossa slangklämman och koppla bort vaenslangen.
6
Not applicable for
Non applicable à
Nicht für
Niet van toepassing op
No aplica para
Non si applica per
Gäller ej för
C262CWE - xxxxxxxxXX
5
IM-AM_C260-Electric-Ventilator_93084-0623.indd 9IM-AM_C260-Electric-Ventilator_93084-0623.indd 9 05/06/2023 15:45:2705/06/2023 15:45:27

10
Disconnect the main connector. For a C263S - xxxxxxxxXX also
disconnect the wiring connector between toilet and control
panel.
Déconnectez le connecteur principal. Pour un C263S -
xxxxxxxxXX déconnectez également le connecteur de câblage
entre les toilees et le panneau de commande.
Ziehen Sie den Hauptstecker ab. Trennen Sie bei einer C263S
- xxxxxxxxXX auch den Verbinder der Leitung von der Toilee
zum Bedienfeld ab.
Maak de hoofdconnector los. Maak voor een C263S-xxxxxxxXX
ook de connector tussen toilet en bedieningspaneel los.
Desconecte el conector principal. Para C263S - xxxxxxxxXX
también desconecte el conector de cable entre el inodoro y el
panel de control.
Scollegare il conneore principale. Per una C263S - xxxxxxxxXX
scollegare anche il conneore elerico tra la toilee e il
pannello di controllo.
Koppla bort strömanslutningen. Med en C263S - xxxxxxxxXX,
koppla också bort kabelanslutningen mellan toaleen och
kontrollpanelen.
EN
FR
DE
NL
ES
IT
SE
Remove the covering plate.
Rerez la trappe d’accès.
Enernen Sie die Abdeckplae.
Verwijder het afdekplaatje.
Quite la placa de cobertura.
Rimuovere la piastra proteva.
Ta bort skyddslocket.
87
IM-AM_C260-Electric-Ventilator_93084-0623.indd 10IM-AM_C260-Electric-Ventilator_93084-0623.indd 10 05/06/2023 15:45:2705/06/2023 15:45:27

11
Unscrew the toilet from the oor. Li the toilet up and
remove it from the bathroom.
Dévissez la toilee plancher. Levez la toilee et rerez-la
de la salle de bain.
Schrauben Sie die Toilee vom Boden ab. Heben Sie die
Toilee an und enernen Sie diese aus dem Bad.
Schroef het toilet los van de vloer. Til het toilet op en neem
het uit de badkamer.
Destornille el inodoro del suelo. Levante el inodoro y quítelo
del baño.
Allentare le vi che bloccano la toilee dal pavimento.
Sollevare la toilee e rimuoverla dal bagno.
Skruva loss toaleen från golvet. Ly upp toaleen och ta
ut den från badrummet.
EN
FR
DE
NL
ES
IT
SE
Unscrew the side cover.
Dévissez le cache latéral.
Schrauben Sie die seitliche Abdeckung ab.
Schroef de zijplaat los.
Destornille la cubierta lateral.
Allentare le vi del coperchio laterale.
Skruva bort sidoluckan.
109
IM-AM_C260-Electric-Ventilator_93084-0623.indd 11IM-AM_C260-Electric-Ventilator_93084-0623.indd 11 05/06/2023 15:45:2805/06/2023 15:45:28

12
Not applicable for
Non applicable à
Nicht für
Niet van toepassing op
No aplica para
Non si applica per
Gäller ej för
C26XXXX - xxxxxxxx09 + C26XXXX - xxxxxxxx10
Not applicable for
Non applicable à
Nicht für
Niet van toepassing op
No aplica para
Non si applica per
Gäller ej för
C26XXXX - xxxxxxxx09 + C26XXXX - xxxxxxxx10
Make two holes by removing the indicated material.
Percez deux trous et rerant le matériau indiqué.
Machen Sie zwei Löcher, indem Sie das angezeigte Material
enernen.
Maak twee gaten door het aangegeven materiaal te
verwijderen.
Realice dos oricios quitando el material indicado.
Pracare due fori rimuovendo il materiale indicato.
Gör två hål genom a ta bort det material som visas.
EN
FR
DE
NL
ES
IT
SE
Temporarily replace the toilet in posion. Draw the outline of
the round hole on the oor of the vehicle.
Replacez temporairement la toilee en posion. Dessinez le
contour du trou rond sur le plancher du véhicule.
Stellen Sie die Toilee wieder auf. Zeichnen Sie den Umriss der
runden Önung auf den Fahrzeugboden.
Plaats het toilet jdelijk terug. Neem het ronde gat over op de
vloer van het voertuig.
Cambie temporalmente el inodoro de posición. Dibuje el
contorno del oricio en el suelo del vehículo.
Porre temporaneamente la toilee in posizione. Tracciare il
contorno del foro rotondo sul pavimento del veicolo.
Sä llbaka toaleen llfälligt. Rita konturen på det runda
hålet på fordonets golv.
1211
IM-AM_C260-Electric-Ventilator_93084-0623.indd 12IM-AM_C260-Electric-Ventilator_93084-0623.indd 12 05/06/2023 15:45:2805/06/2023 15:45:28

13
Not applicable for
Non applicable à
Nicht für
Niet van toepassing op
No aplica para
Non si applica per
Gäller ej för
C26XXXX - xxxxxxxx09 + C26XXXX - xxxxxxxx10
Not applicable for
Non applicable à
Nicht für
Niet van toepassing op
No aplica para
Non si applica per
Gäller ej för
C26XXXX - xxxxxxxx09 + C26XXXX - xxxxxxxx10
Remove the toilet again and drill an 85mm hole through the
oor of the vehicle. Use the centre of the drawn hole as a
reference point.
Rerez de nouveau la toilee et percez un trou de 85 mm
dans le plancher du véhicule. Ulisez le centre du trou dessiné
comme point de référence.
Enernen Sie die Toilee wieder und bohren Sie ein 85-mm-
Loch durch den Fahrzeugboden. Nehmen Sie die Mie der
gezeichneten Önung als Bezugspunkt.
Neem het toilet weer weg en boor een gat van 85 mm door
de vloer van het voertuig. Gebruik het centrum van de
getekende omtrek als referene.
Quite el inodoro nuevamente y realice un oricio de 85 mm
en el suelo del vehículo. Ulice el centro del oricio trazado
como punto de referencia.
Rimuovere nuovamente la toilee e pracare un foro di
85mm sul pavimento del veicolo. Usare il centro del foro
tracciato come punto di riferimento.
Ta bort toaleen igen och borra e 85 mm hål genom
fordonets golv. Använd mien av det ritade hålet som
referenspunkt.
EN
FR
DE
NL
ES
IT
SE
Place the adaptor and screw it to the oor. Seal the adaptor at
the boom of the vehicle.
Placez l'adaptateur et vissez-le dans le plancher. Scellez
l'adaptateur sous le véhicule.
Setzen Sie den Adapter ein und schrauben Sie ihn am Boden
fest.Dichten Sie den Adapter an der Unterseite des Fahrzeugs
ab.
Plaats de adapter en schroef deze vast. Kit de adapter aan de
onderkant van het voertuig.
Coloque el adaptador y el tornillo en el suelo. Selle el
adaptador en la parte inferior del vehículo.
Posizionare l’adaatore e ssarlo al pavimento. Sigillare
l’adaatore sul fondo del veicolo .
Placera adaptern och skruva fast den i golvet.Täta adaptern
under fordonet.
1413
IM-AM_C260-Electric-Ventilator_93084-0623.indd 13IM-AM_C260-Electric-Ventilator_93084-0623.indd 13 05/06/2023 15:45:2805/06/2023 15:45:28

14
Route the vent wiring through the holes as illustrated. Screw the side cover back in place. Ensure the wires are not trapped
between the toilet and side cover.
Acheminez le câblage d'aéraon à travers les trous comme illustré. Vissez le cache latéral dans sa posion. Veillez à ce que les
câbles ne soient pas piégés entre les toilettes et le cache latéral.
Führen Sie die Lüerkabel wie abgebildet durch die Önungen. Schrauben Sie die seitliche Abdeckung wieder an Überzeugen
Sie sich davon, dass die Kabel nicht zwischen der Toilette und der seitlichen Abdeckung eingeklemmt werden.
Leid de bedrading van de venlator door de gaten, zoals afgebeeld. Schroef de zijplaat terug . Let op dat de bedrading niet
bekneld raakt tussen het toilet en de zijplaat.
Guíe el cableado de venlación a través de los oricios como se muestra. Atornille la cubierta lateral nuevamente en su sio.
Asegúrese de que los cables no queden atrapados entre el inodoro y la cubierta lateral.
Far scorrere il cavo della ventola araverso i fori come indicato in gura. Serrare il coperchio laterale in posizione. Assicurarsi
che i cavi non restino incastrati tra la toilette e il coperchio laterale.
Dra kablaget genom hålen i enlighet med illustraonen. Skruva på sidoluckan igen. Se till att kablarna inte fastnar mellan
toaletten och sidoluckan.
EN
FR
DE
NL
ES
IT
SE
15
IM-AM_C260-Electric-Ventilator_93084-0623.indd 14IM-AM_C260-Electric-Ventilator_93084-0623.indd 14 05/06/2023 15:45:2805/06/2023 15:45:28

15
Not applicable for
Non applicable à
Nicht für
Niet van toepassing op
No aplica para
Non si applica per
Gäller ej för
C26XXXX - xxxxxxxx09 + C26XXXX - xxxxxxxx10
Fix the venlator in place using the foam.
Verify that the ventilator is facing as per the specified
positioning.
Fixez le venlateur dans son emplacement à l'aide de la mousse
Vérifiez que le ventilateur est face à la position spécifiée
Befesgen Sie den Venlator mit dem Schaumsto.
Vergewissern Sie sich, dass der Ventilator wie angegeben
ausgerichtet ist
Plaats de venlator en xeer deze met behulp van de
afdichtring. Let op de juiste orientatie van de ventilatorx.
Fije el venlador en su sio usando la espuma. Verifique
que el ventilador esté orientado en la posición especificada.
Fissare il venlatore in posizione ulizzando la schiuma.
Verificare che il ventilatore sia rivolto verso la posizione
specificata.
Fäst äkten på plats med skumplasten. Kontrollera att
fläkten är vänd enligt den specificerade placeringen.
EN
FR
DE
NL
ES
IT
SE
Fit the large seal at the boom.
Apposez le grand joint sous la toilee.
Legen Sie die große Dichtung passend auf den Boden.
Plaats de grote afdichtring tegen de onderkant.
Coloque el sello grande en la parte inferior.
Fissare la guarnizione grande sul fondo.
Passa in den stora tätningen under.
1716
IM-AM_C260-Electric-Ventilator_93084-0623.indd 15IM-AM_C260-Electric-Ventilator_93084-0623.indd 15 05/06/2023 15:45:2905/06/2023 15:45:29

16
Only applicable for
Applicable uniquement pour
Nur für
Enkel van toepassing op
Sólo aplica para
Si applica solo per
Gäller endast för
C263S - xxxxxxxxXX
Put the toilet back into posion. Fixing all screw posions
again. Ensure the connection between base and adaptor
is correct.
Remeez les toilees en place. Nouvelle xaon des posions
de vis. Veillez à ce que la jonction entre la base de la
toilette et l'adaptateur soit correcte.
Stellen Sie die Toilee wieder an ihren Platz. Befesgen Sie alle
Schrauben wieder. Achten Sie darauf, dass die Verbindung
zwischen der Basis und dem Adapter korrekt ist.
Plaats het toilet terug. Schroef het toilet weer vast. Let op
dat de adapter op de bodem van het toilet aansluit.
Coloque el inodoro en su posición. Fijación de posición de
todos los tornillos. Asegúrese de que la conexión entre la
base y el adaptador sea la correcta.
Riposizionare la toilee. Fissare nuovamente tue le vi.
Assicurarsi che il collegamento tra la base e l’adattatore
sia corretto.
Ställ llbaka toaleen på plats. Fäst alla skruvposioner igen.
Se till att anslutningen mellan basen och adaptern är
korrekt.
EN
FR
DE
NL
ES
IT
SE
Remove the scker.
Rerez l'autocollant.
Enernen Sie den Auleber.
Verwijder de scker.
Quite el adhesivo.
Rimuovere la pellicola adesiva.
Ta bort dekalen.
1918
IM-AM_C260-Electric-Ventilator_93084-0623.indd 16IM-AM_C260-Electric-Ventilator_93084-0623.indd 16 05/06/2023 15:45:2905/06/2023 15:45:29

17
Only applicable for
Applicable uniquement pour
Nur für
Enkel van toepassing op
Sólo aplica para
Si applica solo per
Gäller endast för
C26XXXX - xxxxxxxx01 + C26XXXX - xxxxxxxx09
Li the control panel.
Levez le panneau de commande.
Heben Sie das Bedienfeld an.
Neem het bedieningspaneel uit.
Levante el panel de control.
Sollevare il pannello di controllo.
Ly upp kontrollpanelen.
EN
FR
DE
NL
ES
IT
SE
Replace the current printed circuit board with the new one.
Place the connectors at the corresponding posions. Avoid
touching the surface of the new printed circuit board.
Remplacez le circuit imprimé actuel par un neuf. Placez les
connecteurs sur les posions correspondantes. Évitez de
toucher la surface du nouveau circuit imprimé.
Ersetzen Sie die eingebaute Plane durch die neue. Schließen Sie
die Steckverbinder an die richgen Anschlüsse an. Vermeiden
Sie es, die Oberfläche der neuen Platine zu berühren.
Vervang de huidige printplaat door de nieuwe. Sluit de
connectoren op dezelfde posie aan. Raak het oppervlak
van de nieuwe printplaat niet aan.
Sustuya el tablero de circuitos impreso actual por el nuevo.
Coloque los conectores en las posiciones correspondientes.
Evite tocar la superficie del tablero de circuitos impreso nuevo.
Sostuire il circuito stampato auale con uno nuovo. Posizionare i
conneori nelle posizioni corrisponden. Evitare di toccare la
superficie del nuovo circuito stampato.
Byt ut kretskortet mot det nya. Placera anslutningarna vid de
motsvarande posionerna. Ta inte på det nya kretskortets
yta.
2120
IM-AM_C260-Electric-Ventilator_93084-0623.indd 17IM-AM_C260-Electric-Ventilator_93084-0623.indd 17 05/06/2023 15:45:2905/06/2023 15:45:29

18
Route the wiring to the printed circuit board via the exisng
wiring. Use e wraps to secure.
Acheminez le câblage jusqu'au circuit imprimé via le câblage
existant. Ulisez les serres câbles pour xer.
Führen Sie die Kabel entlang der vorhandenen Verkabelung zur
Plane. Sichern Sie die Kabel mit Kabelbindern.
Leid de bedrading van de venlator via de bestaande
bedrading naar het bedieningspaneel met behulp van e
wraps.
Guíe el cableado hacia el tablero de circuitos impreso a través
del cableado existente. Ulice las bridas para asegurar.
Collegare il cavo al circuito stampato mediante il cavo già
esistente. Ulizzare le fascee stringicavo per ssarlo.
Dra kablarna ll kretskortet via det bentliga kablaget. Fäst
med buntband.
EN
FR
DE
NL
ES
IT
SE
Connect the venlator connector onto the printed circuit
board. Replace the control panel into the housing.
Connectez le connecteur du venlateur sur le circuit imprimé.
Replacez le panneau de commande dans son logement.
Verbinden Sie den Venlator-Stecker mit der Plane. Setzen Sie
das Bedienfeld wieder ins Gehäuse ein.
Plaats de connector van de venlator op de printplaat.Plaats
het bedieningspaneel terug.
Conecte el conector del venlador en el tablero de circuitos
impreso. Sustuya el panel de control en la carcasa.
Collegare il conneore del venlatore sul circuito stampato.
Sostuire il pannello di controllo nell’alloggiamento.
Anslut äktens anslutning ll kretskortet. Sä llbaka
kontrollpanelen i höljet.
2322
IM-AM_C260-Electric-Ventilator_93084-0623.indd 18IM-AM_C260-Electric-Ventilator_93084-0623.indd 18 05/06/2023 15:45:2905/06/2023 15:45:29

19
Reconnect the main connector. Push on the right buon to
verify the funconality of the Electric Venlator.
Reconnectez le connecteur principal.Appuyez sur le bouton
de droite pour vérier le bon fonconnement du Kit de
Venlaon.
Schließen Sie den Hauptstecker wieder an. Drücken Sie auf die
rechte Taste, um zu überprüfen, ob der elektrische Venlator
funkoniert.
Sluit de hoofdconnector weer aan.Duw op de rechterknop om
te controleren of de Elektrische Venlator werkt.
Vuelva a conectar el conector principal.Presione el botón
derecho para vericar la funcionalidad del Venlador Eléctrico.
Ricollegare il conneore principale.Premere il pulsante
destro per vericare il funzionamento del sistema elerico di
venlazione.
Koppla in strömkontakten igen.Tryck på den högra knappen
och kontrollera a Elektriska Fläkten fungerar.
EN
FR
DE
NL
ES
IT
SE
Put the toilet back in posion. Fix screw ngs back into place.
Ensure the connection between base and adaptor is
correct.
Remeez la toilee en place. Vissez la toilee dans sa posion
iniale. Veillez à ce que la jonction entre la base de la
toilette et l'adaptateur soit correcte.
Stellen Sie die Toilee wieder an ihren Platz. Setzen Sie die
Schraubfassungen wieder ein. Achten Sie darauf, dass die
Verbindung zwischen der Basis und dem Adapter korrekt ist.
Plaats het toilet terug. Schroef het toilet weer vast. Let op
dat de adapter op de bodem van het toilet aansluit.
Coloque el inodoro en su posición. Fije los tornillos
nuevamente en su sio. Asegúrese de que la conexión
entre la base y el adaptador sea la correcta.
Riposizionare la toilee. Riposizionare e serrare le vi di
ssaggio. Assicurarsi che il collegamento tra la base e
l’adattatore sia corretto.
Ställ llbaka toaleen på plats. Sä llbaka skruvfästena på
plats. Se till att anslutningen mellan basen och adaptern
är korrekt.
25
Not applicable for
Non applicable à
Nicht für
Niet van toepassing op
No aplica para
Non si applica per
Gäller ej för
C263S - xxxxxxxxXX
24
IM-AM_C260-Electric-Ventilator_93084-0623.indd 19IM-AM_C260-Electric-Ventilator_93084-0623.indd 19 05/06/2023 15:45:3005/06/2023 15:45:30

20
Place the new scker on top of the control panel.
Collez le nouvel autocollant sur le panneau de commande.
Bringen Sie den neuen Auleber auf dem Bedienfeld an.
Plak de nieuwe scker.
Coloque el nuevo adhesivo en la parte superior del panel de
control.
Posizionare la nuova pellicola adesiva sulla parte superiore del
pannello di controllo.
Placera den nya dekalen uppe på kontrollpanelen.
EN
FR
DE
NL
ES
IT
SE
Sck the seal onto the plate. Place the lter box in posion rst
and then the plate on top.
Apposez le joint sur la trappe d’accès. Placez tout d'abord le
ltre puis la trappe sur le dessus.
Kleben Sie die Dichtung auf die Plae. Setzen Sie zuerst den
Filterkasten ein und dann die Plae darauf.
Plak de afdichtring op het afdekplaatje. Plaats eerst het lter
en dan het afdekplaatje.
Adhiera el sello en la placa. Coloque la caja del ltro en
posición primero y después la placa en la parte superior.
Fissare la guarnizione sulla piastra. Per prima cosa posizionare
la scatola del ltro, poi la piastra sulla scatola.
Sä tätningen på locket. Placera först lterlådan på plats och
sedan locket ovanpå.
2726
IM-AM_C260-Electric-Ventilator_93084-0623.indd 20IM-AM_C260-Electric-Ventilator_93084-0623.indd 20 05/06/2023 15:45:3005/06/2023 15:45:30

21
Not applicable for
Non applicable à
Nicht für
Niet van toepassing op
No aplica para
Non si applica per
Gäller ej för
C262CWE - xxxxxxxxXX
Reconnect the water tube and secure together with the hose
clamp.
Reconnectez le tube à eau et xez-le avec le collier de serrage.
Schließen Sie die Wasserleitung wieder an und sichern Sie mit
der Schlauchschelle.
Sluit de waterslang aan en schroef de slangenklem vast.
Vuelva a conectar el tubo del agua y asegúrelo con la
abrazadera.
Ricollegare il tubo dell’acqua e ssarlo insieme al tubo di
ssaggio.
Koppla in vaenslangen igen och fäst med slangklämman.
EN
FR
DE
NL
ES
IT
SE
Screw the toilet back to the oor and wall and replace the
waste-holding tank. Your Electric Venlator is ready to use.
Revissez la toilee au plancher et à la paroi, et remeez le
réservoir à maères en place. Votre Kit de Venlaon est prêt
à être ulisé.
Schrauben Sie die Toilee wieder am Boden und an der
Wand fest und setzen Sie den Fäkalientank wieder ein. Ihr
elektrischer Venlator ist jetzt einsatzbereit.
Schroef het toilet weer vast aan vloer en wand en plaats
de afvaltank terug. Uw Elektrische Venlator is klaar voor
gebruik.
Atornille el inodoro en el suelo y en la pared y vuelva a colocar
el depósito de residuos. Su Venlador Eléctrico está listo para
usarse.
Fissare nuovamente la toilee al pavimento e al muro,
quindi sostuire il serbatoio di scarico. Il sistema elerico di
venlazione è pronto all’uso.
Skruva llbaka toaleen på golvet och väggen och sä llbaka
avfallstanken. Din Elektriska Fläkt är klar a användas.
2928
IM-AM_C260-Electric-Ventilator_93084-0623.indd 21IM-AM_C260-Electric-Ventilator_93084-0623.indd 21 05/06/2023 15:45:3005/06/2023 15:45:30
Other manuals for C260 Series
4
Table of contents
Other Thetford Fan manuals
Popular Fan manuals by other brands

Panasonic
Panasonic FV-08-11VFM5 installation instructions

Soleus Air
Soleus Air FSM-45 owner's manual

KDK
KDK M48WG Operating and installation instructions

VOV
VOV VTS-1641 instruction manual

Harbor Breeze
Harbor Breeze Cape Coast E-YLM52WW5C1 installation guide

Home Decorators Collection
Home Decorators Collection GRENADA YG522-BN Use and care guide