TA02982 E page 4 of 8
56
200
203
3
1
65
17
A
54
53
55
55
3.0 MAINTENANCE
When not in use, the tool should be put in the rest position
and placed in the plastic case for storage and transportation.
The plastic case can also accommodate 14 die sets
(See Figure 3).
To put the tool in the rest position:
−
Retract the ram completely
as describe in 2.4.
− Keeping the handles
completely closed, release
the xed handle which will
rotate automatically to the
rest position . The
moveable handle will then
be locked by means of the
handle latch (49).
Every six months, check the oil level in the reservoir.
If necessary, bring the oil level up to the top lip of the
reservoir, see section 3.4 , a, b, c, e, g, h and i.
− Always use clean recommended oil, see section 1.1, pg. 2.
−
Do not use old or recycled oil.
−
Do not use hydraulic brake uid.
IMPORTANT: Ensure that disposal of used oil is in
accordance with current legislation.
Air in the hydraulic circuit may affect the performance
of the tool (e.g. no lower die advancement; slow
advancement of lower die; lower die pulsating).
See Figures 4 and 5.
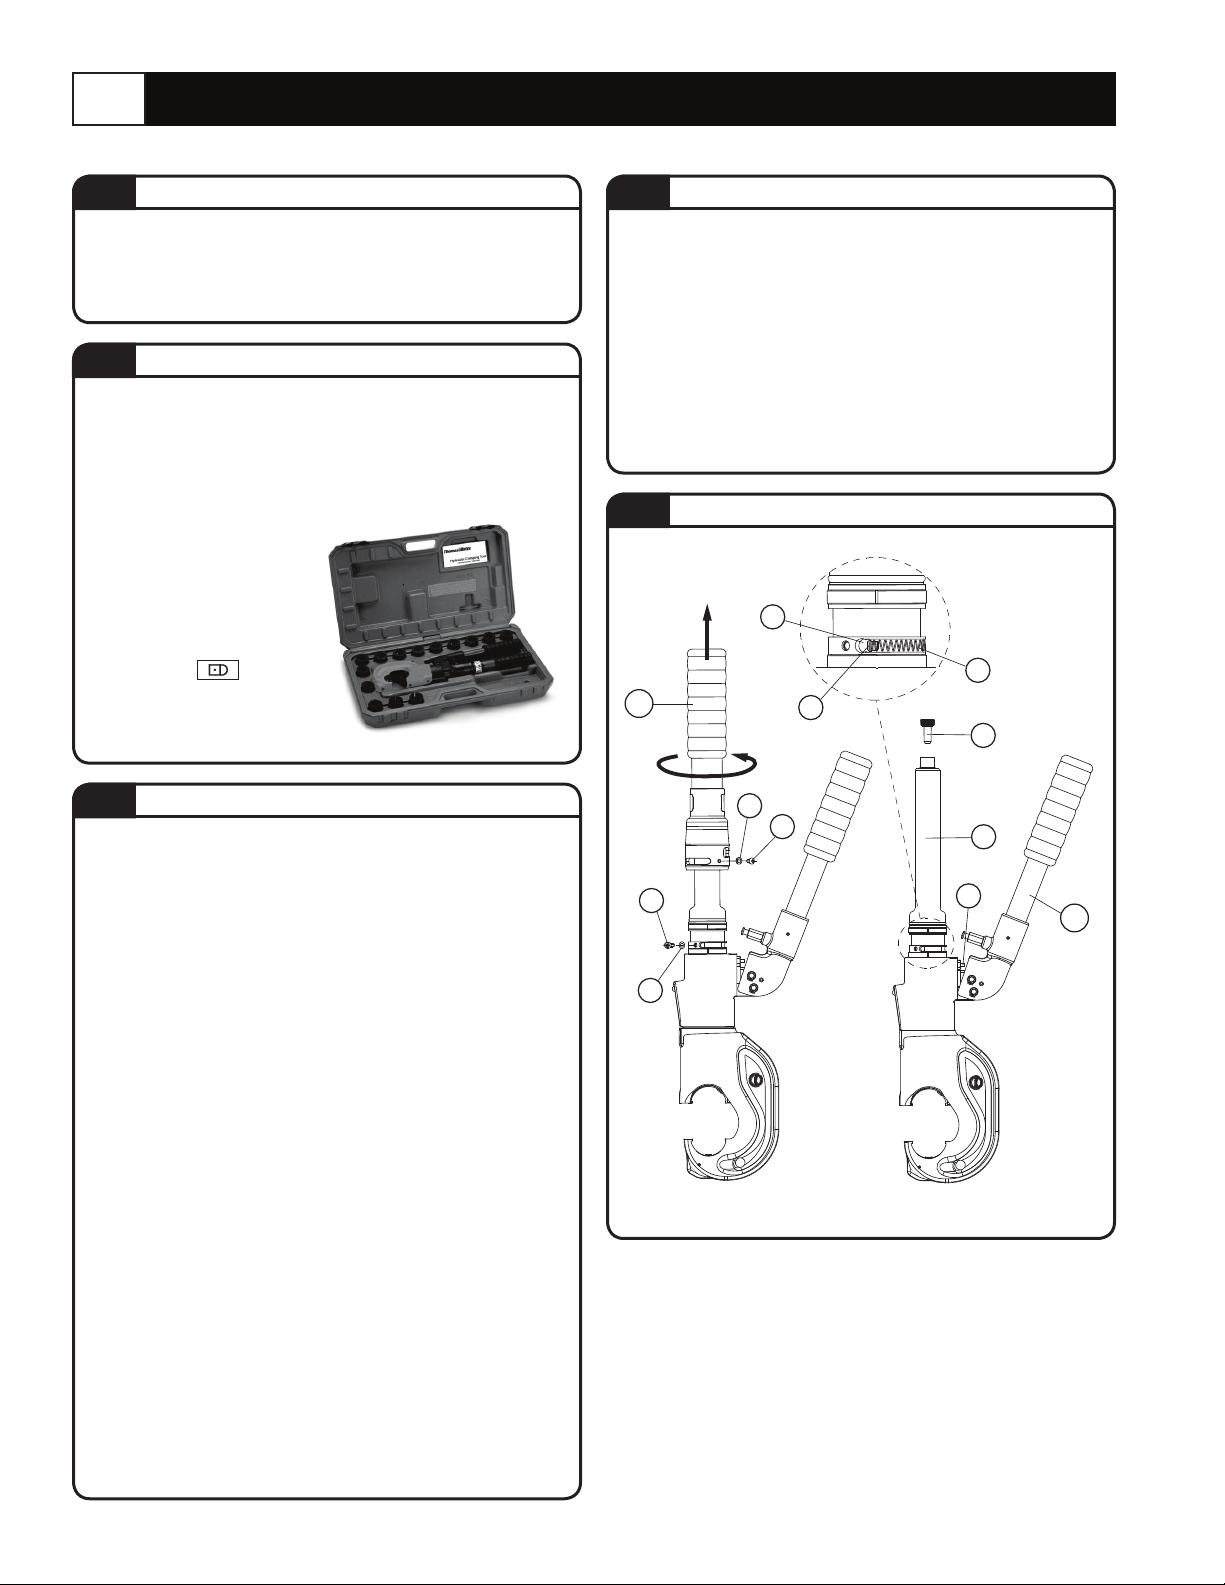
To purge air bubbles from hydraulic circuit:
a. Hold tool upright with the head in a vice and handles
open (Figure 4).
b. Using a 2,5mm allen key, remove screws (17 and
56), slide off the xed handle (200) to expose the oil
reservoir (3). Recover spring (54) and spring cover (53).
c. Remove reservoir cap (1).
d. Operate the moveable handle (203) three or four times
to advance the ram (202).
e. Depress pressure release pin (65) until ram is fully
retracted.
f. Repeat points dand eat least ve times, to ensure all
air bubbles in the hydraulic circuit are purged into the
reservoir.
g.
If the oil level is low, top off as directed in paragraph 3.5.
h. Replace the cap (1).
i. With the tool in the horizontal position, relocate spring
(54) and spring cover (53) in seat A (see detail in Fig. 4).
Reassemble the xed handle (200), insert screws (17
and 56) complete with washers (55) in their respective
positions and tighten them.
If the tool continues to malfunction, return the tool for
service/repair as detailed on page 8.
STORAGE
ADDING OIL
PURGING AIR BUBBLES
TOOL POSITION
Compliance with the following points should help to maintain the optimum performance of the tool.
Dust, sand and dirt are a danger for any hydraulic device.
Every day, after use, the tool must be cleaned with a clean
cloth, taking care to remove any residual particles, especially
close to pivots and moveable parts.
CLEANING
3.1 3.5
3.2
3.4
3.6
FIGURE 4 For Maintenance Operations
FIGURE 3