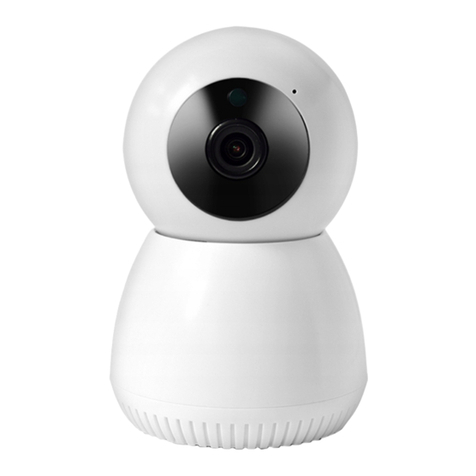
Tiandy S6 User manual

1
High Definition Intelligent IR
IP Auto-tracking Speed Dome Camera
User’s Manual

2
CONTENT
Chapter 1 Precautions.....................................................................................................................3
Chapter 2 Structure.........................................................................................................................5
Chapter 3 Functions Description....................................................................................................6
3.1 Features..............................................................................................................................6
3.2 Function Instruction..........................................................................................................8
3.3 Specification.......................................................................................................................8
Chapter 4 Installation Guide.........................................................................................................11
4.1 Preparation ......................................................................................................................11
4.2 Installation.......................................................................................................................11
4.3 Interface Instruction .......................................................................................................14
4.4 Installation Procedures (Take Wall Mount as Example) ..............................................15
4.5 External Cable Connection Instruction..........................................................................17
Chapter 5 WEB Instruction...........................................................................................................18
5.1 System Requirement .......................................................................................................18
5.2 Built-in Web Instruction .................................................................................................18
5.3 Log in................................................................................................................................18
5.4 Preview.............................................................................................................................19
5.5 Playback ...........................................................................................................................21
Chapter 6 Configuration................................................................................................................23
6.1 Audio Video Set................................................................................................................23
6.2 Dome Set ..........................................................................................................................25
6.3 VCA ...................................................................................................................................31
6.4 OSD ...................................................................................................................................38
6.5 Storage Management.......................................................................................................39
6.6 Network Management.....................................................................................................40
6.7 User management ...........................................................................................................43
6.8 Alarm Management.........................................................................................................43
6.9 PTZ Management and Control........................................................................................46
6.10 Advance..........................................................................................................................46
Chapter 7 Simple Problem-solving Methods...............................................................................48
Chapter 8 After-sales Service .......................................................................................................50
Appendix I Lightning and Surge ...........................................................................................50
Appendix II::Hoisting construction Guide ...........................................................................53

3
Chapter 1 Precautions
In order to avoid danger and operate the products correctly, please read this manual carefully
before installation.
The precaution contains two parts “Warning” and “Note” as following:
Warnings alert the user to avoid
the potential risk of death or serious
injury
Cautions alert the user to avoid the
potential risk of injury or property
damage
Warning:
●Please use AC 24V power supply meeting SELV(Safety Extra Low Voltage) and in accordance with
IEC60950-1 compliance with Limited Power Source
●Please contact nearest distributor or service center if the products don’t work properly, do not
remove or modify the device in any way (unauthorized modification or repair problems caused by
your own risk).
●Please don’t expose the indoor product to rain or moisture.
●The installation should be performed by professional staff, and comply with local regulations.
●Please mount easily using power protection device in the wire installation.
●Please make sure the connection can withstand at least 50 Newtons vertically downward pull.
Note:
●Please check if the power supply is correct.
●In transportation and storage process, please prevent stress, severe vibration and immersion to
avoid any damage
●Please don’t touch the image sensor and housing directly, if necessary, please gently clean with
alcohol dampened.
●Please don’t touch the cooling components directly, in order to avoid burns.
●Please don’t focus aligned glare (such as lighting, sunlight, etc.), otherwise it will easily lead to
too bright or pull light phenomena, also affect the image sensor life.
●The laser beam may burn the image sensor, so when it is used, please don’t expose the image
sensor in laser beam.
●Please don’t put it in the damp, dusty, extreme heat, extreme cold, strong electromagnetic
radiation places.
●Please make sure the installation location keep enough distance from the electromagnetic

4
sensitive devices surrounding to avoid electromagnetic interference.
●Please prevent heat buildup and keeping the surrounding ventilation.
●Please prevent the speed dome from water or any liquid.
●The product must be carried by original package, either in delivery to users or in return delivery
to the factory for repairing. Otherwise, damage caused in transportation will not be covered by
warranty.
●The battery replaced incorrectly will lead to use of exceptions, and we don’t recommend users to
replace directly; If necessary, please use batteries recommended by the manufacturer (for devices
with battery).
●Please don’t dismantle internal parts, please turn to qualified maintenance professionals to carry
out repairs
●Long-term high speed cruising may cause slip rings broken and belt aging, also affect speed dome
life.
●Working Environment
Speed Dome
Environmental temperature
-40℃~+65℃
Moisture
<95%(Non-condensing)
Atmospheric pressure
86~106KPa
Power
AC24V/2.0A
Note: make sure outdoor installation meets water-proof requirements.

5
Chapter 2 Structure
Front view Side view

6
Chapter 3 Functions Description
3.1 Features
1. Built-in Decoder
●HD IP Speed Dome, support 720P 25/30fps or 1080P 25/30fps output.
●Support English menu
●Support standard Onvif
●Power-off protection, no data loss
●RJ-45 port network port
●Support PELCO_P,PELCO_D protocols.
●Support 3D location
●Support standby function
●225 programmable presets
●8 cruising tracks, each cruising track has 32 preset positions
●8 auto scan tracks, the left and right boundaries and scan speed can be set
●Support OSD, date and time display
●Support 1 channel alarm input and 1 channel alarm output
●Support TF storage and local capture
2. Integrated Universal Speed Change Rotator
●Manual Speed:0.05°~160°/s, Max speed 240°/s
●360°continuous pan rotation, tilt -11°~90°auto flip
●Stepless speed change, auto zoom/speed matching
●Classic double bearing structure, more stable operation
●Delicate stepping motor, stable, sensitive and accurate
3. All-weather Outdoor Design
●Sensor intelligent control
●Double housing structure
●IP66 water proof
●Support anti- lightning and anti-surge

7
4. Camera Module
●Support auto iris, auto focus and auto BLC
●Mini. Illumination 0.5Lux/F1.6(color),0.095Lux/F1.6(B/W)
●Support 3D noise reduction and WDR
5. Network
●Support Ethernet control
●Support remote view and control by browser and client software
●Support Micro SD card
●Support NFS
●Support remote view and control by browser and client software
●Support Micro SD card
●Support for NFS record
●Support four levels user authority
●Support for authorized users and passwords, support HTTPS encryption and IEEE 802.1x
network access control
●Support dual-stream, support H.264/MJPEG, support multi-level video quality configuration,
and support real-time video output resolution 1080p, 960p and 720p
●Support multiple network protocols, IPv4/IPv6, HTTP, HTTPS, 802.1x, Qos, FTP, SMTP, UPnP,
SNMP, DNS, DDNS, NTP, RTSP, RTP,
TCP / IP, DHCP, PPPoE
6. IR Function
●Mini. Illumination 0Lux
●Adopt array IR, low consumption, IR distance 150m
●IR LEDs and zoom auto match
●Support NFS
●Built-in heat treatment and defog systems
●Constant current circuit design, IR LED life >30,000 hours

8
3.2 Function Instruction
●Focus/Rotate Auto Match
Speed Dome can auto adjust pan and tilt rotation speed depending on the focus distance.
●Preset Position Setting and Calling
Preset function means the speed dome can memory current pan/tilt angel, focus, zoom, ect. When
need, it can be called upon directly. Our speed dome support up to 255 preset positions.
●Auto Scan
Users can set the left and right boundaries by control keyboard. Then speed dome can scan
between it. It can set up to 8 groups scan path.
●Auto Cruising
Users can program some preset positions into auto cruising sequence, then the speed dome can
track as it. Each cruising tracks has 32 preset positions.
●Pattern Tour
Speed Dome can memory 180s running path. When start pattern tour, speed dome can track as
recording path. It supports 4 groups pattern tour.
●Guard Location
The dome will rotate back to preset position after a period of vacant time.
●Power-off Protection
Speed dome can resume operation status before the power-off, no data loss.
3.3 Specification
Model
Specification
HD IP IR Auto-tracking Speed Dome
Camera
Sensor
1.3M:AR0130-1/3”
CMOS
2M:IMX222-1/2.8” CMOS
Pixel
1.3M
2.1
Image Resolution
Color:0.5 Lux @ (F1.6,50 IRE,ICR close)
B/W:0.095 Lux @ (F1.6,50 IRE,ICR open)

9
Resolution
≥720TVL
≥1000TVL
White Balance
Auto / Manual/ATW
GC
Auto /Manual
S/N
>50dB
Noise Reduction
3D&2D
WDR
Support
Electronic Shutter
1/25 ---1/10000s
Day/Night
Auto ICR
Focus
Auto / Manual
Lens
Focal Length
14.7~84.6mm,20X
4.7~94mm,20X
Zoom
3S
Horizontal Angle
54.8°-3.4°
55.5°-3.0°
Near Distance
20~1000mm
Iris
F1.6 ~F2.7
F1.6 ~F3.0
PTZ
Horizontal Rotation
Range
360°continuous rotation
Horizontal Speed
0.05°~160°/s(stepless speed)
Vertical Rotation
Range
11°~90°auto flip
Vertical Speed
0.05°-120°/s
Preset
255
Auto Cruise
8 group, each group can set 32 preset
Auto Scan
Support track, horizontal, vertical, frame, whole view and
random scan
Guard Location
Link preset/scan/cruise/pattern
Power off Memory
Support
Position
Information Display
On/Off

10
IR
IR Distance
150m
IR Angle
Zoom matching, far/middle/near
Network
Image resolution
1280×960
1920×1080
Frame rate
50Hz: 25 fps
(1280×960)
25 fps (1280×720)
60Hz: 30 fps
(1280×960)
30 fps (1280×720)
50Hz:25fps(1920×1080)
25fps(1280×960)
25fps(1280×720)
60Hz:30fps(1920×1080)
30fps(1280×960)
30fps(1280×720)
Video Compression
H.264/MJPEG
Audio Compression
G711A/G711U/G726/ADPCM/AAC
Network Protocol
IPv4,HTTP,HTTPS,802.1x, FTP,SMTP,UPnP,SNMP
DNS,DDNS,NTP,RTSP,RTP,TCP/IP,DHCP,PPPoE
Preview Channel
Max 6ch
Stream
Triple
Authority
32 users, 4 level: administrator, browse, browse+control,
browse+control+setup
Safe Mode
Authorized user name and password, HTTPS encryption;
IEEE 802.1x network access control, IP address filtering
Interface
Audio Input
Support
Audio Output
Support
Network
10M/100M
TF Card
Support
Program
Support standard Onvif
Browser
IE8,IE9,IE10,Chrome8+,Firefox3.5+
General
Power
AC24V 40W max
Working
Temperature and
Humidity
-40 ℃-65℃
Humidity<90%
Protection Level
IP66,TVS 4000V lightning protection
Dimensions
Ф230(mm)*350(mm)
Weight
4.8kg

11
Chapter 4 Installation Guide
4.1 Preparation
1. Tools:
Please prepare the necessary tools according to specific situations
2. Check installation space and address
Check the space is enough to install the speed dome. The wall must be thick enough to install the
expansion screws and can bear 4 times the weight of the dome camera itself.
3. Please well keep the whole package
After open the package, please well keep them in case need to return to manufacturer if any
problem.
★Note:The non-original package may lead to damage during the transportation.
4.2 Installation
The speed dome supports four types installation as following:
1:Wall mount and dimension:

12
Ø45
109
85
139 163
Ø9
258
Wall Mount Bracket Dimension
2:Pedant mount and dimension:
Ø45
Ø118
Ø90
Ø9
236
Pedant Mount Bracket Dimension

13
3:External corner and dimension
85
139 164
104
120
M8
176
External Corner Bracket and Dimension
4:Pole mount and dimension:
139 165
120
44
M8
Pole Mount Bracket and Dimension

14
4.3 Interface Instruction
Speed Dome and Bracket Interface Dimension
Ø230
350
Ø45
26
6.4
10.8
39

15
Speed Dome and Bracket Interface Perspective Picture
4.4 Installation Procedures (Take Wall Mount as Example)
Figure 1

16
Figure 2
Steps:
Remove the wall mounting bracket and speed dome, and lead the cable through the bracket and
set aside to the right position. Aligned the screw holes of speed dome to that of bracket, and use
M6 screws to fix. (as Figure 1)
Mark the drill holes position on wall with ink pen for bracket installation, then drill holes and punch
the expansion screws in, then fasten the bracket with M8 screws as Figure 2.
Description:
1) The wall must have sufficient load-bearing capacity.
2) Outdoor installation shall be completely sealed moisture; leads cable should closely along the
bracket wiring as Figure 1.

17
4.5 External Cable Connection Instruction
A1: Power Cable:AC/DC24V;
A2: Network: Connect computer or other devices
A3: Audio Cable: Audio input and output can connect mic and speaker
A4: Alarm Cable:Connect external alarm devices;
Note: Please refer to labels on the cables

18
Chapter 5 WEB Instruction
5.1 System Requirement
The IP speed dome web settings support Windows XP, Win7 system, please make sure right
installation and setup of following items:
(1) Display resolution: 1024 * 768 or higher, color: High Color (32-bit).
(2) Please make sure the Windows system install the necessary character style.
5.2 Built-in Web Instruction
When using the network video products for the first time, an ActiveX control is needed. Note: please
use IE browser of windows and make sure the version above 6.0. Do not use any other browser
except Firefox, Google.
(1) Login IP address and enter to ActiveX download interface.
(2)Download ActiveX and click 【Run】to install
5.3 Log in
Camera default IP address is:192.168.1.2,please make sure computer and IP camera in the
same IP address area.
You need to download Active X plug when first time to use.

19
5.4 Preview
Descriptions of live view page
5.4.1 Live View

20
Descriptions of live view parameters and toolbar
Icon
Description
Icon
Description
Major stream
Manual recording on / off,
and default storage path is
D\NetVideoBrowser\
Minor stream
Manually capture, and
default storage path is
D\NetVideoBrowser\
Third stream
Intercom on/off
Screen lock
Full screen
Screen adapt to current
resolution
Audio on, volume adjustment
and mute
Note When stream type is【Pure Video】,audio preview is invalid.
5.4.2 Video parameter
(1)<Default> to resume the default settings.
(2)According to network situation you can choose preview mode
from <Low bandwidth>, <Low latency> to <High quality>,
<High fluency>
5.4.3 PTZ control
(1)Select rotation direction of speed dome,
enable auto scan.
(2)<Zoom>Zoom in /Zoom out
(3)<Focus> Manual Focus.
(4)<Iris>Manually adjust iris.
(5) set PTZ speed
(6) Wipper
(7) Preserved for future functions
(8) Defog: , HLC: , WDR:
Table of contents
Other Tiandy Security Camera manuals
