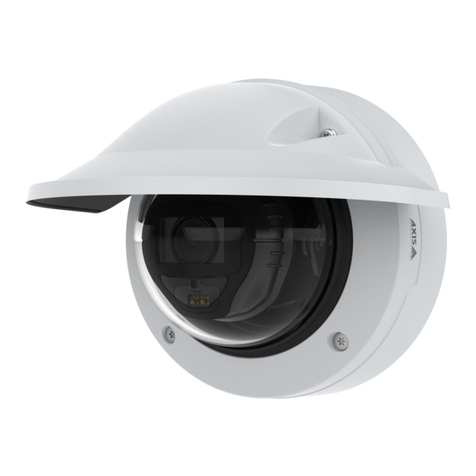
Tiandy TC-D5622H-R80 User manual

IRIntelligent High-Speed Dome
Installation and User’s manual
English
V3.01
Please read the manual carefully before installing and using the unit.

Catalogue
Welcome ........................................................................................................................1
IImportant Safeguards..............................................................................................2
II Installation Guide.....................................................................................................4
2.1 Preparation for Installation ...............................................................................4
2.2 Installation........................................................................................................5
III Description of Functions........................................................................................12
3.1 Performance Characteristic............................................................................12
3.2 Function declaration.......................................................................................13
IV Technical parameter..............................................................................................26
VFunctional Instructions ..........................................................................................27
5.1 Common function quick instruction list...........................................................27
5.2 Menu operation guide ....................................................................................33
Simple Trouble Shooting Table....................................................................................59
Lightning and Surge Protection ....................................................................................60
Propositional preventive maintenance..........................................................................60

IR Intelligent High-Speed Demo Installation and User Manual
Welcome
Thank you for purchasing IR intelligent high-speed dome.
This manual is used for operating and programming the unit as your reference. You can find relevant
information of functions and commands, as well as detailed menu tree and fast operating instructions in
this manual. The section of installation provides the needed information for setting and installing the unit.
Before installing and using the unit, please read the information in this manual carefully.
1

IR Intelligent High-Speed Dome Installation and User Manual
I Important Safeguards
This manual is the basic instruction about IR intelligent high-speed dome. This manual consists
of important information about security and warning, function specification, performance characteristic
and parameter, installation step, general faults and the solution to get out of them, maintenance and
others need to know when using the IR intelligent high-speed dome.
If you first use the IR intelligent high-speed dome or ever used the similar products, you had better
read this manual before using this unit.
If possible, please start reading from the first page in sequence. If you just hope to see the needed
parts, you also can select them from catalogue. Please refer page 27 to get the function list of the unit.
This unit uses special presets to realize some function operation.
Careful transportation
During the course of transportation and storage, the product should be avoided from incorrect
operations such as heavy pressing, strong vibration, soaking,,etc. which may cause damage to the unit.
This unit must adopt parts packing transportation regardless of delivery or return to factory maintenance.
The damage which caused by assemble packing transportation is not covered by the warranty.
Careful installation
During the course of installation, the product should be handled properly, and should be avoided
from incorrect operations such as squeeze the structure parts, heavy press, strong vibration etc, which
may cause mechanical problem and reflect the overall performance of the unit. The dome cover of the
unit which belongs to advanced optical products should be avoided from incorrect operations such as
directly touch by hand which may scratch the cover and affect image quality. When installed, please
follow all electrical standards for safety and adopt the particular power supply which is provided with the
unit. Control signal and video signal should be kept enough distance from high voltage equipments and
cables when they are in transmission, and necessary steps should be taken to prevent lightning damage
or power surge. Don’t turn on power before finish installation.
Don’t dismantle
Don’t dismantle the unit. There are no parts inside the unit which can be repaired by the users
themselves. When mechanical problems arise, do not be in a haste to do any repairing, please refer to
the user’s manual to find the trouble. If causes can not be located, please refer servicing to qualified
professionals. All servicing must be done by authorized personnel.
2

IR Intelligent High-Speed Demo Installation and User Manual
Set in place far from electric and magnetic fields
If the unit is set near EMI source such as television, wireless transmitter, electromagnetic device,
motors, transformers, speakers etc which may create electromagnetic field, the electromagnetic field will
influence images. Please keep sufficient distance.
Don't aim the camera at light objects
No matter the unit is running or not, the camera should never be aimed at the sun or object with
extremely bright light, and never be aimed at or monitor immobile light object for a long time. Otherwise,
the camera’s CCD might be permanently damaged.
Careful maintenance
The camera should be carefully used and avoided form impact or vibration, otherwise, it will be
damaged. Don't use strong or corrosive detergent to clean dome camera’s body. You should clean it with
dry cloth. When the dirt is not easy cleared, you can wipe it by neutral detergent. If the camera lens is
dirty, please wipe it by the special paper.
Please use this product in the required working environment:
Working Environment IR intelligent high-speed dome
Environmental Temperature -35~40 ℃
Environmental Humidity <95%
Atmospheric Pressure 86~106KPa
Power Supply AC24V/2.5 A
NOTE: Don’t install the indoor unit for outside. Please be sure the outdoor installation meet to
waterproof demand.
3

IR Intelligent High-Speed Dome Installation and User Manual
II Installation Guide
2.1 Preparation for Installation
1. Basic demand
Before installing and using this unit, please read the following warning information:
1) Installation and maintenance should be carried out by professional personnel as per relative
regulation. All electrical work must obey the latest electrical regulations, fire regulations and
relevant regulation. Check whether the accessories of the unit are complete according to
packing list and confirm the place whether the method of installation is correct in accord with
required, if not, please contact your supplier. Please use this product in required environment.
2) Indoor IR intelligent high-speed dome only designs for house supply. It can’t be installed
exposed to rain or in very humid place.
3) After re-installation or repair, you need to measure the resistance between the circuit and shell
to check whether the insulation is good, and ensure there is no short-circuit between the circuit
and shell.
4) Confirm there is enough place to contain the product and its structure components. Confirm the
ceiling, wall and bracket for installation can take the total weight of the product and its structure
components, and materials used to support the weight can sustain four times the weight of the
product.
2. Cable preparation
1) Select cables according to transmission distance: the minimum specification requirements of
vision coaxial-cable is as below:
75Ω impedance;
Copper wire;
95% braided copper mesh shielding.
Domestic Model International Model Maximum distance (meters /feet)
RG59/U RG59/U 229m(750ft)
5C-2V RG6/U 305m(1000ft)
7C-2V RG11/U 457m(1500ft)
The same type of video cables may be different depending on manufacturer. The data shown in
above table is the transmission distance of general vision cable.
4

IR Intelligent High-Speed Demo Installation and User Manual
2) The following data is recommended maximum distance for application of 24VAC or 24VDC, the
distance is calculated from 10% voltage drop. (For AC or DC electric driving equipment, the
maximum allowable voltage drop is 10 %.)
Cable diameter 0.5mm²(20AWG) 1mm²(18AWG) 1.5mm²(16AWG) 2.5mm²(14AWG)
Power 23W 38m(123ft) 60m(196ft) 95m(311ft) 151m(495ft)
Power 72W 12m(39ft) 19m(62ft) 30m(98ft) 48m(156ft)
3. Toggle switch setting
Set the toggle switch according to the control protocol, baud rate and address. (Refer to the third
chapter<Description of Functional >)
2.2 Installation
A series of IR intelligent high-speed dome dimension figure
B series of IR intelligent high-speed dome dimension figure
5

IR Intelligent High-Speed Dome Installation and User Manual
C series of IR intelligent high-speed dome dimension figure
E series of IR intelligent high-speed dome dimension figure
IR intelligent high-speed dome is designed for wall mounted and pendent mounted installation
Conditions of wall mounted installation:
Wall mounted unit can be used in the rigid wall structure of indoor and outdoor.
1) The wall thickness should be enough to install setscrews.
2) The wall can withstand at least 4 times the weight of the unit.
Punch holes for wall mounted bracket
Take the wall mounted bracket from the packing box, and use the open holes at the bottom of
bracket as template and draw punch positions on the wall. (As shown in the following figure)
6

IR Intelligent High-Speed Demo Installation and User Manual
Punch holes and drive in four M8 setscrews. (As shown in the following figure)
Conditions of pendent mounted installation:
Pendent mounted unit can be used indoor in the rigid wall structure.
1) The thickness of ceiling should be enough to install setscrews.
2) The ceiling can withstand at least 4 times the weight of the unit.
Punch holes for pendent mounted bracket
Take the pendent mounted bracket from the packing box, and use open holes at the bottom of
bracket as template and draw punch positions on the ceiling. (As shown in the following figure)
Punch holes in punch positions and drive in four M6 setscrews. (As shown in the following figure)
7

IR Intelligent High-Speed Dome Installation and User Manual
A series of IR intelligent high-speed dome installation
Installation steps of wall mounted unit:
1) Take dome base from the packing box. Pull the wire and
cables out through the bracket, and than aim at four open
holes and fix the bracket firmly to the pre-installed setscrews
with four M8 nuts. (As shown on the left)
2) Install the dome base onto the bracket.
3) Please refer the instruction to connect the power supply,
video and controlling cables.
4) Take out IR dome body from the packing box. Setup
communication protocol, baud rate and address through SW1
and SW2 at the bottom of the IR dome body. When install the
IR dome body, IR dome body’s socket need to correspond
with the dome base’s socket. Hold the camera with both
hands, aim the IR dome body’s clip at the dome base’s
bayonet (Note the corresponding red marks ), put the clip into
bayonet slowly, and then press the top of clip with a little
force, you can confirm the installation is set at positions after
heard two crisp voice of a combined bump.
Note: Confirm the IR dome body was completely stuck, or
else the IR dome body may cover off or the dome cover may
be fretted. Pull down the IR dome body lightly to check
whether the IR dome body is completely stuck.
5) Install demo cover onto demo base and fix them.
Installation steps of pendent mounted unit:
1) Take dome base from the packing box. Pull the wire and
cables out through the bracket, and than aim at four open
holes and fix the bracket firmly to the pre-installed setscrews
with four M6 nuts .(As shown on the left)
Refer to the installation steps of wall mounted unit.
8

IR Intelligent High-Speed Demo Installation and User Manual
B series of IR intelligent high-speed dome installation
Installation steps of wall mounted unit:
1) Take IR dome camera from packing box, set up dome
camera protocol, baud rate and address. Pull the wire and
cable out through the bracket, and then aim at four open
holes on the bracket and fix the IR dome camera firmly to
bracket with M6 socket head screws which are along with the
unit.( As shown on the left)
2) Aim at four open holes on the wall and fix the bracket firmly to
the pre-installed setscrews with four M8 nuts.
3) Please refer to the instruction to connect the power supply,
video and controlling cables.
Installation steps of pendent mounted unit:
1) Take IR dome camera from the packing box, setup
communication protocol, baud rate and address through SW1
and SW2 at the bottom of the IR dome camera. Pull the wire
and cable out through the bracket, and then aim at four open
holes on the bracket and fix the IR dome camera firmly to the
bracket with M6 screws. (As shown on the left)
2) Aim at four open hole on the ceiling and fix the bracket firmly
to the pre-installed setscrews with four M6 nuts
3) Please refer to the instruction to connect the power supply,
video and controlling cables.
9

IR Intelligent High-Speed Dome Installation and User Manual
C series of IR intelligent high-speed dome installation
Installation steps of wall mounted unit:
1) Take dome base out from the packing box. Pull the wire and
cable out through the bracket, fix the IR dome body firmly to
the bracket with M6 socket head screws which are along with
the unit.(As shown on the left)
2) Fix the bracket firmly onto the pre-installed setscrews on the
wall with four M8 nuts.
3) Take out IR dome body from the packing box. Setup
communication protocol, baud rate and address through SW1
and SW2 at the bottom of the dome body. When install the
dome body, dome body’s socket need to correspond with the
dome base’s socket. Hold the camera with both hands, aim
the dome body’s clip at the dome base’s bayonet (Note the
red marks correspond), put the clip into bayonet slowly, and
then press the top of clip with a little force, you can confirm
the installation is set at positions, after heard two crisp voice
of a combined bump.
Note: Confirm the dome body was completely stuck, or else
the dome body may cover off or the dome cover may be
fretted. Pull down the dome body lightly to check whether the
dome body is completely stuck.
4) Install dome cover onto dome base and fix them
Installation steps of pendent mounted unit:
1) Take dome base out from the packing box. Pull the wire and
cable out through the bracket, and fix the IR dome base firmly
to the bracket with M6 screws. (As shown on the left)
2) Aim at four open holes on the ceiling and fix the bracket firmly
to the pre-installed setscrews on the ceiling with four M6 nuts.
3) Refer to the installation steps of wall mounted unit.
10

IR Intelligent High-Speed Demo Installation and User Manual
E series of IR intelligent high-speed dome installation
Note: The pendent mounted bracket can not be used outside. Because of this specialized operation
condition, please ensure that this dome camera meet to the waterproof demand.
1) The suspender which is used with the pendent mounted bracket must meet to waterproof demand.
Otherwise, the customer will be responsible for the water fault.
2) It’s forbidden to pull the leading-out wire of the unit out through the Flange side hole of the pendent
mounted bracket.
3) Make sure the sealing ring and Flange sunken hole of pendent mounted bracket are tightly
combined and sealed from water.
4) Put silica gel around Flange of pendent mounted bracket to seal from water.
5) Put silica gel around the connector of pendent sleeve and upper shield to seal from water.
6) All exposed screw holes of pendent mounted bracket must be played silica gel to seal from water.
Installation steps of wall mounted unit:
1) Take IR dome body from the packing box. Set up
communication protocol, baud rate and address. Pull the
wire and cable out through the bracket, and then aim at four
open holes on the bracket and fix the IR dome camera
firmly to bracket with M6 socket head screws along with the
unit.( As shown on the left)
2) Aim at four open holes on the wall and fix the bracket firmly
to the pre-installed setscrews with four M8 nuts.
3) Please refer to the instruction to connect the power supply,
video and controlling cables.
Installation steps of pendent mounted unit:
1) Take out IR dome body from the packing box. Setup
communication protocol, baud rate and address through SW1
and SW2 at the bottom of the IR dome body. Pull the wire and
cable out through the bracket, and then aim at four installed
holes on the ceiling and fix the IR dome camera firmly to
bracket with M6 screws ( As shown on the left)
2) Aim at four installing hole on the ceiling and fix the bracket
firmly to the pre-installed setscrews with four M6 nuts.
3) Please refer to the instruction to connect the power supply,
video and controlling cables.
11

IR Intelligent High-Speed Dome Installation and User Manual
III Description of Functions
IR intelligent high-speed dome is equipped with high performance DSP camera with zooming lens,
higher efficiency IR lamps, built-in PTZ and digital decoder, which represents the future trend of high
technology monitoring products. The unit is adopts full-digital control, flexible programming and
exquisitely simple transmission system design. The unit is capable of rapid positioning and consecutively
tracing and scanning, which realizes the real sense of all-directional and no blind spots monitoring. The
unit support PELCO - D, PELCO - P, TIANDY and other communication protocol, makes operation more
flexible and simple.
The series of IR intelligent high-speed dome can be applied in every walk of life to monitor moving
objects in larger areas, such as monitoring banks, airports, transportation, state government agencies,
power, prisons, hotels, commercial buildings, factories, schools, museums etc.
3.1 Performance Characteristic
1. Functions Introduce
Adopted full-functional high-performance DSP design, performance stable and reliable.
3D positioning function, realizes screen coordinate positioning and partial enlarges through software.
Minimum hand-controlling speed of stable operation is 0.01 ° / S. Maximum patrolling speed of
precise positioning is 350 °/S.
Reserved network module interfaces can be loaded to network-intelligent camera.
Support and automatic identification PELCO-D, PELCO-P, TIANDY and other communication
protocols.
No internally saved data lose when power off; In-build module contains surge immunity protection.
204 presets for free storage, precise positioning, and have preset screen freeze function.
Programmable automatic patrolling tracks, automatic linear scan function and guarding function.
Supports remote fault diagnosis, system upgrade, reset, and address setting function.
Automatically identify different camera modules, communication protocol and baud rate.
Optional Multi-language functions, and also achieves date, temperature, angle and compass display.
Optional timing function.
2. Integrated high-speed PTZ
Integrated design , compact structure, high reliability
Precise motor drive, infinite variable speed, steady operation, no jitter, sensitive control.
Achieve automatically flip 180º and consecutive monitoring vertically.
12

IR Intelligent High-Speed Demo Installation and User Manual
Low power consumption, calorific value is only half of the similar manufacturer’s products.
3. Built-in HD integrative camera
Auto iris, auto backlighting compensation.
Auto/manual white balance.
Auto / manual focus.
Automatic brightness control.
HD integrative camera.
Multiple zoom integrative cameras can be chosen.
4. 24-hour outdoor design
Built-in heaters, sensors intelligent control.
Built-in radiator fan, by which the unit can work at high temperature ambient condition 60 ℃.
The cover is constructed with all-alloy, which ensures strong and durable.
Built-in multilevel 3000V lightning protection, surge protection and surges protection.
3.2 Function declaration
This section describes the principle of main functions' implementation, not involve specific method of
operation, different platforms have different operation methods, generally subject to operation manual of
manufacturers, there may be some special demand and operation methods in some cases, please
contact with the dealers to get necessary information.
Manual target tracking
Users can control the camera to trace the moving object or change the monitoring area by moving
the joystick on the keyboard up, down, left or right What's more, the angle of view or the size of the image
of the object can be changed by adjusting the focal length. In the default Auto-focus, Auto-Iris state, the
lens can automatically quickly adjust to get clear image according to the change of the object.
Auto flip
In the process of operating the joystick to trace and monitor, if the user move the lens to the bottom
(vertical) then continues pressing the joystick, the lens will automatically flip 180º horizontally, then the
user can still control it to move upwards till 90°, which enables the user to directly observe the situation
on the back side, thus fore-and-aft 180° consecutive monitoring can be realized.
Set and call preset
The presets function works in this way: The IR intelligent high-speed dome stores the data of PTZ
horizontal angle, tilt angle and lens focal-length in the current state. The user can quickly and
conveniently storage and call the preset by the keyboard and other control equipment, and then move
13

IR Intelligent High-Speed Dome Installation and User Manual
the PTZ and camera module to the corresponding position.
Focal length/ speed automatic matching techniques
When the focus is long and in the mode of manual adjustment, due to the high sensitivity of the IR
intelligent high-speed dome, even the slightest movement of the joystick would make the image move
quickly, and cause image losses. Based on human design, the IR intelligent high-speed dome can
automatically adjust the horizontal and vertical moving speed according to the current focal-length, which
makes the manual target-tracing operation much easier.
Auto linear scan function
The auto linear scan function is a built-in function of the IR intelligent high-speed dome, which can
preset left/right border. The user can run the left/right scan directly through an external command, and
then the dome camera will automatically run horizontally between the left limiting position and the right
limiting position at the preset speed.
3D positioning function
In the effective zoom range of the unit, users can directly enlarge and narrow all area of screen view
and put any point in the view moved to center of the field.
Pattern (pattern scan)
The IR intelligent high-speed dome can continuously record running track for 600 seconds or 500
instructions, after start pattern, the unit can automatically cyclic scanning and monitoring according to
preset recorded trajectory.
Observe mode
Users can preset observe time and action mode of IR intelligent high-speed dome (call preset
number, auto linear scan function, auto patrol, patterns, memory recalling function once power off). If
users have no action within the setting time, the unit will automatically start up preset action.
Menu function
The menu can satisfy different customers' requirement by support Chinese and English full screen
operation. The menu can be made to other langue according to customer’s demand.
Clock function
Users can set different action in different time which can realize seven days a week, eight periods a
day automatic setting function.
Azimuth function
Users can set up north direction to realize the precise display of rotation direction. IR intelligent
high-speed dome also supports zone indication. When the unit is turned to a preset area, the screen can
14

IR Intelligent High-Speed Demo Installation and User Manual
show the title of the preset area.
Privacy Mask function
For the privacy and safety area, some black lumps can be set to privacy zones. The size and
position of the black lumps can be adjustable. Altogether 24 privacy zones can be set in the unit. (This
function needs support of the camera)
Set address
This IR intelligent high-peed dome support 255 addresses, the unit only responds to the command
of its own address or broadcast address. The address can be set by toggle switch or soft address
function.
Camera control
1) Zoom control
Users can adjust the zoom by controlling the keyboard to get panoramic view or close view.
2) Focus control
System default is automatic focus. While the lens moves, the camera module can automatically
focus on the center of the object view to get clear image. In special conditions, users can manually adjust
the focus to achieve desired image effect.
3) Auto iris control
The iris can automatically influence the change of ambient light and make quickly adjustment to
output image of stable brightness.
4) Automatic backlight compensation
When the backlight compensation function is turned on, in extremely bright background, the camera
module can compensate the brightness of the relatively dark objects, at the same time adjust the light of
the bright background, avoiding that the whole image is too bright to watch due to the too high brightness
of the background, while the object is too dark to be distinguished, so that clear image can be got. The
system closed this function as the default.
5) Auto / manual white balance
According to the ambient light, automatically or manually adjust the light to reappear the real color.
6) IR cut filter (only for cameras with color and black-and-white conversion function )
The camera with night vision function will automatically switch CCD illumination according to the
ambient light in auto IR cut filter mode. For example: During the day the light is enough, the camera can
use general illumination to get brightly colored picture, while in night, the camera can automatically
change low illumination to get clear object with black and white picture.
Users can set IR cut filter to manual by the keyboard, in this case, the camera can not automatically
make corresponding conversion according to ambient light. Users can manually select color or
black-and-white pictures shown.
15

IR Intelligent High-Speed Dome Installation and User Manual
Set toggle switches
Before installing the IR intelligent high-speed dome, please configure protocol, baud rate and
address code. (The factory default automatic identification protocol & baud rate is address code 1)
SW1 Protocol & baud rate toggle switch SW2 address code toggle switch
Part of the Data-chosen-switches protocol & baud rate:
Auto identification protocol & baud rate PELCO-D&2400BPS PELCO-P&9600BPS
1) Protocol setting
Protocol SW1-1 SW1-2 SW1-3
Auto identification or PELCO-D OFF OFF OFF
TIANDY OFF OFF ON
PELCO-P ON OFF OFF
DaHua / GA
ON OFF ON
HIK
ON ON OFF
Reserve
…… …… ……
2) Baud rate setting
Baud rate SW1-4 SW1-5
Auto identification or 1200bps OFF OFF
2400bps ON OFF
4800bps OFF ON
9600bps ON ON
3) Address setting
SW2 toggle switch used to set address of the unit. Address sitting is used binary system, the eighth
bit is the highest bit, and the first bit is the lowest bit. The broadcast address is 0, which means if only the
address of control port is 0, the units which have suited for protocol and baud rate can be controlled.
The following is the protocol address coding table of PELCO - D/TIANDY:
16

IR Intelligent High-Speed Demo Installation and User Manual
SW2 PELCO-D address code setting
Address code SW2-1 SW2-2 SW2-3 SW2-4 SW2-5 SW2-6 SW2-7 SW2-8
1 ON OFF OFF OFF OFF OFF OFF OFF
2 OFF ON OFF OFF OFF OFF OFF OFF
3
ON
ON
OFF
OFF
OFF
OFF
OFF
OFF
4
OFF
OFF
ON
OFF
OFF
OFF
OFF
OFF
5
ON
OFF
ON
OFF
OFF
OFF
OFF
OFF
6
OFF
ON
ON
OFF
OFF
OFF
OFF
OFF
7 ON ON ON OFF OFF OFF OFF OFF
8 OFF OFF OFF ON OFF OFF OFF OFF
9 ON OFF OFF ON OFF OFF OFF OFF
10
OFF
ON
OFF
ON
OFF
OFF
OFF
OFF
11
ON
ON
OFF
ON
OFF
OFF
OFF
OFF
12
OFF
OFF
ON
ON
OFF
OFF
OFF
OFF
13 ON OFF ON ON OFF OFF OFF OFF
14 OFF ON ON ON OFF OFF OFF OFF
15 ON ON ON ON OFF OFF OFF OFF
16 OFF OFF OFF OFF ON OFF OFF OFF
17
ON
OFF
OFF
OFF
ON
OFF
OFF
OFF
18
OFF
ON
OFF
OFF
ON
OFF
OFF
OFF
19
ON
ON
OFF
OFF
ON
OFF
OFF
OFF
20 OFF OFF ON OFF ON OFF OFF OFF
21 ON OFF ON OFF ON OFF OFF OFF
22 OFF ON ON OFF ON OFF OFF OFF
23
ON
ON
ON
OFF
ON
OFF
OFF
OFF
24
OFF
OFF
OFF
ON
ON
OFF
OFF
OFF
25
ON
OFF
OFF
ON
ON
OFF
OFF
OFF
26
OFF
ON
OFF
ON
ON
OFF
OFF
OFF
27 ON ON OFF ON ON OFF OFF OFF
28 OFF OFF ON ON ON OFF OFF OFF
29 ON OFF ON ON ON OFF OFF OFF
30
OFF
ON
ON
ON
ON
OFF
OFF
OFF
31
ON
ON
ON
ON
ON
OFF
OFF
OFF
32
OFF
OFF
OFF
OFF
OFF
ON
OFF
OFF
17

IR Intelligent High-Speed Dome Installation and User Manual
SW2 PELCO-D address code setting (continued)
Address code SW2-1 SW2-2 SW2-3 SW2-4 SW2-5 SW2-6 SW2-7 SW2-8
33
ON
OFF
OFF
OFF
OFF
ON
OFF
OFF
34
OFF
ON
OFF
OFF
OFF
ON
OFF
OFF
35 ON ON OFF OFF OFF ON OFF OFF
36 OFF OFF ON OFF OFF ON OFF OFF
37 ON OFF ON OFF OFF ON OFF OFF
38 OFF ON ON OFF OFF ON OFF OFF
39 ON ON ON OFF OFF ON OFF OFF
40
OFF
OFF
OFF
ON
OFF
ON
OFF
OFF
41 ON OFF OFF ON OFF ON OFF OFF
42 OFF ON OFF ON OFF ON OFF OFF
43 ON ON OFF ON OFF ON OFF OFF
44 OFF OFF ON ON OFF ON OFF OFF
45 ON OFF ON ON OFF ON OFF OFF
46
OFF
ON
ON
ON
OFF
ON
OFF
OFF
47
ON
ON
ON
ON
OFF
ON
OFF
OFF
48 OFF OFF OFF OFF ON ON OFF OFF
49 ON OFF OFF OFF ON ON OFF OFF
50 OFF ON OFF OFF ON ON OFF OFF
51 ON ON OFF OFF ON ON OFF OFF
52 OFF OFF ON OFF ON ON OFF OFF
53
ON
OFF
ON
OFF
ON
ON
OFF
OFF
54 OFF ON ON OFF ON ON OFF OFF
55 ON ON ON OFF ON ON OFF OFF
56 OFF OFF OFF ON ON ON OFF OFF
57 ON OFF OFF ON ON ON OFF OFF
58 OFF ON OFF ON ON ON OFF OFF
59 ON ON OFF ON ON ON OFF OFF
60
OFF
OFF
ON
ON
ON
ON
OFF
OFF
61 ON OFF ON ON ON ON OFF OFF
62 OFF ON ON ON ON ON OFF OFF
63 ON ON ON ON ON ON OFF OFF
64 OFF OFF OFF OFF OFF OFF ON OFF
18
Table of contents
Other Tiandy Security Camera manuals
