Tiger CQD-B Series User manual

CQD-B
CQD-B10S
TIGER CORPORATION
Head Office: 3-1 Hayami-cho, Kadoma City, Osaka 571-8571, Japan

CQD-B
CQD-B10S
For household use
Electric Skillet
Instruction Manual
Thank you for purchasing this product.
Read all information in this instruction manual before using the appliance.
Keep this manual in a handy location for future reference.

1
English
Contents
1 Safety Instructions .................................... 3
2 Parts ......................................................... 7
When using the product for the rst time
or after the product has been stored for a
while.......................................................... 8
3 How to use............................................... 9
When cooking with the deep pan or
takoyaki plate (optional accessory)
installed
4 How to use.............................................. 13
When grilling with the grooved griddle
plate (optional accessory) inserted
5 After use ................................................. 17
6 Cleaning ................................................. 18
7 Troubleshooting...................................... 19
Purchasing consumables and optional
accessories................................................ 20
Specications ............................................ 20
繁體中文
目錄
1 ................................................. 21
2 .............................................. 25
...... 26
3 ................................................. 27
4 ................................................. 31
5 ..................................................... 35
6 ................................................. 36
7 ................................................. 37
............................... 38
........................................................... 38
简体中文
目录
1 .......................................... 39
2 ................................... 43
............. 44
3 ................................................. 45
4 ................................................. 49
5 ..................................................... 53
6 ........................................................ 54
7 ...................................... 55
........................... 57
........................................................... 57

2

3
1
Safety Instructions
Read carefully before using and be sure to follow the instructions.
The precautions described below are intended to protect the user and other individuals from physical harm
and to safeguard against damage to property.
Be sure to follow the instructions since they are important safeguards.
Do not remove the safety instructions seal attached to the product.
Safety instructions are classied according to the level
of harm and damage caused by improper use as shown
below.
This indicates "There is a possibility
of death or serious injury*1" when unit
is improperly handled by the user.
Warning
Caution
Caution
Description of symbols used
The symbol indicates a warning
or caution. The specic details
of the warning or caution are
indicated inside the symbol or in a
picture or text near the symbol.
The symbol indicates an action
which is prohibited. The specic
details of prohibited matters are
indicated inside the symbol or in a
picture or text near the symbol.
The symbol indicates an action
or instruction to be taken.
The specic details of instructed
matters are indicated inside the
symbol or in a picture or text near
the symbol.
Disassemble
is prohibited.
Do not modify.
Do not allow anyone other than a repair
technician to disassemble or repair the
product. This is to avoid re, electric shock, or
injuries.
Only use with AC 220-230V.
Using the product at any other voltage may
result in re or electric shock.
Use an AC outlet of 7A or higher
exclusively for the product.
Connecting other instruments with the same
AC outlet may cause the branch socket to
overheat, resulting in re.
Do not use a damaged power cord, and
do not damage the power cord.
(Protect the power cord. Do not use force,
place near a high humidity area, pull, twist,
bundle, place something heavy on top, or
tuck.) This is to avoid re or electric shock.
If dust collects on the plug for AC outlet,
completely wipe off the dust.
This is to avoid re.
If the supply cord is damaged, it must be
replaced by the manufacturer, its service
agent or similarly qualied persons in
order to avoid a hazard.
Firmly insert the plug into an AC outlet.
This is to avoid electric shock, shorting,
smoke, or re.
Do not use the product if the plug in the
AC outlet is damaged or loose.
This is to avoid electric shock, shorting, or
re.
Do not
touch the
unit with
wet hand.
Do not plug or unplug with wet hands.
This is to avoid electric shock or injuries.
Do not allow children to use the
appliance by themselves and do not put
within reach of infants or toddlers.
Failing to do so may result in burns, electric
shock, or injury.
Do not use for deep-frying.
This is to avoid re.
Warning
Prohibition
Direction
This indicates "There is a possibility
of injury*2 or damage to property*3"
when the unit is improperly handled
by the user.
*1: “Serious injury”is dened here as a medical condition such as loss
of sight, injuries, burns (high-temperature or low-temperature burns),
electric shocks, broken bones or poisoning which will have aftereffects
and/or which will require hospitalization or long-term outpatient
care.
*2: “Injury”is dened here as a physical injury, a scald or an electric shock
which will not require hospital treatment or long-term outpatient care.
*3: “Damage to property”is dened here as damage extending to buildings,
household effects, domestic animals, pets, etc.

4
English
Never
immerse
the unit in
water or
other liguid.
Do not submerge the heater unit in water
or pour water on it.
This is to avoid shorting, electric shock, or
malfunction.
This appliance is not intended for use by
persons with physical difculties or lack
of experience and knowledge-unless they
have been given supervision or
instruction concerning to the use of the
appliance by a person responsible for
his/her safety.
Unsupervised use may result in burn, electric
shock, or injury.
Unplug the
power plug.
Leave unplugged when not in use.
This is to avoid injuries, scalds, electric
shock, or re caused by a short-circuit.
Be sure to rmly
hold the plug when
removing it from the
AC outlet.
This is to avoid electric
shock, shorting, or re.
Do not use multiple
outlet receptacles.
This is to avoid re.
Do not use this product for any purpose
other than cooking.
This is to avoid re.
Do not use near a wall or furniture.
Steam or heat may damage the wall or
furniture and cause discoloration or
deformation. This may also cause problems
or re.
Stop using the product immediately in
the event of trouble.
Continued use in anything but proper
working order may result in re, electrical
shock, or injuries.
(Examples of trouble)
• The power cord or plug becomes
abnormally hot.
• When the power cord is moved, power is
supplied at some moments and not
supplied at other moments.
• When the product is different than usual,
such as it becomes abnormally hot or there
is the smell of something burning.
• Other troubles
Immediately unplug the power cord from the
AC outlet and contact the place of purchase
for inspection and servicing.
Do not use the product in the following
locations.
• Table, wagon, or coverings (such as those
made of vinyl) vulnerable to heat
• Newspaper or other paper
• Tatami or carpet
• Unstable surface
• Near water
• Near curtains
• Near re
• Any place that cannot support the main unit
guard when it is standing on its legs (such
as the burner rings of a stove)
Failure to do so may cause re, electric
shock, problems, discoloration, or marks.
Remove foreign objects and stains before
use.
If the product is used while the heater, heat
insulating board, the bottom of the deep pan
or one of the plates (optional accessory), or
the heat-sensing rod is contaminated with
foreign matter or dirty, this may cause the
product or one of the aforementioned items
to heat excessively, possibly resulting in
scorching of the table on which the product
is placed or damage to the product.
Do not leave the product unattended
during use.
This is to avoid re caused by cooking.
Never supply power to the product without
rst setting the deep pan or a plate
(optional accessory) in place in the product.
This is to avoid scalds or re.
Warning
Caution

5
1
Safety Instructions
Do not apply heat directly to food in can or bottle.
This is to avoid the container becoming ruptured
or red hot, which may cause scalds or injuries.
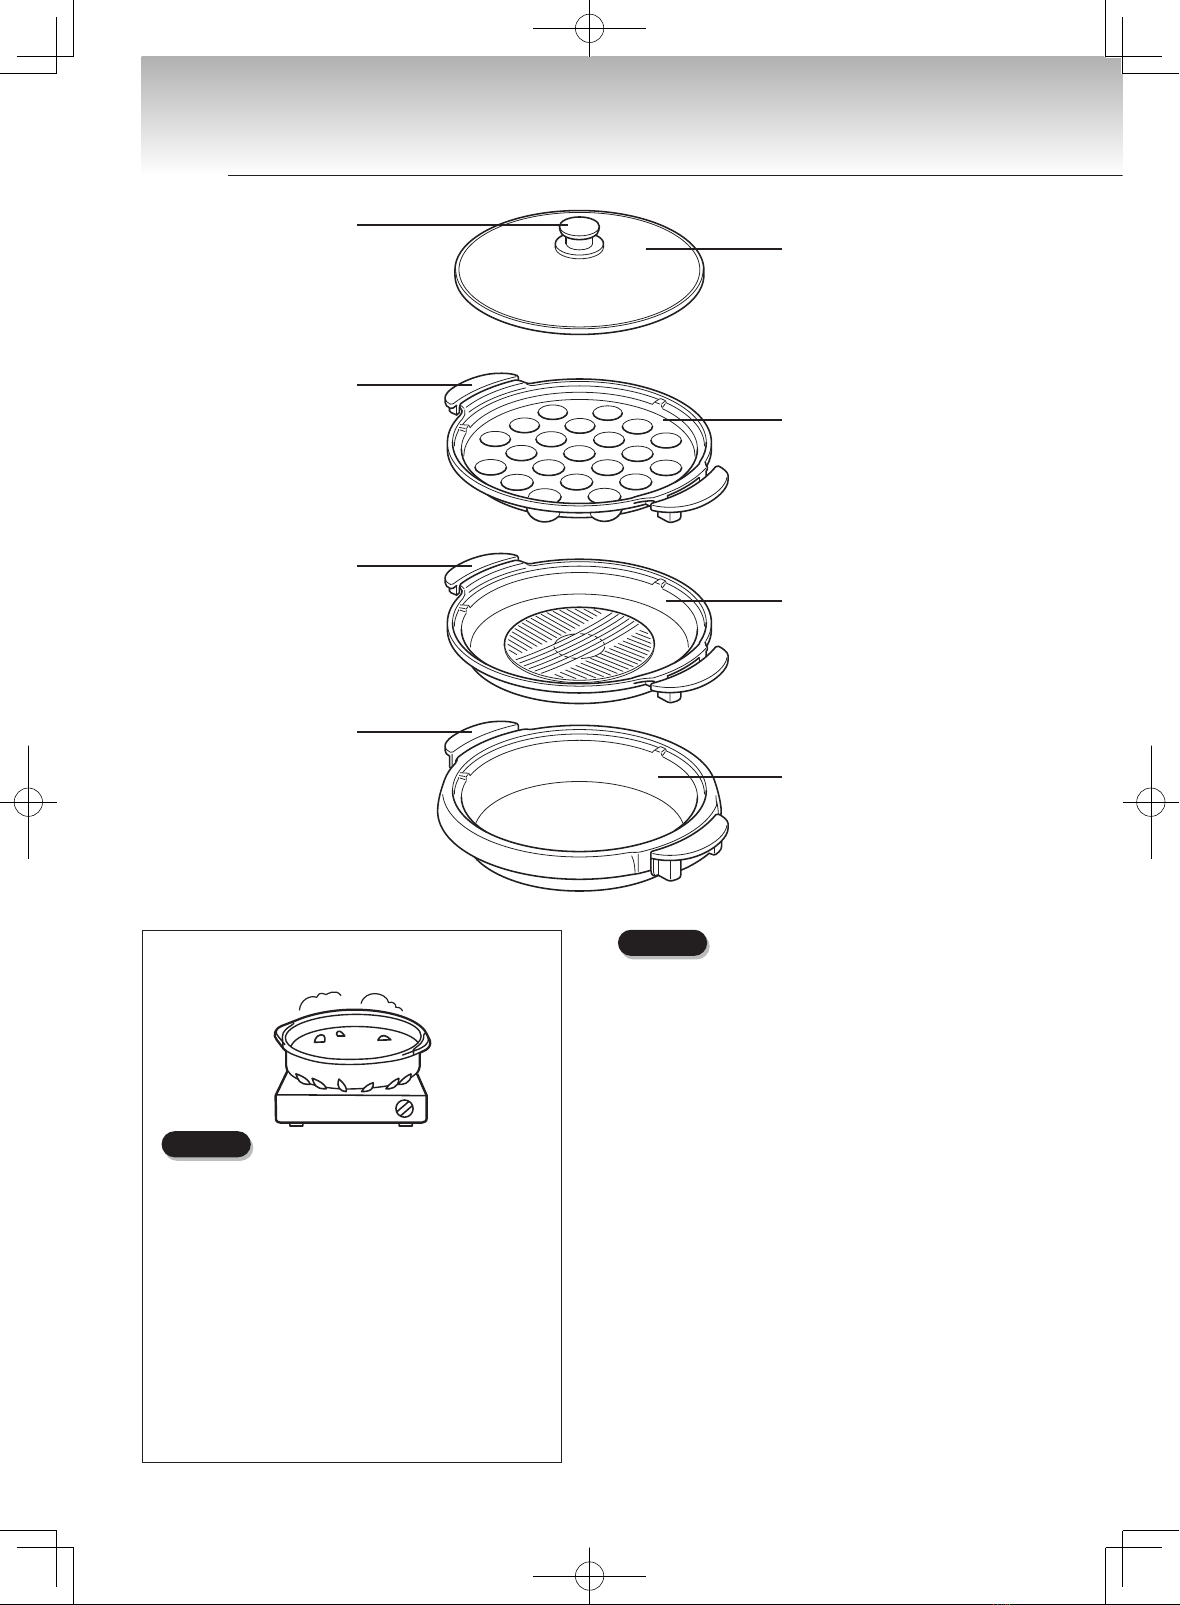
Do not place anything (such as a pot or tea
kettle) other than the included deep pan or a
plate (optional accessory) on the plate heater.
This is to avoid re, electric shock, or malfunction.
If you put the lid on the deep pan and then
boil water or soup stock, be careful that
the content does not boil over.
This is to avoid electric shock, shorting, re,
scalds, or malfunction.
When opening the lid, be careful with any
steam coming out.
This is to avoid scalds.
When heating liquids (water, stocks, or soups),
stir the liquid well before turning on the heat.
Not doing so could cause the liquid to boil suddenly,
possibly causing splattering, burns, or injury.
Do not
touch or
contact
Do not touch hot surfaces, such as the lid, the
deep pan, a plate (optional accessory), the heater,
or the heat-sensing rod, while the product is in use
or before it has cooled down sufciently after use.
This is to avoid scalds. Because the handles of the lid and
deep pan are very hot, do not touch them with bare hands.
After heating for a long time, do not touch
the lid handle with bare hands.
The resin portion becomes hot and may cause scalds.
Do not attempt to replace or to remove the deep
pan or a plate (optional accessory) while in use.
This is to avoid scalds.
Do not remove the deep pan, plate (optional
accessory), water-holding plate (optional
accessory), or water-holding plate cover
(optional accessory) from the product when it
is still hot or with the power cord connected.
This is to avoid scalds or re.
The appliance is not intended to be
operated by means of an external timer or
separate remote-control system.
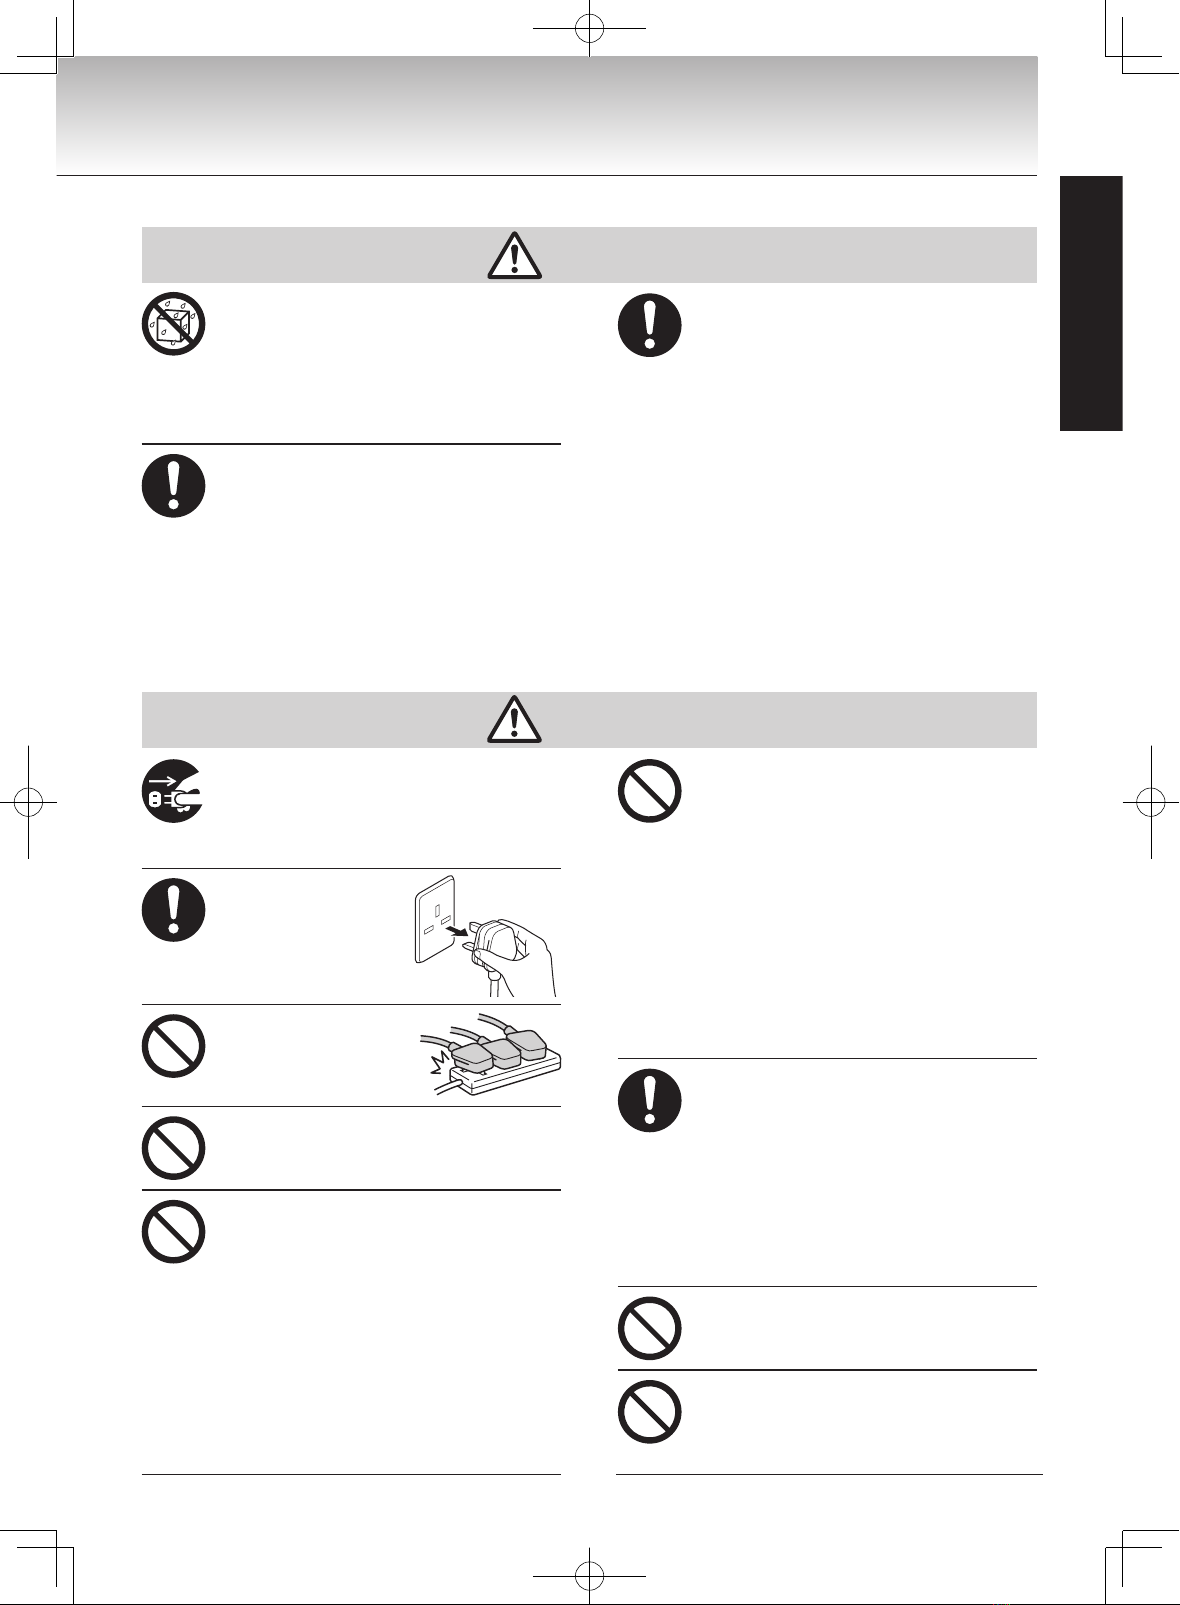
When removing the deep pan from a gas
stove, always use oven mitts.
This is to avoid scalds which may be caused
by hot handles.
Do not heat the deep pan on a gas stove
for more than 10 minutes. Do not use a
gas stove to cook anything in the deep
pan other than broth-based dishes.
Extended periods of heating may cause the
handles of the deep pan to become hot and may
cause burn injuries or warping of the deep pan.
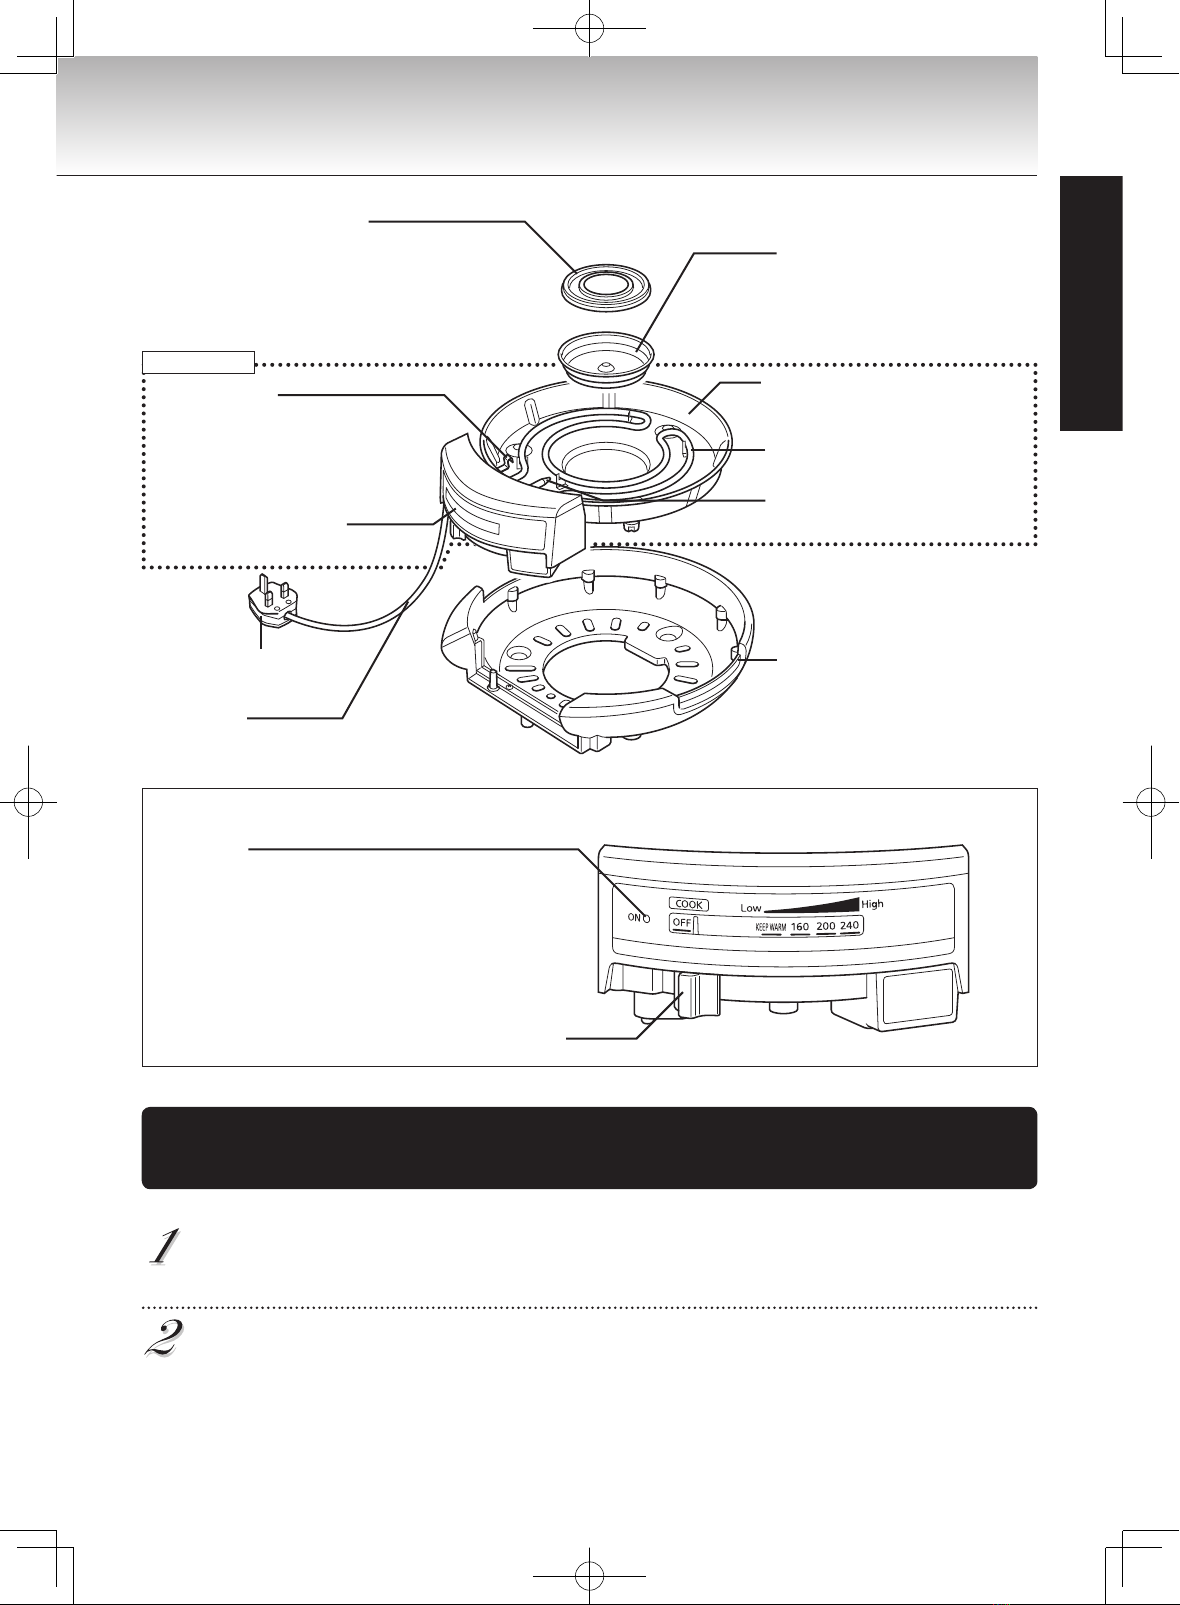
Caution
Clean after the main unit has cooled down.
This is to avoid scalds caused by touching a
hot surface.
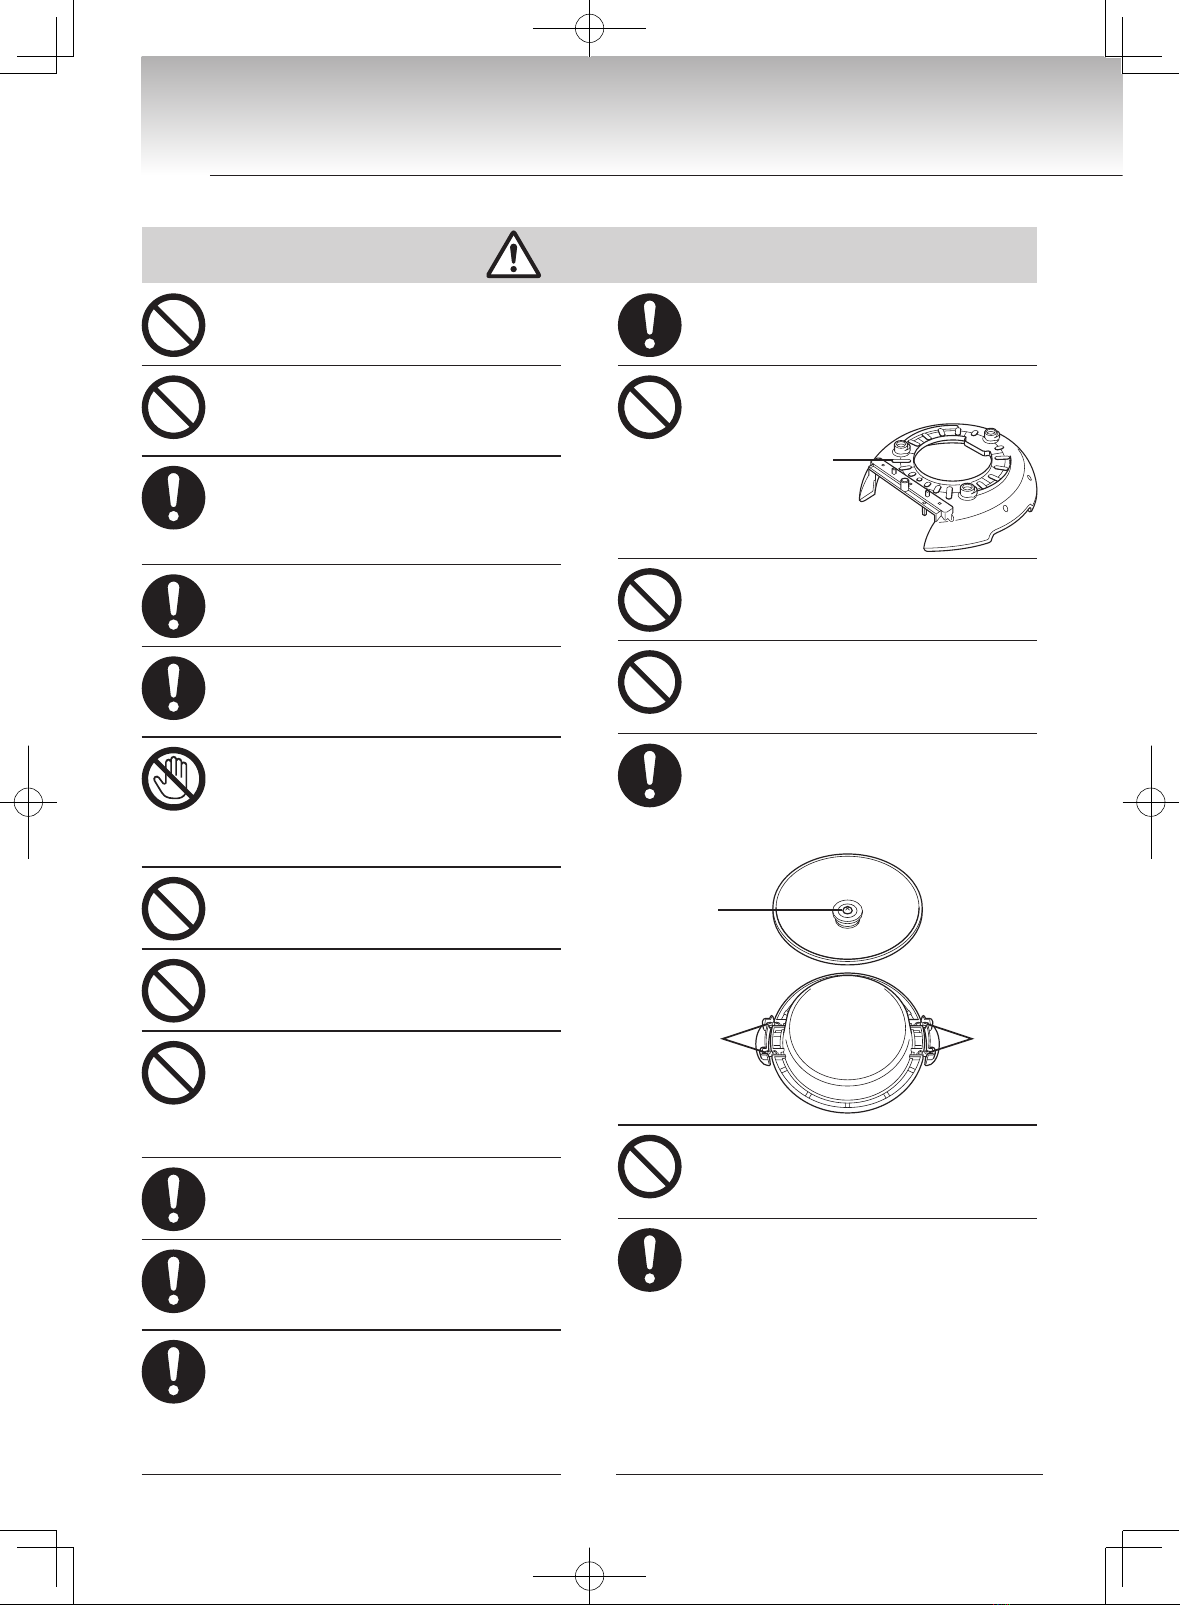
Do not block the vent of the main unit guard.
Doing so may cause res or damage the product.
Do not apply excessive force to the
safety bracket or alter its shape.
Doing so may cause res or damage the product.
Do not leave food or moisture in the
product for a long time.
The deep pan and plates may corrode and
the non-stick coating may peel.
Tighten the screws under the handles of
the deep pan, plate (optional accessory), or
lid if any of these handles becomes loose.
If you use them with loose handles, the handles
may come off causing scalds or injuries.
Screw
Screws Screws
Do not use the product if the heat insulating
board has lost its gloss or is discolored.
This may cause excessive heat, burn to
table, or malfunction. Replace it immediately.
Household use only.
This appliance is intended to be used in
household and similar applications such as:
• staff kitchen areas in shops, ofces and
other working environments
• farm houses
• by clients in hotels, motels and other
residential type environments
• bed and breakfast type environments
Vent

6
English
● Do not subject the temperature controller to
shocks.
Dropping or hitting it with another object may cause
malfunction.
● Do not place the main unit guard, heater unit, or
plate (optional accessory) on a gas stove.
The main unit may burn and the plate may become
deformed, causing malfunction.
● When cooking a dish other than stew, do not use
the deep pan on a gas stove.
Preparing fried food using the deep pan placed on a
gas stove will cause the deep pan to become very hot
and deformed.
● Do not place the main unit guard, heater unit,
deep pan, or plate (optional accessory) on an
induction heating element or similar cooking
surface.
Doing so may cause the main unit guard or heater
unit to burn, or cause the deep pan or plate to deform
and become damaged.
● Do not place the deep pan on a gas stove without
any food in it.
The non-stick coating may become damaged or
deformed, rendering it unsuitable for use.
● Do not use the product to cook while any
combination of the deep pan and plates (optional
accessory) are stacked on top of one another,
regardless of whether two or three cooking
surfaces have been stacked.
This may cause malfunction or the temperature may
not rise.
● Do not use a metal spatula or knife.
The non-stick coating may become damaged or
corrode.
● Do not allow the deep pan or a plate (optional
accessory) to come into contact with the main
unit guard when the cooking surface is hot.
The heat may cause deformation of the main unit.
● When the lid is still hot, do not place it on vinyl
fabric or table.
It may leave marks on the surface.
● To prevent the lid from cracking, do not perform
the following tasks.
• Do not apply heat partially.
• Do not use direct re.
• Do not use when the lid is not fully in place.
• Do not hit with strong force.
• Do not cool rapidly.
• Do not use scouring powder or metal scourer when
cleaning.
• Do not tighten screws on the lid handle beyond what
is necessary.
These safety instructions will allow the electric skillet to be used for many years.

7
2
Parts
When in a hurry, use a gas stove to speed
heating.
Caution
Caution
● Always place the deep pan in the center of
the gas stove.
● Do not heat the deep pan when empty.
● Adjust fire so that the flame does not reach
the handles. This is to avoid damage.
● Because the handles will become hot, do
not hold them directly with bare hands.
Always use oven mitts.
● Do not heat the deep pan on a gas stove
for more than 10 minutes.
Extended period of heating makes the
handles of the deep pan hot and dangerous.
● Make sure the lid is set completely in place.
● Do not move the deep pan or a plate (optional
accessory) while it is in use or immediately after
use. This is to avoid scalds.
● The deep pan and plates (optional accessory)
cannot be used with induction heating devices.
● The lid is exclusively for the deep pan.
Do not use the lid on the grooved griddle plate
or the takoyaki plate.
Lid handle
Handle
Lid
Deep pan
Grooved griddle plate
(optional accessory)
Takoyaki plate
(optional accessory)
Handle
Handle

8
English
When using the product for the rst time or after the product has been
stored for a while
Remove it from the box, and then remove its packing material and
cushioning material.
Clean the lid, the deep pan, and plates (optional accessory) with water.
(→ p.18)
When cleaning the bottom of the plate for the rst time, there may be some coating there, so use a paper
napkin etc to wipe it off.
Display unit
Light
The light is on when the temperature
is being adjusted, and off when the
preset temperature is reached. The
light may go on or off depending
on the temperature control of the
cooking operation.
Temperature
control lever
Water-holding plate cover
(optional accessory)
Install on the product only when
using the grooved griddle plate.
Water-holding plate
(optional accessory)
Install on the product only when
using the grooved griddle plate.
Heater unit
Safety bracket
Does not permit current to ow
through the product when the
deep pan or a plate (optional
accessory) has not been set into
the main unit guard. (→ p.9, 13)
Temperature controller
(CQD only)
Heat insulating board
Be sure to set into the main unit
guard whenever using the product.
Heater
Do not hold directly.
Heat-sensing rod
Detects the temperature.
Main unit guard
Power cord
Plug for AC outlet
To connect to AC outlet

9
3
How to use [ When cooking with the deep pan or
takoyaki plate (optional accessory) installed ]
Set the heater unit into the main
unit guard.
Heater unit
Main unit guard
1
Conrm that the safety bracket is
raised.
Conrm that
it is raised
Safety bracket
2
●
Before inserting the deep pan or plate (optional
accessory), be sure to check that the heater unit
has been inserted.
●
Check that the heater unit plus the deep pan or
plate (optional accessory) are not offset from their
proper positions. If any of these are misaligned,
current will not ow through the product, because
the safety bracket will not operate normally.
Check when setting
Raised safety bracket
Lowered safety bracket
(Reinsert the heater unit.)

10
English
Insert the deep pan or the takoyaki
plate (optional accessory).
3
Conrm that the temperature
adjustment lever is toggled to the
left end and that the yellow bar
has reached the “OFF” position.
Temperature
adjustment lever
Gradation
mark
Yellow bar
4
If cooking anything other than a broth-based dish,
be sure to spread a thin layer of vegetable oil over
the entire surface of the deep pan or plate (optional
accessory).
Before cooking
●
Cleanly remove any water droplets or foreign
matter from the reverse side of the deep pan or
plate (optional accessory), heater, heat-sensing
rod, or heat insulating board. Failure to do so
could cause scorching or fires.
●
Do not set the water-holding plate (optional
accessory) into the product when cooking with the
deep pan or takoyaki plate (optional accessory)
inserted. Doing so could damage the product.
Caution
[When the deep pan is used]
[When the takoyaki plate (optional accessory) is
used]

11
3
How to use [ When cooking with the deep pan or takoyaki
plate (optional accessory) installed ]
Insert the plug into an AC outlet.
5
Adjust the yellow bar to the
intended gradation mark,
depending on the food being
prepared, using the temperature
adjustment lever. Once the deep
pan or plate (optional accessory)
has heated up, begin cooking.
6
It takes approximately 20 minutes to reach the
desired temperature (if the lid is not used).
[The rst time power is supplied]
There may be smoke or smell of resin, but it will
become less noticeable with use.
[When cooking stew]
When the water or soup stock boils, remove the lid,
add ingredients, and then cook.
Temperature
adjustment lever
Gradation
mark
Yellow bar

12
English
Light and sound during operation
● The light may go on or off depending on the
temperature control of the cooking operation.
● The clicking sound is caused by the plate heater's
thermal expansion; it is not a malfunction.
Remove any burned residue while cooking.
Move the yellow bar to the “KEEP WARM” marking.
Note that keeping prepared food warm for long
periods will dry it out and harm its flavor.
To avoid burned food
To keep warm
The use of metal skewers or other implements may
scratch the plate.
Takoyaki should be made with bamboo
skewers.
●
Do not switch out or remove the deep pan or the plate (optional
accessory) while cooking. Doing so may cause burn injuries.
●
Wait until the deep pan or plate (optional accessory)
and the heater unit have cooled down before
attempting to hold or carry the product. Do not hold
onto the temperature controller. If the product is held by
the temperature controller, it may become unfastened
from the main unit guard, allowing the latter to fall.
Temperature controller
Hold by the
main unit guard.
● Do not put a lid over the takoyaki plate (optional
accessory). If a lid is placed on top during cooking,
water condensed on the bottom of the lid may drip
onto the heated plate when the lid is removed and
cause splattering of oil and water, resulting in burn
injuries. Additionally, a lid may cause the takoyaki
plate’s temperature to rise, leading to a risk of fire.
●
When using the takoyaki plate for Gambas al Ajillo (Spanish-style
Garlic Shrimp) or similar dishes (food stewed in oil), completely
wipe off any moisture on the food, place it on the plate at the
same time as the oil and cook it with the temperature adjustment
lever set between KEEP WARM and 160.
If the oil and food is cooked too long at 160, the oil may splatter
or the food may fly. Adjust the temperature appropriately while
cooking.
Temperature guideline
Cooking example Indication
Deep pan
Teppanyaki (iron griddle-
style dishes), stir-fried
vegetables, fried rice
240
Potstickers, okonomiyaki
(savory Japanese
pancakes), stir-fried
noodles, sh meunière,
Salisbury steak (lower
temperature during cooking)
200
Fried eggs, crêpe-thin
omelets, pancakes,
crêpes, French toast
160
Takoyaki plate
(optional accessory)
Takoyaki
240
Gambas al ajillo (Spanish
shrimp in garlic-oil sauce)
KEEP WARM
to 160∗
To keep warm
KEEP WARM
∗
When using the takoyaki plate for Gambas al Ajillo
(Spanish-style Garlic Shrimp) or similar dishes (food
stewed in oil), completely wipe off any moisture on the
food, place it on the plate at the same time as the oil
and cook it with the temperature adjustment lever set
between KEEP WARM and 160.
● The indication is a rough temperature guide.
●
The warming temperature is approximately 70 °C to 90 °C.
Caution

13
4
How to use [
When grilling with the grooved griddle plate
(optional accessory) inserted
]
Set the heater unit into the main
unit guard.
Heater unit
Main unit guard
1
Conrm that the safety bracket is
raised.
Conrm that
it is raised
Safety bracket
2
Raised safety bracket
Lowered safety bracket
(Reinsert the heater unit.)

14
English
● Before inserting the plate (optional accessory), be
sure to check that the heater unit has already been
installed.
● Be sure to install the water-holding plate (optional
accessory) and water-holding plate cover (optional
accessory).
● Be sure to add water to the water-holding plate
(optional accessory).
● Confirm that neither the heater unit nor the plate
(optional accessory) are misaligned. If either is not
installed properly, current will not flow through the
product, because the safety bracket will not operate
normally.
Check when setting
Insert the water-holding plate
(optional accessory), and ll with
water to the level indicated on
the interior of the water-holding
plate.
3
Place the water-holding plate
cover (optional accessory)
and set it into position. Set the
grooved griddle plate (optional
accessory) into position.
4
(2) Fill with water
to the level
indicated inside.
Protrusion
(1) Set the water-
holding plate
in place.
Interior of the water-
holding plate
Water-
holding
plate cover
If cooking anything other than a broth-based dish,
be sure to spread a thin layer of vegetable oil over
the entire surface of the deep pan or plate (optional
accessory).
Before cooking

15
4
How to use [ When grilling with the grooved griddle plate
(optional accessory) inserted ]
Conrm that the temperature
adjustment lever is toggled to the
left end and that the yellow bar
has reached the “OFF” position.
Temperature
adjustment lever
Gradation
mark
Yellow bar
5
Insert the plug into an AC outlet.
6

16
English
Adjust the yellow bar to the
intended gradation mark,
depending on the food being
prepared, using the temperature
adjustment lever. Once the plate
(optional accessory) has heated
up, begin cooking.
7
It takes approximately 20 minutes to reach the
desired temperature (if the lid is not used).
[The rst time power is supplied]
There may be smoke or smell of resin, but it will
become less noticeable with use.
Temperature
adjustment lever
Gradation
mark
Yellow bar
Remove any burned residue while cooking.
To avoid burned food
Slowly add water through
the water-filling hole of
the grooved griddle plate
until the protrusion in
the middle of the water-
holding plate is covered.
(Be careful, as there will
be steam.) (→ p.14)
When the water level in the water-holding
plate has gone down
Water-lling hole
Light and sound during operation
● The light may go on or off depending on the
temperature control of the cooking operation.
● The clicking sound is caused by the plate heater's
thermal expansion; it is not a malfunction.
Move the yellow bar to the “KEEP WARM” marking.
Note that keeping prepared food warm for long
periods will dry it out and harm its flavor.
To keep warm
Temperature guideline
Cooking example Indication
Steak, barbecued meat 240
To keep warm
KEEP WARM
∗The indication is a rough temperature guide.
∗The warming temperature is approximately 70 °C
to 90 °C.
●
Cleanly remove any water droplets or foreign matter
from the heater, heat-sensing rod, insulating board,
or the reverse side of the plate (optional accessory).
Failure to do so could cause scorching or fires.
● Failure to add water to the water-holding plate
(optional accessory) may cause excessive heating,
resulting in warping, discoloration, damage, or fire.
●
Do not add water past the level indicated on the
inside of the water-holding plate (optional accessory).
Doing so could cause water to overflow onto the
heat insulating board, possibly resulting in stains that
cannot be cleaned and failure of the product to cook
properly.
● Do not switch out or remove the plate (optional
accessory) while cooking. Doing so may cause
burn injuries.
● Wait until the plate (optional accessory) and the
heater unit have cooled down before attempting
to hold or carry the product. Do not hold onto the
temperature controller. If the product is held by the
temperature controller, it may become unfastened
from the main unit guard, allowing the latter to fall.
Temperature controller
Hold by the
main unit guard.
● Do not place the lid on the grooved griddle plate.
The handle will get hot, which may cause burns.
Caution

17
5
After use
Move the temperature adjustment
lever to the left end, and line the
yellow bar up with the “OFF” marking.
Do not leave anything in the plate or deep pan.
This may cause the non-stick coating to peel.
Therefore, always wipe off burnt residue or seasoning,
then start cleaning. (
→ p.18
)
1
Disconnect the plug from the AC outlet.
2
Allow the deep pan or plate (optional
accessory) to cool off slightly. While
still warm, wipe away any scorched-
on bits, seasonings, or other grime
from the cooking surface with a soft
paper napkin or similar implement.
Once the product has cooled down
further, remove the deep pan or
plate from the main unit.
3
After cooking stew, discard any sauce left rst, and
then carry out the step 3.
Gradation
mark
Yellow bar
Once the heater has sufciently
cooled, remove the heater unit.
4
Press down on the main unit guard and remove it by
pulling it upward while continuing to press down.
(For care and maintenance, → p.18.)
Heater unit
Main unit guard
How to store
● After cleaning, store them in the original box. The
storage instructions can be found on the box.
● If not storing the product in the box in which it
came, stack the following parts on top of the main
unit in the order given: deep pan, grooved griddle
plate (optional accessory), takoyaki plate (optional
accessory). Stack paper or similar material
between the deep pan and both plates (optional
accessory) to product them during storage.
Stacking these items directly on top one another
may scratch the fluororesin coatings or black heat-
absorbing treatments on their surfaces.
Takoyaki plate
(optional accessory)
Grooved griddle plate
(optional accessory)
Paper
Deep pan
Paper
● Do not touch the deep pan, plates (optional
accessory), heater, or heat insulating board until
they have sufficiently cooled. Touching any of
these items before they are cooled may cause
burn injuries.
● Remove the heater unit with an upward-moving
motion. Doing otherwise may damage or break the
unit.
Caution
Moisten with
water

18
English
6
Cleaning
Unplug the power cord and allow the product to cool down before cleaning.
For detergents, use only those developed for kitchen use (dishes and cooking utensils).
Only use clean soft materials such as cloth or sponge.
Parts to be cleaned whenever they are used
Deep pan
Takoyaki plate (optional accessory)
Grooved griddle plate (optional accessory)
u If stain is found, place the plate
or deep pan in warm water (for
about one hour).
vUse a sponge moistened with
detergent diluted with water or
warm water to clean. Then,
rinse with water.
wUse a dry cloth to wipe off water
and make them dry. When
cleaning the bottom of the plate
or deep pan for the rst time,
there may be some coating
there, so use a paper napkin
etc to wipe it off.
Caution
● Do not use harmful materials
such as thinner, cleanser,
bleach, metal scrubber, nylon
scrubber, and chemically
treated wiping cloths.
● Do not put in the dishwasher
or dish dryer, or use boiling
water.
● Do not rub the plate or deep
pan excessively.
● When cleaning the product
with detergent, use a
synthetic kitchen detergent
(formulated for dishware,
pots, and pans), and rinse
thoroughly.
∗Detergent not rinsed from
the product may cause
resin and other materials to
deteriorate or discolor.
● Do not submerge the heater
unit in water or pour water on
it.
Heater unit
Temperature
controller
Heater
Heat insulating
board
uTo wipe down the heat
insulating board, use a cloth
soaked in detergent diluted in
warm water and then wrung out
thoroughly. Use a dry cloth to
wipe down the heater and
temperature controller.
vWipe away any detergent
residue with a dry cloth.
Lid uUse a sponge moistened with
detergent diluted with water or
warm water to clean. Then,
rinse with water.
vUse a dry cloth to dry.
Places to be cleaned whenever they become dirty
Main unit guard uUse a sponge moistened with
detergent diluted with water or
warm water to clean. Then,
rinse with water.
vUse a dry cloth to wipe off water
and make them dry.
Caution
● Do not rub the seal or printed
area on the main unit with
force.
Power cord Use a dry cloth to wipe.
Water-
holding
plate
(optional
accessory)
Water-
holding
plate cover
(optional
accessory)
Any other servicing should be performed by an authorized service representative.
This manual suits for next models
1
Table of contents
Other Tiger Kitchen Appliance manuals

Tiger
Tiger MCS-A050 User manual

Tiger
Tiger MMQ-S User manual

Tiger
Tiger CQE-A11W User manual

Tiger
Tiger NFH-G User manual

Tiger
Tiger LWU-A User manual

Tiger
Tiger Maho Nabe User manual

Tiger
Tiger RFE-1100 User manual

Tiger
Tiger CQE-A11U User manual

Tiger
Tiger CRL-A Series User manual

Tiger
Tiger M785 User manual