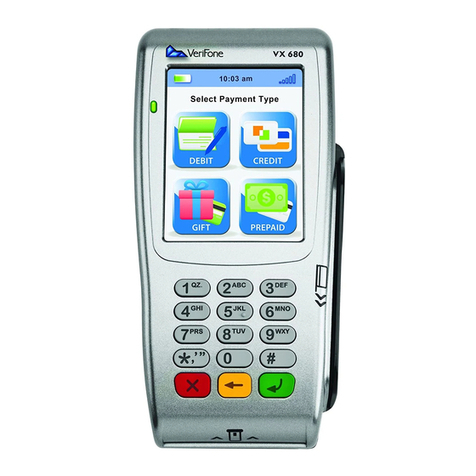
Till Verifone T650p User manual

Quick Reference Guide 1
WWW.TILLPAYMENTS.COM
Verifone T650p
INTEGRATED POINT OF SALE TERMINAL

2Quick Reference Guide
Quick
Reference
Guide
FOR VERIFONE T650P TERMINAL
2Quick Reference Guide

Quick Reference Guide 3
Get to know your terminal
Contactless
reader
Paper roll
cover
Power/Accessibility
mode button
Volume button
Navigation keys
Card insert
Card swipe
USB-C charging port
Notification bar

4Quick Reference Guide
On the terminal screen, swipe down and press and hold the wifi icon
Toggle ‘on’ wifi and select desired network
Enter password and tap ‘connect’
Getting Started
Connecting to WiFi
If the ‘aeroplane mode’ message is displayed on the device, you can turn o aeroplane
mode by swiping down from the top of the terminal screen
Swipe left and press the areoplane mode icon to switch it o
Turn o aeroplane mode
Installing & Ordering Paper Rolls
STEP 1
STEP 2
Hold both sides of the paper door, which is on the upper corner of
the device and open the paper door by pulling outside. Remove
any partial roll of paper in the tray.
Loosen the glued leading edge of the new paper roll or remove the
protective strip. Unwind the paper roll past any glue residue. Hold
the roll so that paper feeds from the top of the roll. Align the printer
paper to the tabs to the paper guides and hold the paper up when
closing the door.
STEP 3
With the printer paper extending outside, close the printer door
by swinging upward until the door clicks shut, allowing the printer
paper to extend outside the printer door.
To place order for receipt paper, please contact
Till Payments Support at support@tillpayments.com.

Quick Reference Guide 5
Menus

6Quick Reference Guide
Click on ‘Point of Sale’ in the menu to start transaction
On the keypad, enter the transaction amount and tap ‘Purchase’
The terminal will prompt the customer to insert, swipe or tap card
The account payment screen will be presented and the customer will be prompted to
select their account; Cheque, Savings or Credit
Once the payment is successful, a message will appear and the terminal will prompt to
print receipt for the merchant or print/email the reciept to the customer
How to process a Transaction

Quick Reference Guide 7
On the MENU screen, you are able to see ‘Order History’ or ‘Search Orders’
You will be presented with dierent ways to search transactions by type
Search by:
Order History: Displays the transactions that were accepted on the terminal
Search by Card number
Search by Date: Calendar view of transactions. Ability to sort by start and end date
Transaction Search

8Quick Reference Guide
Press ‘Menu’ and then press ‘Manage POS Pairing’
Press the plus (‘+’) button to begin the pairing process. This will enable the ‘Start Pairing’
screen to appear’
On your POS system, start up Spice and enter your Unique POS ID and the Payment Terminal
IP Address as displayed on the Till Pairing Screen e.g. 192.168.0.35. Press ‘Pair’. At the same
time, press ‘Start’ on the terminal screen
Spice will display pairing in process and will display pairing code
Terminal will display Pairing Code. If matched then press ‘Yes’
Terminal will display Pairing Successful. Press ‘Finish’
Spice will display that the T650p Payment Terminal is connected
T650p Payment Terminal connection status is green and displays that the Terminal is paired
to the correct POS
Pairing your terminal to the
Point of Sale (POS) system

Quick Reference Guide 9
Press ‘Menu’ and then press ‘Manage POS Pairing’
Select the POS that you wish to unpair by pressing the POS information
Press the Unpair Button
Confirm the intention to Unpair by pressing “Unpair”
Unpaired confirmed
Unpairing your terminal from the
Point of Sale (POS) system
Unpairing the T650P Terminal is a capability that is used for removing the pairing of the
Payment
Terminal to the Point of Sale System. This capability is used when a merchant wants to pair the
Payment Terminal to another Point of Sale System in their premises or when a terminal has lost
its pairing for various reasons including loss of communications or other technical reasons.
To unpair the Terminal from the POS system:

10 Quick Reference Guide
Trouble
Shooting
Hardware faults
Device does not start
Ensure that the device is plugged into a dedicated power source;
Check if the power cable connector is plugged in properly.
Device Display Does Not Show Correct/ Readable Info
If the device display does not show correct/readable info, please check all the cable
connections.
Blank Display
If the device display is dark, tap the screen with the stylus or your finger. If the unit was in
screen-saver mode, the screen will turn on when touched;
If the display does not show correct or readable information, then check all the cable
connections.
Resetting Device
If the device is not responding, please restart by the holding the start button for 1-2 seconds
until a message is displayed on the screen. Touch the “Restart” selection to restart the device.
Software faults
Transactions Fail to Process
Check the Magnetic Card Reader:
1. Perform a test transaction using one or more dierent magnetic stripe cards to ensure that
the problem is not a defective card;
2. Ensure that you are swiping the card properly;
3. Process a transaction manually using the keypad instead of the card reader. If the manual
transaction works, then the problem may be a defective card reader.
Check the Smart Card Reader
1. Perform a test transaction using several dierent smart cards to ensure the problem is not a
defective card.
2. Ensure that the card is inserted correctly.
3. Ensure that the MSAM cards are properly inserted in the slots and are properly secured.

Quick Reference Guide 11
Swipe down from the top of the touch screen and select the launcher
Select ‘device management’
Press ‘Verifone cloud’
Scroll to the bottom of the screen and press ‘hear beat’
The light should indicate green, meaning a ‘healthy’ status of the terminal. If the heartbeat
fails, there will be a red ‘X’ rather than a green tick
Terminal Heartbeat
Heartbeat technology creates communication between the terminal and technicians so that
technicians can remotely understand the status of a terminal. This enables technicians to
triage any issues as eiciently as possible. To trigger a terminal heartbeat test:

12 Quick Reference Guide
Icons and meanings
Cellular
Icon Description
Indicates strength of
signal
Cellular is disabled
Cellular is
connected but does
not have internet
access
Icon Description
Indicates strength of
signal
Wifi is disabled
Wifi network is
password protected
Wifi is connected but
does not have internet
access
Terminal has detected
wifi but is not
connected
Wifi Wifi signal strength
Icon Description
Wifi 0 bars
(weakest signal)
Wifi 1 bar
Wifi 2 bars
Wifi 3 bars
Wifi 4 bars
What to do incase of an outage
Mobile Broadband Outage
Till Payments’ Integrated Solution uses both fixed broadband and 4G Mobile Broadband as
the carriage. If one of these network fails then the alternative method takes over transactions
processing. Alternatively:
If your terminal is unable to communicate, the terminal will automatically switch to
Electronic Fall Back (EFB) Mode; or
If the mobile network is unavailable, you can continue to process transactions by
connecting to an available WiFi connection.
Electronic Fall Back (EFB) Mode
With EFB, you can continue processing transactions even when the network is unavailable. Your
terminal will store the transactions oline and will send the transactions for processing once
service has been restored. To obtain authorsation to certain transaction limits which can be
processed in EFB mode:

Quick Reference Guide 13
Call 1800 243 444, press 1 and then press 1
Enter your merchant number, then press the # key. If you normally use an EFTPOS terminal,
please use your manual merchant number (Eight digit merchant ID). This information can
be located on your merchant statement or a receipt
Select the transaction type – 1 Card Present, 2 Telephone or Mail Order.
Enter the credit card number, then press the # key
Enter the card expiry date, then press the # key
Enter the CCV, (the last three digits on the back of the card amongst the signature strip),
and press the # key
Enter the transaction amount in dollars and cents, ignoring the decimal point, then press
the # key. Confirm the amount. 1 if correct, 2 to change the amount
Listen for the authorisation response and record on the enter into the auth screen
Acquiring System Unavailable
If the transactions are below the merchants agreed floor limit, the transaction will be approved
oline. If the transaction
Local Network Failure
If the Merchants router fails then the Integrated connection between the POS and Payment
Terminal can not be established. In this case the merchant will need to push the terminal into
standalone operations.

14 Quick Reference Guide
Need a bit of help?
Contact us
Call 1300 369 692 or email
support@tillpayments.com
Our dedicated team of experts can assist you over the phone 24/7 with questions,
problem resolution and extra training. Keep your merchant ID number handy when you call,
this will help speed up your enquiry.
For online reports and statements please visit https://merchant.tillpayments.com
Quick Reference Guide 14
Table of contents
Popular Touch Terminal manuals by other brands

Texas Instruments
Texas Instruments 770 operating instructions
Roger
Roger PRT12 v1.3 Installation and programming guide

Datalogic
Datalogic Viper-NET user manual
COBHAM
COBHAM SAILOR 6018 installation manual

Hatteland
Hatteland HD 12T21 MMD-xxx-Fxxx Series user manual

ZIEHL-ABEGG
ZIEHL-ABEGG A-G-247NW operating instructions
