manuals.online logo
Brands
  1. Home
  2. •
  3. Brands
  4. •
  5. TILLIG BAHN
  6. •
  7. Toy
  8. •
  9. TILLIG BAHN H0-ELITE-EW 2 User manual

TILLIG BAHN H0-ELITE-EW 2 User manual

Güterwagen
H0-ELITE-EW 2
www.tillig.com / www.facebook.com/tilligbahn 368064 / 05.09.2019 1
Stückliste:
1 Stück – Schwellenband 1
1 Stück – Außenschiene li.
1 Stück – Außenschiene re.
1 Stück – Zunge li.
1 Stück – Zunge re.
2 Stück – Endschiene li.
2 Stück – Endschiene re.
1 Stück – Flügelschiene li.
1 Stück – Flügelschiene re.
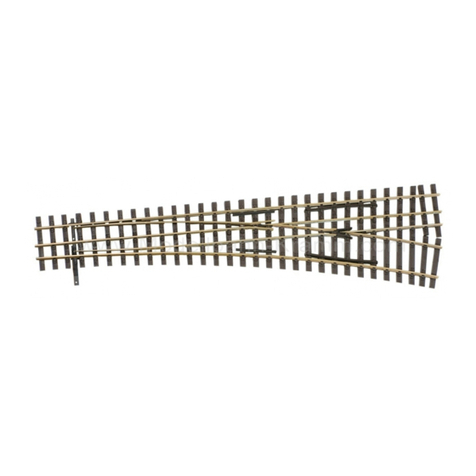
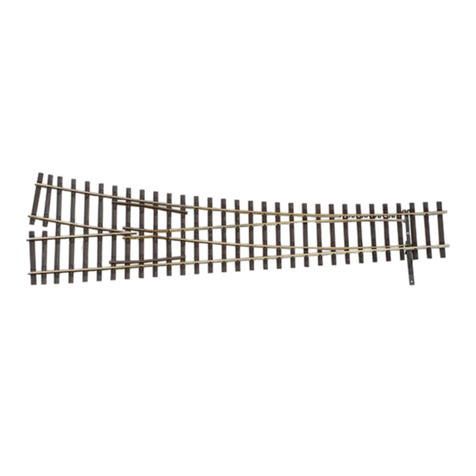
Art.-Nr. 85422 – Bausatz Weiche links
Art.-Nr. 85423 – Bausatz Weiche rechts
Benötigtes Werkzeug:
Gleisschneider oder Minibohrmaschine mit Trenn-
scheibe, Schlüsselfeilen, Flachzange, Lötkolben,
Reißzwecken, Seitenschneider, Messschieber
Für das Standardsortiment der Eliteweichen kann als
Baugrundlage die Planungsmappe H0-Elite Art.-Nr.
09620 verwendet werden. Für den Bau von Bogenwei-
chen mit individueller Geometrie bieten die Weichen mit
dem Flexsteg-Schwellenverbinder die Möglichkeit, „Ihre“
gewünschte Weichenform zu realisieren. Dabei sollte
beachtet werden, dass ein Überbiegen als auch Über-
strecken der Schwellenroste schon aus Gründen einer
vorbildgerechten Darstellung vermieden wird.
Gestatten Sie noch einen Hinweis: Arbeiten Sie ohne
Zeitdruck und genau. Das Ergebnis, eine Weiche, die
hervorragende Fahreigenschaften bietet und optisch jede
Gleisanlage aufwertet, wird Ihnen viel Freude bereiten.
Allgemeiner Hinweis:

-
sprechend der Weichengeometrie vorzubiegen und an
den für die Stromabnahme vorgesehenen Stellen unten
am Schienenfuß zu blanken.
Montage:
Tools required:
Track cutter or mini-drill with cut-o wheel, needle
les, at-nosed pliers, soldering iron, thumbtacks,
side-cutting pliers, sliding calliper
For the standard assortment of Elite-Points, the plan-
ning folder H0-Elite Art.-No. 09620 can be used as a
basis for construction. To construct curved points (tur-
nouts) with their own individual geometry, the points
󰀨-
bility to set up “your” own desired point (turnout) form.
However, you should be careful to avoid over-bending

construction.
And allow us one more suggestion here: it is better
to work without time constraints, but with precision. The
󰀨-
tional handling characteristics and optically enhances
any track system, will provide you with all the more en-
joyment.
General notice: Prior to installing anything onto the
     -

be bent in proportion to the point geometry and shined
at the points intended for power contact underneath on
the foot of the rail.
Assembly:
Outillage requis:
Coupe-rail ou mini perceuse avec disque à trancher,
limes à clés, pince plate, fer à souder, punaises,
pince coupante de côté, pied à coulisse

-
dard des aiguillages Elite. Pour la construction d’aiguilla-
-



de trop allonger les caillebotis des traverses pour obtenir

Encore une remarque: travaillez sans vous presser et
󰀨

-
rera beaucoup de plaisir.
Remarque générale:     

-


Montage:
Item no. 85422 – Point kit left
Item no. 85423 – Point kit right
Replacement parts list:
1 piece – Sleeper band 1
1 piece – Outer rail (l.)
1 piece – Outer rail (r.)
1 piece – Tongue (l.)
1 piece – Tongue (r.)
2 piece – End rail (l.)
2 piece – End rail (r.)
1 piece – Wing rail (l.)
1 piece – Wing rail (r.)
1 x Stellschwelle (beinhaltet
in GS Stelleinheit)
2 x Radlenker
4 x Strombrücken
2 x Isolierschienenverb.
2 x Schieneverb. brüniert
1 x GS Stelleinheit
1 x BAL
1 x Directional cross-tie
(included in GS height
adjustment unit)
2 x Wheel guide
4 x Electric bonds
2 x Insulating rail joiners
2 x Rail joiners bronzed
1 x GS height adjustment
unit
1 x BAL
Liste des pièces:



 
 
 



Réf. n° 85422 – Kit de construction aiguillage gauche
Réf. n° 85423 – Kit de construction aiguillage droite


2 x Rail de guidage
4 x Ponts de courant
2 x Connecteurs de rail d’isolation
2 x Connecteurs de rail d’isolation bruni

1 x Instructions de
service
1. 

le bas à travers la grille des traverses sur les traverses

(P. 2 Illustr. 2 et 3)
2.     
l’aiguillage, sur la voie existante.
3. -

commence au niveau de la 2e traverse. Celle-ci pointe
vers le milieu de la voie.
4. 


5. 


          
(P. 2 Illustr. 4)
6.          
          

7. 
8. 
(P. 2 Illustr. 5)
9. Plier les crochets des aiguilles à la verticale à 90° vers
le bas. (P. 2 Illustr. 5)
10. -
me de l’aiguillage.
11. 

12. Retirer l‘aiguillage de la voie (P. 2 Illustr. 2) et replier
-

13. 
et les contre-rails et le raccorder au commutateur sans

14. 
de guidage.
1. Aus den Neusilberstreifen werden U-förmige Strom-
brücken gebogen. Diese werden an den entspre-
chenden Schwellen von unten durch das Schwel-
lenrost gesteckt und je nach Einschubrichtung der
S. 2, Abb. 2 und 3
2. Das Schwellenrost, beginnend mit dem Weichenan-
fang, an das vorhandene Gleis anlegen.
3. Außenschienen vom Weichenausgang her so weit

an der Schwelle beginnt, diese zeigt dabei zur Gleis-
mitte.
4. Die Flügelschienen entsprechend der Weichengeo-
metrie biegen und anschließend in das Schwellen-
rost vom Weichenausgang her bis Anschlag ein-
schieben.
5. Die Hauptspitze des Herzstückes wird in der Regel
durch die Endschiene des Stammgleises gebildet.
Die Endschiene Stammgleis in das Schwellenrost

14,4 mm zum Ende der Flügelschiene. S. 2, Abb. 4
6. Die Endschiene Zweiggleis vorbiegen und so weit
einschieben, dass sich mit der Hauptspitze auf der

7. Stellschwelle in das Stellfach einschieben.
8. An den Zungenspitzen leichte Radien anbringen.
S. 2, Abb. 5
9. Die Zungenhaken senkrecht 90° nach unten biegen.
S. 2, Abb. 5
10. Weichenzungen entsprechend der Weichenform ggf.
vorbiegen.
11. Einschieben der Zungenschienen und die Zungen-

12. Weiche von dem Gleis (S. 2, Abb. 2) abziehen und
die Enden der Zungenhaken unterhalb der Stell-
schwelle um 90° zurück biegen.
13. Kabel zur Stromversorgung an dem Herzstück und
den Flügelschienen anlöten und mit dem potential-
   -
triebes Art.-Nr. 86112 verbinden.
14.     
der Radlenker.
1. A U-shaped electric bond is to be bending from the
nickel-silver strips. These are then to tuck through
from underneath at the respective ties and bend on
the insertion direction of the rails (p.2, g. 2 and 3).
2. Lay down the tie-rack with the beginning of the tur-
nout onto the pre-existing track.
3. Bend the branch rail according to the geometry of
the turnout. Push booth outer rails from the end of
the turnout into the ties (ironmongeries) until the

The recess area shows in the direction of the midd-
le of the turnout track.
4. Bend the wing rails according to the turnout geo-
metry. Push it into the ties from the end of the turn-
out until the end stop is reached.
5. The main point of the frog is normally formed by the
end rail of the main track. So push the end rail of
the main track into the ties from the turn-out. The
peak of the rail is on a distance from 14,4 mm to the
end of the wing rail (page 2, g. 4).
6. Bend the end rail of the branch track and push it
into the ties from the end side of the turnout so far
that a continuous edge is formed with the end rail
of the main track.
7. Insert the directional cross-tie (sliding sleeper) into
the space between the rails and the tie-rack.
8. Hone down the peak of the tongue (page 2, g. 5).
9. Bend the tongue hooks vertical 90° downwards
(page 2, g. 5).
10. If necessary, bend the tongue according to the geo-
metry of the turnout.
11. Push in the tongue and hook in the tongue hooks
into the directional cross-tie.
12. Bend back the ends of the tongue hooks by 90°
underneath the directional cross-tie. (page 2, g.2)
13. Solder the power supply cable onto the frog and
wing rails and connect them with the switch for frog
of the turnout-motor (item-no.: 86112).
14. Embed the turnout, align the rails and push the
wheel guide in.
DE GB FR
Güterwagen
H0-ELITE-EW 2
www.tillig.com / www.facebook.com/tilligbahn 368064 / 05.09.2019 2
Kusovník:



1 ks – Jazyk levý
1 ks – Jazyk pravý
2 kusy – Koncová kolejnice levá
2 kusy – Koncová kolejnice pravá


Obj. č. 85422 – Montážní sada výhybky levé
Obj. č. 85423 – Montážní sada výhybky pravé

nastavitelnou jednotku GS)
 



1 x Nastavitelná jednotka GS
1 x BAL
Potřebné nářadí:
Řezačka na kolejnice nebo mini vrtačka s řezacím kotoučem, klíčové pilníky,
ploché kleště, páječka, připínáčky, štípačky, posuvné měřítko
   
-



Dovolte ještě jednu poznámku: 
-

Obecná poznámka

-

Montáž:
1. 

(obr. 2 a 3)
2. 
3. -

4. 

5. 

(obr. 4)
6. 

7. 
8. (obr. 5)
9. (obr. 5)
10. 
11. 
12.     (obr. 2)      

13. -


14. 
Lista części:



1 sztuka – Iglica lewa
1 sztuka – Iglica prawa
 



Nr art. 85422 – Zestaw zwrotnica lewa
Nr art. 85423 – Zestaw zwrotnica prawa



2 x Kierownica


2 x 

1 x BAL
Potrzebne narzędzia: Przecinak do szkła lub miniwiertarka z tarczą rozcinającą,
pilnik kluczykowy, szczypce płaskie, lutownica, pinezki, szczypce do ciecia
drutu, suwmiarka

-
          
-


Proszę pozwolić na jeszcze jedną uwagę: 
-

Wskazówka ogólna
-


szyny.
.
Montaž:
1.          
-
(rys. 2 i 3)
2. 
3. -

4. 

5. -

(rys. 4)
6. -

7. 
8.  (rys. 5)
9.  (rys. 5)
10. 
11. 
12. (rys. 2)

13. -
-
nicy nr art. 86112.
14. 
(DE) Abb. 2: Draufsicht
(GB) Figure 2: Top View
(FR) Illustr. 2: Vue en plan
(CZ) Obr. 2: Náhled
(PL) Rys. 2: Widok z góry
(DE) Abb. 3: Unteransicht
(GB) Figure 3: View from underneath
(FR) Illustr. 3: Vue du dessous
(CZ) Obr. 3: Podhled
(PL) Rys. 3: Widok z dołu
(DE) Abb. 4: Herzstückspitze
(GB) Figure 4: Tip of the frog
(FR) Illustr. 4: Pointe du cœur
(CZ) Obr. 4: Hrot srdcovky
(PL) Rys. 4: Wierzchołek krzyżownicy
(DE) Abb. 5: Zungenhaken
(GB) Figure 5: Tongue hook
(FR) Illustr. 5: Crochet à languette
(CZ) Obr. 5: Hák jazyka
(PL) Rys. 5: Haki iglic





A(DE) Bitte nach unten biegen!
(GB) Please bend in a downward direction!
(FR) Veuillez plier vers le bas!


B
A
B
B
CZ PL
Güterwagen
H0-ELITE-EW 2
www.tillig.com / www.facebook.com/tilligbahn 368064 / 05.09.2019 3
Bauvarianten Construction variations Variantes de contruction
Konstrukční varianty Wersje montażowe
(DE) Weiche rechts analog Weiche links / (GB) Points right analogue to points left
(FR) Aiguillage droite comme aiguillage gauche / (CZ) Pravá výhybka je analogická s levou výhybkou
(PL) Zwrotnica prawa analogicznie do zwrotnicy lewej
(DE) Stellschwelle
(GB) Switching sleeper



(DE) Außenschiene Zweiggleis
(GB) Outer rail Branch track




(DE) Außenschiene Stammgleis
(GB) Outer rail Main track
(FR) Außenschiene Voie directe


(DE) Weichenzunge links
(GB) Point tongue left
(FR) Lame d‘aiguille gauche
(CZ) Jazyk výhybky levá
(PL) Iglica zwrotnicy lewa
(DE) Weichenzunge rechts
(GB) Point tongue right
(FR) Lame d‘aiguille droite
(CZ) Jazyk výhybky pravá
(PL) Iglica zwrotnicy prawa
(DE) Strombrücke
(GB) Electric bond
(FR) Pont de courant


(DE) Radlenker
(GB) Wheel guide
(FR) Rail de guidage

(PL) Kierownica
(DE) Flügelschiene
(GB) Wing rail
(FR) Contre-rail


(DE) Endschiene links
(GB) End rail left

(CZ) Koncová kolejnice levá

(DE) Endschiene rechts
(GB) End rail right

(CZ) Koncová kolejnice pravá





 







0-3
0-3
(DE) Nicht geeignet für Kinder unter 14 Jahren wegen ab-
nehmbarer und verschluckbarer Kleinteile und Verletzungs-
gefahr durch funktionsbedingte scharfe Ecken und Kanten.
Dieses Produkt darf am Ende seiner Nutzungsdauer nicht über
den normalen Hausmüll entsorgt werden, sondern muss an einem
Sammelpunkt für das Recycling von elektrischen und elektroni-


(GB) Not suitable for young people under the age of 14 due to the small parts that can be
removed and swallowed and risk of injury due to function-related sharp corners and edges.
When this product comes to the end of its useful life, you may not dispose of it in the ordinary domestic

If you don’t know the location of your nearest disposal centre please ask your retailer or the local
󰀩
(FR) Ne convient pas aux enfants de moins de 14 ans en raison de pièces pouvant être re-
tirées et avalées et du risque de blessure en raison de coins et de bords vifs dus au fonc-
tionnement.      

Veuillez vous adresser à votre revendeur ou à l’administration communale pour connaître les points

(CZ) Není určené pro děti mladší 14ti let. Obsahuje funkční a odnímatelné malé a ostré součásti a
hrany.


(PL) Nieodpowiednie dla dzieci poniżej 14 roku życia z uwagi na niebezpieczeństwo połknię-
cia i zadławienia się drobnymi częściami oraz możliwość skaleczenia się ostrymi końcówkami
i krawędziami części funkcyjnych.      -
         

          


(DE) Bitte beachten Sie:-
       -
    󰀨   
an dem Produkt erfolgen/vorgenommen werden. Bei Fahrzeugen mit eingebauter
      
󰀨   -

(GB) Please note: This TILLIG product is subject to the statutory warranty en-
titlement of 24 months from the date of purchase. This warranty claim expires
       

claims for warranty can only be asserted if the vehicle concerned is returned in
an as-delivered state (without built-in digital decoder, with plugged-in interference
suppression kit).
(FR) Attention:-

    

           

(CZ) Upozornění:         
-
-
 
         

(PL) Należy mieć na względzie, że:
        
-
-

jedynie, gdy dany pojazd przekazany zostanie przedstawicielowi handlowemu w
        

Güterwagen
H0-ELITE-EW 2
www.tillig.com / www.facebook.com/tilligbahn 368064 / 05.09.2019 4
(DE) alternativ: Stelleinrichtung auf gegenüber-

Seilzugkanal und kleiner Kasten können gegen-
einander getauscht werden.
(GB) alternatively: -

control cable channel and small box can be
swapped around.
(FR) alternative:     

canal de poulie et une petite caisse sont in-
terchangeables. L’alimentation en courant



(CZ) alternativa:
     
-

(PL) alternatywnie:   
     
-

(DE) Zur Ausgestaltung des Weichenumfeldes liegen der Weiche noch weitere Teile der Weichenstelleinrichtung bei, die laut Zeichnung angebracht
werden können.
(GB)
(FR)

(CZ) 
(PL)
(DE) Stelleinrichtung im montierten Zustand / (GB) Control equipment when assembled
(FR) Dispositif de réglage à l’état monté / (CZ) Uspořádání výhybky ve smontovaném stavu
(PL) Urządzenie nastawni w stanie zmontowanym
(DE) Rahmen
(GB) Frame
(FR) Châssis
(CZ) Rám
(PL) Rama
(DE) Umlenkrollenabdeckung,
wahlweise Abdeckung
(GB) Return pulley cover, optional cover
(FR) Recouvrement de la poulie de déviation,
Recouvrement au choix
(CZ) Kryt vratných kladek, volitelně kryt
(PL) Osłona krążków zwrotnych,
osłona do wyboru
(DE) Seilzugabdeckung
(GB) Control cable cover
(FR) Recouvrement câble Bowden
(CZ) Volitelně kryt
(PL) Osłona napędu linowego
(DE) Technische Änderungen vorbehalten! Bei Reklamationen wenden Sie sich bitte an Ihren Fachhändler.
(GB) Subject to technical changes! Please contact your dealer if you have any complaints.
(FR) Sous réserve de modications techniques! Pour toute réclamation, adressez-vous à votre revendeur.
(CZ) Technické změny vyhrazeny! Při reklamaci se obraťte na svého obchodníka.
(PL) Zastrzega się możliwość zmian technicznych! W przypadku reklamacji prosimy zgłaszać się do specjalistycznego sprzedawcy.
(DE)(GB) Hotline customer service
(FR)(CZ)
(PL)
www.tillig.com/Service_Hotline.html
(DE) Bitte vergleichen Sie vor
dem Montagebeginn die vorhan-
denen Teile mit der Bauanleitung.
Reklamationen montierter oder
teilmontierter Bausätze können
nicht anerkannt werden!
(GB) Before starting to assemble, please
check that all parts are there by compa-
ring them with the building instructions.
Complaints about assembled or partially
assembled kits cannot be accepted!
(FR) Avant de commencer le montage,
comparer les pièces disponibles avec cel-
les gurant dans les instructions de ser-
vice. Nous ne pouvons pas accepter les
réclamations concernant des kits montés
ou partiellement montés.
(CZ) Porovnejte prosím před montáží dané
součástky s návodem. Reklamace smon-
tovaných či částečně smontovaných dílů
nebude brána v potaz!
(PL) Przed rozpoczęciem montażu należy
porównać otrzymane części z instrukc-
ją montażu. Reklamacje złożonych lub
częściowo złożonych zestawów nie będą
uznawane!

TILLIG Modellbahnen GmbH
Promenade 1, 01855 Sebnitz
Tel.: +49 (0)35971 / 903-45
Fax: +49 (0)35971 / 903-19

This manual suits for next models

2

Other TILLIG BAHN Toy manuals

TILLIG BAHN 85182 User manual

TILLIG BAHN

TILLIG BAHN 85182 User manual

TILLIG BAHN Vindobona 2 User manual

TILLIG BAHN

TILLIG BAHN Vindobona 2 User manual

TILLIG BAHN 15152 User manual

TILLIG BAHN

TILLIG BAHN 15152 User manual

TILLIG BAHN H0-Elite EW 1 User manual

TILLIG BAHN

TILLIG BAHN H0-Elite EW 1 User manual

TILLIG BAHN BR 112.1 User manual
TILLIG BAHN

TILLIG BAHN BR 112.1 User manual

TILLIG BAHN 78223 User manual

TILLIG BAHN

TILLIG BAHN 78223 User manual

TILLIG BAHN 01762 User manual

TILLIG BAHN

TILLIG BAHN 01762 User manual

TILLIG BAHN 83331 User manual

TILLIG BAHN

TILLIG BAHN 83331 User manual

TILLIG BAHN H0-ELITE-EKW User manual

TILLIG BAHN

TILLIG BAHN H0-ELITE-EKW User manual

TILLIG BAHN 02625 User manual

TILLIG BAHN

TILLIG BAHN 02625 User manual

TILLIG BAHN 85186 User manual

TILLIG BAHN

TILLIG BAHN 85186 User manual

TILLIG BAHN H0-ELITE-IBW User manual

TILLIG BAHN

TILLIG BAHN H0-ELITE-IBW User manual

TILLIG BAHN 501279 User manual

TILLIG BAHN

TILLIG BAHN 501279 User manual

TILLIG BAHN 16571 User manual

TILLIG BAHN

TILLIG BAHN 16571 User manual

TILLIG BAHN 02743 User manual

TILLIG BAHN

TILLIG BAHN 02743 User manual

TILLIG BAHN 03940 User manual

TILLIG BAHN

TILLIG BAHN 03940 User manual

TILLIG BAHN 76721 User manual

TILLIG BAHN

TILLIG BAHN 76721 User manual

TILLIG BAHN 85193 User manual

TILLIG BAHN

TILLIG BAHN 85193 User manual

TILLIG BAHN 85346 User manual

TILLIG BAHN

TILLIG BAHN 85346 User manual

TILLIG BAHN 87228 User manual

TILLIG BAHN

TILLIG BAHN 87228 User manual

TILLIG BAHN 96119 User manual

TILLIG BAHN

TILLIG BAHN 96119 User manual

TILLIG BAHN 04544 User manual

TILLIG BAHN

TILLIG BAHN 04544 User manual

TILLIG BAHN 85395 User manual

TILLIG BAHN

TILLIG BAHN 85395 User manual

TILLIG BAHN 85532 User manual

TILLIG BAHN

TILLIG BAHN 85532 User manual

Popular Toy manuals by other brands

Jenx Monkey Assembly instructions

Jenx

Jenx Monkey Assembly instructions

Elenco Electronics EDU-37332 instruction manual

Elenco Electronics

Elenco Electronics EDU-37332 instruction manual

Märklin 37507 manual

Märklin

Märklin 37507 manual

Faller 120097 manual

Faller

Faller 120097 manual

Smoby GOURMAND CHALET manual

Smoby

Smoby GOURMAND CHALET manual

Faller LARGE ALPINE FARM quick start guide

Faller

Faller LARGE ALPINE FARM quick start guide

Power Wheels W2602 owner's manual

Power Wheels

Power Wheels W2602 owner's manual

Copernicus Premium Royal Inspiration Station IS3 Assembly guide

Copernicus

Copernicus Premium Royal Inspiration Station IS3 Assembly guide

HPI Racing Vorza Flix HP instruction manual

HPI Racing

HPI Racing Vorza Flix HP instruction manual

Eduard SBD-3 Dauntless Assembly instructions

Eduard

Eduard SBD-3 Dauntless Assembly instructions

Eduard Zoom Su-27SM Flanker B Assembly instructions

Eduard

Eduard Zoom Su-27SM Flanker B Assembly instructions

Kiddery Toys BKW101 Assembly instructions

Kiddery Toys

Kiddery Toys BKW101 Assembly instructions

Eduard Pz. Kpfw. IV Ausf. H quick start guide

Eduard

Eduard Pz. Kpfw. IV Ausf. H quick start guide

Bandai Namco JUJUTSU KAISEN ZERO TAMAGOTCHI instruction manual

Bandai Namco

Bandai Namco JUJUTSU KAISEN ZERO TAMAGOTCHI instruction manual

Trix BR 420 manual

Trix

Trix BR 420 manual

PARKZONE Typhoon 3D instruction manual

PARKZONE

PARKZONE Typhoon 3D instruction manual

Inside the Armour Churchill ARVII Ultimate Edition instruction manual

Inside the Armour

Inside the Armour Churchill ARVII Ultimate Edition instruction manual

Mattel Barbie L6850 instructions

Mattel

Mattel Barbie L6850 instructions

manuals.online logo
manuals.online logoBrands
  • About & Mission
  • Contact us
  • Privacy Policy
  • Terms and Conditions

Copyright 2025 Manuals.Online. All Rights Reserved.