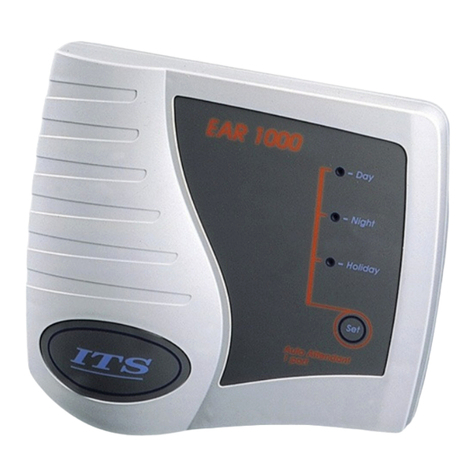
Time Tech F10 User manual

Fingerscanner Technology for Time Attendance & Access Controller
1
TIME TECH
The Best Manufacturer and Designer of Biometric Technology
Adopts advance & reliable technology
Ma e technology to be user-friendly & easy to use
HARDWARE MANUAL

Fingerscanner Technology for Time Attendance & Access Controller
2
INDEX
Preamble …………………………………………………………………….. 3
1. Terminal / Machine Package……………………………………………… 4
2. Buttons & Functions……………………………………………………….. 4
3. S ecification………………………………………………………………… 6
4. Installation……………………………………………………………………6
5. Dis lay………………………………………………………………………. 8
6. Menu………………………………………………………………………….8
6.1. Register…………………………………………………………………….9
6.2. Delete……………………………………………………………………….11
6.3 Set Comm…………………………………………………………………...11
6.4. Set Time…………………………………………………………………….12
6.5. Advanced……………………………………………………………………12
6.6. View Info…………………………………………………………………….15
7. Usage and Safety Regulations ……………………………………………..16

Fingerscanner Technology for Time Attendance & Access Controller
3
Preamble
Res ected users, sincerely thank you for choosing Time Tech
Fingerscanner Terminal for your time attendance or access controller
equi ment. Please read the manual and understand the basic structure of the
roduct, erformance, function and master installation, using and maintenance
and management of basic knowledge before using the roduct.
Time Tech terminals are using the ARM9 terminal hardware latforms,
with ATMEL rocessor which rovide better stability and much higher working
s eed. It ado ts the Stand Alone working mode, which brings convenient in
every a lications.
Several models are available with several different functions and looks,
but with similar major functions. Verification is im lemented by using finger rint,
and/or assword, some models also equi ed with internal RF card
verification methods, external wiegand communication.
Terminals use standard TCP network rotocol, and su ort the U-disk
storage of data transmission, meet user in the network environment or without
network. Data transmission also ossible to do via internet (using ublic IP),
that gives no border across cities or countries to do data transmission.
Design and construction are made by rofessionals, which ut quality as
first riority without neglecting the attractive and elegant design. All machines
should have high erformance, robust design and long live of usage for heavy
duty condition.

Fingerscanner Technology for Time Attendance & Access Controller
4
1. Terminal / Machine Package
Each machine will come u with:
1. Terminal (machine)
2. Attached bracket (for wall hanging)
3. Screws (for wall hanging)
4. Deskto board (to ut the machine on desk)
5. Cable dataAda tor 100-240V, 50/60Hz.
6. CD (contains software and manuals)
2. Buttons & Functions
Front view (for different models, key ad might be on below the screen)

Fingerscanner Technology for Time Attendance & Access Controller
5
Rear View (Some models might not have Lock, Wiegand, Bell, 5V Ports)
Left Side View

Fingerscanner Technology for Time Attendance & Access Controller
6
3. S ecifications
4. Installation
There are 2 installations methods are available:
1. Deskto Installation
Please use the Deskto Board and screw the board to the machine, lease
the machine always in flat surface.
2. Wall Hanging Installation
Please take off the metal bracket on the back of the machine by un-screw
the left and right screws, ut and install the metal bracket on to the wall
firmly (using the screws and fishers inside the ackage).
Attached the machine into the bracket (has been firmly attached to wall)
and firmly screw back the machine with the metal bracket (left and right).

Fingerscanner Technology for Time Attendance & Access Controller
7
Direct Connection Illustration:
Networ Connection Illustration:
Electric Loc Connection Illustration:

Fingerscanner Technology for Time Attendance & Access Controller
8
5. Dis lay
The main dis lay and indicators :
6. Menu
Press the Menu Button, machine will a ears 6 major o tions:
1. Register
2. Delete
3. Set Comm
4. Set Time

Fingerscanner Technology for Time Attendance & Access Controller
9
5. Advance
6. View Info
1. Register
O tion related to registration of user and administrator.
1.1 User
To register New User or to Back U (register more data for the same erson)
Proceed to register the data you want to use (Finger, Password, ID Card,
Finger & Password, Finger & Card). Note: Only machine equi ed with RF
module or wiegand can do the ID Card)
Note: Finger osition should be flat and on the center of the sensor. Please
clean and dry the finger before usage.

Fingerscanner Technology for Time Attendance & Access Controller
1
1.2 Admin
Administrator registration will be giving restriction for un-authorized ersons to
enter the machine’s menu. Registration method is the same as user
registration.
1.3 Ver. Mode
Verification Mode, might be selected by: 1:1, 1:N, 1:1:N, and giving the o tion
for verification sensitivity.
1:1 Verify = To set the verification sensitivity er user for 1:1 condition
verification. Range is between 0 – 50. The bigger numbers means more
sensitive.
Init.1:1 = To set the sensitivity of all users for 1:1 condition verification.
Range is between 0 – 50. The bigger numbers means more sensitive.
1:N Identify= To set the sensitivity of all users for 1:N condition verification.
Range is between 1 – 4. The bigger numbers means more sensitive.
1.4 U-Upload

Fingerscanner Technology for Time Attendance & Access Controller
11
To u load user’s data from USB Disk.
2. Delete
O tion to delete user.
3. Set Comm.
To set the communication method, there are:
U-Down (USB Download)
3.1.1 Glog&Del, to get the staff new attendance data and delete the file after
downloading is finish.
3.1.2 All Glog, to get the staff new attendance data
3.1.3 Slog&Del, to get the administrator new usage data
3.1.4 All Slog, to get the administrator all usage data
3.1.5 Enr.Data, to get the enrolled user’s data

Fingerscanner Technology for Time Attendance & Access Controller
12
3.2 RS 232
3.3 Ethernet (TCP/IP)
Connection using Ethernet should be corres ondence with the com uter or
server, lease refer to the A lication Software Manual for details.
4 Set Time
O tion to set Time and Date.
5 Advanced
Contains of:
5.1. Device
5.1.1 Machine ID, to set the machine ID number
5.1.2 Admin Qnty, so set how many administrator using the machine
5.1.3 Language, to set language
5.1.4 Voice Out, to set voice
5.1.5 Volume, to set voice’s volume
5.1.6 Auto off, to set auto off. Machine can be set into slee mode 1-255
minute after turned on.
5.1.7 Screen Saver, to set the ictures for screen saver function
5.18 RS 485 Download, to set whether data transmission will use RS 485
5.1.9 Verify, to define the verification method between finger, assword, Card
5.1.10 Default Setting, to reset the machine’s arameter to the factory default.

Fingerscanner Technology for Time Attendance & Access Controller
13
Note: This o tion does not delete the user and data.
5.2 Logs
5.2.1 Arec Wrn, to warn admin when admin memory left as the number written
5.2.2 Urec Wrn, to warn user when user memory left is as the number written
5.2.3 ReVerify, to give user time delay between first entry and second entry (in
minute)
5.3 Loc Ctrl (Access Controller related o tions)
5.3.1 Time Setting, set the Period (time zone).
There are 50 Periods (time zone) available and each with setting hours and
days (Monday - Sunday). One zone er day.
5.3.2 Loc Register, set the user for access Grou and Period (time zone).
! Every user who will use the door access should have Period (time zone) or
Gru set.
Regarding the Gru , is o tional advance setting, may be im lemented if
needed ( lease read below further instructions and functions).
5.3.3 Time Group Set, set the combination Periode (time zone).
This is the o tion to combine the Period (time zone) you have set, there are 5
Grou s available.
The Grou can be im lemented to user (as mentioned above: 5.3.2 – Set
Grou ).
! Group 1, 2, 3 are functioning for Time Attendance and Door Access.
! Group 4 is functioning for o en door and trigger the alarm.
If the user in Grou 4 has o ened and triggered the alarm, then it will need the
administrator to switch off the alarm.
! Group number 5 is functioning for record time. This grou is intended for
security- atrol. User in Grou 5 will need to combine with user in one or
combination of the Grou 1, 2, 3 to access door.
5.3.4 Unloc Group, set the combination of Grou , 10 grou s available.
It is the function to combine existing Grou s to access door. The combinations
are: 1, 2, 3, 12, 13, 15, 23, 25, 35, 123, 135, 125, 235, 1235.

Fingerscanner Technology for Time Attendance & Access Controller
14
Exam le:
Unlock Grou 12 Means user in Grou 1 and Grou 2 should be
verified together (within 10 seconds) to access door.
Note:
! After the first user is verified, the next user verification fails for 5 times, then
the first erson verification is aborted (need to re eat again).
! After the first user is verified, if the next user does not do verification for 10
seconds, the first erson verification is aborted (need to re eat again).
5.3.5 Unloc Time, set the time delay for locking (in minute)
5.3.6 Loc Type Set,
5.3.6.1 Alarm Type, set the ty e of alarm mode
NG Switch off the alarm mode.
NO Alarm with Normally O en condition
NC Alarm with Normally Close condition
5.3.6.2 Alarm Delay, set the alarm time delay (in seconds).
This o tion is to set the time delay to trigger the alarm if the lock has not
reached its normal condition after “Unlock Time” (above index 5.3.5) has
finished.
Exam le:
Lock Mode (NC), Unlock Time is 10 seconds, Alarm Delay 5 seconds.
This means, after the door has o ened for 10 seconds and still not
closing (has not reach back its normal condition), then in 5 seconds,
the alarm will sound. Close the door ro erly (normal condition) to
switch off the alarm.
5.3.7 Access Mode
5.3.7.1 G. Mode, to set (on/off) the General Mode
5.3.7.2 Users, to set how many users should be verified before o en/access
door (can be set 1-5 users).
! G. Mode is set “No”, machine will use the “Unlock Grou ” setting to access
door.

Fingerscanner Technology for Time Attendance & Access Controller
15
! G. Mode is set “Yes”, machine will neglect the “Unlock Grou ” (Index 5.3.4)
setting to access door.
NB: The grou in the user’s Lock Register (index 5.3.2 is not affected by G.
Mode setting “Yes”)
Exam le:
G. Mode is set “Yes”, Users is set “2”, machine will neglect the existing
“Unlock Grou ” setting, and will need 2 users for succeeding verification (in 10
seconds) to access door.
Note:
! After the first user is verified, the next user verification fails for 5 times, then
the first erson verification is aborted (need to re eat again).
! After the first user is verified, if the next user does not do verification for 10
seconds, the first erson verification is aborted (need to re eat again).
6. View Info
6.1 Reg. Data, to view the storage details
6.2 Records, to view user’s; admin’s record, and delete all records
6.3 Product, to view roduct’s info.

Fingerscanner Technology for Time Attendance & Access Controller
16
7. Usage and Safety Regulations
1. Do not ex ose the unit to direct sun light.
2. Do not ex ose the unit machine to water, dusk, heat.
3. Always lug the ada tor and ort in correct osition.
4. Put the machine in flat osition when on deskto and straight osition when
wall hanging.
5. Do not scratch the sensor which shar object.
6. Do not use alcohol, or other chemical liquid when cleaning the unit.
7. Always rovide steady electricity voltage for the ada tor.
8. Kee out reach of children.
9. Do not o en and try to fix the machine by yourself when any roblem
ha ens, lease contact the service center or your local dealer.
This manual suits for next models
3
Table of contents
