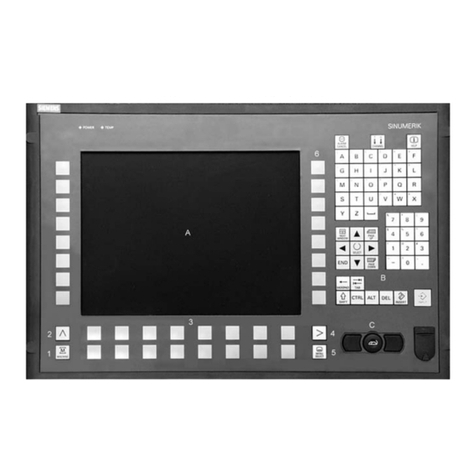
TimeLine Lynx Keyboard Control Unit User manual

Operating Manual
Keyboard Control Unit
Copyright 1995
All Rights Reserved
Manual No. 73A005-B

Preface
ii Keyboard Control Unit
09/08/00
Assistance and Information
TimeLine Technical Support
1755 La Costa Meadows Drive: Phone:(760) 761-4440
Suite B Fax: (760) 761-4449
Software Version Serial Number
Technical Assistance is available ONLY if the Keyboard Control
Unit (KCU) is registered. Mail in your Warranty Card
immediately to register the KCU.
Remember, when calling for technical support, you must provide
the software version and KCU serial number so that we can give
you accurate and prompt assistance.
Printing History
All rights reserved. No part of this publication may be reproduced, stored in a retrieval
system, or transmitted, in any form, or by any means electronically, mechanical,
photocopying, recording or otherwise, without the prior written permission of TimeLine
Vista, Inc.
Each revision will cause the letter to the right of the manual part number to change.
The purpose for each revision will be listed below. Events such as the addition of a
feature or functional test will cause the revision number to change.
Internal Document Number: 73K005 Revision B
Revision Date Serial No. Affected Changes Made
AAll First Edition
B8/11/95 All Complete Rewrite
Printed in the United States of America.

Preface
Keyboard Control Unit iii
09/08/00
Limited Warranty
TimeLine Vista, Inc. (TimeLine) warrants this product against
defects in material or workmanship as follows:
1. For a period of ninety (90) days from the date of purchase
TimeLine will at it’s option, either perform necessary repairs
at it’s expense or pay the labor charges of others it authorizes
to repair the defective product. After the initial 90 day period
labor charges are the responsibility of the purchaser.
2. In addition TimeLine will supply at no charge, new or rebuilt
replacements for defective parts for a period of one (1) year
from the date of purchase.
Labor and Parts
To obtain warranty service, the purchaser must notify TimeLine
in writing during the initial ninety (90) day period. TimeLine will
then authorize the purchaser to take or deliver, prepaid, the
product to TimeLine or it’s authorized Service Center.
Parts Only
During the remainder of the warranty period, any defective part
will be replaced if the purchaser will take or deliver the product,
prepaid to TimeLine. Labor incurred in the repair is at the
purchaser’s expense.
This Warranty does not cover any damage due to accident, misuse,
abuse, or negligence.
We suggest that the purchaser retain the dated sales receipt as
evidence of the original date of purchase. This warranty is not
transferable and applies only to the original, registered purchaser.
REPAIR OR REPLACEMENT AS PROVIDED UNDER THIS
WARRANTY IS THE EXCLUSIVE REMEDY OF THE PUR-
CHASER. TIMELINE SHALL NOT BE LIABLE FOR BREACH OF
ANY EXPRESS OR IMPLIED WARRANTY ON THIS PRODUCT,
EXCEPT TO THE EXTENT PROHIBITED BY APPLICABLE LAW,
AND EXCEPT FOR THE LIMITED WARRANTY DESCRIBED
ABOVE. TIMELINE EXPRESSLY DISCLAIMS ANY WARRANTY,
EXPRESS OR IMPLIED, OF MERCHANTABILITY OR FITNESS
FOR A PARTICULAR PURPOSE.
USA: Some states do not allow the exclusion or limitation of inci-
dental or consequential damages, or allow limitations on how long
an implied warranty lasts, so the above limitation and exclusions
may not apply to you. This warranty gives you specific legal rights
and you may also have other rights that vary from state to state.

Preface
iv Keyboard Control Unit
09/08/00
Safety
To assist identification of potentially hazardous circumstances or
procedures, warnings and cautions will be displayed with the
appropriate text. Occasionally, information that provides an
enhanced understanding of the text will be provided as a Note.
Note: A Note provides information about or an explanation of a
topic related to the subject being discussed.
Warning
Warnings describe a procedure that if not followed as specified could potentially
cause damage to the equipment, a loss of data, or create an error condition.
Manual Contents and Use
This manual starts with information that is used most frequently
and moves to less frequently used information. To use the manual
effectively, first review the applications and system configurations
presented in the Applications chapter to determine your
requirements and preferences.
Then use the Installation chapter to install the Keyboard Control
Unit and make the correct equipment connections. Follow the
initialization and start up tutorial described in the Getting
Started chapter to get a “hands-on” demonstration of the KCU’s
capabilities.
If you experience any difficulties, refer to the Troubleshooting
chapter to analyze the problem. Refer to the subsequent chapters
for detailed information about each of the KCU functions.
Introduction Provides KCU features, a system overview, system
configurations, and specifications.
Applications Illustrates some of the most common KCU applications.
Installation Describes KCU installation and interface procedures.
Getting Started Describes KCU basic operating procedures.
Troubleshooting List the most common KCU messages, prompts, and warnings.
Features and Controls Describes the key functions of the KCU.
Advanced Features Describes those functions available uniquely in non-080 series

Preface
Keyboard Control Unit v
09/08/00
KCU software configurations.
Appendix SMPTE Made Simple
Provides basic information and various applications using
SMPTE time code.
Key Combination Guide
Provides Key and Key Combination Identification Numbers for
"stuck key" errors.
Glossary
An alphabetic list of terms used during the discussion of the
KCU.
Quick Reference Guide
Graphical charts of the KCU Setup options.
Conventions Used for Examples
This manual uses the following conventions.
Press Press a key, generally a movement key or function key such as
[CLR].
Select Press or adjust the indicated key or wheel to obtain a result or
display
You see A key word, indicator, or number that you can see on the front
panel or display.
[CLR] This indicates a particular key on the KCU, such as the clear key
in this example.
LED This is one of the lights on the KCU.
Key Each of the buttons, switches or keys on the KCU that you press
to cause something to happen.

Preface
vi Keyboard Control Unit
09/08/00

Keyboard Control Unit
vii 2/6/95
Table of Contents
CHAPTER 1 INTRODUCTION
Keyboard Control Unit Features .......................................................................................... 1-2
System Overview................................................................................................................... 1-4
Keyboard Control Unit (KCU)......................................................................................... 1-5
Lynx-2 and Lynx Time Code Modules ............................................................................ 1-6
Lynx System Supervisor Unit (SSU) .............................................................................. 1-7
Lynx Console Control Unit (CCU) .................................................................................. 1-8
Remote Motion Controller ............................................................................................... 1-9
Jog/Shuttle Wheel Assembly Kit....................................................................................1-10
System Configurations .........................................................................................................1-11
Specifications........................................................................................................................1-12
Keyboard .........................................................................................................................1-12
Jog/Shuttle Wheel...........................................................................................................1-12
Power Supply ..................................................................................................................1-12
Physical...........................................................................................................................1-12
Software Versions...........................................................................................................1-12
CHAPTER 2 APPLICATIONS
Stand-alone KCU Operation .................................................................................................2-2
Typical Uses..................................................................................................................... 2-2
Considerations ................................................................................................................. 2-2
Stand-alone KCU with a VTR............................................................................................... 2-3
Typical Uses..................................................................................................................... 2-3
Considerations ................................................................................................................. 2-3
Varispeed and Gearbox Operations with the KCU .............................................................. 2-4
KCU and System Supervisor Unit (SSU) Operation ........................................................... 2-5
CHAPTER 3 INSTALLATION
Hardware Supplied ............................................................................................................... 3-1
System Setup Planning......................................................................................................... 3-2
Power ............................................................................................................................... 3-2
Cabling ............................................................................................................................. 3-2
Power On Initialization ................................................................................................... 3-2

Table of Contents
Keyboard Control Unit
viii 09/08/00
Installing the KCU.................................................................................................................3-2
Cabling..............................................................................................................................3-2
Connecting the KCU and Power Supply Unit .................................................................3-4
Power Supply....................................................................................................................3-5
Connecting the Lynx-2 Modules ......................................................................................3-6
GPIs ..................................................................................................................................3-7
System Supervisor Unit ...................................................................................................3-8
Quick Test and Initialization.................................................................................................3-9
Testing the Lynx-2 Modules.............................................................................................3-9
Setting Up the KCU .......................................................................................................3-10
Verifying Communications.............................................................................................3-10
Interface Diagrams ..............................................................................................................3-10
KCU Stand-Alone ...........................................................................................................3-11
Post-Production System–System Supervisor Unit........................................................3-12
CHAPTER 4 GETTING STARTED
Initializing and Configuring the KCU...................................................................................4-2
Turning on the KCU.........................................................................................................4-2
Resetting the KCU ...........................................................................................................4-2
Setting the System Reference ..........................................................................................4-3
Initializing Lynx Communication ....................................................................................4-3
Using KCU Memory...............................................................................................................4-4
Capturing a Time Code Value..........................................................................................4-4
Retrieving a Time Code Value .........................................................................................4-5
Changing Memory Size ....................................................................................................4-5
Using Time Code Registers....................................................................................................4-6
Local Zero Register...........................................................................................................4-6
Time Register ...................................................................................................................4-7
Preroll Register ................................................................................................................4-7
Postroll Register ...............................................................................................................4-7
Reference Sync Point Register .........................................................................................4-8
Source Sync Point Register ..............................................................................................4-8
Offset Register..................................................................................................................4-9
Error Register...................................................................................................................4-9
In Point Register ..............................................................................................................4-9
Out Point Register..........................................................................................................4-10
Duration Register...........................................................................................................4-11
Cue Point Register..........................................................................................................4-12

Table of Contents
Keyboard Control Unit
09/08/00 ix
Grouping Machines with the KCU ......................................................................................4-12
Machine Modes ...............................................................................................................4-12
Changing the Master Machine.......................................................................................4-15
Separating the Master and Reference Machines...........................................................4-15
Using Offsets ........................................................................................................................4-16
Setting an Offset.............................................................................................................4-16
Calculating Offsets Using Sync Points ..........................................................................4-17
Trimming an Offset ........................................................................................................4-18
Editing with the KCU ..........................................................................................................4-20
Editing Example .............................................................................................................4-20
Setting a Sync Point .......................................................................................................4-21
Clearing a Sync Point .....................................................................................................4-22
KCU Messages and Errors...................................................................................................4-22
Displaying System Error Messages ...............................................................................4-22
Displaying Version Numbers .........................................................................................4-23
Accessing Status Mode ...................................................................................................4-23
Setup [SETUP] Options .......................................................................................................4-23
Setup Options .................................................................................................................4-24
Setup Example................................................................................................................4-25
KCU Options Menus ............................................................................................................4-26
Editing [EDIT] Options Menu........................................................................................4-26
Event Select GPI [EVNT] Options Menu.......................................................................4-27
Film [FILM] Options Menu............................................................................................4-27
SSU List [LIST] Options Menu......................................................................................4-27
Edit Looping [LOOP] Options Menu..............................................................................4-28
System [SYS] Options Menu ..........................................................................................4-28
Track Select [TRKS] Options Menu...............................................................................4-28
Transport [TRAN] Options Menu ..................................................................................4-29
CHAPTER 5 TROUBLESHOOTING
Keyboard Power-Up Messages.............................................................................................. 5-2
Prompts.................................................................................................................................. 5-2
Self Test Messages ................................................................................................................ 5-4
System Error Messages......................................................................................................... 5-5
Warnings ............................................................................................................................... 5-6

Table of Contents
Keyboard Control Unit
x09/08/00
CHAPTER 6 FEATURES AND CONTROLS
KCU Display Screen ..............................................................................................................6-2
Machine Information........................................................................................................6-2
Time Code Information ....................................................................................................6-3
Machine Status.................................................................................................................6-3
Calculator Scratch Pad ....................................................................................................6-4
Transport Controls.................................................................................................................6-5
LOC (Locate) Key .............................................................................................................6-5
CUE Key ...........................................................................................................................6-5
ALL STOP Key .................................................................................................................6-5
ROLLBACK Key...............................................................................................................6-6
REPLAY Key ....................................................................................................................6-6
EDIT Key ..........................................................................................................................6-6
<< (Rewind) Key ...............................................................................................................6-7
>> (Fast Forward) Key .....................................................................................................6-7
■(Stop) Key......................................................................................................................6-7
> (Play) Key ......................................................................................................................6-7
REH Key ...........................................................................................................................6-8
REC Key ...........................................................................................................................6-8
Using the Jog/Shuttle Wheel and Controls ...........................................................................6-9
TRIM Key .........................................................................................................................6-9
JOG Key..........................................................................................................................6-10
NEXT Key.......................................................................................................................6-10
SHUTTLE Key ...............................................................................................................6-10
ENTR Key.......................................................................................................................6-10
Device Select Keys ...............................................................................................................6-11
SYS Key ..........................................................................................................................6-11
GEN Key.........................................................................................................................6-11
FILM Key........................................................................................................................6-11
SETUP Key.....................................................................................................................6-11
TRKS Key .......................................................................................................................6-12
TRAN Key.......................................................................................................................6-12
EVNT Key.......................................................................................................................6-12
LIST Key.........................................................................................................................6-13
MEM Key........................................................................................................................6-13

Table of Contents
Keyboard Control Unit
09/08/00 xi
Machine (Group) Select Keys...............................................................................................6-14
A-F Machine (Group) Select Keys ..................................................................................6-14
GRP (GROUP) Key.........................................................................................................6-14
SOLO Key .......................................................................................................................6-14
LOOP Key .......................................................................................................................6-14
BANK Key.......................................................................................................................6-15
Calculator Keys ....................................................................................................................6-15
Accessing Time Code Registers......................................................................................6-16
00–ZERO Key .................................................................................................................6-16
CLR Key..........................................................................................................................6-16
0–TIME/VID Key ............................................................................................................6-17
1–PRE/A1 Key ................................................................................................................6-17
2–POST/A2 Key ..............................................................................................................6-17
3–REF/A3 Key ................................................................................................................6-18
4–SYNCP/A4 Key ...........................................................................................................6-18
5–OFST/CUE Key...........................................................................................................6-18
6–ERR/TC Key................................................................................................................6-18
7–IN Key .........................................................................................................................6-18
8–OUT Key .....................................................................................................................6-18
9–DUR/ASM Key ............................................................................................................6-19
= (EQUAL) Key..............................................................................................................6-19
+ (PLUS) Key.................................................................................................................6-19
– (MINUS) Key ..............................................................................................................6-19
KCU Auxiliary Function Keys .............................................................................................6-20
RCL Key..........................................................................................................................6-20
STO Key..........................................................................................................................6-20
CAPT Key .......................................................................................................................6-21
SUBFR Key.....................................................................................................................6-21
KCU Status Keys and LED Indicators ................................................................................6-22
ON LINE (Poll) Key and LEDs ......................................................................................6-22
Busy LEDs ......................................................................................................................6-22
REC (Record Enable) Key and LEDs .............................................................................6-23
AUX LEDs ......................................................................................................................6-23
Special Function Keys ..........................................................................................................6-24
IN Key .............................................................................................................................6-24
OUT Key .........................................................................................................................6-24
REF SYNC Key...............................................................................................................6-24
SRC SYNC Key...............................................................................................................6-25
CUE PT Key....................................................................................................................6-25
END PT Key ...................................................................................................................6-25

Table of Contents
Keyboard Control Unit
xii 09/08/00
Macros ..................................................................................................................................6-25
CHAPTER 7 ADVANCED FEATURES
Varispeed (KCU 600 Series Software)...................................................................................7-2
Varispeed Configuration Requirements ..........................................................................7-2
X-Frame Synchronization ................................................................................................7-2
Varispeed Operation with KCU.......................................................................................7-3
Varispeed Pivot Points and Offsets .................................................................................7-3
Varispeed Options Menu Differences ..............................................................................7-6
Calculating with Varispeed..............................................................................................7-8
Displaying Varispeed Status............................................................................................7-9
Varispeed Error Messages .............................................................................................7-10
System Supervisor Unit (KCU 300 Series Software)..........................................................7-10
Installing the SSU..........................................................................................................7-10
KCU Options Menus with the SSU ...............................................................................7-12
Event [EVNT] Select GPI Options Menu ......................................................................7-12
Group [GRP] Options Menu...........................................................................................7-14
Record Enable [REC] Options Menu .............................................................................7-14
System Options Menu ....................................................................................................7-15
Time Code Generators....................................................................................................7-15

Keyboard Control Unit
09/08/00 1-1
Chapter 1 Introduction
The Lynx Keyboard Control Unit (KCU) is a versatile, powerful
machine controller and editor, encompassing a wide spectrum of
multiple machine synchronization and audio editing applications.
Because the operating environment of the KCU incorporates
multiple microprocessors, there are several versions of software
available. Features vary with each software version. This manual
describes the KCU features and functions when fitted with the
following series of operating software:
•KCU080 Stand-alone KCU operation
•KCU300 System Supervisor Unit, multiple controller operation
•KCU600 Stand-alone Varispeed synchronization
This chapter introduces the KCU in the following categories:
•KCU features
•System overview
•System configurations
•Specifications

Introduction
Keyboard Control Unit
1-2 09/08/00
Keyboard Control Unit Features
The KCU provides comprehensive control of up to six tape or film
transports and two programmable GPI (General Purpose
Interface) relay closures. Machines may be operated individually,
or any selection of available machines may be operated as a
synchronized group. Any machine may be operated as the master
transport for group operations.
Figure Chapter 1 -1. Keyboard Control Unit

Introduction
Keyboard Control Unit
09/08/00 1-3
The following is a partial list of features of the Keyboard Control
Unit (KCU):
•User panel with lighted keys.
•Two-row alphanumeric display with large (.25" high), blue-
green characters.
•Programmable macro keys to execute complex operations with
a single keystroke.
•Special function keys for single keystroke time code capture
and store-to-key data registers.
•Calculator keypad for direct entry of time code numbers.
•Calculator keypad for track enable.
•Calculator keypad to control data access in system register
store and recall operations.
•Jog wheel for shuttle and frame jog functions with VTRs and
many ATRs.
•Jog wheel for trimming of data register values in frames and
subframes.
•Intuitive, prompting environment to minimize the need for
operator training.
•All time code and system setup data retained when powered
down, due to independent CPU with battery backed-up RAM.
•Two GPI relays, including dialog beep mode with menu
selections for three or four beeps, beep spacing, and beep
duration.
•System lock tally.
•Supervisor Port communicates with Lynx System Supervisor
Unit.
•Large illuminated transport keys operate single transports
(Solo mode) or all selected transports (Group mode).
•25-foot RS422 cable provided to connect KCU power supply
and the first Lynx-2 module.

Introduction
Keyboard Control Unit
1-4 09/08/00
System Overview
This section describes the following components of the KCU
system (shown in the following figure):
•Keyboard Controller Unit (KCU)
•Lynx-2 and Lynx Time Code Modules
•Lynx System Supervisor Unit (SSU)
•Lynx Console Control Unit (CCU)
•Remote Motion Controller (RMC)
•Jog/Shuttle Wheel
Figure Chapter 1 -2. System Overview
See the Applications chapter of this manual for examples of
configurations to meet specific needs.

Introduction
Keyboard Control Unit
09/08/00 1-5
Keyboard Control Unit (KCU)
The Keyboard Control Unit (KCU) allows remote control of up to
six machines. Editing and control commands are entered on the
keyboard. Time code status and register contents appear on the
40-character fluorescent display that is hinged above the keyboard.
The control panel is designed with separate key banks for ease of
operation for the following:
•Motion control
•Device selection
•Function macros
•Special functions
A numeric calculator keypad addresses specific devices and
associated memory registers, performs time code calculations, and
allows direct input of time and numeric data.
The KCU keypad jog/shuttle wheel allows jog operations and
shuttle operations. The wheel can be used for convenient
trimming of numeric data.
Using the KCU is described in the Getting Started and the
Features and Controls chapters of this manual.

Introduction
Keyboard Control Unit
1-6 09/08/00
Lynx-2 and Lynx Time Code Modules
Each Lynx-2 and Lynx Time Code Module features a SMPTE/EBU
time code generator, a wide-band time code reader, and a
comprehensive machine controller and synchronizer.
Figure Chapter 1 -3. Lynx-2 Module
Each time code module is daisy-chained through a 9-pin RS422
connector to the KCU. The Lynx modules issue Record, Record
Stop and Rehearse commands to machines controlled by the KCU.
The Lynx modules can also be used to control the record-enable
status for serially controlled machines.
Film Modules
TimeLine offers Lynx-2 and Lynx Film Modules. Film modules
integrate sprocketed film transports controlled from a biphase bus
into a Lynx-synchronized system.
Gearbox Processor
Lynx-2 Modules and Lynx Modules fitted with the Gearbox
Processor can handle X-Frame and Varispeed synchronization.
Synchronization is conveniently addressed from the KCU keypad.

Introduction
Keyboard Control Unit
09/08/00 1-7
Lynx System Supervisor Unit (SSU)
The Lynx System Supervisor Unit (SSU) is a sophisticated
communications interface unit. The SSU provides integrated
control of a variety of devices used in audio and sound post-
production environments.
Figure Chapter 1 -4. System Supervisor Unit
The SSU simplifies external computer control of a complex post-
production system. The SSU assumes the workload of all high-
speed data communications necessary to control and synchronize
tape machines and film transports, via Lynx-2 and Lynx Time
Code and Film Modules.
The SSU provides a variety of additional control facilities
including, but not limited to, eight GPI relays, two annunciator
outputs, three externally controllable time code outputs, multiple
remote controller connections, and MIDI Time Code output.
Using the Lynx SSU is described in detail in the Advanced
Features chapter of this manual.

Introduction
Keyboard Control Unit
1-8 09/08/00
Lynx Console Control Unit (CCU)
The Console Control Unit (CCU) is a keyboard input accessory for
the System Supervisor Unit. A CCU may be used in conjunction
with a KCU. The optional Jog/Shuttle wheel assembly is available
for console mounting.
Figure Chapter 1 -5. Console Control Unit
The miniature CCU keyboard mounts in the faceplate of Neve,
SSL, and other consoles. The CCU handles up to six transports.
Multiple CCUs can be connected to the System Supervisor Unit to
provide expanded configurations for film dubbing multiconsoles.
Each operator has individual control of machine transport
functions.
Other manuals for Lynx Keyboard Control Unit
1
This manual suits for next models
1
Table of contents
Popular Control Unit manuals by other brands
Novoferm
Novoferm HAD MS manual
Motorline professional
Motorline professional MC102 User& installer's manual

Presto
Presto PRESTORIZON Series installation guide

Fanstel
Fanstel BlueFan BT680E manual

Intelligent Appliance
Intelligent Appliance IA-2104-U user manual

Gan Systems
Gan Systems GS-EVB-HB-66508B-RN Technical manual
