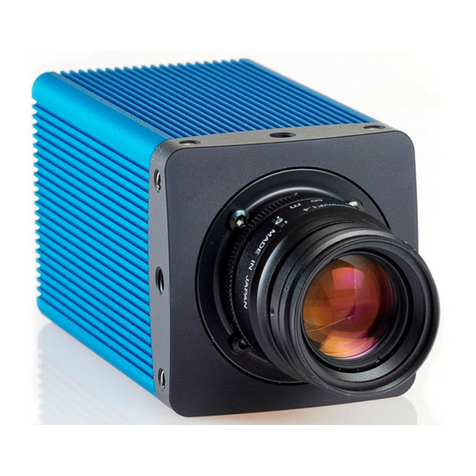
TKH SVS-VISTEK EoSens CL User manual

EoSens® CL
User Guide

Contents
1Before you start 5
1.1 About this manual 5
1.1.1 Tips, remarks, and notes 5
1.1.2 Registered trademarks 6
1.1.3 Conformity and use 6
1.1.4 Supplements 7
1.2 Warranty and non-warranty clause 7
1.3 Support 7
2Introduction 9
2.1 Intended use 9
2.2 Scope of delivery 9
2.3 Optional accessories 10
2.4 System requirements 10
3The camera 11
3.1 Camera description 11
3.2 Operating temperature 12
3.3 Additional cooling 12
3.4 Interfaces of the camera 12
3.5 Status LED 13
4First steps 14
4.1 Connecting power and I/O signals 14
4.2 Connecting camera and image processing system 15
4.3 Camera settings and profiles 16
4.4 Changing the pixel clock 17
4.5 Cleaning sensor and lens 18
5Technical data 19
5.1 Camera specifications 19
5.2 Sensor specifications 20
5.3 Connector pinning 21
5.3.1 CameraLink connector 21
2

5.3.2 Power connector 22
5.4 Sensor defect specifications 24
5.5 Camera dimensions 24
5.6 Timing diagrams 26
5.6.1 Free run with electronic shutter 26
5.6.2 External sync with internal timer 26
5.6.3 Pulse width mode 26
5.7 Spectral response 27
5.7.1 Monochrome and color with UV/IR Cut Filter 27
5.7.2 Monochrome and color without UV/IR Cut Filter 27
6Appendix 28
Declaration of Conformity 29
3

Figures
Fig.: 3-1: Interfaces of the camera EoSens® CL 13
Fig.: 4-1: Power connector pinning 14
Fig.: 4-2: Optocoupler 15
Fig.: 4-3: Connecting camera and image processing system 15
Fig.: 5-1: CameraLink connector, MDR-26 21
Fig.: 5-2: Power connector 22
Fig.: 5-3: Quantum Efficiency mono and color with UV/IR Cut Filter 27
Fig.: 5-4: Quantum Efficiency mono and color without UV/IR Cut Filter 27
4

1 Before you start
1.1 About this manual
This manual contains helpful information to install
and operate the described camera. It has been
produced with care. Nevertheless, information
might be erroneous or incomplete. Mikrotron
GmbH cannot be held responsible for any prob-
lems resulting from incomplete or erroneous
information.
In case you detect errors or need further inform-
ation, please inform us via mail:
Call +49- 89-7263-4200
We highly recommend to read this manual care-
fully.
NOTICE This manual is subject to change without notice.
It is intended for staff with technical qualifications
who have been specially trained and have the
appropriate knowledge in the field of automation
technology, electrical and optical devices.
INFO Keep this manual for future use.
1.1.1 Tips, remarks, and notes
This manual contains tips and notes that help to
avoid data loss or camera damage. They are
emphasized as follows:
INFO Provides information that may help to improve
camera handling or avoid data loss.
NOTICE Provides information to avoid damage to the sys-
tem.

1.1.2 Registered trademarks
In this manual the following registered trademarks may be used:
lMotionBLITZ®
lImageBLITZ®
lEoSens®
lGenICam®
lMicrosoft® and Windows®
lIntel®
Throughout the manual, these trademarks are not specifically marked as registered
trademarks. This in no way implies that these trademarks can be used in another con-
text without the trademark sign.
1.1.3 Conformity and use
This equipment has been tested and found to comply with the limits for a Class A
digital device, pursuant to Part 15 of the FCC Rules. These requirements are
designed to provide reasonable protection against harmful interference when the
equipment is operated in a commercial environment.
This equipment generates, uses, and can radiate radio frequency energy and, if not
installed and used in accordance with the instructions given in this guide, may cause
harmful interference to radio communications. Operation of this equipment in a res-
idential area is likely to cause harmful interference in which case the user will have to
correct the interference at its own expense.
NOTICE You are herewith cautioned that any changes or modifications not expressly
approved in this description could void your authority to operate this equipment.
制造说明:
此设备的生产与测试依照FCC条例第15条条例,符合A类电子设备标准。产品提
供在商用使用环境中的合理保护,以防止使用过程中可能涉及到的损害。
此设备会产生、使用并可发射出无线电波,如果未按照本手册中所述安装和使
用,可能会对无线通信设备产生干扰。如本设备在居民区操作出现干扰等情
况,用户需要自费处理。
备注:请注意,如未按照此使用说明操作而自行更改设备,那么您将无权使用
本设备。
規制適合宣言とご使用について(米国FCC)
この機器は、FCC規則 のパート15に定められたクラスAデジタル装置に関する規制
要件に基づいて所定の試験が実施され、その適合が認証されています。これらの
規制要件は、商業環 境 において機 器 を使 用 する際、有害な干渉に対する妥当
な保 護 を提 供 するために設けられています。この機器は、無線周波数エネルギー
を生成かつ利用するとともに、放射することもあります。このリファレンスガイドの指
示に従って設置および使 用 が行われない場合は、無線通信に有害な干渉を引き
起こす恐れがあります。この機器を住宅地で利 用 すると有害な干渉を起こすこと
もあり、その場 合 、使用者は自己負担において適切な対 策 を講 じる必要がありま
す。
1 Before you start
MikrotronGmbH / 1.3CL / CAMMC1362/63-UG / 2022 6 - 30

注意事項:このリファレンスガイドに明示的に承 認 していない変更や修正を行った
場合には、本製品を使 用 する権 利が無効となることがあります。
1.1.4 Supplements
For customers in Canada
This apparatus complies with the Class A limits for radio noise emissions set out in
Radio Interference Regulations.
Pour les utilisateurs au Canada
Cet appareil est conforme aux normes Classe A pour bruits radioélectriques, spé-
cifiées dans le Règlement sur le brouillage radioélectrique.
Life support applications
The products described in this manual are not designed for use in life support appli-
ances or devices and systems where malfunction of these products can reasonably be
expected to result in personal injury.
NOTICE Mikrotron customers using or selling these products for use in such applications do
so at their own risk and agree to fully indemnify Mikrotron for any damages res-
ulting from such improper use or sale.
1.2 Warranty and non-warranty clause
Warranty is described in §8 of our General Terms and Conditions which can be
downloaded on the Mikrotron web page (www.mikrotron.de/en/terms.html).
In addition, take the following non-warranty clauses into account.
NOTICE The camera does not contain serviceable parts. Do not open the body of the cam-
era. If the camera has been opened, the warranty will be void.
NOTICE The camera has to be used with a supply voltage according to the camera’s spe-
cification. Connecting a lower or higher supply voltage, AC voltage, reversal polar-
ity or using wrong pins of the power connector may damage the camera. Doing so
will void warranty.
Our warranty does not protect against accidental damage, loss, or acts of nature.
INFO Mikrotron cannot be held responsible for the loss of data. We recommend a backup
plan.
1.3 Support
1. In case of support or a warranty claim, make a note of the camera type and its
serial number (S/N). You find all necessary information on the identification
plate of the camera.
1 Before you start
MikrotronGmbH / 1.3CL / CAMMC1362/63-UG / 2022 7 - 30

2. Contact us in one of the following ways:
oContact us via email: [email protected]. Our support team will guide
you through the process.
oOr visit our support website
www.mikrotron.de/en/services/support.html
and fill out the form. You will receive an automatic reply from our ticket sys-
tem.
1 Before you start
MikrotronGmbH / 1.3CL / CAMMC1362/63-UG / 2022 8 - 30

2 Introduction
2.1 Intended use
The camera EoSens® CL belongs to the product class of so-called high-speed
machine vision (MV) cameras that are integrated into test or measurement systems.
High-speed MV cameras are designed to capture images with high frame rate for
various purposes in an industrial or scientific environment to deliver image data for
further analysis. The images are transmitted to a frame grabber on a connected com-
puter where they can be evaluated with the help of a software.
Other uses
Any other use is regarded as unintended use and leads to the loss of guarantee and
liabilities. Contact the manufacturer for other uses.
These products are designed for industrial applications only. The cameras are not
designed for life support systems where malfunction of the products might result in
any risk of personal harm or injury.
2.2 Scope of delivery
The following components are part of delivery. Before installing the camera, check if
the delivery is complete:
lCamera as ordered
lF-mount or C-mount lens adapter as ordered
lUSB storage device with
oVCAM2 software
oGenICam XML file
oProduct documentation
NOTICE Check if the delivery is complete before installing the camera.
INFO The firmware can be updated remotely via a special updating software. For firmware
2 Introduction 9

2.3 Optional accessories
Lenses
Only lenses for industrial purpose are suitable. To find lenses or other accessories,
visit www.mikrotron.de/en.
Cable
lKKRDCLSRxx: CameraLink cables with lengths from 0.5 to 8 m are available.
INFO If the cable length exceeds 8m, high-quality cables are required.
In order to use Full camera link, two cables for each camera are needed.
Power supply
lNTCAM13xx: The 12V/2.5A power supply is available with 5 or 10 m cable.
lNTCAM13xxSTR with strobe connector: The 12V / 2.5 A power supply with
strobe connector is available with 5 or 10 m cable.
Adapter
lF-mount adapter
lC-mount adapter
2.4 System requirements
The PC or image processing system that is connected with the camera must be
equipped with:
lAn image processing system, e.g. PC and operating system according to the
requirements of the frame grabber
lA fully installed frame grabber with the most recent device driver and software
lA CameraLink cable (one cable for BASE mode or two cables for operating in
FULL mode)
lAn external power supply providing an output voltage between 8 and 24 V and
a current of at least 2 A (e.g. NTCAM13xx or NTCAM13xx10)
2 Introduction 10

3 The camera
3.1 Camera description
The CMOS 1.3 Megapixel CameraLink cameras offer a high photo sensitivity and
therefore make inspection in low light conditions possible. Both BASE and FULL mode
cameras are available as monochrome and color version.
Mikrotron CameraLink cameras comply with the CameraLink standard. The camera
link standard defines the following items:
lThree configuration types BASE, MEDIUM and FULL with different data transfer
speeds
lThe transfer protocol which is used by the frame grabber to communicate with
the camera.
For detailed information about the CameraLink standard, refer to the AIA web page:
www.visiononline.org.
The color and monochrome cameras are supplied with the following features:
lAnalog and digital gain (digital gain only for color versions)
lAuto exposure
lDecimation mode (subsampling)
lFirmware updates on site possible
lInversion mode
lMultiple pixel exposure
lROI move mode
lThreshold mode
lTrigger debouncer
lProgrammable via CameraLink interface
lSmall, compact housing
Bayer filter
The sensor of the EoSens color cameras is supplied with a Bayer color filter. In order
to get the color information, the imaging software has to decode the information of
each pixel into red, green, and blue (RGB) by using the values of its neighboring
pixels. Each red, green and blue filter element covers exactly one pixel on the sensor.
A matrix of 2x2 filter elements builds a filter element matrix. A Bayer pattern image
therefore must have an even number of pixels and an even number of lines. The
ordering of the RGB pixels for each sensor is provided in the section on technical
data.
UV/IR cut filter
In addition, color cameras are equipped with an UV/IR cut filter. Light with
wavelengths between 370nm and 670nm will be transmitted. As CMOS sensors are
susceptible to UV and IR rays outside the visible spectrum, UV/IR filter avoid blurred
images and therefore improve color images.
3 The camera 11

3.2 Operating temperature
Despite of its high performance, the fanless 1.3CL camera is compact and works
silently. If the camera is mounted on mechanical parts, the heat generated during
operation will be dissipated by the cooling fins at the rear of the camera and the
mechanical parts.
NOTICE The camera body temperature must not exceed the values specified in the technical
data (see "Technical data" on page19).
In case of overheating, the camera will automatically be switched off and the com-
munication between camera and PC will be interrupted.
INFO Durability of the camera will be reduced when being operated in an environment
that is constantly exceeding the maximum permissible operating temperature. In this
case, take additional cooling measures as described below.
NOTICE The camera is not intended for use on an isolated mounting plate or in a closed
housing because the temperature of the camera will rise continuously.
3.3 Additional cooling
INFO If the camera is e.g. mounted on a sturdy aluminum structure, not only cooling is
ensured but also a stable optical path. In addition, vibrations will be minimized
within the entire system.
If the ambient temperature is constantly exceeding 40°C, additional cooling is recom-
mended. This can be achieved by
lAir- or water-cooling system
lAir-conditioned housings
3.4 Interfaces of the camera
At the rear of the camera, two CL sockets are provided. If only BASE is connected with
the frame grabber, a maximal data transfer speed of 255MB/s can be reached. If
the connectors BASE and FULL are connected via two cables with the frame grabber,
the data transfer speed amounts to 680MB/s.
3 The camera 12

2
1
3
4
Fig.: 3-1: Interfaces of the camera EoSens® CL
1 FULL interface 2 BASE interface
3 LED 4 6-pin Hirose socket
This connection allows a standardized real-time communication between frame grab-
ber and camera via the standardized CameraLink machine vision protocol.
The 6-pin Hirose connector is used to connect an external power supply.
3.5 Status LED
The multi-color status LED indicates camera and CL connection states.
LED State Indication
OFF No power
Solid orange System is booting
Fast flash alternate
green/orange
Connection detection in progress, PoC active
Slow flash alternate
red/green
Device incompatible, PoC active
Solid green Device connected but no data being transferred
Slow pulse orange Device connected, waiting for event (e.g. trigger)
Fast flash green Device connected, data being transferred
Fast flash red System error
3 The camera 13

4 First steps
4.1 Connecting power and I/O signals
The power connector of DC power supply must be connected to the 6-pin Hirose
plug (HR10A-7P-6S).
1
2
3 4
5
6
Fig.: 4-1: Power connector pinning
NOTICE If it is connected with another 12 - 24V/2A power supply, take the pinning of the
connector into account.
Pin Signal Pin Signal
1VCC 2VCC
3STRBOUT 4GNDSTRB
5GND 6GND
INFO Before applying power, verify the polarity of the leads (+/-) and whether the applied
voltage is correct.
Pin 3 of the 6-pin connector provides a strobe signal (STRBOUT) which is high during
exposure.
Internally, the STRB signal of pin 3 (STRBOUT) is connected with an optocoupler.
4 First steps 14

Fig.: 4-2: Optocoupler
NOTICE The camera must be used with a supply voltage according to the camera spe-
cification. Connecting a lower or higher supply voltage, AC voltage, reversal polar-
ity or using wrong pins of the power connector may damage the camera. If doing
so, the warranty will expire immediately.
4.2 Connecting camera and image processing system
INFO Before you start, make sure that all components of the camera-host chain, i.e. cam-
era, connectors, cables, and frame grabber as well as the software are CameraLink-
compliant.
1
2
3
4
5
6
Fig.: 4-3: Connecting camera and image processing system
4 First steps 15

1. Switch off the image processing system (1).
2. Connect the BASE connector of the camera (4) with the BASE connector of the
frame grabber (2).
3. For FULL CL, connect the FULL connector of the camera (4) with the FULL con-
nector of the frame grabber (2).
NOTICE Do not connect a FULL connector with a BASE connector. Otherwise com-
munication between camera and frame grabber cannot be established.
4. Connect the external power supply with the Hirose connector (6) of the camera
(4).
5. To connect a STROBEOUT (SYNC), take the pinning into account.
6. Unscrew the dust protection cover of the camera.
7. Mount the lens (5).
8. Connect the power supply (6) with the main supply.
9. Switch on the image processing system (1).
10. Check the LED of the camera to verify that the camera is ready for use.
4.3 Camera settings and profiles
The camera provides several registers. The content of a complete camera register set
is called a profile. All values in a register are given in hexadecimal notation (e.g.: 0xff
= 255). Depending on the camera type, the non-volatile memory provides space for
9/17 profiles:
lOne power-up profile
lFour / eight user profiles
lFour / eight factory profiles
NOTICE The camera does not have to be configured via the serial link to start operation as
the power-up profile will deliver all values to bring the camera into a defined oper-
ation mode.
In addition, there is one camera profile in the volatile memory. If the camera is
powered-up, the power-up profile, which is permanently stored in the non-volatile
memory of the camera, will be loaded into the volatile memory.
Any change of a specific register via the serial interface is immediately processed and
written into the camera profile. Its content will be lost as soon as power is switched
off. If you want to keep your changes, they have to be stored into one of the profiles
of the non-volatile memory.
Profile
Video data
width
[MB/s]
Resolution
[Pixel]
Image
frequency
[fps] Mode
Pixel clock
[MHz]
c 144 1280x1024 110 2x8 80
The eight user profiles are predefined with the following values:
4 First steps 16

Profile
no.
Video
data
width
[MB/s]
Resolution
[pixel]
Image
frequency
[fps] Mode CL config.
Pixel
clock
[MHz]
0 155 640x480 2x10 Base 80
1 180 1280x1024 2x10 Base 80
2 124 640x480 2x8 Base 80
3 144 1280x1024 2x8 Base 80
4 311 640x480 4x10 Medium 80
5 370 1280x1024 4x10 Medium 80
6 490 640x480 1594 8x8 Full 80
7 570 1280x1024 8x8 Full 80
INFO The user profiles 4 to 7 are available in FULL mode with the cameras CAMMC1362
and CAMMC1363 only. All values can be changed by using a load / write com-
mand.
In contrary to the user profiles, the eight factory profiles cannot be changed. They
offer the presettings described below and can be loaded with a read command.
Profile
no.
Video
data
width
[MB/s]
Resolution
[pixel]
Image
frequency
[fps] Mode CL config.
Pixel
clock
[MHz]
0 155 640 x 480 Base 80
1 180 1280x1024 Base 80
2 124 640x480 2x8 Base 80
3 144 1280x1024 2x8 Base 80
4 311 640x480 Medium 80
5 370 1280x1024 Medium 80
6 490 640x480 1594 8x8 Full 80
7 570 1280x1024 8x8 Full 80
INFO The factory profiles 4 to 7 are only available in FULL mode with the cameras
CAMMC1362 and CAMMC1363.
4.4 Changing the pixel clock
If for example fiber repeaters are used, the cameras pixel clock will have to be
decreased or set to a specific value. Otherwise it might not work properly. In order to
change the pixel clock, the camera’s power-up profile has to be adjusted.
4 First steps 17

Preparation
1. Download and install the 64 bit version of the MC Control Tool from the website
https://mikrotron.de/en/services/downloads.html
2. Close the Director2 application if running and make sure the camera is correctly
connected.
3. Changing the pixel clock with the software
4. Start the MC Control Tool and connect the camera (software).
5. Click the MISC tab and select “factory profile 7” from the “Load profile” selec-
tion.
6. Click “Load”.
7. After the profile is loaded, click the Image Control tab.
Changing the pixel clock
NOTICE After loading the factory profile, do not change other settings than the ones
described below.
1. Switch the tab mode to 10 x 8.
2. Select the pixel clock.
3. Click the MISC tab.
4. Select the “power up profile” from the “Save actual profile” selection.
5. Click “Save”. The camera will now start with the selected pixel clock.
6. Close the MC Control Tool.
4.5 Cleaning sensor and lens
Unplug the camera before you clean any parts!
Never open the housing when cleaning the window of the sensor. If the camera has
been opened, the warranty will be void.
1. If there are coarse particles on the lens or the window of the sensor, use a
vacuum cleaner to remove them before cleaning to prevent scratches.
2. Clean the window of the sensor and the lens with a dry and soft lens-cleaning tis-
sue.
NOTICE Do not use tools that may harm the sensor or lens.
4 First steps 18

5 Technical data
5.1 Camera specifications
Resolution 1.3 Megapixel
Frame rate (8 bit) max. 506 fps
Shutter speed 2 µs – 1 s
Shutter time (steps) 2 µs
Max. Jitter via CXP
Trigger
±4 ns
Max. Trigger fre-
quency
300 kHz
Quantum efficiency 35% @ 550 nm
Interfaces CameraLink
Base mode: 2 x 8 / 2 x 10
Medium mode: 4 x 10
Full mode: 8 x 8
Extended mode: 10 x 8
Frequency: 80 MHz
Data rate max: 625 MByte/s
Cable length max: 8 m
Adapter C- / F-mount
Dimensions [mm]
(W x H x L)
63 x 63 x 38 (without lens adapter)
63 x 63 x 41.3 (C-mount)
80 x 80 x 69.8 (F-mount)
Weight [kg] 0.30
Cooling Fanless
Power supply 8 - 24 V DC @ 5 W (Power adapter supplied)
Operating tem-
perature (camera
body)
+5 °C ... +50 °C
Shock resistance 70 g
Vibration resistance 7 grms
Compliance CameraLink 2.0
5 Technical data 19

5.2 Sensor specifications
Sensor type CMOS, monochrome or RGB (Bayer filter)
Image sensor size 17.92 x 14.34 mm
Resolution 1280 x 1024 px
Pixel depth Cube6, mini1, EoSens GE: 8 bit
EoSens CL:10 bit
Pixel size 14 x 14 μm
Active area 17,92 x 14,34 mm
ROI min. 128 x 2 px
Fill factor 40 %
Light sensitivity 10,16 V/lux-sec @ 550 nm
Full well charge 30000 e¯
Bayer filter pattern BayerGB8 / BayerGB10
Because the pattern must always start at the same field with
a color camera only even height and even offset-y is pos-
sible. The camera will automatically round down if odd val-
ues are entered. Also bear in mind when using the invert
readout function the pattern must be inverted too.
5 Technical data 20
Table of contents
Other TKH Digital Camera manuals
