TMT Automation ChowHUB User manual

ChowHUB
Smart phone controlled device
for gate automation
User Manual

A. Safety Instructions
B. Product Description
B1. ChowHUB Smartphone controlled device for gate automation
B2. Kit Contents
C. Installation Guide
C1. General Installation
C2. Wire Connection Step by Step
C3. Wire Connection Open/Stop/Close
C4. Connecting to Chow!APP
C5. Setting of Chow!APP Step by step
C6. Setting of Chow!APP Open/Stop/Close
C7. Operation page
C8. Installation and connection of the door status sensor
D. Troubleshooting
1
1
1
1
2
2
2
3
5
6
6
6
7
8
Index

QR CODE STICKER IS
AT BEHIND FOR UID
NUMBER.
ChowHUB User Manual
A. Safety Instructions
B. Product Description
B1. ChowHUB Smartphone controlled device for gate automation
1
WARNING :
Please read this manual carefully before installation. TMT Automation Inc. is not responsible for improper installation and failure to comply with
local electrical and building regulations. Please keep all the components of the ChowHUB and this manual for further consultation.
● Please connect the ChowHUB to the gate automation when the gate or garage door is close.
● Please connect the ChowHUB to the gate automation when the power is OFF.
● Please check if the gate automation works properly before installing the ChowHUB.
● DO NOT make any modifications to any components except it is mentioned in this manual.
● Children are NOT allowed to use ChowHUB and Chow!APP without supervised by adults.
● ChowHUB and Chow!APP can only be operated when the gate or garage door can be seen.
● Do check and make sure there is no obstacle when operating the gate or garage door.
ChowHUB is a device which can connect to an existing garage door, sliding gate and swing gate opener. ChowHUB can be controlled remotely
via smartphones. ChowHUB allows multiple users to do operation, e.g. open and close the gate (or door) through Chow!APP. Installing a
ChowCAM(Camera) is recommended to have a real-time image on the gate or garage door while operating the ChowHUB with Chow!APP.
B2. Kit Contents
ChowHUB is a device which can connect to an existing garage door, sliding gate and swing gate opener. ChowHUB can be controlled remotely
via smartphones. ChowHUB allows multiple users to do operation, e.g. open and close the gate (or door) through Chow!APP. Installing a
ChowCAM(Camera) is recommended to have a real-time image on the gate or garage door while operating the ChowHUB with Chow!APP.
Frequency
IP rating
Working temperature
Dimensions
Power
433Mhz and 2.4GHz
IP44
-20oC ~ 70oC
56x110x35mm
AC/DC, 12V/24V, 1A
CHOWHUB
1
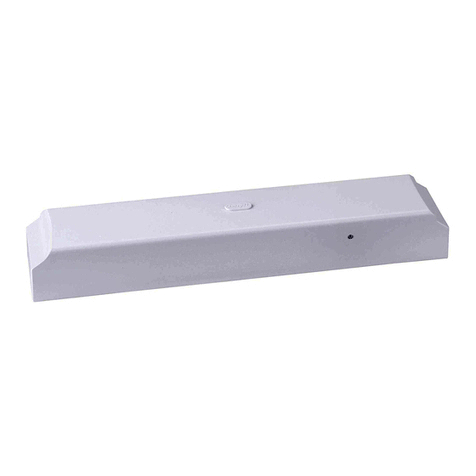
DOOR STATUS SENSOR
5
POWER PLUG
6
ANTENNA
7
HOLDER
2EXPANSION SCREWS
3WIRE*3PCS
4

ChowHUB User Manual
2
C. Installation Guide
C1. General Installation
1. Measure the drilling positions for the (3) expansion screws with the (2) Holder.
Fasten the (2) Holder with the (3) expansion screws to the wall.
2. Install the (4) Antenna on the (1) ChowHUB
C2. Wire Connection Step by Step
1. The wires should go through the (2) Holder. It is recommended to remove the terminal block for an easy wire connection.
3. The (1) ChowHUB will magnetically be attached to the (2) Holder.
4. Attach the (6) Power plug to the ChowHUB. The Blue LED will blink right after it’s plug in, and the ChowHUB will be ready for pairing.
CHOWHUB
1
HOLDER
2
87mm
90o
POWER PLUG
6
ANTENNA
7
WIRE*3PCS
4
HOLDER
2
EXPANSION SCREWS
3EXPANSION SCREWS
3

ChowHUB User Manual 3
PB GND
C3. Wire Connection Open/Stop/Close
Before connection, please make sure you gate automation system has Open/Stop/Close terminal. (R1) is the terminal for a wired limit
switch which sends signal to your smart phone when triggered.
2. Please connect (C1) and (GND) terminals to the step by step terminal of your gate automation. (R1) is the terminal for a wired limit
switch that sends signal to your smart phone when triggered.
3. To control a second device. Please connect (C2) and (GND) terminals to the step by step terminal of your gate automation. (R2) is the
terminal for a wired limit switch that sends signal to your smart phone when triggered.
C1
1 2 3 4 5 6 7 8 9 10 11 12 13 14
GND C2 GND C3 R1 R2 R3 12V
OUTPUT INPUT
GND GND GND GND
12V/24V
C1
1 2 3 4 5 6 7 8 9 10 11 12 13 14
GND C2 GND C3 R1 R2 R3 12V
OUTPUT INPUT
GND GND GND GND
12V/24V
C1
1 2 3 4 5 6 7 8 9 10 11 12 13 14
GND C2 GND C3 R1 R2 R3 12V
OUTPUT INPUT
GND GND GND GND
12V/24V
PB GND
STOPOPEN GNDCLOSE
Please refer to the manual of your automation
to find the step by step terminal
Please refer to the manual of your automation
to find the step by step terminal
Please refer to the manual of your automation
to find the Open/Stop/Close terminal
Wired door status sensor
(Optional)
Wired door status sensor
(Optional)
Wired door status sensor
(Optional)

ChowHUB User Manual
4
Please pay extra attention to wire connection to (6) Power plug and terminal 11 (12V/24V) / terminal
12_GND
** Please DO NOT connect (6) Power plug and providing power from the motor and the same time
Terminal 11 and 12 provide 12V/1A
when connect to (6) Power plug
Terminal 13 and 14 become 12V/24V
input terminals which can take AC or DC
power from the motor
Scenario 1 Scenario 2
12V /24V from the Motor
7 8 9 10 11 12 13 14
R1 R2 R3 12V
OUTPUT INPUT
GND GND GND
12V/24V
7 8 9 10 11 12 13 14
R1 R2 R3 12V
OUTPUT INPUT
GND GND GND
12V/24V
P
R
Before connecting to the ChowHUB, please return to the factory setting.
Before starting pairing
1. Press the (P) button for 5 seconds and
release it.
2. Plug out and reconnect the wire to restart
the Wi-Fi box.
Output 12V / 1A

ChowHUB User Manual 5
C4. Connecting to Chow!APP
Connecting to Chow!APP by the first user
1. Connect the smartphone to a Wi-Fi network.
**ChowHUB is ONLY compatible with 2.4GHz Wi-Fi network!
**ChowHUB will be connected to the Wi-Fi network you choose.
2. Log in or sign up for Chow!APP.
3. Tap the (+) icon to add the device.
4. Tap the (ChowHUB) icon.
5. Enter the password for the Wi-Fi. DO make sure entering the correct password.
7. Tap on the ChowHUB icon on the (Find) device page
Set a PIN code for safety use. Once the PIN code is confirmed, the ChowHUB will appear on the main page for further operation.
** The PIN code is required for other users to access to the ChowHUB.
** The PIN code can be reset by pressing (P) and (R) button in the ChowHUB to default to the factory setting.
Adding other users
1. Follow Step 1 to 4 in connecting to Chow by the first user.
2. Tap (Find device) and tap on the ChowHUB icon.
3. Entering the PIN code set by the first user.
4. Confirm the setting, and the ChowHUB will show on the main page of Chow.

ChowHUB User Manual
6
C5. Setting of Chow!APP Step by step
1. Fill in the name of the device
2. Select the (Cycle mode)
3. Select (Wireless Door Sensor).
** For the connection of wireless limit switch, please refer to
C8. Installation and connection of the Door sensor
4. Select How many device you are going to control
5. Click (Let’s get started) to finish setting
C6. Setting of Chow!APP Open/Stop/Close
1. Fill in the name of the device
2. Select the (Open/Stop/Close mode)
3. Select (Wireless Door Sensor).
**For the connection of wireless Door sensor, please refer to
C8. Installation and connection Door sensor
4. Select the device you are going to control
5. Click start to finish setting
6. Click DC mode
C7. Operation page
1. Operation button
2. Switching bar for different device
3. Setting page
1) Device Information
2) Edit or Add devices
3) Available Accessories
4) Parameter Settings
1
2
3
4
5
1
2
3
5
1
2
3

ChowHUB User Manual 7
C8. Installation and connection of the Door sensor
Door sensor
Connect the Door sensor to Chow! APP
Sensor
Magnetic
trigger
A Door sensor consist of a Magnetic trigger and a sensor. The Door sensor will send
a signal when the gate opener reach the close position.
1. Pull out the isolation plate, and the LED will turn ON when the trigger close to
the sensor.
2. The LED will go OFF when two parts are separated.
3. The Door sensor will send signal every hour when it is in low battery status
1. Tap the ChowHUB icon on the main page -> Entering the Setting page -> Tap the (Edit or Add devices) -> Tap the (Pairing)
2. Align the trigger and the sensor till the LED on the Door sensor is ON.
3. The App shows (Learn Successfully).
4. The Door sensor is recommended to be installed at the close position of the gate or garage door.
1
1
2
3
4
5
5
Cobble Garage Door Opener
Photocells (Optional accessories)
Door status sensor
ChowHUB
Transmitter
Please set stopper in the open limit position of the rack and after the setup is completed, then garage
door opener can start the system learning process.
2
2
4
DOOR STATUS SENSOR
5
3

ChowHUB User Manual
8
D. Troubleshooting
1. Install the Door sensor at the fix part of the gate or garage door.
2. Install the Door sensor when the gate or garage door is fully closed. Please note that the trigger and a senor need to be perfectly
aligned when the gate or garage door is fully closed.
3. The LED of the receiver will be ON when two parts are aligned. The sensor will send a signal to the ChowHUB.
4. A notification will be sent from the ChowHUB to your smartphone when the gate or garage door is closed.
Situation 1_The Blue LED is NOT Blinking when the ChowHUB connects to the Power plug
Press the (P) button and the Blue LED will blink
Situation 2_Blue and Green LED blinks alternatively when Connecting to Chow by the first user
Entering a wrong password to your Wifi network
Situation 3_Red LED blinks when Connecting to Chow by the first user
The ChowHUB cannot identify the IP from the router. Please disconnect other device.
Situation 4_ Red LED blinks when Enter the PIN code
Entering the wrong PIN code. Please confirm the correct PIN code with the first user.
Situation 5_ Green LED blinks
The Wi-Fi signal is weak. Please adjust the antenna of the ChowHUB or adding an Wi-Fi amplifier to enhance the Wi-Fi signal.
Situation 6_ Red LED stays ON
Red LED stays ON indicates a system error. Please press the (R) button
Situation 7_Default to factory setting
Default to factory setting will be applied when you lose your PIN code for sharing the device. After defaulting, please follow the previous
indications to reconnect the ChowHUB to Wi-Fi network.
1. Tap the ChowHUB icon on the main page for 3 seconds and delete the ChowHUB
2. Open the ChowHUB, press the (P) button for 5 seconds and release it. The Green LED will blink once.
3. Press the (R) button. When the Blue LED blinks, it means the ChowHUB is successfully defaulted.
Situation 8_Change the PIN code
Enter the operation page of the device in Chow -> Tap the (Device information) in the setting page -> Tap (Pin code Setting) to set a new PIN
code
Situation 9_Change to another Wi-Fi network
Enter the operation page of the device in Chow -> Tap the (Device information) in the setting page -> Tap the Wi-Fi icon to change to another
Wi-Fi network

ChowHUB User Manual 9

ChowHUB User Manual
10
Other manuals for ChowHUB
1
Table of contents
