Toika LAILA User manual

THE LAILA LOOM
Laila is suitable for weaving all types of fabrics except for rugs.
The loom is equipped with either 4 shafts/4 treadles or 8
shafts/8 treadles that enable weaving wide range of different
fabrics.
Laila is designed for weavers who do not have enough space
for a very large loom. The loom can be folded even with the
warp in place, so it occupies very little space when being
stored or transported.
Laila is suitable for both children and adults. Weaving with
Laila gives the same feel as weaving with a larger
countermarch loom.
The Laila bench is especially proportioned for this loom. It is
available separately.
The price of the loom includes a cork board, a scissor holder
and a manual.
Parts of the loom:
1. Left side
2. Right side (8) (7)
3. Lower front rail
4. Lower back rail
5. Breast beam (1) (2)
6. Back beam
7. Upper front rail
8. Upper back rail
9. Warp beam (6) (10)
10. Crank
11. Cloth beam (9) (5)
12. Cloth beam release (31)
13. 2 warp & 2 cloth sticks (*) (12)
14. 2 lease sticks (*) (11)
15. Jacks (*) (30)
16. 2 rods for jacks (*)
17. 2 long locking rods (*) (32)(4)
18. Shaft bars (*) (24)(22)
19. Upper lams (*) (25)
20. Lower lams (*)
21. 2 rods for lams (*) (29) (3)
22. Box for side lams
23. Treadles (*)
24. Treadle rod
25. Treadle holders
26. Beater top (*)
27. Beater race (*)
28. 2 beater legs (*)
29. Lower joint part TOIKA OY
30. Upper joint part Haittilantie 4 A Tel: (03) 5421 095
31. Right back leg 37800 AKAA, FINLAND Fax: (03) 5421 001
32. Left back leg www.toika.com Email: [email protected]m
(*) = Not in the picture

(1) (2) (25)
(29)
(22) (32)
(31)
(30)
(11) (9) (5) (6) (3) (4) (7) (8)
A. Allen key, 1 pc.
B. Step bolt 6x75 mm for fastening the treadle holders, 2 pc
C. Step bolt 8x80 mm for fastening the beater top, 2 pc
D. Furniture bolt (sleeve nut + threaded rod + barrel nut) 6 x 60 mm for the rails, 4 pc
E. Rod for beater 7,5 cm + 2 cotter pins, 2 pc (see 16.)
F. Furniture bolt (sleeve nut + threaded rod + sleeve nut) 6 x 40 mm for fastening the joint parts, 8 pc,
and step bolt 6x55 mm, 2 pc (see B.)
G. Furniture bolt (sleeve nut + threaded rod + sleeve nut) 6 x 60 mm for the beater race, 2 pc
H. Furniture bolt (sleeve nut + threaded rod + sleeve nut) 6 x 115 mm for the castle frame, 2 pc
I. Treadle spacer, 3 pc
J. Small wooden dowel for the breast and the back beam, 4 pc
K. Big wooden dowel for the front and the back of the castle frame, 8 pc (already in place)
16. Rod for jacks 11,5 cm + cotter pin, 2 pc
17. Locking rod for jacks, 2 pc
21. Rod for lams 13,5 cm + cotter pin, 2 pc
24. Treadle rod 34 cm + cotter pin, 1 pc
(26) (B) (C) (A)
(27)
(H)
(28) (D) (F) (O)
(G)
(9)
(10) (J)
(I)
(11) (K)
(12) (24)
(21)
(16)
(17)

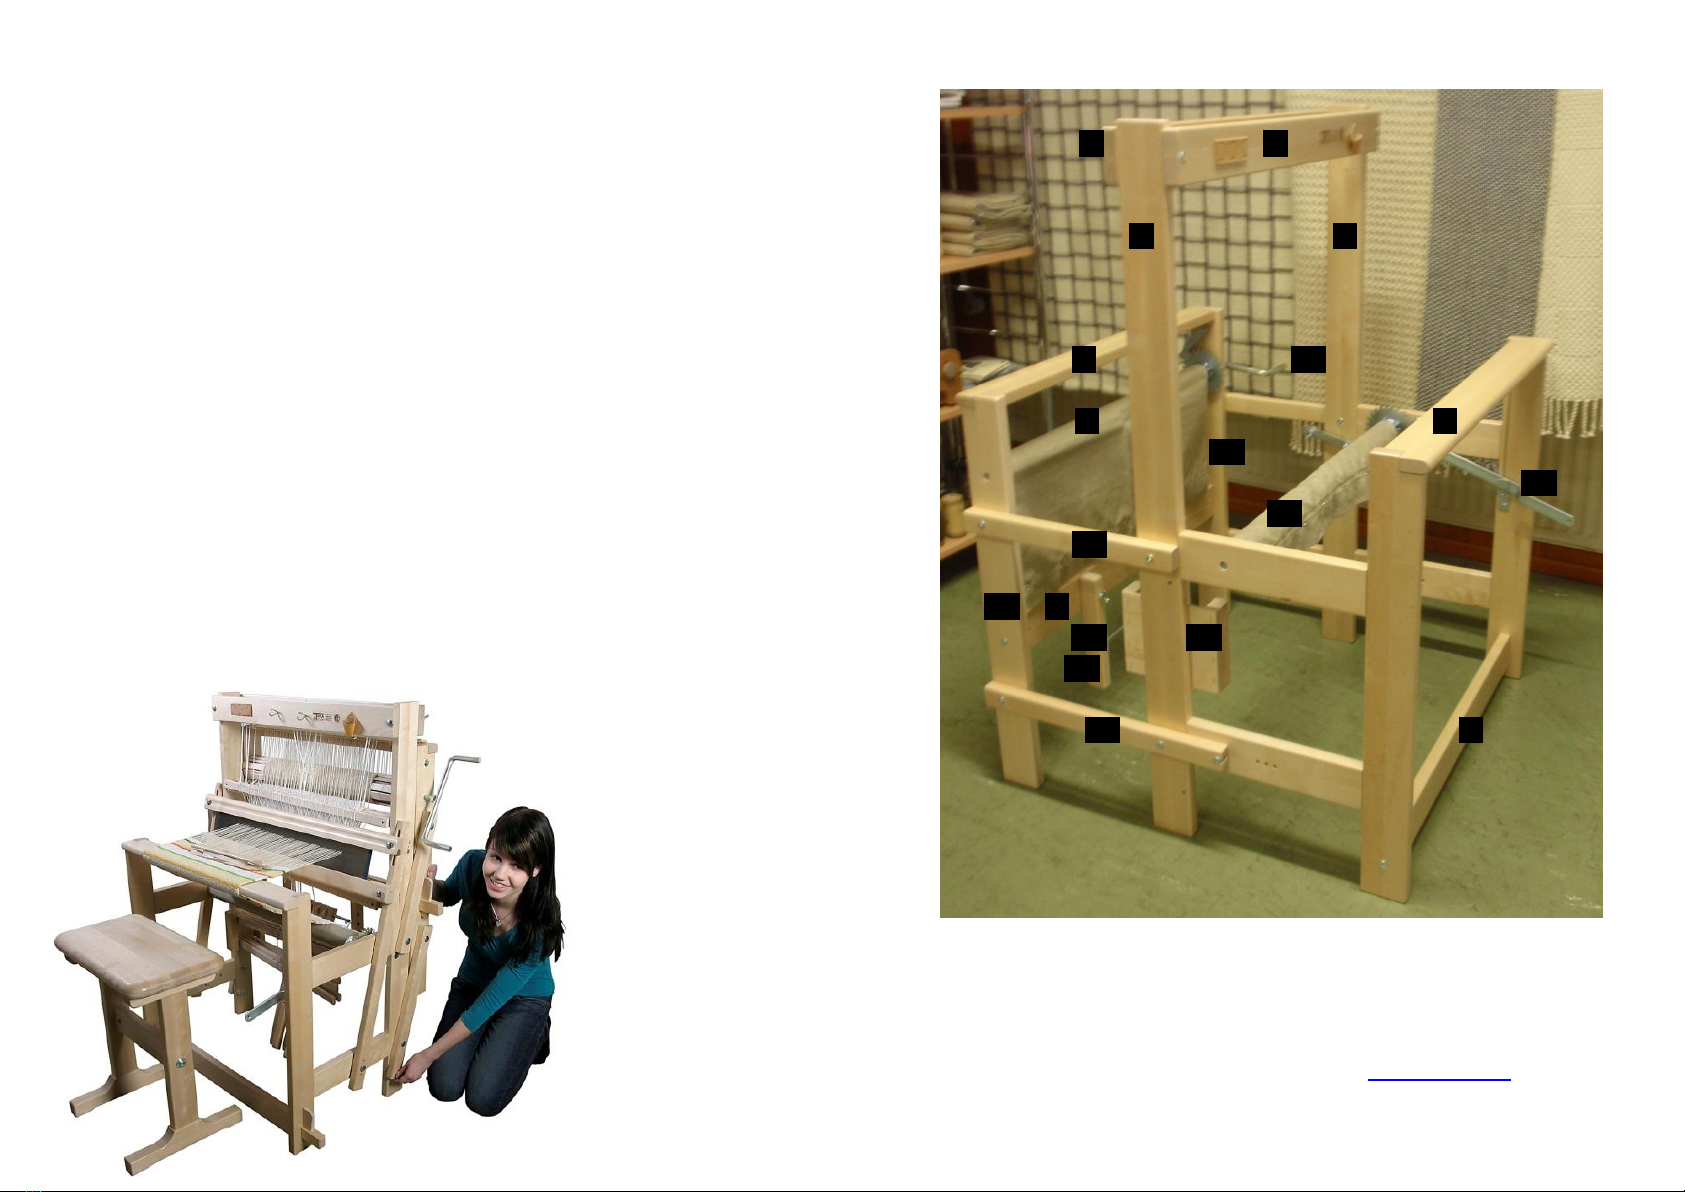
Assembly of the Laila loom:
1. Fasten the treadle holders (25) on the back rail
(4) with two step bolts (B) 6x75 mm. Put the treadle
rod (24) in place with the head without hole first
and lock with a cotter pin. The treadle holders have
several holes for adjusting the height of the
treadles. The second hole from above is usually
used.
(4)
(25) (25)
(24)
(24)
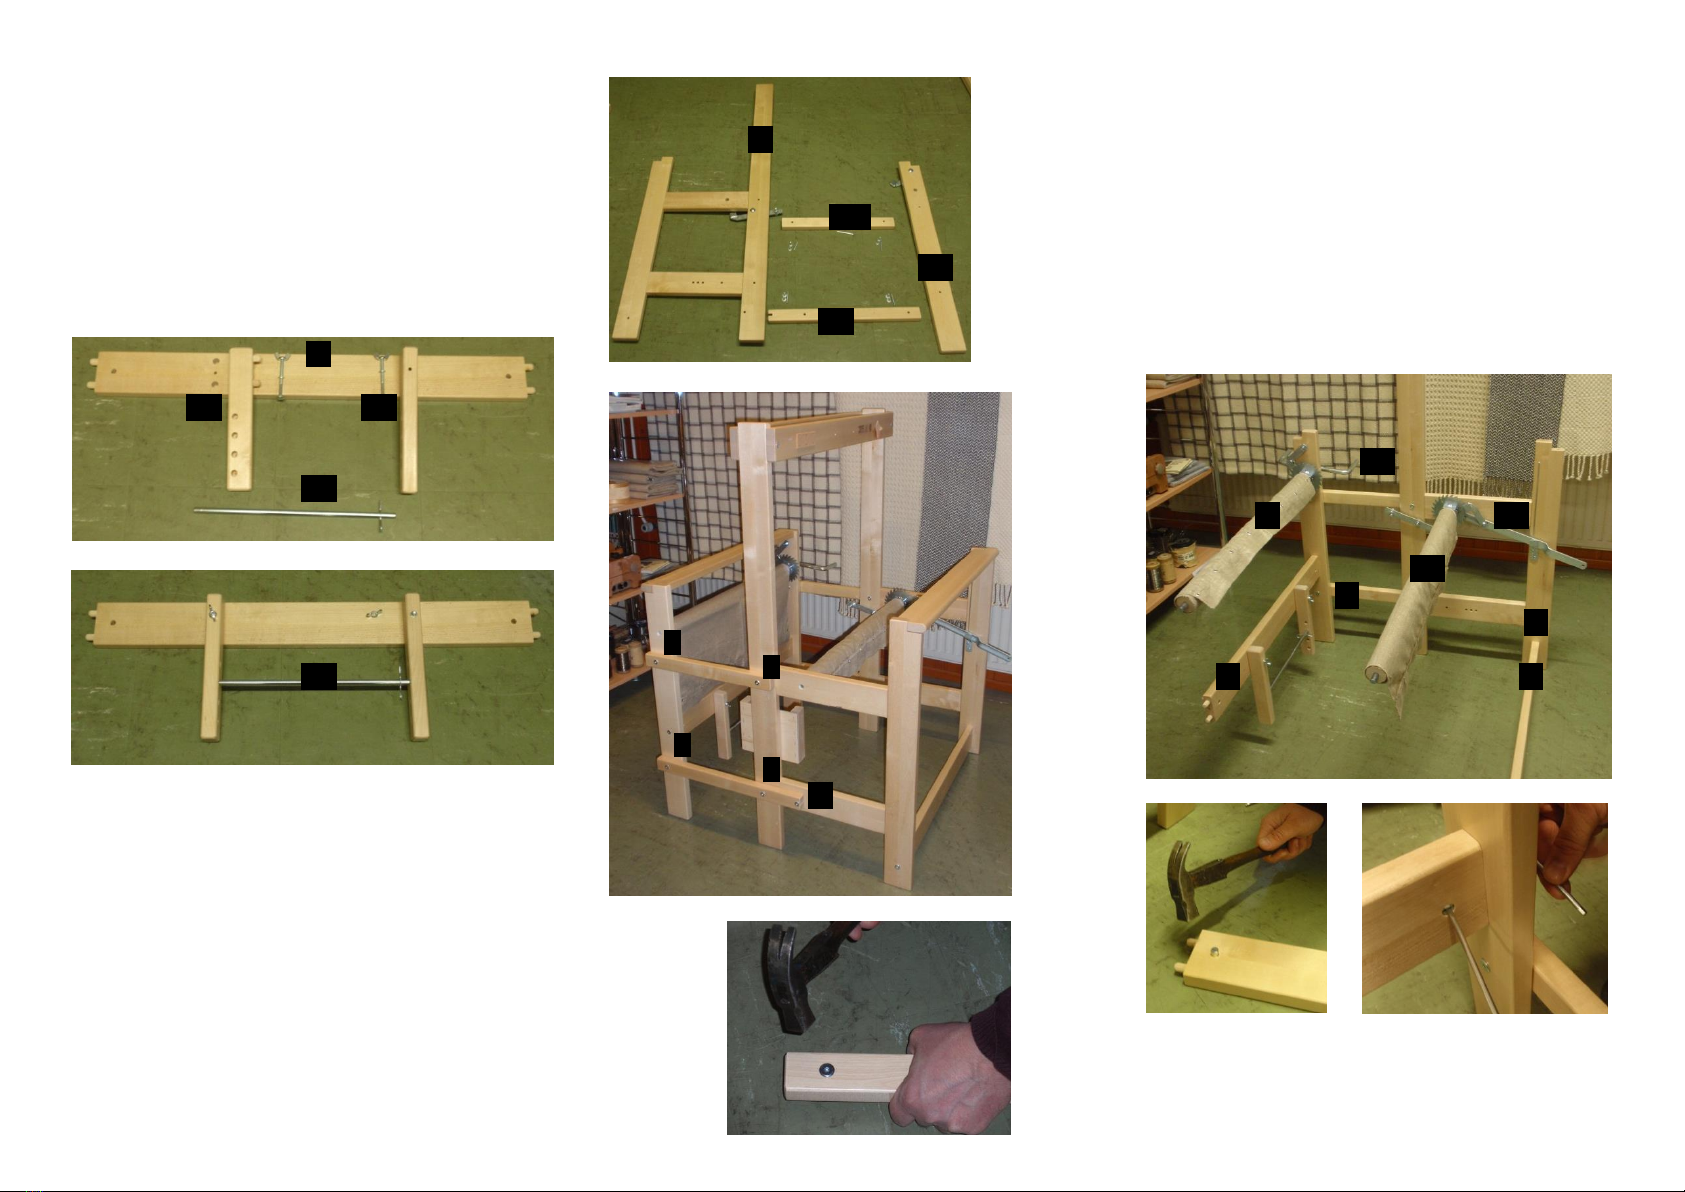
2. Fasten parts (30) and (29) to the sides of the
loom with 8 furniture bolts (F) 6x40 mm (= sleeve
nut + threaded rod + sleeve nut) and 2 step bolts
(B): Fasten part (30) with one furniture bolt and
part (29) with one furniture bolt and one step bolt
(B) to the right side of the loom (2). Fasten the
back leg (31) to parts (29) and (30) with one
furniture bolt each. Do the same with the left side
of the loom (1). Make sure that you bolt the right
back leg to the right side and the left back leg to the
left side.
(2)
(30)
(31)
(29)
(B)
Hammer
the sleeve
nuts into
the wood!
3. Fasten the lower front rail (3) and the lower back
rail (4) on the right side of the loom (2) with 2
furniture bolts (D) 6x60 mm (= sleeve nut +
threaded rod + barrel nut (*)).
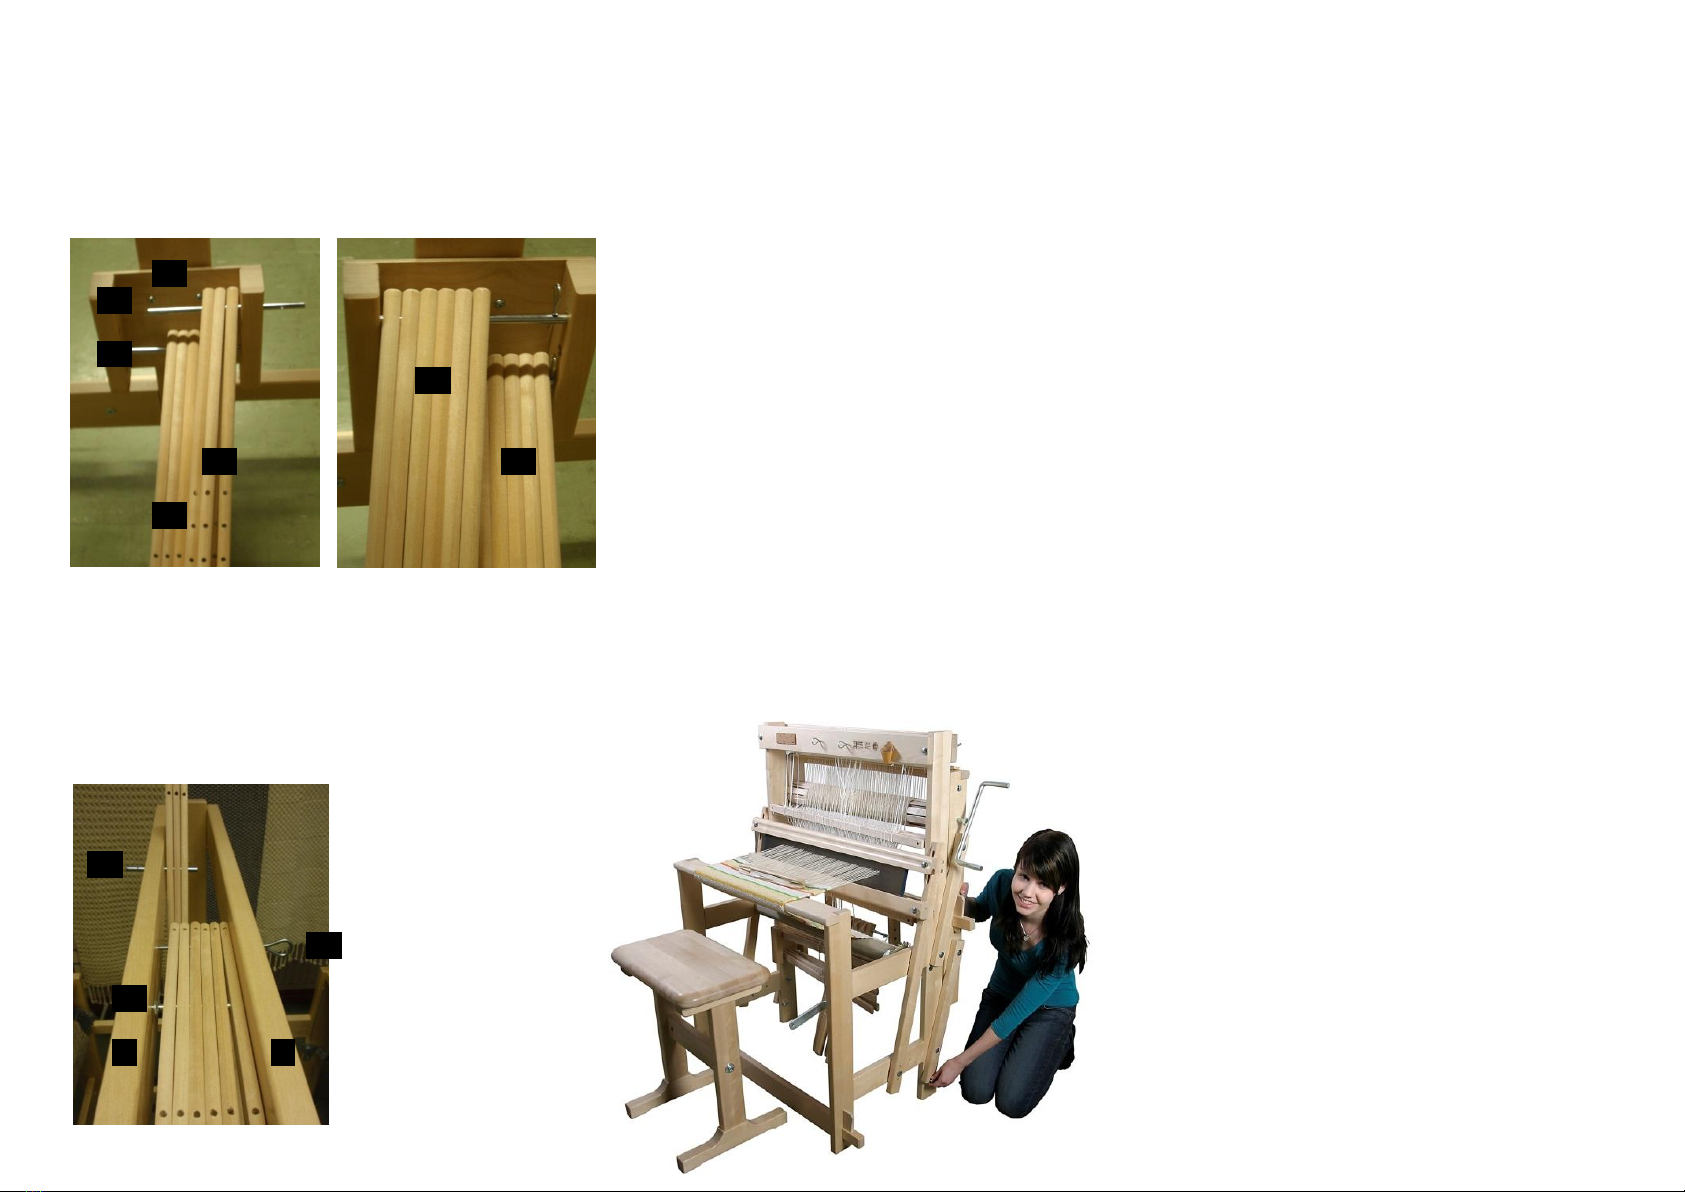
Put the warp beam (9) in place in the right back leg
and turn the crank (10) in place. Put the lever of the
cloth beam release (12) on the axle of the cloth
beam (11) before setting the cloth beam in place on
the right side of the loom. The cloth beam stays in
place when you set the hook on the cogwheel.
(10)
(9) (12)
(11)
(*)
(*)
(4) (3)
(*) = sleeve nut + threaded rod + barrel nut
Hammer the barrel nut in place. Set the position
with a screwdriver.

4. Put the left side (1) in place carefully. Fasten the
front rail (3) and the back rail (4) on the left side of
the loom (1) with furniture bolts (D) 6 x 60 mm (=
sleeve nut + threaded rod + barrel nut (*)).
(1) (2)
(9)
(11)
(4)
(*)
(3)
(*)
(*) = sleeve nut + threaded rod + barrel nut
Hammer the barrel nut in place. Set the position
with a screwdriver.
5. Fasten the upper rails (7) and (8) to the left side
(1) and the right side (2) of the loom. The wooden
dowels (K) are already in place. Fasten the parts
with 2 long furniture bolts (H) 6 x 120 mm (= sleeve
nut + threaded rod + sleeve nut). The same bolt
fastens both the front and the back part to the side.
6. Set the wooden dowels (J) in the holes of the
front legs and put the breast beam (5) in place. Do
the same with the back legs and the back beam (6).
(5)
7. Assemble the beater on the floor. Fasten the
beater top (26) to the beater legs (28) with two
step bolts (C). Fasten the beater race (27) to the
beater legs (28) with furniture bolts (H) 6x60 mm (=
sleeve nut + threaded rod + sleeve nut).
(26)
(27)
(28) (28)
Put the beater in place and fasten the beater to the
loom with the 2 beater rods €6x45 mm (see 16.)
The height and the distance of the beater can be
adjusted. The middle holes are often used.
8. Remove the cotter pin from the treadle rod (24)
and put the treadles (23) and the treadle spacers (I)
in place. Lock the rod with the cotter pin.
(23)

9. Put the rods for the lams (21) in their holes in the
box for the side lams (22) the head without holes
first. Set the upper lams (19) on the upper rod and
the lower lams (20) on the lower rod. Lock the rods
with cotter pins.
(22)
(21)
(21)
(19)
(19) (20)
(20)
10. Put the rods for the jacks (16) in the outer holes
of the upper back rail (8) the heads without holes
first. Put the jacks (15) in place (the rod goes in the
middle hole). Lock the rods with cotter pins. Fit the
locking rods (17) in place in the holes in the upper
front rails (7).
(16)
(17)
(16)
(8) (7)
11. Tighten the bolts. This should be done every
now and then, for the bolts may loosen during
weaving.
Now the Laila loom is assembled and you may start
preparing the loom for weaving!
12. Folding the Laila loom:
The Laila loom can be folded even with the warp in
place, so it can be stored in a small space while
waiting for weaving. Tighten or loosen the warp
when needed.
a. At first loosen the furniture bolts on the
lower and upper joint parts (29 & 30).
b. Remove the step bolts in the front of the
lower joint parts (29).
c. Fold the loom by lifting the warp beam (9).
d. Put the step bolts in their new places in the
loom sides and screw on the wing nuts.
HAPPY WEAVING!
HAH
Other Toika Weaving manuals