Toyota JAT810 User manual

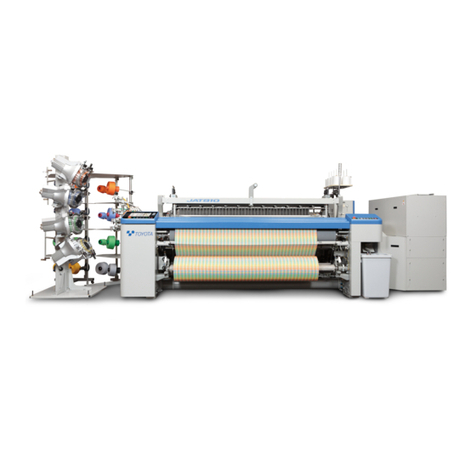
TOYOTA AIR JET
WEAVING MACHINE
Towel Loom
Model JAT810
Thank you for purchasing the JAT810 Air Jet Weaving Machine.
This instruction manual describes the correct installation, operating principles, function, adjustment, and maintenance of
the JAT810 motions, all of which should be familiar to all personnel concerned.
Before operating, adjusting, or maintaining the JAT810, be sure to read this manual carefully to understand the JAT810.
Introduction:
This manual is edited separately to provide instructions for towel looms. It consists of Machine and
Electrical Parts. For items not covered herein, refer to the “Instruction Manual” for the standard looms
(hereafter called Standard Machine “Instruction Manual”.)
Especially for matters related to safety, please first read Section S of the Standard
Machine “Instruction Manual”.
As to the contents of the items described in both of the two above-said manuals, give priority to this
towel manual.
Specifications, operating instructions, and dimensions in this manual are subject to change for improvements without
prior notice.
TOYOTA shall take no responsibility for loss, damage, expense or claims for bodily injury or property damage arising
from incorrect usage which is not in accordance with the instructions given in this manual.
In no event will TOYOTA be liable for products resulting from the use of this machine.

Contents
M1. Preparation for Setting ㌀㌀㌀㌀㌀㌀㌀㌀㌀㌀㌀㌀㌀㌀㌀㌀㌀㌀㌀㌀㌀㌀㌀㌀㌀㌀㌀㌀㌀㌀㌀㌀㌀㌀㌀㌀㌀㌀㌀㌀㌀㌀㌀㌀㌀㌀㌀㌀㌀㌀㌀㌀㌀㌀㌀㌀㌀㌀㌀㌀㌀㌀㌀㌀㌀㌀㌀㌀㌀㌀㌀㌀㌀㌀㌀㌀㌀㌀㌀㌀㌀㌀㌀㌀㌀㌀㌀㌀㌀㌀㌀㌀㌀㌀㌀㌀㌀㌀㌀㌀㌀㌀㌀㌀㌀㌀㌀㌀㌀㌀㌀
1
[1] Yarn Beam Installation㌀㌀㌀㌀㌀㌀㌀㌀㌀㌀㌀㌀㌀㌀㌀㌀㌀㌀㌀㌀㌀㌀㌀㌀㌀㌀㌀㌀㌀㌀㌀㌀㌀㌀㌀㌀㌀㌀㌀㌀㌀㌀㌀㌀㌀㌀㌀㌀㌀㌀㌀㌀㌀㌀㌀㌀㌀㌀㌀㌀㌀㌀㌀㌀㌀㌀㌀㌀㌀㌀㌀㌀㌀㌀㌀㌀㌀㌀㌀㌀㌀㌀㌀㌀㌀㌀㌀㌀㌀㌀㌀㌀㌀㌀㌀㌀㌀㌀㌀㌀㌀㌀㌀㌀㌀㌀㌀㌀㌀㌀
1
[1.1] Gland beam installation ㌀㌀㌀㌀㌀㌀㌀㌀㌀㌀㌀㌀㌀㌀㌀㌀㌀㌀㌀㌀㌀㌀㌀㌀㌀㌀㌀㌀㌀㌀㌀㌀㌀㌀㌀㌀㌀㌀㌀㌀㌀㌀㌀㌀㌀㌀㌀㌀㌀㌀㌀㌀㌀㌀㌀㌀㌀㌀㌀㌀㌀㌀㌀㌀㌀㌀㌀㌀㌀㌀㌀㌀㌀㌀㌀㌀㌀㌀㌀㌀㌀㌀㌀㌀㌀㌀㌀㌀㌀㌀㌀㌀㌀㌀㌀㌀㌀㌀㌀
1
[1.2] Pile beam installation㌀㌀㌀㌀㌀㌀㌀㌀㌀㌀㌀㌀㌀㌀㌀㌀㌀㌀㌀㌀㌀㌀㌀㌀㌀㌀㌀㌀㌀㌀㌀㌀㌀㌀㌀㌀㌀㌀㌀㌀㌀㌀㌀㌀㌀㌀㌀㌀㌀㌀㌀㌀㌀㌀㌀㌀㌀㌀㌀㌀㌀㌀㌀㌀㌀㌀㌀㌀㌀㌀㌀㌀㌀㌀㌀㌀㌀㌀㌀㌀㌀㌀㌀㌀㌀㌀㌀㌀㌀㌀㌀㌀㌀㌀㌀㌀㌀㌀㌀㌀㌀㌀㌀
3
[1.3] Bearing installation㌀㌀㌀㌀㌀㌀㌀㌀㌀㌀㌀㌀㌀㌀㌀㌀㌀㌀㌀㌀㌀㌀㌀㌀㌀㌀㌀㌀㌀㌀㌀㌀㌀㌀㌀㌀㌀㌀㌀㌀㌀㌀㌀㌀㌀㌀㌀㌀㌀㌀㌀㌀㌀㌀㌀㌀㌀㌀㌀㌀㌀㌀㌀㌀㌀㌀㌀㌀㌀㌀㌀㌀㌀㌀㌀㌀㌀㌀㌀㌀㌀㌀㌀㌀㌀㌀㌀㌀㌀㌀㌀㌀㌀㌀㌀㌀㌀㌀㌀㌀㌀㌀㌀㌀㌀㌀
6
[2] Preparation of the Beam ㌀㌀㌀㌀㌀㌀㌀㌀㌀㌀㌀㌀㌀㌀㌀㌀㌀㌀㌀㌀㌀㌀㌀㌀㌀㌀㌀㌀㌀㌀㌀㌀㌀㌀㌀㌀㌀㌀㌀㌀㌀㌀㌀㌀㌀㌀㌀㌀㌀㌀㌀㌀㌀㌀㌀㌀㌀㌀㌀㌀㌀㌀㌀㌀㌀㌀㌀㌀㌀㌀㌀㌀㌀㌀㌀㌀㌀㌀㌀㌀㌀㌀㌀㌀㌀㌀㌀㌀㌀㌀㌀㌀㌀㌀㌀㌀㌀㌀㌀㌀㌀㌀㌀㌀㌀㌀㌀
7
[2.1] Preparation of gland beam ㌀㌀㌀㌀㌀㌀㌀㌀㌀㌀㌀㌀㌀㌀㌀㌀㌀㌀㌀㌀㌀㌀㌀㌀㌀㌀㌀㌀㌀㌀㌀㌀㌀㌀㌀㌀㌀㌀㌀㌀㌀㌀㌀㌀㌀㌀㌀㌀㌀㌀㌀㌀㌀㌀㌀㌀㌀㌀㌀㌀㌀㌀㌀㌀㌀㌀㌀㌀㌀㌀㌀㌀㌀㌀㌀㌀㌀㌀㌀㌀㌀㌀㌀㌀㌀㌀㌀㌀㌀㌀㌀㌀㌀㌀㌀
7
[2.2] Preparation of pile beam ㌀㌀㌀㌀㌀㌀㌀㌀㌀㌀㌀㌀㌀㌀㌀㌀㌀㌀㌀㌀㌀㌀㌀㌀㌀㌀㌀㌀㌀㌀㌀㌀㌀㌀㌀㌀㌀㌀㌀㌀㌀㌀㌀㌀㌀㌀㌀㌀㌀㌀㌀㌀㌀㌀㌀㌀㌀㌀㌀㌀㌀㌀㌀㌀㌀㌀㌀㌀㌀㌀㌀㌀㌀㌀㌀㌀㌀㌀㌀㌀㌀㌀㌀㌀㌀㌀㌀㌀㌀㌀㌀㌀㌀㌀㌀㌀㌀㌀
7
[3] How to Run the Warps and Woven Fabric Through㌀㌀㌀㌀㌀㌀㌀㌀㌀㌀㌀㌀㌀㌀㌀㌀㌀㌀㌀㌀㌀㌀㌀㌀㌀㌀㌀㌀㌀㌀㌀㌀㌀㌀㌀㌀㌀㌀㌀㌀㌀㌀㌀㌀㌀㌀㌀㌀㌀㌀㌀㌀㌀㌀㌀㌀㌀㌀㌀㌀㌀㌀㌀㌀㌀㌀㌀㌀㌀㌀
8
[4] How to Remove/Reinstall the P-tension Shaft forEasier New Fabric Weaving ㌀㌀㌀㌀㌀㌀㌀㌀㌀㌀㌀㌀㌀㌀㌀㌀㌀㌀㌀㌀㌀㌀㌀㌀㌀㌀㌀㌀㌀㌀㌀㌀
9
M2. Shedding Motion㌀㌀㌀㌀㌀㌀㌀㌀㌀㌀㌀㌀㌀㌀㌀㌀㌀㌀㌀㌀㌀㌀㌀㌀㌀㌀㌀㌀㌀㌀㌀㌀㌀㌀㌀㌀㌀㌀㌀㌀㌀㌀㌀㌀㌀㌀㌀㌀㌀㌀㌀㌀㌀㌀㌀㌀㌀㌀㌀㌀㌀㌀㌀㌀㌀㌀㌀㌀㌀㌀㌀㌀㌀㌀㌀㌀㌀㌀㌀㌀㌀㌀㌀㌀㌀㌀㌀㌀㌀㌀㌀㌀㌀㌀㌀㌀㌀㌀㌀㌀㌀㌀㌀㌀㌀㌀㌀㌀㌀㌀㌀㌀㌀㌀㌀㌀㌀㌀
10
[1] Dobby Shedding Specifications ㌀㌀㌀㌀㌀㌀㌀㌀㌀㌀㌀㌀㌀㌀㌀㌀㌀㌀㌀㌀㌀㌀㌀㌀㌀㌀㌀㌀㌀㌀㌀㌀㌀㌀㌀㌀㌀㌀㌀㌀㌀㌀㌀㌀㌀㌀㌀㌀㌀㌀㌀㌀㌀㌀㌀㌀㌀㌀㌀㌀㌀㌀㌀㌀㌀㌀㌀㌀㌀㌀㌀㌀㌀㌀㌀㌀㌀㌀㌀㌀㌀㌀㌀㌀㌀㌀㌀㌀㌀㌀㌀㌀㌀㌀㌀
10
[1.1] Setting the Heald Frame Heightand Shed Size ㌀㌀㌀㌀㌀㌀㌀㌀㌀㌀㌀㌀㌀㌀㌀㌀㌀㌀㌀㌀㌀㌀㌀㌀㌀㌀㌀㌀㌀㌀㌀㌀㌀㌀㌀㌀㌀㌀㌀㌀㌀㌀㌀㌀㌀㌀㌀㌀㌀㌀㌀㌀㌀㌀㌀㌀㌀㌀㌀㌀㌀㌀㌀㌀
10
[2] Electronic Shedding Specifications ㌀㌀㌀㌀㌀㌀㌀㌀㌀㌀㌀㌀㌀㌀㌀㌀㌀㌀㌀㌀㌀㌀㌀㌀㌀㌀㌀㌀㌀㌀㌀㌀㌀㌀㌀㌀㌀㌀㌀㌀㌀㌀㌀㌀㌀㌀㌀㌀㌀㌀㌀㌀㌀㌀㌀㌀㌀㌀㌀㌀㌀㌀㌀㌀㌀㌀㌀㌀㌀㌀㌀㌀㌀㌀㌀㌀㌀㌀㌀㌀㌀㌀㌀㌀㌀㌀㌀㌀㌀㌀
12
[2.1] Setting the Heald Frame Height and Shedding Amount ㌀㌀㌀㌀㌀㌀㌀㌀㌀㌀㌀㌀㌀㌀㌀㌀㌀㌀㌀㌀㌀㌀㌀㌀㌀㌀㌀㌀㌀㌀㌀㌀㌀㌀㌀㌀㌀㌀㌀㌀㌀㌀㌀㌀㌀㌀㌀㌀㌀㌀㌀㌀
12
[3] Jacquard Shedding Specifications ㌀㌀㌀㌀㌀㌀㌀㌀㌀㌀㌀㌀㌀㌀㌀㌀㌀㌀㌀㌀㌀㌀㌀㌀㌀㌀㌀㌀㌀㌀㌀㌀㌀㌀㌀㌀㌀㌀㌀㌀㌀㌀㌀㌀㌀㌀㌀㌀㌀㌀㌀㌀㌀㌀㌀㌀㌀㌀㌀㌀㌀㌀㌀㌀㌀㌀㌀㌀㌀㌀㌀㌀㌀㌀㌀㌀㌀㌀㌀㌀㌀㌀㌀㌀㌀㌀㌀㌀㌀㌀㌀
13
[3.1] Height of Top Rail Bracket㌀㌀㌀㌀㌀㌀㌀㌀㌀㌀㌀㌀㌀㌀㌀㌀㌀㌀㌀㌀㌀㌀㌀㌀㌀㌀㌀㌀㌀㌀㌀㌀㌀㌀㌀㌀㌀㌀㌀㌀㌀㌀㌀㌀㌀㌀㌀㌀㌀㌀㌀㌀㌀㌀㌀㌀㌀㌀㌀㌀㌀㌀㌀㌀㌀㌀㌀㌀㌀㌀㌀㌀㌀㌀㌀㌀㌀㌀㌀㌀㌀㌀㌀㌀㌀㌀㌀㌀㌀㌀㌀㌀㌀㌀
13
[3.2] Hanging of Draw Yarn ㌀㌀㌀㌀㌀㌀㌀㌀㌀㌀㌀㌀㌀㌀㌀㌀㌀㌀㌀㌀㌀㌀㌀㌀㌀㌀㌀㌀㌀㌀㌀㌀㌀㌀㌀㌀㌀㌀㌀㌀㌀㌀㌀㌀㌀㌀㌀㌀㌀㌀㌀㌀㌀㌀㌀㌀㌀㌀㌀㌀㌀㌀㌀㌀㌀㌀㌀㌀㌀㌀㌀㌀㌀㌀㌀㌀㌀㌀㌀㌀㌀㌀㌀㌀㌀㌀㌀㌀㌀㌀㌀㌀㌀㌀㌀㌀㌀㌀㌀
13
M3. Temple ㌀㌀㌀㌀㌀㌀㌀㌀㌀㌀㌀㌀㌀㌀㌀㌀㌀㌀㌀㌀㌀㌀㌀㌀㌀㌀㌀㌀㌀㌀㌀㌀㌀㌀㌀㌀㌀㌀㌀㌀㌀㌀㌀㌀㌀㌀㌀㌀㌀㌀㌀㌀㌀㌀㌀㌀㌀㌀㌀㌀㌀㌀㌀㌀㌀㌀㌀㌀㌀㌀㌀㌀㌀㌀㌀㌀㌀㌀㌀㌀㌀㌀㌀㌀㌀㌀㌀㌀㌀㌀㌀㌀㌀㌀㌀㌀㌀㌀㌀㌀㌀㌀㌀㌀㌀㌀㌀㌀㌀㌀㌀㌀㌀㌀㌀㌀㌀㌀㌀㌀㌀㌀㌀㌀㌀㌀㌀㌀㌀㌀㌀
14
[1] Longitudinal Position of the Temple㌀㌀㌀㌀㌀㌀㌀㌀㌀㌀㌀㌀㌀㌀㌀㌀㌀㌀㌀㌀㌀㌀㌀㌀㌀㌀㌀㌀㌀㌀㌀㌀㌀㌀㌀㌀㌀㌀㌀㌀㌀㌀㌀㌀㌀㌀㌀㌀㌀㌀㌀㌀㌀㌀㌀㌀㌀㌀㌀㌀㌀㌀㌀㌀㌀㌀㌀㌀㌀㌀㌀㌀㌀㌀㌀㌀㌀㌀㌀㌀㌀㌀㌀㌀㌀㌀㌀㌀㌀㌀
14
[2] Crosswise Position of the Temple ㌀㌀㌀㌀㌀㌀㌀㌀㌀㌀㌀㌀㌀㌀㌀㌀㌀㌀㌀㌀㌀㌀㌀㌀㌀㌀㌀㌀㌀㌀㌀㌀㌀㌀㌀㌀㌀㌀㌀㌀㌀㌀㌀㌀㌀㌀㌀㌀㌀㌀㌀㌀㌀㌀㌀㌀㌀㌀㌀㌀㌀㌀㌀㌀㌀㌀㌀㌀㌀㌀㌀㌀㌀㌀㌀㌀㌀㌀㌀㌀㌀㌀㌀㌀㌀㌀㌀㌀㌀㌀㌀㌀
15
[2.1] Left-hand side of the loom ㌀㌀㌀㌀㌀㌀㌀㌀㌀㌀㌀㌀㌀㌀㌀㌀㌀㌀㌀㌀㌀㌀㌀㌀㌀㌀㌀㌀㌀㌀㌀㌀㌀㌀㌀㌀㌀㌀㌀㌀㌀㌀㌀㌀㌀㌀㌀㌀㌀㌀㌀㌀㌀㌀㌀㌀㌀㌀㌀㌀㌀㌀㌀㌀㌀㌀㌀㌀㌀㌀㌀㌀㌀㌀㌀㌀㌀㌀㌀㌀㌀㌀㌀㌀㌀㌀㌀㌀㌀㌀㌀㌀㌀㌀
15
[2.2] Right-hand side of the loom㌀㌀㌀㌀㌀㌀㌀㌀㌀㌀㌀㌀㌀㌀㌀㌀㌀㌀㌀㌀㌀㌀㌀㌀㌀㌀㌀㌀㌀㌀㌀㌀㌀㌀㌀㌀㌀㌀㌀㌀㌀㌀㌀㌀㌀㌀㌀㌀㌀㌀㌀㌀㌀㌀㌀㌀㌀㌀㌀㌀㌀㌀㌀㌀㌀㌀㌀㌀㌀㌀㌀㌀㌀㌀㌀㌀㌀㌀㌀㌀㌀㌀㌀㌀㌀㌀㌀㌀㌀㌀㌀㌀
15
[3] Vertical Position of the Temple㌀㌀㌀㌀㌀㌀㌀㌀㌀㌀㌀㌀㌀㌀㌀㌀㌀㌀㌀㌀㌀㌀㌀㌀㌀㌀㌀㌀㌀㌀㌀㌀㌀㌀㌀㌀㌀㌀㌀㌀㌀㌀㌀㌀㌀㌀㌀㌀㌀㌀㌀㌀㌀㌀㌀㌀㌀㌀㌀㌀㌀㌀㌀㌀㌀㌀㌀㌀㌀㌀㌀㌀㌀㌀㌀㌀㌀㌀㌀㌀㌀㌀㌀㌀㌀㌀㌀㌀㌀㌀㌀㌀㌀㌀㌀㌀㌀
16
[4] Standard Setting of the Temple Ring ㌀㌀㌀㌀㌀㌀㌀㌀㌀㌀㌀㌀㌀㌀㌀㌀㌀㌀㌀㌀㌀㌀㌀㌀㌀㌀㌀㌀㌀㌀㌀㌀㌀㌀㌀㌀㌀㌀㌀㌀㌀㌀㌀㌀㌀㌀㌀㌀㌀㌀㌀㌀㌀㌀㌀㌀㌀㌀㌀㌀㌀㌀㌀㌀㌀㌀㌀㌀㌀㌀㌀㌀㌀㌀㌀㌀㌀㌀㌀㌀㌀㌀㌀㌀㌀㌀㌀㌀
16
[5] Vertical Position of the Temple Cover ㌀㌀㌀㌀㌀㌀㌀㌀㌀㌀㌀㌀㌀㌀㌀㌀㌀㌀㌀㌀㌀㌀㌀㌀㌀㌀㌀㌀㌀㌀㌀㌀㌀㌀㌀㌀㌀㌀㌀㌀㌀㌀㌀㌀㌀㌀㌀㌀㌀㌀㌀㌀㌀㌀㌀㌀㌀㌀㌀㌀㌀㌀㌀㌀㌀㌀㌀㌀㌀㌀㌀㌀㌀㌀㌀㌀㌀㌀㌀㌀㌀㌀㌀㌀㌀㌀㌀
17
[6] Adjustment of Fell Plate Position㌀㌀㌀㌀㌀㌀㌀㌀㌀㌀㌀㌀㌀㌀㌀㌀㌀㌀㌀㌀㌀㌀㌀㌀㌀㌀㌀㌀㌀㌀㌀㌀㌀㌀㌀㌀㌀㌀㌀㌀㌀㌀㌀㌀㌀㌀㌀㌀㌀㌀㌀㌀㌀㌀㌀㌀㌀㌀㌀㌀㌀㌀㌀㌀㌀㌀㌀㌀㌀㌀㌀㌀㌀㌀㌀㌀㌀㌀㌀㌀㌀㌀㌀㌀㌀㌀㌀㌀㌀㌀㌀㌀㌀㌀
17
[7] Periodic Maintenance of Temple Base ㌀㌀㌀㌀㌀㌀㌀㌀㌀㌀㌀㌀㌀㌀㌀㌀㌀㌀㌀㌀㌀㌀㌀㌀㌀㌀㌀㌀㌀㌀㌀㌀㌀㌀㌀㌀㌀㌀㌀㌀㌀㌀㌀㌀㌀㌀㌀㌀㌀㌀㌀㌀㌀㌀㌀㌀㌀㌀㌀㌀㌀㌀㌀㌀㌀㌀㌀㌀㌀㌀㌀㌀㌀㌀㌀㌀㌀㌀㌀㌀㌀㌀㌀㌀㌀
18
M4. Selvaging Machine ㌀㌀㌀㌀㌀㌀㌀㌀㌀㌀㌀㌀㌀㌀㌀㌀㌀㌀㌀㌀㌀㌀㌀㌀㌀㌀㌀㌀㌀㌀㌀㌀㌀㌀㌀㌀㌀㌀㌀㌀㌀㌀㌀㌀㌀㌀㌀㌀㌀㌀㌀㌀㌀㌀㌀㌀㌀㌀㌀㌀㌀㌀㌀㌀㌀㌀㌀㌀㌀㌀㌀㌀㌀㌀㌀㌀㌀㌀㌀㌀㌀㌀㌀㌀㌀㌀㌀㌀㌀㌀㌀㌀㌀㌀㌀㌀㌀㌀㌀㌀㌀㌀㌀㌀㌀㌀㌀㌀㌀㌀㌀㌀㌀㌀
19
[1] Leno Weave with Two Clockers ㌀㌀㌀㌀㌀㌀㌀㌀㌀㌀㌀㌀㌀㌀㌀㌀㌀㌀㌀㌀㌀㌀㌀㌀㌀㌀㌀㌀㌀㌀㌀㌀㌀㌀㌀㌀㌀㌀㌀㌀㌀㌀㌀㌀㌀㌀㌀㌀㌀㌀㌀㌀㌀㌀㌀㌀㌀㌀㌀㌀㌀㌀㌀㌀㌀㌀㌀㌀㌀㌀㌀㌀㌀㌀㌀㌀㌀㌀㌀㌀㌀㌀㌀㌀㌀㌀㌀㌀㌀㌀㌀㌀㌀㌀㌀
19
[1.1] Installation of Clocker ㌀㌀㌀㌀㌀㌀㌀㌀㌀㌀㌀㌀㌀㌀㌀㌀㌀㌀㌀㌀㌀㌀㌀㌀㌀㌀㌀㌀㌀㌀㌀㌀㌀㌀㌀㌀㌀㌀㌀㌀㌀㌀㌀㌀㌀㌀㌀㌀㌀㌀㌀㌀㌀㌀㌀㌀㌀㌀㌀㌀㌀㌀㌀㌀㌀㌀㌀㌀㌀㌀㌀㌀㌀㌀㌀㌀㌀㌀㌀㌀㌀㌀㌀㌀㌀㌀㌀㌀㌀㌀㌀㌀㌀㌀㌀㌀㌀㌀㌀㌀
20
[1.2] How to Run the Selvage Yarns ㌀㌀㌀㌀㌀㌀㌀㌀㌀㌀㌀㌀㌀㌀㌀㌀㌀㌀㌀㌀㌀㌀㌀㌀㌀㌀㌀㌀㌀㌀㌀㌀㌀㌀㌀㌀㌀㌀㌀㌀㌀㌀㌀㌀㌀㌀㌀㌀㌀㌀㌀㌀㌀㌀㌀㌀㌀㌀㌀㌀㌀㌀㌀㌀㌀㌀㌀㌀㌀㌀㌀㌀㌀㌀㌀㌀㌀㌀㌀㌀㌀㌀㌀㌀㌀㌀㌀
21
[1.3] Yarns for Leno Weave SelvagingMotion㌀㌀㌀㌀㌀㌀㌀㌀㌀㌀㌀㌀㌀㌀㌀㌀㌀㌀㌀㌀㌀㌀㌀㌀㌀㌀㌀㌀㌀㌀㌀㌀㌀㌀㌀㌀㌀㌀㌀㌀㌀㌀㌀㌀㌀㌀㌀㌀㌀㌀㌀㌀㌀㌀㌀㌀㌀㌀㌀㌀㌀㌀㌀㌀㌀㌀㌀㌀㌀㌀㌀㌀㌀㌀
22
[2] Trimmed Selvage Motion ㌀㌀㌀㌀㌀㌀㌀㌀㌀㌀㌀㌀㌀㌀㌀㌀㌀㌀㌀㌀㌀㌀㌀㌀㌀㌀㌀㌀㌀㌀㌀㌀㌀㌀㌀㌀㌀㌀㌀㌀㌀㌀㌀㌀㌀㌀㌀㌀㌀㌀㌀㌀㌀㌀㌀㌀㌀㌀㌀㌀㌀㌀㌀㌀㌀㌀㌀㌀㌀㌀㌀㌀㌀㌀㌀㌀㌀㌀㌀㌀㌀㌀㌀㌀㌀㌀㌀㌀㌀㌀㌀㌀㌀㌀㌀㌀㌀㌀㌀㌀㌀㌀㌀㌀
23
[2.1] Installation, Adjustment, andPreparatory Operation ㌀㌀㌀㌀㌀㌀㌀㌀㌀㌀㌀㌀㌀㌀㌀㌀㌀㌀㌀㌀㌀㌀㌀㌀㌀㌀㌀㌀㌀㌀㌀㌀㌀㌀㌀㌀㌀㌀㌀㌀㌀㌀㌀㌀㌀㌀㌀㌀㌀㌀㌀㌀㌀㌀㌀㌀㌀
23
[3] Gripper㌀㌀㌀㌀㌀㌀㌀㌀㌀㌀㌀㌀㌀㌀㌀㌀㌀㌀㌀㌀㌀㌀㌀㌀㌀㌀㌀㌀㌀㌀㌀㌀㌀㌀㌀㌀㌀㌀㌀㌀㌀㌀㌀㌀㌀㌀㌀㌀㌀㌀㌀㌀㌀㌀㌀㌀㌀㌀㌀㌀㌀㌀㌀㌀㌀㌀㌀㌀㌀㌀㌀㌀㌀㌀㌀㌀㌀㌀㌀㌀㌀㌀㌀㌀㌀㌀㌀㌀㌀㌀㌀㌀㌀㌀㌀㌀㌀㌀㌀㌀㌀㌀㌀㌀㌀㌀㌀㌀㌀㌀㌀㌀㌀㌀㌀㌀㌀㌀㌀㌀㌀㌀㌀㌀㌀㌀㌀㌀㌀㌀
25
[3.1] Installation Adjustment ㌀㌀㌀㌀㌀㌀㌀㌀㌀㌀㌀㌀㌀㌀㌀㌀㌀㌀㌀㌀㌀㌀㌀㌀㌀㌀㌀㌀㌀㌀㌀㌀㌀㌀㌀㌀㌀㌀㌀㌀㌀㌀㌀㌀㌀㌀㌀㌀㌀㌀㌀㌀㌀㌀㌀㌀㌀㌀㌀㌀㌀㌀㌀㌀㌀㌀㌀㌀㌀㌀㌀㌀㌀㌀㌀㌀㌀㌀㌀㌀㌀㌀㌀㌀㌀㌀㌀㌀㌀㌀㌀㌀㌀㌀㌀㌀㌀㌀
25
M5. Pile Let-Off ㌀㌀㌀㌀㌀㌀㌀㌀㌀㌀㌀㌀㌀㌀㌀㌀㌀㌀㌀㌀㌀㌀㌀㌀㌀㌀㌀㌀㌀㌀㌀㌀㌀㌀㌀㌀㌀㌀㌀㌀㌀㌀㌀㌀㌀㌀㌀㌀㌀㌀㌀㌀㌀㌀㌀㌀㌀㌀㌀㌀㌀㌀㌀㌀㌀㌀㌀㌀㌀㌀㌀㌀㌀㌀㌀㌀㌀㌀㌀㌀㌀㌀㌀㌀㌀㌀㌀㌀㌀㌀㌀㌀㌀㌀㌀㌀㌀㌀㌀㌀㌀㌀㌀㌀㌀㌀㌀㌀㌀㌀㌀㌀㌀㌀㌀㌀㌀㌀㌀㌀㌀㌀㌀㌀㌀㌀
26
[1] Pile Let-off Mechanism ㌀㌀㌀㌀㌀㌀㌀㌀㌀㌀㌀㌀㌀㌀㌀㌀㌀㌀㌀㌀㌀㌀㌀㌀㌀㌀㌀㌀㌀㌀㌀㌀㌀㌀㌀㌀㌀㌀㌀㌀㌀㌀㌀㌀㌀㌀㌀㌀㌀㌀㌀㌀㌀㌀㌀㌀㌀㌀㌀㌀㌀㌀㌀㌀㌀㌀㌀㌀㌀㌀㌀㌀㌀㌀㌀㌀㌀㌀㌀㌀㌀㌀㌀㌀㌀㌀㌀㌀㌀㌀㌀㌀㌀㌀㌀㌀㌀㌀㌀㌀㌀㌀㌀㌀㌀㌀㌀
26
[2] Outline of Let-off Control ㌀㌀㌀㌀㌀㌀㌀㌀㌀㌀㌀㌀㌀㌀㌀㌀㌀㌀㌀㌀㌀㌀㌀㌀㌀㌀㌀㌀㌀㌀㌀㌀㌀㌀㌀㌀㌀㌀㌀㌀㌀㌀㌀㌀㌀㌀㌀㌀㌀㌀㌀㌀㌀㌀㌀㌀㌀㌀㌀㌀㌀㌀㌀㌀㌀㌀㌀㌀㌀㌀㌀㌀㌀㌀㌀㌀㌀㌀㌀㌀㌀㌀㌀㌀㌀㌀㌀㌀㌀㌀㌀㌀㌀㌀㌀㌀㌀㌀㌀㌀㌀㌀㌀㌀㌀
27
[3] Adjustment of Easing Roller ㌀㌀㌀㌀㌀㌀㌀㌀㌀㌀㌀㌀㌀㌀㌀㌀㌀㌀㌀㌀㌀㌀㌀㌀㌀㌀㌀㌀㌀㌀㌀㌀㌀㌀㌀㌀㌀㌀㌀㌀㌀㌀㌀㌀㌀㌀㌀㌀㌀㌀㌀㌀㌀㌀㌀㌀㌀㌀㌀㌀㌀㌀㌀㌀㌀㌀㌀㌀㌀㌀㌀㌀㌀㌀㌀㌀㌀㌀㌀㌀㌀㌀㌀㌀㌀㌀㌀㌀㌀㌀㌀㌀㌀㌀㌀㌀㌀㌀㌀㌀
27
[4] Adjustment of Electronic Terry Motion Type Let-off Pile Beam ㌀㌀㌀㌀㌀㌀㌀㌀㌀㌀㌀㌀㌀㌀㌀㌀㌀㌀㌀㌀㌀㌀㌀㌀㌀㌀㌀㌀㌀㌀㌀㌀㌀㌀㌀㌀㌀㌀㌀㌀㌀㌀㌀㌀㌀㌀㌀㌀㌀㌀㌀㌀
28
[5] Assembly of Pile tenser shaft㌀㌀㌀㌀㌀㌀㌀㌀㌀㌀㌀㌀㌀㌀㌀㌀㌀㌀㌀㌀㌀㌀㌀㌀㌀㌀㌀㌀㌀㌀㌀㌀㌀㌀㌀㌀㌀㌀㌀㌀㌀㌀㌀㌀㌀㌀㌀㌀㌀㌀㌀㌀㌀㌀㌀㌀㌀㌀㌀㌀㌀㌀㌀㌀㌀㌀㌀㌀㌀㌀㌀㌀㌀㌀㌀㌀㌀㌀㌀㌀㌀㌀㌀㌀㌀㌀㌀㌀㌀㌀㌀㌀㌀㌀㌀㌀㌀㌀㌀
29
M6. Torsion Back ㌀㌀㌀㌀㌀㌀㌀㌀㌀㌀㌀㌀㌀㌀㌀㌀㌀㌀㌀㌀㌀㌀㌀㌀㌀㌀㌀㌀㌀㌀㌀㌀㌀㌀㌀㌀㌀㌀㌀㌀㌀㌀㌀㌀㌀㌀㌀㌀㌀㌀㌀㌀㌀㌀㌀㌀㌀㌀㌀㌀㌀㌀㌀㌀㌀㌀㌀㌀㌀㌀㌀㌀㌀㌀㌀㌀㌀㌀㌀㌀㌀㌀㌀㌀㌀㌀㌀㌀㌀㌀㌀㌀㌀㌀㌀㌀㌀㌀㌀㌀㌀㌀㌀㌀㌀㌀㌀㌀㌀㌀㌀㌀㌀㌀㌀㌀㌀㌀㌀㌀㌀㌀㌀
31
[1] Advance Adjustment㌀㌀㌀㌀㌀㌀㌀㌀㌀㌀㌀㌀㌀㌀㌀㌀㌀㌀㌀㌀㌀㌀㌀㌀㌀㌀㌀㌀㌀㌀㌀㌀㌀㌀㌀㌀㌀㌀㌀㌀㌀㌀㌀㌀㌀㌀㌀㌀㌀㌀㌀㌀㌀㌀㌀㌀㌀㌀㌀㌀㌀㌀㌀㌀㌀㌀㌀㌀㌀㌀㌀㌀㌀㌀㌀㌀㌀㌀㌀㌀㌀㌀㌀㌀㌀㌀㌀㌀㌀㌀㌀㌀㌀㌀㌀㌀㌀㌀㌀㌀㌀㌀㌀㌀㌀㌀㌀㌀㌀㌀㌀
31
[1.1] Tentative Adjustment㌀㌀㌀㌀㌀㌀㌀㌀㌀㌀㌀㌀㌀㌀㌀㌀㌀㌀㌀㌀㌀㌀㌀㌀㌀㌀㌀㌀㌀㌀㌀㌀㌀㌀㌀㌀㌀㌀㌀㌀㌀㌀㌀㌀㌀㌀㌀㌀㌀㌀㌀㌀㌀㌀㌀㌀㌀㌀㌀㌀㌀㌀㌀㌀㌀㌀㌀㌀㌀㌀㌀㌀㌀㌀㌀㌀㌀㌀㌀㌀㌀㌀㌀㌀㌀㌀㌀㌀㌀㌀㌀㌀㌀㌀㌀㌀㌀㌀㌀㌀㌀
31
[2] Adjustment at the Change of Gland Warp Tension㌀㌀㌀㌀㌀㌀㌀㌀㌀㌀㌀㌀㌀㌀㌀㌀㌀㌀㌀㌀㌀㌀㌀㌀㌀㌀㌀㌀㌀㌀㌀㌀㌀㌀㌀㌀㌀㌀㌀㌀㌀㌀㌀㌀㌀㌀㌀㌀㌀㌀㌀㌀㌀㌀㌀㌀㌀㌀㌀㌀㌀㌀㌀㌀㌀㌀㌀㌀㌀
33
[3] Machine Stop or Disabled Operation due to Abnormal Tension㌀㌀㌀㌀㌀㌀㌀㌀㌀㌀㌀㌀㌀㌀㌀㌀㌀㌀㌀㌀㌀㌀㌀㌀㌀㌀㌀㌀㌀㌀㌀㌀㌀㌀㌀㌀㌀㌀㌀㌀㌀㌀㌀㌀㌀㌀㌀㌀㌀㌀㌀
33
[4] Height Adjustment ㌀㌀㌀㌀㌀㌀㌀㌀㌀㌀㌀㌀㌀㌀㌀㌀㌀㌀㌀㌀㌀㌀㌀㌀㌀㌀㌀㌀㌀㌀㌀㌀㌀㌀㌀㌀㌀㌀㌀㌀㌀㌀㌀㌀㌀㌀㌀㌀㌀㌀㌀㌀㌀㌀㌀㌀㌀㌀㌀㌀㌀㌀㌀㌀㌀㌀㌀㌀㌀㌀㌀㌀㌀㌀㌀㌀㌀㌀㌀㌀㌀㌀㌀㌀㌀㌀㌀㌀㌀㌀㌀㌀㌀㌀㌀㌀㌀㌀㌀㌀㌀㌀㌀㌀㌀㌀㌀㌀㌀㌀㌀㌀㌀㌀
34
M7. Warp Stop Device ㌀㌀㌀㌀㌀㌀㌀㌀㌀㌀㌀㌀㌀㌀㌀㌀㌀㌀㌀㌀㌀㌀㌀㌀㌀㌀㌀㌀㌀㌀㌀㌀㌀㌀㌀㌀㌀㌀㌀㌀㌀㌀㌀㌀㌀㌀㌀㌀㌀㌀㌀㌀㌀㌀㌀㌀㌀㌀㌀㌀㌀㌀㌀㌀㌀㌀㌀㌀㌀㌀㌀㌀㌀㌀㌀㌀㌀㌀㌀㌀㌀㌀㌀㌀㌀㌀㌀㌀㌀㌀㌀㌀㌀㌀㌀㌀㌀㌀㌀㌀㌀㌀㌀㌀㌀㌀㌀㌀㌀㌀㌀㌀㌀㌀㌀㌀
35
[1] Longitudinal Position ㌀㌀㌀㌀㌀㌀㌀㌀㌀㌀㌀㌀㌀㌀㌀㌀㌀㌀㌀㌀㌀㌀㌀㌀㌀㌀㌀㌀㌀㌀㌀㌀㌀㌀㌀㌀㌀㌀㌀㌀㌀㌀㌀㌀㌀㌀㌀㌀㌀㌀㌀㌀㌀㌀㌀㌀㌀㌀㌀㌀㌀㌀㌀㌀㌀㌀㌀㌀㌀㌀㌀㌀㌀㌀㌀㌀㌀㌀㌀㌀㌀㌀㌀㌀㌀㌀㌀㌀㌀㌀㌀㌀㌀㌀㌀㌀㌀㌀㌀㌀㌀㌀㌀㌀㌀㌀㌀㌀㌀㌀
35
[2] Vertical Position ㌀㌀㌀㌀㌀㌀㌀㌀㌀㌀㌀㌀㌀㌀㌀㌀㌀㌀㌀㌀㌀㌀㌀㌀㌀㌀㌀㌀㌀㌀㌀㌀㌀㌀㌀㌀㌀㌀㌀㌀㌀㌀㌀㌀㌀㌀㌀㌀㌀㌀㌀㌀㌀㌀㌀㌀㌀㌀㌀㌀㌀㌀㌀㌀㌀㌀㌀㌀㌀㌀㌀㌀㌀㌀㌀㌀㌀㌀㌀㌀㌀㌀㌀㌀㌀㌀㌀㌀㌀㌀㌀㌀㌀㌀㌀㌀㌀㌀㌀㌀㌀㌀㌀㌀㌀㌀㌀㌀㌀㌀㌀㌀㌀㌀㌀㌀㌀
36
[2.1] Change of the number of shim㌀㌀㌀㌀㌀㌀㌀㌀㌀㌀㌀㌀㌀㌀㌀㌀㌀㌀㌀㌀㌀㌀㌀㌀㌀㌀㌀㌀㌀㌀㌀㌀㌀㌀㌀㌀㌀㌀㌀㌀㌀㌀㌀㌀㌀㌀㌀㌀㌀㌀㌀㌀㌀㌀㌀㌀㌀㌀㌀㌀㌀㌀㌀㌀㌀㌀㌀㌀㌀㌀㌀㌀㌀㌀㌀㌀㌀㌀㌀㌀㌀㌀㌀㌀㌀㌀㌀㌀
36
[2.2] Adjustment of vertical position ofdropper box bracket ㌀㌀㌀㌀㌀㌀㌀㌀㌀㌀㌀㌀㌀㌀㌀㌀㌀㌀㌀㌀㌀㌀㌀㌀㌀㌀㌀㌀㌀㌀㌀㌀㌀㌀㌀㌀㌀㌀㌀㌀㌀㌀㌀㌀㌀㌀㌀㌀㌀㌀㌀㌀㌀㌀㌀
37
M8. Lubrication ㌀㌀㌀㌀㌀㌀㌀㌀㌀㌀㌀㌀㌀㌀㌀㌀㌀㌀㌀㌀㌀㌀㌀㌀㌀㌀㌀㌀㌀㌀㌀㌀㌀㌀㌀㌀㌀㌀㌀㌀㌀㌀㌀㌀㌀㌀㌀㌀㌀㌀㌀㌀㌀㌀㌀㌀㌀㌀㌀㌀㌀㌀㌀㌀㌀㌀㌀㌀㌀㌀㌀㌀㌀㌀㌀㌀㌀㌀㌀㌀㌀㌀㌀㌀㌀㌀㌀㌀㌀㌀㌀㌀㌀㌀㌀㌀㌀㌀㌀㌀㌀㌀㌀㌀㌀㌀㌀㌀㌀㌀㌀㌀㌀㌀㌀㌀㌀㌀㌀㌀㌀㌀㌀㌀㌀㌀
38
[1] Lubrication Cycle and Applicable Fluids㌀㌀㌀㌀㌀㌀㌀㌀㌀㌀㌀㌀㌀㌀㌀㌀㌀㌀㌀㌀㌀㌀㌀㌀㌀㌀㌀㌀㌀㌀㌀㌀㌀㌀㌀㌀㌀㌀㌀㌀㌀㌀㌀㌀㌀㌀㌀㌀㌀㌀㌀㌀㌀㌀㌀㌀㌀㌀㌀㌀㌀㌀㌀㌀㌀㌀㌀㌀㌀㌀㌀㌀㌀㌀㌀㌀㌀㌀㌀㌀㌀㌀㌀㌀
38
[2] Oil Change of Terry Motion Cam Box ㌀㌀㌀㌀㌀㌀㌀㌀㌀㌀㌀㌀㌀㌀㌀㌀㌀㌀㌀㌀㌀㌀㌀㌀㌀㌀㌀㌀㌀㌀㌀㌀㌀㌀㌀㌀㌀㌀㌀㌀㌀㌀㌀㌀㌀㌀㌀㌀㌀㌀㌀㌀㌀㌀㌀㌀㌀㌀㌀㌀㌀㌀㌀㌀㌀㌀㌀㌀㌀㌀㌀㌀㌀㌀㌀㌀㌀㌀㌀㌀㌀㌀㌀㌀㌀㌀㌀
41
[3] Oil Change and Grease Replenishment of Jacquard Bevel Gearbox ㌀㌀㌀㌀㌀㌀㌀㌀㌀㌀㌀㌀㌀㌀㌀㌀㌀㌀㌀㌀㌀㌀㌀㌀㌀㌀㌀㌀㌀㌀㌀㌀㌀㌀㌀㌀㌀㌀㌀㌀㌀㌀
41
M9. Electronic Terry Motion㌀㌀㌀㌀㌀㌀㌀㌀㌀㌀㌀㌀㌀㌀㌀㌀㌀㌀㌀㌀㌀㌀㌀㌀㌀㌀㌀㌀㌀㌀㌀㌀㌀㌀㌀㌀㌀㌀㌀㌀㌀㌀㌀㌀㌀㌀㌀㌀㌀㌀㌀㌀㌀㌀㌀㌀㌀㌀㌀㌀㌀㌀㌀㌀㌀㌀㌀㌀㌀㌀㌀㌀㌀㌀㌀㌀㌀㌀㌀㌀㌀㌀㌀㌀㌀㌀㌀㌀㌀㌀㌀㌀㌀㌀㌀㌀㌀㌀㌀㌀㌀㌀㌀㌀㌀㌀㌀㌀㌀
42
[1] Adjusting the Stoppers㌀㌀㌀㌀㌀㌀㌀㌀㌀㌀㌀㌀㌀㌀㌀㌀㌀㌀㌀㌀㌀㌀㌀㌀㌀㌀㌀㌀㌀㌀㌀㌀㌀㌀㌀㌀㌀㌀㌀㌀㌀㌀㌀㌀㌀㌀㌀㌀㌀㌀㌀㌀㌀㌀㌀㌀㌀㌀㌀㌀㌀㌀㌀㌀㌀㌀㌀㌀㌀㌀㌀㌀㌀㌀㌀㌀㌀㌀㌀㌀㌀㌀㌀㌀㌀㌀㌀㌀㌀㌀㌀㌀㌀㌀㌀㌀㌀㌀㌀㌀㌀㌀㌀㌀㌀㌀㌀㌀
42
[2] Zero-point Restoration Proximity Switch ㌀㌀㌀㌀㌀㌀㌀㌀㌀㌀㌀㌀㌀㌀㌀㌀㌀㌀㌀㌀㌀㌀㌀㌀㌀㌀㌀㌀㌀㌀㌀㌀㌀㌀㌀㌀㌀㌀㌀㌀㌀㌀㌀㌀㌀㌀㌀㌀㌀㌀㌀㌀㌀㌀㌀㌀㌀㌀㌀㌀㌀㌀㌀㌀㌀㌀㌀㌀㌀㌀㌀㌀㌀㌀㌀㌀㌀㌀㌀㌀㌀㌀㌀
43
[3] Reverse Current Absorber Cover㌀㌀㌀㌀㌀㌀㌀㌀㌀㌀㌀㌀㌀㌀㌀㌀㌀㌀㌀㌀㌀㌀㌀㌀㌀㌀㌀㌀㌀㌀㌀㌀㌀㌀㌀㌀㌀㌀㌀㌀㌀㌀㌀㌀㌀㌀㌀㌀㌀㌀㌀㌀㌀㌀㌀㌀㌀㌀㌀㌀㌀㌀㌀㌀㌀㌀㌀㌀㌀㌀㌀㌀㌀㌀㌀㌀㌀㌀㌀㌀㌀㌀㌀㌀㌀㌀㌀㌀㌀㌀㌀㌀㌀
44
[4] Lubrication of Terry Motion Gear Box ㌀㌀㌀㌀㌀㌀㌀㌀㌀㌀㌀㌀㌀㌀㌀㌀㌀㌀㌀㌀㌀㌀㌀㌀㌀㌀㌀㌀㌀㌀㌀㌀㌀㌀㌀㌀㌀㌀㌀㌀㌀㌀㌀㌀㌀㌀㌀㌀㌀㌀㌀㌀㌀㌀㌀㌀㌀㌀㌀㌀㌀㌀㌀㌀㌀㌀㌀㌀㌀㌀㌀㌀㌀㌀㌀㌀㌀㌀㌀㌀㌀㌀㌀㌀㌀㌀㌀
44
E1. Setting of Towel Loom-related Function Panel ㌀㌀㌀㌀㌀㌀㌀㌀㌀㌀㌀㌀㌀㌀㌀㌀㌀㌀㌀㌀㌀㌀㌀㌀㌀㌀㌀㌀㌀㌀㌀㌀㌀㌀㌀㌀㌀㌀㌀㌀㌀㌀㌀㌀㌀㌀㌀㌀㌀㌀㌀㌀㌀㌀㌀㌀㌀㌀㌀㌀㌀㌀㌀㌀㌀㌀㌀㌀㌀㌀㌀㌀㌀㌀㌀㌀
45
[1] Towel Screen Setting Method㌀㌀㌀㌀㌀㌀㌀㌀㌀㌀㌀㌀㌀㌀㌀㌀㌀㌀㌀㌀㌀㌀㌀㌀㌀㌀㌀㌀㌀㌀㌀㌀㌀㌀㌀㌀㌀㌀㌀㌀㌀㌀㌀㌀㌀㌀㌀㌀㌀㌀㌀㌀㌀㌀㌀㌀㌀㌀㌀㌀㌀㌀㌀㌀㌀㌀㌀㌀㌀㌀㌀㌀㌀㌀㌀㌀㌀㌀㌀㌀㌀㌀㌀㌀㌀㌀㌀㌀㌀㌀㌀㌀㌀㌀㌀㌀㌀㌀
45
[1.1] Operation for ground weaving only㌀㌀㌀㌀㌀㌀㌀㌀㌀㌀㌀㌀㌀㌀㌀㌀㌀㌀㌀㌀㌀㌀㌀㌀㌀㌀㌀㌀㌀㌀㌀㌀㌀㌀㌀㌀㌀㌀㌀㌀㌀㌀㌀㌀㌀㌀㌀㌀㌀㌀㌀㌀㌀㌀㌀㌀㌀㌀㌀㌀㌀㌀㌀㌀㌀㌀㌀㌀㌀㌀㌀㌀㌀㌀㌀㌀㌀㌀㌀㌀㌀㌀
45
[1.2] Wrong warp path (border only) ㌀㌀㌀㌀㌀㌀㌀㌀㌀㌀㌀㌀㌀㌀㌀㌀㌀㌀㌀㌀㌀㌀㌀㌀㌀㌀㌀㌀㌀㌀㌀㌀㌀㌀㌀㌀㌀㌀㌀㌀㌀㌀㌀㌀㌀㌀㌀㌀㌀㌀㌀㌀㌀㌀㌀㌀㌀㌀㌀㌀㌀㌀㌀㌀㌀㌀㌀㌀㌀㌀㌀㌀㌀㌀㌀㌀㌀㌀㌀㌀㌀㌀㌀㌀㌀㌀㌀
45
[1.3] Interlock for weft removal ㌀㌀㌀㌀㌀㌀㌀㌀㌀㌀㌀㌀㌀㌀㌀㌀㌀㌀㌀㌀㌀㌀㌀㌀㌀㌀㌀㌀㌀㌀㌀㌀㌀㌀㌀㌀㌀㌀㌀㌀㌀㌀㌀㌀㌀㌀㌀㌀㌀㌀㌀㌀㌀㌀㌀㌀㌀㌀㌀㌀㌀㌀㌀㌀㌀㌀㌀㌀㌀㌀㌀㌀㌀㌀㌀㌀㌀㌀㌀㌀㌀㌀㌀㌀㌀㌀㌀㌀㌀㌀㌀㌀㌀㌀
45
[1.4] Sheet counter for test pattern weaving㌀㌀㌀㌀㌀㌀㌀㌀㌀㌀㌀㌀㌀㌀㌀㌀㌀㌀㌀㌀㌀㌀㌀㌀㌀㌀㌀㌀㌀㌀㌀㌀㌀㌀㌀㌀㌀㌀㌀㌀㌀㌀㌀㌀㌀㌀㌀㌀㌀㌀㌀㌀㌀㌀㌀㌀㌀㌀㌀㌀㌀㌀㌀㌀㌀㌀㌀㌀㌀㌀㌀㌀㌀㌀㌀㌀
46
[1.5] Cutting ㌀㌀㌀㌀㌀㌀㌀㌀㌀㌀㌀㌀㌀㌀㌀㌀㌀㌀㌀㌀㌀㌀㌀㌀㌀㌀㌀㌀㌀㌀㌀㌀㌀㌀㌀㌀㌀㌀㌀㌀㌀㌀㌀㌀㌀㌀㌀㌀㌀㌀㌀㌀㌀㌀㌀㌀㌀㌀㌀㌀㌀㌀㌀㌀㌀㌀㌀㌀㌀㌀㌀㌀㌀㌀㌀㌀㌀㌀㌀㌀㌀㌀㌀㌀㌀㌀㌀㌀㌀㌀㌀㌀㌀㌀㌀㌀㌀㌀㌀㌀㌀㌀㌀㌀㌀㌀㌀㌀㌀㌀㌀㌀㌀㌀㌀㌀㌀㌀㌀㌀
46
[1.6] Setting the warp manual stop position ㌀㌀㌀㌀㌀㌀㌀㌀㌀㌀㌀㌀㌀㌀㌀㌀㌀㌀㌀㌀㌀㌀㌀㌀㌀㌀㌀㌀㌀㌀㌀㌀㌀㌀㌀㌀㌀㌀㌀㌀㌀㌀㌀㌀㌀㌀㌀㌀㌀㌀㌀㌀㌀㌀㌀㌀㌀㌀㌀㌀㌀㌀㌀㌀㌀㌀㌀㌀㌀㌀㌀㌀㌀㌀㌀㌀㌀
48
[2] How to Set [ PILE ]㌀㌀㌀㌀㌀㌀㌀㌀㌀㌀㌀㌀㌀㌀㌀㌀㌀㌀㌀㌀㌀㌀㌀㌀㌀㌀㌀㌀㌀㌀㌀㌀㌀㌀㌀㌀㌀㌀㌀㌀㌀㌀㌀㌀㌀㌀㌀㌀㌀㌀㌀㌀㌀㌀㌀㌀㌀㌀㌀㌀㌀㌀㌀㌀㌀㌀㌀㌀㌀㌀㌀㌀㌀㌀㌀㌀㌀㌀㌀㌀㌀㌀㌀㌀㌀㌀㌀㌀㌀㌀㌀㌀㌀㌀㌀㌀㌀㌀㌀㌀㌀㌀㌀㌀㌀㌀㌀㌀㌀㌀㌀㌀㌀㌀
49
[2.1] Electronic dobby specification ㌀㌀㌀㌀㌀㌀㌀㌀㌀㌀㌀㌀㌀㌀㌀㌀㌀㌀㌀㌀㌀㌀㌀㌀㌀㌀㌀㌀㌀㌀㌀㌀㌀㌀㌀㌀㌀㌀㌀㌀㌀㌀㌀㌀㌀㌀㌀㌀㌀㌀㌀㌀㌀㌀㌀㌀㌀㌀㌀㌀㌀㌀㌀㌀㌀㌀㌀㌀㌀㌀㌀㌀㌀㌀㌀㌀㌀㌀㌀㌀㌀㌀㌀㌀㌀㌀㌀㌀
49
[3] Pattern Initialization ㌀㌀㌀㌀㌀㌀㌀㌀㌀㌀㌀㌀㌀㌀㌀㌀㌀㌀㌀㌀㌀㌀㌀㌀㌀㌀㌀㌀㌀㌀㌀㌀㌀㌀㌀㌀㌀㌀㌀㌀㌀㌀㌀㌀㌀㌀㌀㌀㌀㌀㌀㌀㌀㌀㌀㌀㌀㌀㌀㌀㌀㌀㌀㌀㌀㌀㌀㌀㌀㌀㌀㌀㌀㌀㌀㌀㌀㌀㌀㌀㌀㌀㌀㌀㌀㌀㌀㌀㌀㌀㌀㌀㌀㌀㌀㌀㌀㌀㌀㌀㌀㌀㌀㌀㌀㌀㌀㌀㌀㌀㌀㌀
51
[4] Setting for Machine Speed Switch ㌀㌀㌀㌀㌀㌀㌀㌀㌀㌀㌀㌀㌀㌀㌀㌀㌀㌀㌀㌀㌀㌀㌀㌀㌀㌀㌀㌀㌀㌀㌀㌀㌀㌀㌀㌀㌀㌀㌀㌀㌀㌀㌀㌀㌀㌀㌀㌀㌀㌀㌀㌀㌀㌀㌀㌀㌀㌀㌀㌀㌀㌀㌀㌀㌀㌀㌀㌀㌀㌀㌀㌀㌀㌀㌀㌀㌀㌀㌀㌀㌀㌀㌀㌀㌀㌀㌀㌀㌀㌀㌀
52
E2. Setting and Operation of Towel Loom Beam-relatedFunction Panel ㌀㌀㌀㌀㌀㌀㌀㌀㌀㌀㌀㌀㌀㌀㌀㌀㌀㌀㌀㌀㌀㌀㌀㌀㌀㌀㌀㌀㌀㌀㌀㌀㌀㌀㌀㌀㌀㌀㌀㌀㌀㌀㌀㌀㌀㌀
54
[1] Setting for bottom beam control ㌀㌀㌀㌀㌀㌀㌀㌀㌀㌀㌀㌀㌀㌀㌀㌀㌀㌀㌀㌀㌀㌀㌀㌀㌀㌀㌀㌀㌀㌀㌀㌀㌀㌀㌀㌀㌀㌀㌀㌀㌀㌀㌀㌀㌀㌀㌀㌀㌀㌀㌀㌀㌀㌀㌀㌀㌀㌀㌀㌀㌀㌀㌀㌀㌀㌀㌀㌀㌀㌀㌀㌀㌀㌀㌀㌀㌀㌀㌀㌀㌀㌀㌀㌀㌀㌀㌀㌀㌀㌀㌀㌀㌀㌀㌀
54
[2] Setting for top beam control㌀㌀㌀㌀㌀㌀㌀㌀㌀㌀㌀㌀㌀㌀㌀㌀㌀㌀㌀㌀㌀㌀㌀㌀㌀㌀㌀㌀㌀㌀㌀㌀㌀㌀㌀㌀㌀㌀㌀㌀㌀㌀㌀㌀㌀㌀㌀㌀㌀㌀㌀㌀㌀㌀㌀㌀㌀㌀㌀㌀㌀㌀㌀㌀㌀㌀㌀㌀㌀㌀㌀㌀㌀㌀㌀㌀㌀㌀㌀㌀㌀㌀㌀㌀㌀㌀㌀㌀㌀㌀㌀㌀㌀㌀㌀㌀㌀㌀㌀㌀㌀
55
[3] Setting for beam change ㌀㌀㌀㌀㌀㌀㌀㌀㌀㌀㌀㌀㌀㌀㌀㌀㌀㌀㌀㌀㌀㌀㌀㌀㌀㌀㌀㌀㌀㌀㌀㌀㌀㌀㌀㌀㌀㌀㌀㌀㌀㌀㌀㌀㌀㌀㌀㌀㌀㌀㌀㌀㌀㌀㌀㌀㌀㌀㌀㌀㌀㌀㌀㌀㌀㌀㌀㌀㌀㌀㌀㌀㌀㌀㌀㌀㌀㌀㌀㌀㌀㌀㌀㌀㌀㌀㌀㌀㌀㌀㌀㌀㌀㌀㌀㌀㌀㌀㌀㌀㌀㌀㌀㌀㌀
56
[4] Yarn beam operation from function panel㌀㌀㌀㌀㌀㌀㌀㌀㌀㌀㌀㌀㌀㌀㌀㌀㌀㌀㌀㌀㌀㌀㌀㌀㌀㌀㌀㌀㌀㌀㌀㌀㌀㌀㌀㌀㌀㌀㌀㌀㌀㌀㌀㌀㌀㌀㌀㌀㌀㌀㌀㌀㌀㌀㌀㌀㌀㌀㌀㌀㌀㌀㌀㌀㌀㌀㌀㌀㌀㌀㌀㌀㌀㌀㌀㌀㌀㌀㌀㌀㌀㌀
57
[5] Operation of Forward/Reverse BeamRotation Switch on the L.H. Frame ㌀㌀㌀㌀㌀㌀㌀㌀㌀㌀㌀㌀㌀㌀㌀㌀㌀㌀㌀㌀㌀㌀㌀㌀㌀㌀㌀㌀㌀㌀㌀㌀㌀㌀㌀㌀㌀
58
E3. Electric Components / Let-off Motions for A Towel Loom㌀㌀㌀㌀㌀㌀㌀㌀㌀㌀㌀㌀㌀㌀㌀㌀㌀㌀㌀㌀㌀㌀㌀㌀㌀㌀㌀㌀㌀㌀㌀㌀㌀㌀㌀㌀㌀㌀㌀㌀㌀㌀㌀㌀㌀㌀㌀㌀㌀㌀㌀㌀㌀㌀㌀㌀㌀㌀㌀㌀㌀㌀
59
[1] Components of the let-off / take-up controller ㌀㌀㌀㌀㌀㌀㌀㌀㌀㌀㌀㌀㌀㌀㌀㌀㌀㌀㌀㌀㌀㌀㌀㌀㌀㌀㌀㌀㌀㌀㌀㌀㌀㌀㌀㌀㌀㌀㌀㌀㌀㌀㌀㌀㌀㌀㌀㌀㌀㌀㌀㌀㌀㌀㌀㌀㌀㌀㌀㌀㌀㌀㌀㌀㌀㌀㌀㌀㌀㌀㌀㌀㌀㌀㌀
60
[2] LED display and check pins ㌀㌀㌀㌀㌀㌀㌀㌀㌀㌀㌀㌀㌀㌀㌀㌀㌀㌀㌀㌀㌀㌀㌀㌀㌀㌀㌀㌀㌀㌀㌀㌀㌀㌀㌀㌀㌀㌀㌀㌀㌀㌀㌀㌀㌀㌀㌀㌀㌀㌀㌀㌀㌀㌀㌀㌀㌀㌀㌀㌀㌀㌀㌀㌀㌀㌀㌀㌀㌀㌀㌀㌀㌀㌀㌀㌀㌀㌀㌀㌀㌀㌀㌀㌀㌀㌀㌀㌀㌀㌀㌀㌀㌀㌀㌀㌀㌀㌀㌀㌀
62
[3] Setting the standard let-off tension ㌀㌀㌀㌀㌀㌀㌀㌀㌀㌀㌀㌀㌀㌀㌀㌀㌀㌀㌀㌀㌀㌀㌀㌀㌀㌀㌀㌀㌀㌀㌀㌀㌀㌀㌀㌀㌀㌀㌀㌀㌀㌀㌀㌀㌀㌀㌀㌀㌀㌀㌀㌀㌀㌀㌀㌀㌀㌀㌀㌀㌀㌀㌀㌀㌀㌀㌀㌀㌀㌀㌀㌀㌀㌀㌀㌀㌀㌀㌀㌀㌀㌀㌀㌀㌀㌀㌀㌀㌀㌀㌀
64
[3.1] Tension calibration / zero adjustmentUpper let-off (pile let-off)㌀㌀㌀㌀㌀㌀㌀㌀㌀㌀㌀㌀㌀㌀㌀㌀㌀㌀㌀㌀㌀㌀㌀㌀㌀㌀㌀㌀㌀㌀㌀㌀㌀㌀㌀㌀㌀㌀㌀㌀㌀㌀㌀
64

[3.2] Tension calibration / zero adjustmentLower let-off (ground let-off) ㌀㌀㌀㌀㌀㌀㌀㌀㌀㌀㌀㌀㌀㌀㌀㌀㌀㌀㌀㌀㌀㌀㌀㌀㌀㌀㌀㌀㌀㌀㌀㌀㌀㌀㌀㌀㌀
65
[4] RAM clear (data initialization) ㌀㌀㌀㌀㌀㌀㌀㌀㌀㌀㌀㌀㌀㌀㌀㌀㌀㌀㌀㌀㌀㌀㌀㌀㌀㌀㌀㌀㌀㌀㌀㌀㌀㌀㌀㌀㌀㌀㌀㌀㌀㌀㌀㌀㌀㌀㌀㌀㌀㌀㌀㌀㌀㌀㌀㌀㌀㌀㌀㌀㌀㌀㌀㌀㌀㌀㌀㌀㌀㌀㌀㌀㌀㌀㌀㌀㌀㌀㌀㌀㌀㌀㌀㌀㌀㌀㌀㌀㌀㌀㌀㌀㌀㌀㌀㌀㌀㌀
66
[4.1] RAM clearing procedure ㌀㌀㌀㌀㌀㌀㌀㌀㌀㌀㌀㌀㌀㌀㌀㌀㌀㌀㌀㌀㌀㌀㌀㌀㌀㌀㌀㌀㌀㌀㌀㌀㌀㌀㌀㌀㌀㌀㌀㌀㌀㌀㌀㌀㌀㌀㌀㌀㌀㌀㌀㌀㌀㌀㌀㌀㌀㌀㌀㌀㌀㌀㌀㌀㌀㌀㌀㌀㌀㌀㌀㌀㌀㌀㌀㌀㌀㌀㌀㌀㌀㌀㌀㌀㌀㌀㌀㌀㌀㌀㌀㌀㌀㌀㌀㌀
66
[4.2] Operation after clearing the RAM㌀㌀㌀㌀㌀㌀㌀㌀㌀㌀㌀㌀㌀㌀㌀㌀㌀㌀㌀㌀㌀㌀㌀㌀㌀㌀㌀㌀㌀㌀㌀㌀㌀㌀㌀㌀㌀㌀㌀㌀㌀㌀㌀㌀㌀㌀㌀㌀㌀㌀㌀㌀㌀㌀㌀㌀㌀㌀㌀㌀㌀㌀㌀㌀㌀㌀㌀㌀㌀㌀㌀㌀㌀㌀㌀㌀㌀㌀㌀㌀㌀㌀㌀㌀
66
[5] How to set the DIP switches㌀㌀㌀㌀㌀㌀㌀㌀㌀㌀㌀㌀㌀㌀㌀㌀㌀㌀㌀㌀㌀㌀㌀㌀㌀㌀㌀㌀㌀㌀㌀㌀㌀㌀㌀㌀㌀㌀㌀㌀㌀㌀㌀㌀㌀㌀㌀㌀㌀㌀㌀㌀㌀㌀㌀㌀㌀㌀㌀㌀㌀㌀㌀㌀㌀㌀㌀㌀㌀㌀㌀㌀㌀㌀㌀㌀㌀㌀㌀㌀㌀㌀㌀㌀㌀㌀㌀㌀㌀㌀㌀㌀㌀㌀㌀㌀㌀㌀㌀㌀
67
[6] Troubleshooting ㌀㌀㌀㌀㌀㌀㌀㌀㌀㌀㌀㌀㌀㌀㌀㌀㌀㌀㌀㌀㌀㌀㌀㌀㌀㌀㌀㌀㌀㌀㌀㌀㌀㌀㌀㌀㌀㌀㌀㌀㌀㌀㌀㌀㌀㌀㌀㌀㌀㌀㌀㌀㌀㌀㌀㌀㌀㌀㌀㌀㌀㌀㌀㌀㌀㌀㌀㌀㌀㌀㌀㌀㌀㌀㌀㌀㌀㌀㌀㌀㌀㌀㌀㌀㌀㌀㌀㌀㌀㌀㌀㌀㌀㌀㌀㌀㌀㌀㌀㌀㌀㌀㌀㌀㌀㌀㌀㌀㌀㌀㌀㌀㌀㌀㌀㌀㌀
68
E4. Instrumentation and Electronic Jacquard for Towel Weaving Machine㌀㌀㌀㌀㌀㌀㌀㌀㌀㌀㌀㌀㌀㌀㌀㌀㌀㌀㌀㌀㌀㌀㌀㌀㌀㌀㌀㌀㌀㌀㌀㌀㌀㌀㌀㌀㌀㌀㌀㌀㌀㌀
69
[1] Jacquard Controller ㌀㌀㌀㌀㌀㌀㌀㌀㌀㌀㌀㌀㌀㌀㌀㌀㌀㌀㌀㌀㌀㌀㌀㌀㌀㌀㌀㌀㌀㌀㌀㌀㌀㌀㌀㌀㌀㌀㌀㌀㌀㌀㌀㌀㌀㌀㌀㌀㌀㌀㌀㌀㌀㌀㌀㌀㌀㌀㌀㌀㌀㌀㌀㌀㌀㌀㌀㌀㌀㌀㌀㌀㌀㌀㌀㌀㌀㌀㌀㌀㌀㌀㌀㌀㌀㌀㌀㌀㌀㌀㌀㌀㌀㌀㌀㌀㌀㌀㌀㌀㌀㌀㌀㌀㌀㌀㌀㌀㌀㌀㌀
69
[2] Types of Interfaces between the Loom and the Jacquard ㌀㌀㌀㌀㌀㌀㌀㌀㌀㌀㌀㌀㌀㌀㌀㌀㌀㌀㌀㌀㌀㌀㌀㌀㌀㌀㌀㌀㌀㌀㌀㌀㌀㌀㌀㌀㌀㌀㌀㌀㌀㌀㌀㌀㌀㌀㌀㌀㌀㌀㌀㌀㌀㌀㌀㌀㌀㌀
69
[3] PICK Data㌀㌀㌀㌀㌀㌀㌀㌀㌀㌀㌀㌀㌀㌀㌀㌀㌀㌀㌀㌀㌀㌀㌀㌀㌀㌀㌀㌀㌀㌀㌀㌀㌀㌀㌀㌀㌀㌀㌀㌀㌀㌀㌀㌀㌀㌀㌀㌀㌀㌀㌀㌀㌀㌀㌀㌀㌀㌀㌀㌀㌀㌀㌀㌀㌀㌀㌀㌀㌀㌀㌀㌀㌀㌀㌀㌀㌀㌀㌀㌀㌀㌀㌀㌀㌀㌀㌀㌀㌀㌀㌀㌀㌀㌀㌀㌀㌀㌀㌀㌀㌀㌀㌀㌀㌀㌀㌀㌀㌀㌀㌀㌀㌀㌀㌀㌀㌀㌀㌀㌀㌀㌀㌀㌀㌀
70
[3.1] Classic Type ㌀㌀㌀㌀㌀㌀㌀㌀㌀㌀㌀㌀㌀㌀㌀㌀㌀㌀㌀㌀㌀㌀㌀㌀㌀㌀㌀㌀㌀㌀㌀㌀㌀㌀㌀㌀㌀㌀㌀㌀㌀㌀㌀㌀㌀㌀㌀㌀㌀㌀㌀㌀㌀㌀㌀㌀㌀㌀㌀㌀㌀㌀㌀㌀㌀㌀㌀㌀㌀㌀㌀㌀㌀㌀㌀㌀㌀㌀㌀㌀㌀㌀㌀㌀㌀㌀㌀㌀㌀㌀㌀㌀㌀㌀㌀㌀㌀㌀㌀㌀㌀㌀㌀㌀㌀㌀㌀㌀㌀㌀㌀㌀
70
[3.2] new CAN type ㌀㌀㌀㌀㌀㌀㌀㌀㌀㌀㌀㌀㌀㌀㌀㌀㌀㌀㌀㌀㌀㌀㌀㌀㌀㌀㌀㌀㌀㌀㌀㌀㌀㌀㌀㌀㌀㌀㌀㌀㌀㌀㌀㌀㌀㌀㌀㌀㌀㌀㌀㌀㌀㌀㌀㌀㌀㌀㌀㌀㌀㌀㌀㌀㌀㌀㌀㌀㌀㌀㌀㌀㌀㌀㌀㌀㌀㌀㌀㌀㌀㌀㌀㌀㌀㌀㌀㌀㌀㌀㌀㌀㌀㌀㌀㌀㌀㌀㌀㌀㌀㌀㌀㌀㌀㌀㌀㌀㌀㌀
73
[4] Setting on the FP screen ㌀㌀㌀㌀㌀㌀㌀㌀㌀㌀㌀㌀㌀㌀㌀㌀㌀㌀㌀㌀㌀㌀㌀㌀㌀㌀㌀㌀㌀㌀㌀㌀㌀㌀㌀㌀㌀㌀㌀㌀㌀㌀㌀㌀㌀㌀㌀㌀㌀㌀㌀㌀㌀㌀㌀㌀㌀㌀㌀㌀㌀㌀㌀㌀㌀㌀㌀㌀㌀㌀㌀㌀㌀㌀㌀㌀㌀㌀㌀㌀㌀㌀㌀㌀㌀㌀㌀㌀㌀㌀㌀㌀㌀㌀㌀㌀㌀㌀㌀㌀㌀㌀㌀㌀㌀
79
[4.1] Description on the [Map]-[Jacquard]-[Setting] screen ㌀㌀㌀㌀㌀㌀㌀㌀㌀㌀㌀㌀㌀㌀㌀㌀㌀㌀㌀㌀㌀㌀㌀㌀㌀㌀㌀㌀㌀㌀㌀㌀㌀㌀㌀㌀㌀㌀㌀㌀㌀㌀㌀㌀㌀㌀㌀㌀㌀㌀㌀㌀㌀㌀㌀
80
[4.2] Description on the [Map]-[Jacquard]-[Manual] screen ㌀㌀㌀㌀㌀㌀㌀㌀㌀㌀㌀㌀㌀㌀㌀㌀㌀㌀㌀㌀㌀㌀㌀㌀㌀㌀㌀㌀㌀㌀㌀㌀㌀㌀㌀㌀㌀㌀㌀㌀㌀㌀㌀㌀㌀㌀㌀㌀㌀㌀㌀㌀㌀㌀
84
[4.3] Description on the [Map]-[Jacquard]-[Value] screen ㌀㌀㌀㌀㌀㌀㌀㌀㌀㌀㌀㌀㌀㌀㌀㌀㌀㌀㌀㌀㌀㌀㌀㌀㌀㌀㌀㌀㌀㌀㌀㌀㌀㌀㌀㌀㌀㌀㌀㌀㌀㌀㌀㌀㌀㌀㌀㌀㌀㌀㌀㌀㌀㌀㌀
85
[4.4] The history of pattern communication with the Jacquard ㌀㌀㌀㌀㌀㌀㌀㌀㌀㌀㌀㌀㌀㌀㌀㌀㌀㌀㌀㌀㌀㌀㌀㌀㌀㌀㌀㌀㌀㌀㌀㌀㌀㌀㌀㌀㌀㌀㌀㌀㌀㌀㌀㌀㌀㌀㌀㌀㌀㌀㌀
86
[4.5] Warning messages related to the Jacquard ㌀㌀㌀㌀㌀㌀㌀㌀㌀㌀㌀㌀㌀㌀㌀㌀㌀㌀㌀㌀㌀㌀㌀㌀㌀㌀㌀㌀㌀㌀㌀㌀㌀㌀㌀㌀㌀㌀㌀㌀㌀㌀㌀㌀㌀㌀㌀㌀㌀㌀㌀㌀㌀㌀㌀㌀㌀㌀㌀㌀㌀㌀㌀㌀㌀㌀㌀㌀㌀
87
[5] [APPENDIX] EXAMPLE FOR INPUTTING TENSION ABSOLUTE VALUES ㌀㌀㌀㌀㌀㌀㌀㌀㌀㌀㌀㌀㌀㌀㌀㌀㌀㌀㌀㌀㌀㌀㌀㌀㌀㌀㌀㌀㌀㌀㌀
88
E5. Electronic Terry Motion ㌀㌀㌀㌀㌀㌀㌀㌀㌀㌀㌀㌀㌀㌀㌀㌀㌀㌀㌀㌀㌀㌀㌀㌀㌀㌀㌀㌀㌀㌀㌀㌀㌀㌀㌀㌀㌀㌀㌀㌀㌀㌀㌀㌀㌀㌀㌀㌀㌀㌀㌀㌀㌀㌀㌀㌀㌀㌀㌀㌀㌀㌀㌀㌀㌀㌀㌀㌀㌀㌀㌀㌀㌀㌀㌀㌀㌀㌀㌀㌀㌀㌀㌀㌀㌀㌀㌀㌀㌀㌀㌀㌀㌀㌀㌀㌀㌀㌀㌀㌀㌀㌀㌀㌀㌀㌀㌀㌀㌀
94
[1] LEDs and Switches in the Inverter Box (See the drawing given on the next page)㌀㌀㌀㌀㌀㌀㌀㌀㌀㌀㌀㌀㌀㌀㌀㌀㌀㌀㌀㌀㌀㌀㌀㌀㌀
94
[2] Installation ㌀㌀㌀㌀㌀㌀㌀㌀㌀㌀㌀㌀㌀㌀㌀㌀㌀㌀㌀㌀㌀㌀㌀㌀㌀㌀㌀㌀㌀㌀㌀㌀㌀㌀㌀㌀㌀㌀㌀㌀㌀㌀㌀㌀㌀㌀㌀㌀㌀㌀㌀㌀㌀㌀㌀㌀㌀㌀㌀㌀㌀㌀㌀㌀㌀㌀㌀㌀㌀㌀㌀㌀㌀㌀㌀㌀㌀㌀㌀㌀㌀㌀㌀㌀㌀㌀㌀㌀㌀㌀㌀㌀㌀㌀㌀㌀㌀㌀㌀㌀㌀㌀㌀㌀㌀㌀㌀㌀㌀㌀㌀㌀㌀㌀㌀㌀㌀㌀㌀㌀㌀㌀㌀㌀㌀
99
[3] Servo Motor Replacement㌀㌀㌀㌀㌀㌀㌀㌀㌀㌀㌀㌀㌀㌀㌀㌀㌀㌀㌀㌀㌀㌀㌀㌀㌀㌀㌀㌀㌀㌀㌀㌀㌀㌀㌀㌀㌀㌀㌀㌀㌀㌀㌀㌀㌀㌀㌀㌀㌀㌀㌀㌀㌀㌀㌀㌀㌀㌀㌀㌀㌀㌀㌀㌀㌀㌀㌀㌀㌀㌀㌀㌀㌀㌀㌀㌀㌀㌀㌀㌀㌀㌀㌀㌀㌀㌀㌀㌀㌀㌀㌀㌀㌀㌀㌀㌀㌀㌀㌀㌀㌀㌀
100
[4] Adjustment ㌀㌀㌀㌀㌀㌀㌀㌀㌀㌀㌀㌀㌀㌀㌀㌀㌀㌀㌀㌀㌀㌀㌀㌀㌀㌀㌀㌀㌀㌀㌀㌀㌀㌀㌀㌀㌀㌀㌀㌀㌀㌀㌀㌀㌀㌀㌀㌀㌀㌀㌀㌀㌀㌀㌀㌀㌀㌀㌀㌀㌀㌀㌀㌀㌀㌀㌀㌀㌀㌀㌀㌀㌀㌀㌀㌀㌀㌀㌀㌀㌀㌀㌀㌀㌀㌀㌀㌀㌀㌀㌀㌀㌀㌀㌀㌀㌀㌀㌀㌀㌀㌀㌀㌀㌀㌀㌀㌀㌀㌀㌀㌀㌀㌀㌀㌀㌀㌀㌀㌀㌀㌀㌀
101
[5] Safety Precautions ㌀㌀㌀㌀㌀㌀㌀㌀㌀㌀㌀㌀㌀㌀㌀㌀㌀㌀㌀㌀㌀㌀㌀㌀㌀㌀㌀㌀㌀㌀㌀㌀㌀㌀㌀㌀㌀㌀㌀㌀㌀㌀㌀㌀㌀㌀㌀㌀㌀㌀㌀㌀㌀㌀㌀㌀㌀㌀㌀㌀㌀㌀㌀㌀㌀㌀㌀㌀㌀㌀㌀㌀㌀㌀㌀㌀㌀㌀㌀㌀㌀㌀㌀㌀㌀㌀㌀㌀㌀㌀㌀㌀㌀㌀㌀㌀㌀㌀㌀㌀㌀㌀㌀㌀㌀㌀㌀㌀㌀㌀㌀㌀
101
[6] Troubleshooting ㌀㌀㌀㌀㌀㌀㌀㌀㌀㌀㌀㌀㌀㌀㌀㌀㌀㌀㌀㌀㌀㌀㌀㌀㌀㌀㌀㌀㌀㌀㌀㌀㌀㌀㌀㌀㌀㌀㌀㌀㌀㌀㌀㌀㌀㌀㌀㌀㌀㌀㌀㌀㌀㌀㌀㌀㌀㌀㌀㌀㌀㌀㌀㌀㌀㌀㌀㌀㌀㌀㌀㌀㌀㌀㌀㌀㌀㌀㌀㌀㌀㌀㌀㌀㌀㌀㌀㌀㌀㌀㌀㌀㌀㌀㌀㌀㌀㌀㌀㌀㌀㌀㌀㌀㌀㌀㌀㌀㌀㌀㌀㌀㌀㌀㌀㌀
102

M1. Preparation for Setting
[1] Yarn Beam Installation
[1.1] Gland beam installation
(1) [Installation on the yarn beam gear side]
Mark the yarn beam 1 85 mm from side “a” with
afelt-tippedpen,etc.
(2) Screw in a yarn beam flange 2 from direction A.
Set the inside of the flange to the marked position.
・For the ease of screwing, apply grease or oil to
the threaded portion.
Note: The dimension mentioned above repre-
sents the reference dimension.
Fine adjustment should be conducted
depending on your fabric.
(3) Set a yarn beam gear 4 to the yarn beam 1 so that
the bolt holes (large, 8 holes) of the yarn beam
gear 4 match the bolt holes of the yarn beam 1.
Then turn the yarn beam flange 2 so as to have the
bolt holes (small, 3 holes) match the bolt holes on
the yarn beam flange 2.
(4) Tighten the yarn beam 1 and yarn beam gear 4
with 8 bolts 8. Then match the bolt hole position
of the yarn beam gear 4 with the yarn beam flange
2. Tighten 3 bolts 7 sequentially and equally.
M1. Preparation for Setting
1

(5) [Flange installation on the side of the counteryarn
beam gear]
Mark the yarn beam 1 at a point the reed drawing
width of L mm to the right of the marking made in
(1).
NOTE:Aminimumeffectivedrawingwidthto
each nominal reed width is a nominal
reed width minus 70 cm.
(6) Screw in the yarn beam flange 3 from direction B.
Match the marking made in (5) to the inside of
yarn beam flange 3.
・For the ease of screwing, apply grease or oil to
the threaded portion.
(7) Screw in the flange ring 5 also from direction B.
Match the bolt holes of the yarn beam flange 3
and flange ring 5 by providing a clearance of 3 to
5mmbetweentheendfacesoftheyarnbeam
flange 3 and flange ring 5 and tighten the bolts.
M1. Preparation for Setting
2

[1.2] Pile beam installation
1) [Mounting a yarn beam gear side]
(1) Standard case (using a flange ring)
(1) Make a mark on 110 mm away from the side a
of yarn beam 1 with a felt pen or something
similar.
(2) Screw-in yarn beam flange 2 from the direction
of "A" until the flange's inside becomes aligned
with the mark made in step (1). For making the
screwing-in job easier, apply grease or oil to
the threaded section.
Note: The dimension of X mentioned above
represents the reference dimension.
Fine adjustment should be conducted
depending on your fabric.
(3) Screw-in ring 5 onto yarn beam 1, and set yarn
beam flange 2 with three fixing bolts (82101-
10035).
(4) Set yarn beam gear 4 onto yarn beam 1 so that
the holes (eight large holes) provided in yarn
beam gear 4 become aligned with those in yarn
beam 1. Then, tighten yarn beam 1 and yarn
beam gear 4 with eight bolt 8 to align the bolt
holes of yarn beam gear 4.
M1. Preparation for Setting
3

(2) Not using a flange ring (setting a left flange to the left side)
(1) Make a mark on the position to fix a flange
with a felt pen or something similar.
(2) Screw-in yarn beam flange 2 from the direction
of "A" until the flange's inside becomes aligned
with the mark.
For making the screwing-in job easier, apply
grease or oil to the threaded section.
(3) Set yarn beam gear 4 onto yarn beam 1 and turn
yarn beam gear 4 so that the holes (eight large
holes) provided in yarn gear 4 become aligned
with those in yarn beam 1.
Turn yarn beam flange 2 until the bolt holes
(three small holes) on yarn beam gear 4 become
aligned with those in yarn beam flange 2.
(4) Tighten yarn beam 1 and yarn beam gear 4 with
eight bolt 8. Then, align the bolt holes between
yarn beam flange 2 and yarn beam gear 4, and
tighten three bolt 7 (82101-10045 or 82101-
10055) evenly and sequentially.
M1. Preparation for Setting
4

2) [Mounting a flange opposite to the yarn beam gear side]
(5) Make a mark on "Drawing-in width –(2 ×
Selvage textural width) +0to10mm"=Lmm
from the right side on the mark made in step (1).
NOTE: The minimum effective drawing-in
width relative to each drawing-in width
is -70 cm.
(6) Screw-in yarn beam flange 3 from the direction
of "B" until inside yarn beam flange 3 becomes
aligned with the mark made in step (5).
•Formakingthescrewing-injobeasier,apply
grease or oil to the threaded section.
(7) Screw-in flange ring 5 also in the direction of "
B" until the gap from the end of yarn beam
flange 3 to that of flange ring 5 comes to 3 to 5
cm. Align bolt holes provided in flange ring 5
with those in yarn beam flange 3, then tighten
bolts.
※In case that left trimmed selvage is taken from the
trimmed selvage stand in accordance with the
specification for left trimmed selvage, the beam
should be set as shown in the figure below.
Also, the maximum textural width is 40 mm
shorter than the drawing-in width (for example, in
case of R/260, the maximum textural width is 2,
560 mm).
<
Gland beam
>
The left flange's inside should become aligned at
the point where X =125 mm from the end a of yarn
beam.
<
Pile beam
>
The left flange's inside on the left side should
become aligned at the point where X =150 mm
from the end a of yarn beam.
In the above-mentioned case, both gland beam and
pile beam should be fixed with using flange ring 5.
M1. Preparation for Setting
5

[1.3] Bearing installation
(1) Mark the point A below from inside a bearing
shaft 9:
(2) Insert a bearing 10 to the bearing shaft 9.
(3) Insert a hoop 11 so as to have the inside of the
bearing 10 matches the marking made in (1).
Then tighten the bolt 12 to position the bearing
10.
(4) Bearing shaft 9 is attached to the machine.
Remove bolt 13 and bearing shaft 9 from the
empty yarn beam when replacing the beams.
Gland beam Beam gear side 25.5mm
Counter beam gear side 28.0mm
Pile beam Beam gear side 92.5mm
Counter beam gear side 65.0mm
M1. Preparation for Setting
6

[2] Preparation of the Beam
[2.1] Preparation of gland beam
Wind the gland beam 1 counterclockwise from the
beam gear side A.
Care should be taken for the direction of
winding of the gland beam 1 and pile beam 2
which run counter to each other.
[2.2] Preparation of pile beam
Wind a pile beam 2 clockwise from the beam gear side
A.
Care should be taken for the direction of
winding of the gland beam 1 and pile beam 2
which run counter to each other.
M1. Preparation for Setting
7

[3] How to Run the Warps and Woven Fabric Through
(1) How to run the gland warps through
Run the warps to a gland warp dropper 2 via a
torsion bar roller 1. Allow them to pass between a
pile warp dropper 3 to reach a heald 11 and a reed
12.
(2) How to run the pile warps through
Run the warps along a deflector roller 4 and via a
shock absorber bar 5 to a pile easing roller 6. Run
them to the heald 11 and reed 12 through the pile
warp dropper 3.
(3) How to run woven fabric
Wind woven fabric on a surface roller 8 via an
expansion bar 7. Wind it on a cross roller 10 by
allowing it to pass over the press roller 9.
A: Gland beam
B: Pile beam
a:Glandyarn
b:Pileyarn
1.Surface roller
NOTE:Danger.Bewareofanumberofspikes
embedded to the surface of the surface
roller 8. Care should be taken when
working near the surface roller 8.
2.Cross roller
Wind woven fabric on to a cross roller 10.
Press it with apress roller 13 to insert the fabric
to the groove.
NOTE:Duringthesetting,terrymotioncanbe
stopped by selecting texture weaving
mode with the function panel.
M1. Preparation for Setting
8

[4] How to Remove/Reinstall the P-tension Shaft forEasier
New Fabric Weaving
At the new fabric weaving, removing top cross rail 1, back roller 5, and P-tension shaft 6 makes it easier to set the reed,
heald frames, and droppers to the weaving machine.
The reed, heald frames and droppers are very heavy, so take extra care when handling them.
In (16), tighten bolts to the torque values specified in the Standard Machine “Instruction Manual,”
Chap. M, Subsect. M.1.9.
(1) Remove bolts 3 from right and left clamps 2 on top
cross rail 1.
NOTE:Donotloosenorremovebolts4.
(2) Take out deflection roller 5.
(3) Make a note of the mounting angle of the leaf
spring, and then loosen bolts 8 on coupling 7.
(4) Slide the coupling 7 in the direction of arrow A.
(5) Remove bolts 10 from holder 9 and take off the
holder.
(6) Remove P-tension shaft 6.
(7) Set the reed, heald frames, and droppers to the
weaving machine.
(8) Put P-tension shaft 6 on the bracket.
(9) Fit coupling 7 onto P-tension shaft 6 until coupling 7
comes into contact with the stop ring, while pressing
shaft 6 in the direction of arrow A and sliding
coupling 7 in the direction of arrow B.
(10) Hold the leaf spring at an angle recorded in (3) and
secure coupling 7 with bolts 8.
(11) Secure holder 9 with bolts 10.
(12) Place deflection roller 5.
(13) Put top cross rail 1 on the bracket.
(14) Tighten bolts 3.
(15) After start of new fabric weaving, set the pile
tension. Then loosen bolts 8 on coupling 7 and
adjust the angle of the P-tension roller again so that
the warp sheet at section “C” becomes almost
horizontal.
(16) Check that bolts 3, 4, 8, and 10 are tightened to the
specified torques.
CAUTION
Clean the pile yarn contact part on the board
panel and the guide bar at every beam
change, and confirm that no foreign sub-
stance is attached. (This is to avoid a thread
being adhered by a substance such as paste
that adversely affects and tension.)
M1. Preparation for Setting
9

M2. Shedding Motion
[1] Dobby Shedding Specifications
For basic handling method, please refer to Stäubli’s Instruction Manual.
[1.1] Setting the Heald Frame Heightand Shed Size
See “Appendix 6. Stäubli’s Positive Dobby (Type
S3220)” for the shed size setting procedures.This
section introduces the following reference values for
the towel looms.
M2. Shedding Motion
10

Reference setting value list
Table M2-1
Shedding lever Pile Leno weave Waste selvage Ground
Frame No. Dimension C
(mm)
Dimension A
Frame height
(mm)
Dimension C
(mm)
Dimension A
Frame height
(mm)
Dimension C
(mm)
Dimension A
Frame height
(mm)
Dimension C
(mm)
Dimension A
Frame height
(mm)
1129147
2109 147
391147
473147
5103 147
690147
7 75 147
8109 147
9 129 142
10 120 142
11 109 142
12 99 142
13 89 142
14 78 142
15 69 142
16 59 142
NOTE:
1. Dobby is Staubli Dobby S3220, or S3260.
2. Specifications for Table M2-1 are as follows:
Heald frame: Rod replacement type 330 mm center thread eye, Dimension H: 618 mm, Stave width: 120 mm
3. For dimension A in specifications of each heald frame, add dimension a in the following Table M2-2 to
dimension A in Table M2-1.
Table M2-2
Heald frame specifications Size Stave width Thread eye lo-
cation
H
(Frame width between up and
down on both end guides)
a(Reference)
Heald frame model number
Rod replacement specification 330
120
Center
618 0 J2650-45200-00
155 618 0 J2650-45260-0B
Riderless type J 331
130
5mm Up
545 -41.5 J2650-08200-0A
155 595 -16.5 J2650-14210-0B
Riderless type C 331
130
Center
549 -34.5 J2650-29200-0C
155 599 -9.5 J2650-34210-0A
4. Height dimension A for the heald frame is the value at the close timing (center shed).
5. The maximum shed size is 95 mm for the Klöcker half-leno device.
M2. Shedding Motion
11

[2] Electronic Shedding Specifications
For basic handling guidelines, follow the instruction manual for the electronic shedding system.
[2.1] Setting the Heald Frame Height and Shedding Amount
For the shedding amount setting procedure, refer to the instruction manual for the electronic shedding system.
This section shows the following towel specifications as reference values.
Table M2-3
Shedding lever Pile Leno weave Waste selvage Ground
Frame No. Dimension C
mm
Dimension A
Frame height
mm
Dimension C
mm
Dimension A
Frame height
mm
Dimension C
mm
Dimension A
Frame height
mm
Dimension C
mm
Dimension A
Frame height
mm
135185.5
247185.5
358 185.5
466185.5
54185.5
614 185.5
7 24 185.5
8 32 185.5
9 17 180.5
10 25 180.5
11 32 180.5
12 38 180.5
13 45 180.5
14 50 180.5
15 55 180.5
16 60 180.5
Note:
1. Specifications for Table M2-3 are as follows:
Heald frame: Riderless C type 331 mm center thread eye, Dimension H: 599 mm, Stave width: 155 mm
2. For dimension A in specifications of each heald frame, add dimension a in the following Table M2-4 to
dimension A in Table M2-3.
Table M2-4
Heald frame specifications Size Stave width Thread eye lo-
cation
H
(Frame width between up and
down on both end guides)
a(Reference)
Heald frame model number
Rod replacement specification 330 110 Center 598 1.5 J2750-45030-0D
Riderless type J 331
118
5mm Up
521 -44 J2750-05030-0B
155 595 -7 J2750-14110-00
Hybrid 595 -7 J2750-15340-00
Riderless type C 331
155
Center
599 0 J2750-34110-0A
Hybrid 599 0 J2750-35340-00
4. Height dimension A for the heald frame is the value at the close timing (center shed).
5. The maximum shed size is 95 mm for the Klöcker half-leno device.
M2. Shedding Motion
12

[3] Jacquard Shedding Specifications
Refer to the instruction manual of Jacquard shedding motion for the handling method.
[3.1] Height of Top Rail Bracket
(1) Loosen a nut 4.
(2) Loosen a bolt 2.
(3) Turn an adjust bolt 3 and adjust a height A of a
top rail bracket 1.
(Standard dimension of height A is 55 mm.)
(4) Tighten the bolt 2 to fasten top rail bracket 1.
(5) Tighten the nut 4.
[3.2] Hanging of Draw Yarn
1. The left end position of draw yarn is 200 mm from the machined face inside the L.H. frame.
2. Determine the longitudinal position of draw yarn bysetting heald No. 1 to a point 43 mm from the rear face of
the rocking shaft.
M2. Shedding Motion
13

M3. Temple
Movable temple
Amovingclothfellproducespile.
NOTE:Tomakethetemplemovementsmooth,abearing4isinstalledtoatemplebasebracket3.
Accordingly, check that all thetemple guides 5 are constantly in contact with the bearing 4
[1] Longitudinal Position of the Temple
(1) Set the crank angle to 0°in fast pick.
(2) Lock the emergency stop push-button switch.
(3) Check clearance dimension “a” between the temple
and reed.
3to4mmwhenthewarptensionisnotapplied
2to3mmwhenloadedwithwarptension
(4) If the clearance is different between the left and
right, loosen expansion bar rod 1 fastening nut 2
(two pieces each on the left and right sides).
Turn the extension bar rod nut left and right to adjust
the longitudinal position of the temple to equalize
the clearance.
NOTE:Payattentiontotheintervalsofthestoppers
to the left and right of the cloth fell.
(See M5.2 Stopper Adjustment) Adjust
interval “a” correctly.
The red may be damaged if in contact with the yarn
guide plate during operation. Difference of interval
“a” in the longitudinal direction will result in the
difference of the pile length, additionally causing
fallen warp due to loose warp.
(5) If the clearance is the same on the left and right
sides, turn turnbuckle 6 of the terry motion lever for
adjustment. (When dimension “a” is different, and
the dimension on the left and right sides is same)
NOTE:Payattentiontotheintervalsofthestoppers
to the left and right of the cloth fell.
(See M9.1 Stopper Adjustment)
Adjust interval “a” correctly.
(6) Release the emergency stop push-button switch.
Check by inching operation that the yarn guide plate
is not in contact with the reed.
M3. Temple
14

[2] Crosswise Position of the Temple
[2.1] Left-hand side of the loom
(1) Loosen the bolts 2 (8 bolts) of a temple case 1.
(2) Move the temple case 1 so that a clearance “a”
between the left-hand side A of a temple ring 3
and a gripper 4 becomes 0.5 mm.
(3) Tighten the bolts 2 to fix the temple case 1.
[2.2] Right-hand side of the loom
(1) Pull the warp drawn through the reed toward you
at a right angle to a reed 5.
(2) Set the temple 7 so as to have the right-hand end
of No. 1 ring 8 of the temple 7 aligned to the
right-hand end 6 of the warp.
(3) After the setting, check that the right-hand end of
afabricisheldwiththewholesurfaceofNo.1
ring 8.
If not held with the whole surface, readjust.
When readjusted, readjust a cutter lever.
(4) To change the drawing width of a reed, loosen the
fastening bolts 9 (6 bolts) to move the temple 7 to
aprescribedposition,thentightenthebolts9to
fix it.
M3. Temple
15

[3] Vertical Position of the Temple
(1) Adjust the height of the left- and right-hand temples
with the number of the shims 1 between a temple
bracket 2 and the temple base 3.
Adjust the number of shims by loosening 8 bolts on
the left-hand side and 6 bolts on the right-hand side.
The standard number of shim is one shim of 1 mm.
(2) It is necessary to have a right-hand side cutter shaft
bracket 4 at the same height with the temple base 3.
Insert the same number of shims inserted between
the cutter shaft bracket 4 and the temple base 3 in
(1).
To adjust, loosen the bolts 5 (2 bolts).
The standard number of shim is one shim of 1 mm.
[4] Standard Setting of the Temple Ring
Loosen the bolt 2 to turn the temple ring 1 so as to have a
marked line x to the top. Tighten the bolt 2 to fix the
temple ring.
・To provide the temple with a harder pull, set the
marked line x to the counter-reed side.
NOTE:Careshouldbetaken,however,sinceloose
warp will result if the end of the fabric falls
from the end of the temple.
・To weaken the temple pull, set the marked line x to the
side of the reed.
M3. Temple
16
Other manuals for JAT810
2
Table of contents
Other Toyota Weaving manuals