Topdon ARTIDIAG100 User manual

Version: V1.00.000
Revised date: 12-20-2017

TOPDON ARTIDIAG100 English User’s Manual
Copyright Information
Copyright © 2018 by TOPDON TECH. CO., LTD. All rights reserved. No part of
this publication may be reproduced, stored in a retrieval system, or transmitted in
any form or by any means, electronic, mechanical, photocopying, recording or
otherwise, without the prior written permission of TOPDON. The information
contained herein is designed only for the use of this unit. TOPDON is not
responsible for any use of this information as applied to other units.
Neither TOPDON nor its affiliates shall be liable to the purchaser of this unit or
third parties for damages, losses, costs, or expenses incurred by purchaser or
third parties as a result of: Accident, misuse, or abuse of this unit, or unauthorized
modifications, repairs, or alterations to this unit, or failure to strictly comply with
TOPDON operating and maintenance instructions. TOPDON shall not be liable for
any damages or problems arising from the use of any options or any consumable
products other than those designated as Original TOPDON Products or TOPDON
Approved Products by TOPDON.
Trademark Information
TOPDON is a registered trademark of TOPDON TECH CO., LTD. (TOPDON) in
China and other countries. All other TOPDON trademarks, service marks, domain
names, logos, and company names referred to in this manual are either
trademarks, registered trademarks, service marks, domain names, logos,
company names of or are otherwise the property of TOPDON or its affiliates. In
countries where any of the TOPDON trademarks, service marks, domain names,
logos and company names are not registered, TOPDON claims other rights
associated with unregistered trademarks, service marks, domain names, logos,
and company names. Other products or company names referred to in this
manual may be trademarks of their respective owners. You may not use any
trademark, service mark, domain name, logo, or company name of TOPDON or
any third party without permission from the owner of the applicable trademark,
service mark, domain name, logo, or company name. You may contact TOPDON
by visiting the website at www.topdon.com, or writing to TOPDON TECH. CO.,
LTD., Huafeng Bao’an Zhigu Innovation Park, Yintian 4th Road, Xixiang Street,
Bao’an District, Shenzhen, Guangdong, P. R. China, to request written
permission to use Materials on this manual for purposes or for all other questions
relating to this manual.
i

TOPDON ARTIDIAG100 English User’s Manual
Safety Precautions
Before using this test equipment, please read the following safety information
carefully.
Always perform automotive testing in a safe environment.
Wear an ANSI-approved eye shield when testing or repairing vehicles.
The vehicle shall be tested in a well-ventilated work area, as engines produce
various poisonous compounds (hydrocarbon, carbon monoxide, nitrogen
oxides, etc.)
Do not connect or disconnect any test equipment while the ignition is on or the
engine is running.
Put blocks in front of the drive wheels and never leave the vehicle unattended
while testing.
Keep the test equipment dry, clean, free from oil, water or grease. Use a mild
detergent on a clean cloth to clear the outside of the equipment as necessary.
Do not drive the vehicle and operate the test equipment at the same time. Any
distraction may cause an accident.
Keep clothing, hair, hands, tools, test equipment, etc. away from all moving or
hot engine parts.
Before starting the engine, put the gear lever in the Neutral position (for
manual transmission) or in the Park (for automatic transmission) position to
avoid injury.
To avoid damaging the test equipment or generating false data, please make
sure the vehicle battery is fully charged and the connection to the vehicle DLC
(Data Link Connector) is clear and secure.
Automotive batteries contain sulfuric acid that is harmful to skin. In operation,
direct contact with the automotive batteries should be avoided. Pay attention
not to splash sulfuric acid into eyes. Keep the ignition sources away from the
battery at all times.
Vehicle ECU Precautions
Do not disconnect battery or any wiring cables in the vehicle when the ignition
switch is on, as this could avoid damage to the sensors or the ECU.
Do not place any magnetic objects near the ECU. Disconnect the power supply
to the ECU before performing any welding operations on the vehicle.
Use extreme caution when performing any operations near the ECU or
sensors. Ground yourself when you disassemble PROM, otherwise ECU and
sensors can be damaged by static electricity.
When reconnecting the ECU harness connector, be sure it is attached firmly,
otherwise electronic elements, such as ICs inside the ECU, can be damaged.
ii

TOPDON ARTIDIAG100 English User’s Manual
TABLE OF CONTENTS
1 Introduction.......................................................................................................................................... 1
1.1 Product Profile...................................................................................................................... 1
1.2 Features................................................................................................................................... 1
1.3 Technical Specifications..................................................................................................... 2
2 Knowledge of ARTIDIAG100........................................................................................................... 3
2.1 ARTIDIAG100 Handset....................................................................................................... 4
2.2 ARTIDIAG100 Accessory Checklists ........................................................................... 5
3 Preparations ......................................................................................................................................... 6
3.1 Charging ARTIDIAG100 ..................................................................................................... 6
3.2 On using your battery........................................................................................................ 6
3.3 Power on/off ......................................................................................................................... 6
3.3.1 Power on.................................................................................................................. 6
3.3.2 Power off ................................................................................................................. 6
3.4 Tips on finger operations ................................................................................................. 6
3.5 Lock & unlock the screen ................................................................................................. 7
3.5.1 Lock the screen ..................................................................................................... 7
3.5.2 Unlock the screen................................................................................................. 7
3.6 Screen layout ........................................................................................................................ 8
3.7 Status bar................................................................................................................................ 8
3.8 Notification bar.................................................................................................................... 8
3.9 Customize your desktop................................................................................................... 9
3.9.1 Move items on the desktop.............................................................................. 9
3.9.2 Delete items from the desktop........................................................................ 9
3.9.3 Change your wallpaper ...................................................................................... 9
3.9.4 Adjust brightness ................................................................................................. 9
3.9.5 Set standby time................................................................................................... 9
3.9.6 Set screen lock....................................................................................................... 9
3.9.7 Adjust the volume..............................................................................................10
3.10 Input Method ...................................................................................................................10
3.10.1 Activate/hide on-screen keyboard.............................................................10
3.10.2 Edit text ...............................................................................................................10
iii

TOPDON ARTIDIAG100 English User’s Manual
3.10.3 Android input method ...................................................................................10
4 Wi-Fi Setting.......................................................................................................................................12
4.1.1 Connect to a Wi-Fi network............................................................................12
4.1.2 Disconnect from a Wi-Fi network.................................................................12
5 How to diagnose ..............................................................................................................................13
5.1 Connections.........................................................................................................................13
5.1.1 Preparation ...........................................................................................................13
5.1.2 DLC Location........................................................................................................13
5.1.3 Vehicle Connection............................................................................................14
5.2 Diagnosis Flowchart .........................................................................................................14
5.3 Initial Setup..........................................................................................................................15
5.3.1 Product registration...........................................................................................15
5.3.2 Diagnostic software layout .............................................................................17
5.3.3 Function menu ....................................................................................................17
5.4 Update Diagnostic Software..........................................................................................18
5.5 Start Diagnosing................................................................................................................18
5.5.1 Read DTC ...............................................................................................................21
5.5.2 Clear Fault Memory...........................................................................................21
5.5.3 Read Data Stream...............................................................................................22
5.6 Reset .....................................................................................................................................24
5.7 Update...................................................................................................................................25
5.8 Profile.....................................................................................................................................25
5.8.1 Firmware Fix .........................................................................................................25
5.8.2 My Report .............................................................................................................25
5.8.3 Profile......................................................................................................................26
5.8.4 Change Password...............................................................................................26
5.8.5 Retrieve Password ..............................................................................................26
5.8.6 Help.........................................................................................................................27
5.8.7 Log Out..................................................................................................................27
5.9 Settings .................................................................................................................................27
5.9.1 Units of Measurement......................................................................................27
5.9.2 Expiration Reminder..........................................................................................27
5.9.3 Screen Shot...........................................................................................................27
iv

TOPDON ARTIDIAG100 English User’s Manual
5.9.4 Diagnostic Feedback.........................................................................................27
5.9.5 Network Test ........................................................................................................27
5.9.6 Diagnostic Software Clear...............................................................................27
5.9.7 Clear Data..............................................................................................................27
5.9.8 About......................................................................................................................27
6 Others ...................................................................................................................................................28
6.1 Email.......................................................................................................................................28
6.1.1 Configure an email account ...........................................................................28
6.1.2 Send an email ......................................................................................................28
6.1.3 View an email.......................................................................................................28
6.1.4 Delete an email ...................................................................................................28
6.1.5 Revise an account setting................................................................................29
6.1.6 Delete an email account ..................................................................................29
6.2 Browser .................................................................................................................................29
6.2.1 Open browser......................................................................................................29
6.2.2 Download files.....................................................................................................30
6.2.3 Manage bookmarks...........................................................................................30
6.2.4 Set homepage .....................................................................................................30
6.2.5 Clear history .........................................................................................................31
6.3 Calendar................................................................................................................................31
6.4 Alarms....................................................................................................................................31
6.4.1 Add an alarm .......................................................................................................31
6.4.2 Delete an alarm...................................................................................................31
6.4.3 Turn on/off alarm ...............................................................................................31
6.5 File Manager........................................................................................................................31
6.6 Applications.........................................................................................................................31
6.6.1 Install applications .............................................................................................31
6.6.2 View installed applications .............................................................................32
6.6.3 Uninstall applications........................................................................................32
6.7 Set Date & Time.................................................................................................................32
6.8 Clear Cache..........................................................................................................................32
7 FAQ ........................................................................................................................................................33
v

TOPDON ARTIDIAG100 English User’s Manual
1 Introduction
1.1 Product Profile
ARTIDIAG100 is a new Android-based vehicle trouble diagnostic device
developed for internet applications. It inherits from TOPDON’s advanced
diagnosing technology and is characterized by covering a wide range of vehicles,
featuring powerful functions, and providing precise test result.
Featuring 5 inch touch screen, it enables users to read/clear DTCs, record, save
and playback data in live graphic display.
Moreover, ARTIDIAG100 also features the following bi-directional “special tests”:
EVAP, O2 Sensor, I/M Readiness, MIL Status, VIN Info, and On-board monitors
testing.
In addition to amazing & powerful diagnosing function, ARTIDIAG100 also
features oil lamp reset and other reset functions.
1.2 Features
1. Diagnose:
Diagnose the electronic control system of prevailing vehicle models
covering Asian, European and American. Diagnosis functions includes:
Read DTCs, Clear DTCs, Read Data Stream, Special Functions etc.;
Specially designed for Android platform with clear and user-friendly
interface;
2. Wi-Fi connection is supported;
3. Web browser: Users can make online search and visit any website.
4. Other Android-based applications can be customized to install or uninstall.
5. File Manager: Lets you manage files or downloaded files stored in memory
card efficiently;
6. Settings: To configure your personalized ARTIDIAG100.
1

TOPDON ARTIDIAG100 English User’s Manual
1.3 Technical Specifications
Item
Description
Operating system
Android 4.2
Display
5 inch touch screen with 800 x 480 pixels
Connectivity
Wi-Fi (802.11 b/g/n)
USB: 2.0
Audio Input/Output
Microphone
Speakers
Operating Temperature
0
℃
~ 40
℃
(32 ~104
℉
)
Storage Temperature
-20
℃
~ 70
℃
(-4 ~158
℉
)
2

TOPDON ARTIDIAG100 English User’s Manual
2 Knowledge of ARTIDIAG100
There are two main components to the ARTIDIAG100 system:
ARTIDIAG100 Handset -- the central system (For details, please refer to
Chapter 2.1.)
Fig. 2-1
Diagnostic Cable -- the cable used to connect ARTIDIAG100 to vehicle’s DLC
for accessing vehicle data
`
(For full configuration, optional)
Fig. 2-2
3

TOPDON ARTIDIAG100 English User’s Manual
2.1 ARTIDIAG100 Handset
Fig. 2-3 ARTIDIAG100 Handset (front & rear view)
Table 2-1 formulates interfaces and indicators of ARTIDIAG100 handset:
No.
Name & Descriptions
1
DB15 Connector – To connect the diagnostic cable.
2
Screen Lock/Power Button – To turn the display tablet on/off with
long press, or lock the screen with short press.
3
Home Button
4
Setting Button
5
Memory Card Slot – To insert the memory card.
6
USB Port –To connect the included power adaptor.
7
Hand Grip
8
Audio Speaker
4
TOPDON ARTIDIAG100 English User’s Manual
9
Touch Screen
10
Selection Button
11
OK Button – To confirm an action or operation.
12
Back Button – To go back to the previous screen.
13
Microphone
2.2 ARTIDIAG100 Accessory Checklists
Common accessories for each ARTIDIAG100 are same, but for different
destinations, the accessories of ARTIDIAG100 (such as diagnostic software,
testing connectors) may vary. Please consult from the local agency or check the
package list supplied with ARTIDIAG100 together.
Table 2-3 – ARTIDIAG100 common accessories and descriptions
No.
Name
Qt.
1
ARTIDIAG100 Handset
1
2
Diagnostic Cable
1
3
Power Adaptor
1
4
USB Cable
1
5
OBD II Diagnostic Connector
1
6
Non-16 pin Diagnostic Connector
(optional)
5

TOPDON ARTIDIAG100 English User’s Manual
3 Preparations
3.1 Charging ARTIDIAG100
1. Connect the USB end of the included power adaptor to the USB port of your
tool;
2. Connect the other end of the adaptor into an AC outlet. If the tool is being
charged, the charging indicator displays . Once the indicator turns , it
means that charging is complete.
3.2 On using your battery
If the battery remains unused for a long period of time or the battery is
completely discharged, it is normal that the tool will not power on while being
charged. Please charge it for a period of 5 minutes and then turn it on.
Please use the included charger to charge your ARTIDIAG100. No
responsibility can be assumed for any damage or loss caused as a result of
using power adaptors other than the one specified.
To conserve the service life of the battery, avoid charging too frequently.
The charging time of battery varies with temperature condition and battery
consumption status.
3.3 Power on/off
3.3.1 Power on
Press the POWER key to turn the handset on.
Note: If it is the first time you have used this tool or the tool remains idle for a long
period of time, ARTIDIAG100 could fail to turn on. Please charge the handset for a
minimum of 5 minutes and attempt to turn on again.
3.3.2 Power off
1. Press the POWER key, an option menu will appear on the screen.
2. Tap “Power off” to turn off ARTIDIAG100.
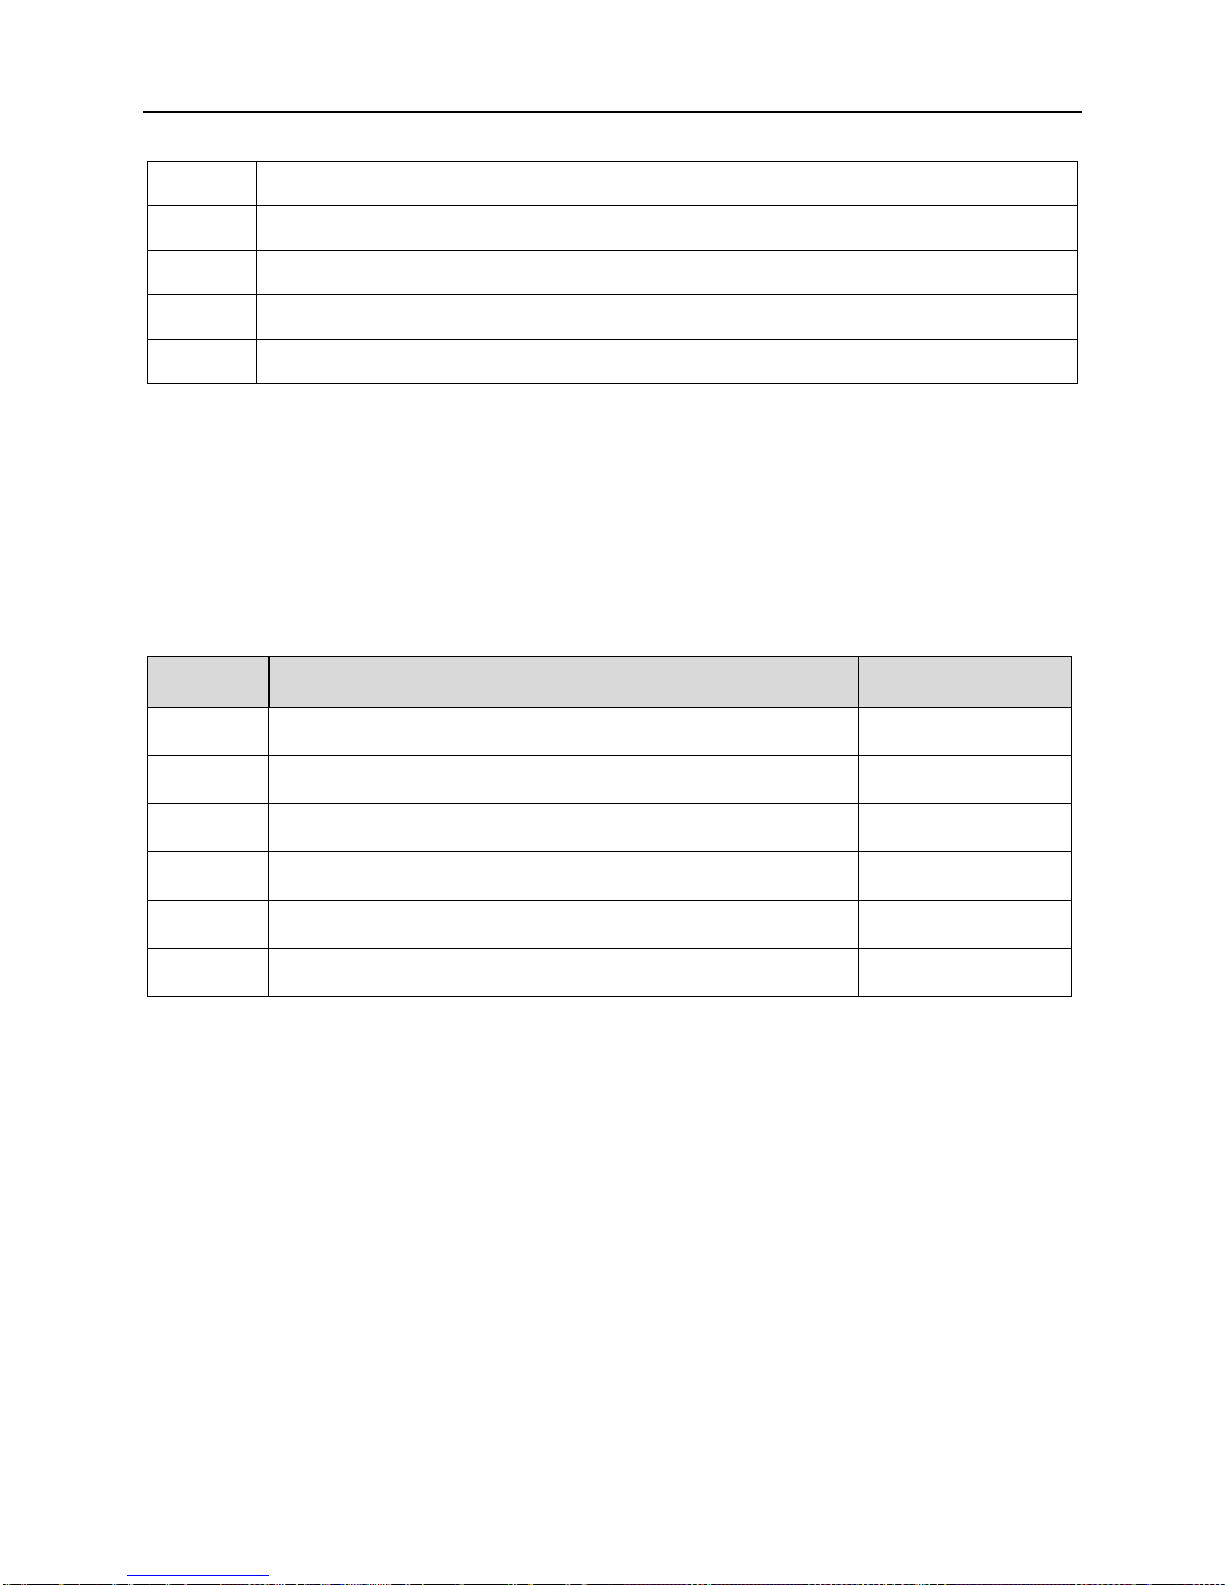
3.4 Tips on finger operations
Actions
Results
Single-tap
To select an item or launch a program.
Double-tap
To zoom in so that the text on a webpage appears in a
6

TOPDON ARTIDIAG100 English User’s Manual
column that fits your device’s screen.
Long press
Tap and hold on the current interface or area until a
contextual menu pops up on the screen, and then release it.
Slide
To jump to different pages.
Drag
Tap the desktop icon and drop it to other location.
Spread apart /
Pinch together
To zoom in manually, place two fingers on the screen and
then spread them apart. To zoom out, place two fingers apart
on the screen and then pinch them together.
3.5 Lock & unlock the screen
Many screen lock modes are available on ARTIDIAG100. Take the preset
screen-lock mode as an example for demonstration.
3.5.1 Lock the screen
When ARTIDIAG100 is ON, press POWER key once to lock the screen;
The system will lock the screen automatically after ARTIDIAG100 remains idle
over the preset standby time.
3.5.2 Unlock the screen
Press POWER key to activate the screen, and then drag the lock to “Unlock”
position.
Note: If you define as unlock using the pattern, you have to draw the right target
pattern to unlock it.
7

TOPDON ARTIDIAG100 English User’s Manual
3.6 Screen layout
Fig. 3-1
3.7 Status bar
For some common indicators, please see the following table.
Icons
Definitions
Icons
Definitions
Positioning GPS Charging
Battery is fully charged
Low battery
New mail Preparing memory card
Uploading Downloading
Connected to a PC
USB bound is activated
Available Wi-Fi is
detected
Connected to Wi-Fi
Notes: When the icon appears on the status bar, please charge it immediately.
3.8 Notification bar
The notification bar is used to display some activities, such as new messages, to
do list and running tasks. You can also open the notification bar to view the
reminder or activity notification.
8

TOPDON ARTIDIAG100 English User’s Manual
3.9 Customize your desktop
3.9.1 Move items on the desktop
1. Tap and hold the item to be moved until it is shaken.
2. Drag and drop it to the target location.
Note: Drag the icon to the margin of the screen and keep it still, the system will
switch to other extension desktop, place it to the desired location.
3.9.2 Delete items from the desktop
1. Tap and hold the item to be moved until it is shaken.
2. Drag it on the trash icon, and then release it.
Warning: Deleting an icon will uninstall the corresponding application. Please be
careful to do so.
3.9.3 Change your wallpaper
1. Tap and hold a blank area on the desktop, a pop-up wallpaper window will be
shown on the screen.
2. Set different wallpaper as desired:
• Wallpapers: Choose a still picture from gallery as wallpaper.
• Live Wallpapers: Open it to choose one of the preset live wallpapers as
wallpaper.
3.9.4 Adjust brightness
Tips: Reducing the brightness of the screen will help to conserve battery power.
1. On the HOME screen, tap Settings > Display > Brightness.
2. Drag the slider to adjust it as desired.
3.9.5 Set standby time
If no activities are made within the defined standby period, the screen will be
locked automatically and the system enters sleep mode to save power.
1. On the HOME screen, tap Settings > Display > Sleep.
2. Choose the desired sleep time.
3.9.6 Set screen lock
This function is designed to lock the screen and buttons to avoid accidental
operations while it is unattended.
1. On the HOME screen, tap Settings > Security > Screen lock.
2. Choose the desired screen lock mode and follow the on-screen instructions to
9

TOPDON ARTIDIAG100 English User’s Manual
finish your setting.
3.9.7 Adjust the volume
This option enables you to adjust the volume of the ring tone, media player, alarm
and notification.
1. On the HOME screen, tap Settings > Sound > Volume.
2. Drag the slider to adjust it.
Note: Alternatively, you can also press the volume keys to control the volume of the
current application.
3.10 Input Method
3.10.1 Activate/hide on-screen keyboard
By default, Android keyboard is available on ARTIDIAG100.
To input text, tap the input box and the on-screen keyboard will be activated
automatically.
After inputting, tap to hide the keyboard.
Note: In some applications, the on-screen keyboard may partially appear over some
interfaces.
3.10.2 Edit text
Cut, copy and paste operations are supported.
1. Tap and hold the desired text area until a blue cursor appears.
2. Tap and drag the cursor to highlight the text to be edited.
3. Tap SELECT ALL, CUT or COPY to perform the corresponding operations. To
delete the selected text, tap the delete key on the keyboard.
3.10.3 Android input method
Fig. 3-2
10

TOPDON ARTIDIAG100 English User’s Manual
1
To toggle between upper case and lower case.
2
To switch to numeric & symbol keyboard.
3
To enter a space.
4
> To delete the character before the cursor.
> Long-press this key to delete all characters before the cursor.
5
Line feed.
Note: For different input box, keyboard layout may vary. The figure shown as above
is provided for reference purpose.
11

TOPDON ARTIDIAG100 English User’s Manual
4 Wi-Fi Setting
Note: If you don’t need Wi-Fi for a while, you can turn it off to conserve battery life.
The ARTIDIAG100 has built-in Wi-Fi that you can use to get online. Once you’re
online, you can register your handset, browse the Internet, get apps and send
email on your network.
4.1.1 Connect to a Wi-Fi network
1. On the HOME screen, tap Settings > Wi-Fi.
2. Tap or slide the Wi-Fi switch to ON, ARTIDIAG100 starts searching all
available wireless LANs.
3. Choose the desired Wi-Fi access point / network,
If the network you chose is open, you can connect directly;
If the selected network is encrypted, you have to enter the right security key
(network password).
Once it is connected successfully, tap the Wi-Fi network from the list to view its
name, link speed, security type, IP address etc.
When this tool is in range, it will connect to the previously linked network
automatically.
4.1.2 Disconnect from a Wi-Fi network
1. On the HOME screen, tap Settings > Wi-Fi.
2. Tap the network with the Connected status, then tap “Disconnect”.
12

TOPDON ARTIDIAG100 English User’s Manual
5 How to diagnose
5.1 Connections
5.1.1 Preparation
Normal testing conditions
Turn on the vehicle power supply.
Throttle should be closed at its close position.
Select testing connectors
If ARTIDIAG100 is testing vehicles equipped with universal OBD II 16 PIN
diagnostic socket, please use the included diagnostic connector. (For vehicles
with non-OBD II 16 PIN diagnostic socket, a non-16 PIN connector is required.)
5.1.2 DLC Location
The DLC (Data Link Connector or Diagnostic Link Connector) is typically a
standardized 16-pin connector where diagnostic code readers interface with the
vehicle’s on-board computer. The DLC is usually located 12 inches from the
center of the instrument panel (dash), under or around the driver’s side for most
vehicles. If Data Link Connector is not located under dashboard, a label should be
there telling location. For some Asian and European vehicles, the DLC is located
behind the ashtray and the ashtray must be removed to access the connector. If
the DLC cannot be found, refer to the vehicle’s service manual for the location.
Fig. 5-1
13

TOPDON ARTIDIAG100 English User’s Manual
5.1.3 Vehicle Connection
The method used to connect the diagnostic connector to a vehicle’s DLC depends
on the vehicle’s configuration as follows:
A vehicle equipped with an OBD II management system supplies both
communication and 12V power through a standardized DLC.
A vehicle not equipped with an OBD II management system supplies
communication through a DLC connection, and in some cases supplies 12V
power through the cigarette lighter receptacle or a connection to the vehicle
battery.
Follow the steps mentioned below to connect OBD II vehicle:
1. Locate vehicle’s DLC socket.
2. Plug the DB15 connector of OBD II diagnostic connector into diagnostic main
cable, and then connect the other end of diagnostic connector to the vehicle’s
DLC socket.
3. Plug the other end of diagnostic main cable into the DB15 connector of
ARTIDIAG100, and then tighten the captive screws.
For non-OBDII vehicle, proceed as follows:
1. Locate vehicle’s DLC socket.
2. Select the corresponding non-16pin connector.
3. Plug the non-16pin end of diagnostic connector into the DLC socket, and
then connect the other end to the diagnostic main cable.
4. Connect the other end of the diagnostic main cable to DB15 connector of
ARTIDIAG100 and then tighten the captive screws.
5.2 Diagnosis Flowchart
For new users, please follow the operation chart shown in Fig. 5-2 to get familiar
with and start using ARTIDIAG100.
14
Table of contents
Other Topdon Medical Equipment manuals

Popular Medical Equipment manuals by other brands


Getinge
Getinge Arjohuntleigh Nimbus 3 Professional Instructions for use

Mettler Electronics
Mettler Electronics Sonicator 730 Maintenance manual

Pressalit Care
Pressalit Care R1100 Mounting instruction

Denas MS
Denas MS DENAS-T operating manual

bort medical
bort medical ActiveColor quick guide

AccuVein
AccuVein AV400 user manual


