manuals.online logo
Brands
  1. Home
  2. •
  3. Brands
  4. •
  5. Toshiba
  6. •
  7. All In One Printer
  8. •
  9. Toshiba MJ-1101 Installation and operating instructions

Toshiba MJ-1101 Installation and operating instructions

Other Toshiba All In One Printer manuals
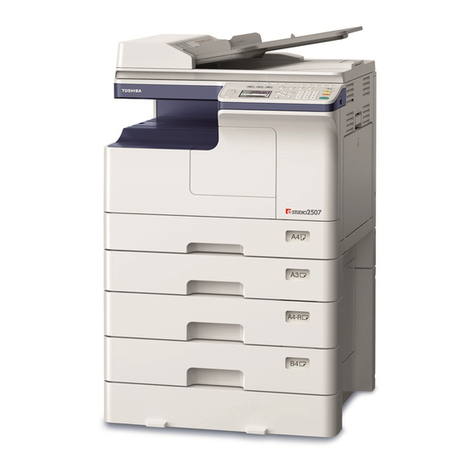
Toshiba e-STUDIO GL-1020 Service manual

Toshiba

Toshiba e-STUDIO GL-1020 Service manual

Toshiba E-STUDIO2000AC User manual

Toshiba

Toshiba E-STUDIO2000AC User manual

Toshiba e-studio 520T User manual

Toshiba

Toshiba e-studio 520T User manual

Toshiba e-studio205L How to use

Toshiba

Toshiba e-studio205L How to use

Toshiba E-STUDIO5506AC User manual

Toshiba

Toshiba E-STUDIO5506AC User manual

Toshiba E-STUDIO2500AC User manual

Toshiba

Toshiba E-STUDIO2500AC User manual

Toshiba 352/452 User manual

Toshiba

Toshiba 352/452 User manual

Toshiba e-BRIDGE Re-Rite User manual

Toshiba

Toshiba e-BRIDGE Re-Rite User manual
Toshiba e-STUDIO FASTstart 200L User manual

Toshiba

Toshiba e-STUDIO FASTstart 200L User manual

Toshiba e-studio 656G User manual

Toshiba

Toshiba e-studio 656G User manual

Toshiba e-STUDIO352 User manual

Toshiba

Toshiba e-STUDIO352 User manual

Toshiba E-STUDIO6506AC User manual

Toshiba

Toshiba E-STUDIO6506AC User manual

Toshiba e-STUDIO203S Setup guide

Toshiba

Toshiba e-STUDIO203S Setup guide

Toshiba e-studio 160 User manual

Toshiba

Toshiba e-studio 160 User manual

Toshiba E-STUDIO 232 User manual

Toshiba

Toshiba E-STUDIO 232 User manual

Toshiba E-Studio 6540c User manual

Toshiba

Toshiba E-Studio 6540c User manual

Toshiba e-studio 223 User manual

Toshiba

Toshiba e-studio 223 User manual

Toshiba e-studio555 User manual

Toshiba

Toshiba e-studio555 User manual

Toshiba E-studio 281c User manual

Toshiba

Toshiba E-studio 281c User manual

Toshiba e-STUDIO A Series User manual

Toshiba

Toshiba e-STUDIO A Series User manual

Toshiba e-studio2330c User manual

Toshiba

Toshiba e-studio2330c User manual

Toshiba E-Studio167 User manual

Toshiba

Toshiba E-Studio167 User manual

Toshiba e-STUDIO556 User manual

Toshiba

Toshiba e-STUDIO556 User manual

Toshiba e-STUDIO 2303AM User manual

Toshiba

Toshiba e-STUDIO 2303AM User manual

Popular All In One Printer manuals by other brands

Brother MFC-J220 Basic user's guide

Brother

Brother MFC-J220 Basic user's guide

Brother MFC-8510DN Basic user's guide

Brother

Brother MFC-8510DN Basic user's guide

Ricoh Aficio FX200 Service training

Ricoh

Ricoh Aficio FX200 Service training

Olivetti d-Copia 16W Operation manual

Olivetti

Olivetti d-Copia 16W Operation manual

Konica Minolta bizhub C3850FS user guide

Konica Minolta

Konica Minolta bizhub C3850FS user guide

Konica Minolta bizhub 758 manual

Konica Minolta

Konica Minolta bizhub 758 manual

Lexmark MX310 Series Service manual

Lexmark

Lexmark MX310 Series Service manual

Ricoh Aficio 3224C operating instructions

Ricoh

Ricoh Aficio 3224C operating instructions

Sagem MF 3625 user manual

Sagem

Sagem MF 3625 user manual

Epson Epson Stylus NX530 quick guide

Epson

Epson Epson Stylus NX530 quick guide

Brother MFC9800 - MFC 9800 B/W Laser owner's manual

Brother

Brother MFC9800 - MFC 9800 B/W Laser owner's manual

Konica Minolta 7033 instruction manual

Konica Minolta

Konica Minolta 7033 instruction manual

Ricoh Aficio MP 161F operating instructions

Ricoh

Ricoh Aficio MP 161F operating instructions

Epson WorkForce WF-2510 Basic guide

Epson

Epson WorkForce WF-2510 Basic guide

Epson Stylus Scan 2000 Product information guide

Epson

Epson Stylus Scan 2000 Product information guide

Epson PictureMate Snap PM 240 Start here

Epson

Epson PictureMate Snap PM 240 Start here

Brother MFC-J430w user guide

Brother

Brother MFC-J430w user guide

Konica Minolta BIZHUB 558 Quick reference guide

Konica Minolta

Konica Minolta BIZHUB 558 Quick reference guide

manuals.online logo
manuals.online logoBrands
  • About & Mission
  • Contact us
  • Privacy Policy
  • Terms and Conditions

Copyright 2025 Manuals.Online. All Rights Reserved.

MJ-1101 Service Manual Addendum
Supplement to the Troubleshooting Section
TOSHIBA
i
Index
Error Code Page
EA20 1,2,3,4,13,14
EA40 5,13,14
EA60/CC30 6,7,8,9
EA70 /CC41 6,7,8,9,13,14
EAEO 10
CB31 11,12
*Recommended Lubricant Molykote EM-30L - 6LE36904000
TOSHIBA
Error code Phenomenon Possible cause Items to confirm / Countermeasures Precautions / Remarks
EA20
㪄㩷Note that the height should be different between the cases when the Finisher
is installed in e-STUDIO281c/351c/451c and when installed in e-
STUDIO352/452 or e-STUDIO2500c/3500c/3510c.
- Paper jams at the
entrance section of
the Finisher (or the
Hole Punch Unit)
- Folded paper edge
- Paper jams C2in the
buffer tray section
- C2Paper exit
problems on the
finishing tray
- Note that the height should be different between the cases when the Finisher
is installed in e-STUDIO281c/351c/451c and when installed in e-
STUDIO352/452 or e-STUDIO2500c/3500c/3510c.
- Confirm the height every time you move the equipment.
C. When installing the Finisher in the equipment, make sure that the height of the Finisher is proper. If it is not, the
Brid
g
e Unit exit M
y
lar ma
y
be deformed
,
and thus the deformed M
y
lar ma
y
obstruct the
p
a
p
er trans
p
ort
p
ath.
Check if the Mylar attached to the exit of the Bridge Unit is deformed and obstructing the paper transport path.
Correct it if deformed.
2. Bridge Unit exit Mylar deformed
B. To keep the installation height of the Finisher stable, it is preferable that the casters are faced to the equipment
side.
A. Confirm that the Finisher is installed horizontally (the height of its front side and that of its rear side are the
same
)
.
1. Improper installation height
(Paper is not properly transported
from the equipment to the
Finisher if each height is
improper.)
The length of the arrows should be the same.
Caster
㪜quipment side
Improper
case Installation height
Normal Abnormal
Deformed Mylar
Paper transport path
㪈
Error code Phenomenon Possible cause Items to confirm / Countermeasures Precautions / Remarks
EA20
a: Slide the buffer guide to the center and lubricate between the shafts of the
front buffer guide.
b: Slide the buffer guide forward or backward and lubricate between the shafts
of the rear buffer guide.
* Be sure to lift up the buffer roller before sliding the guide.
5. False operation of the entrance
sensor or the transport sensor
(An error may occur when the
entrance sensor or the transport
sensor does not perform proper
detection.)
A. Check if the wires of the entrance sensor or the transport sensor are being caught or short circuited, or any of
their connectors is disconnected.
4. False operation of the buffer
guide
(Paper jams may occur if the load
is applied to the buffer guide
during its opening or closing
movement.)
Remove the stationary tray and apply grease "Molykote EM-30L" (the size of 5 grains of rice) to the buffer guide
shaft.
- Paper jams at the
entrance section of
the Finisher (or the
Hole Punch Unit)
- Folded paper edge
- Paper jams C2in the
buffer tray section
- C2Paper exit
problems on the
finishing tray
3. Improper connection between
the equipment and the Hole
Punch Unit
(Paper is not properly transported
from the equipment to the Hole
Punch Unit if they are not
connected correctly.)
When the Hole Punch Unit is installed, check if the connection point is shifted forward or backward.
Normal Abnormal
Hole Punch Unit
㪸Molykote EM-30L
(the size of 5
grains of rice)
Buffer roller
Buffer guide shaft
Molykote EM-30L
(the size of 5
grains of rice)
㪹
Transport sensor actuator
Entrance sensor actuator
㪉
If the entrance sensor does not retract quickly, replace the spring
with a new one P/N 6LB09015000 SPG-FEED-SNSR-1.
Error code Phenomenon Possible cause Items to confirm / Countermeasures Precautions / Remarks
EA20
7. Paper not placed properly in
the drawer
(Paper may be skewed if there is
extra gap between the paper and
the side wall in the drawer and
thus may cause a jam on the
Finisher transport path.)
Be sure to lock the side wall.
Operation check of the transport sensor actuator: Rotate the shaft slowly. If the actuator is not rotated together, its
o
p
eration is normal.
6. False operation of the paper
exit guide
(An error may occur when the
paper exit guide is not operating
properly because paper may
remain on the finishing tray or not
exit properly during sort or
stapling exit.)
Replace SPG-SFFD-SUPT-SF (6LB090140) if the paper exit guide is not operating properly.
- Paper jams at the
entrance section of
the Finisher (or the
Hole Punch Unit)
- Folded paper edge
- Paper jams C2in the
buffer tray section
- C2Paper exit
problems on the
finishing tray
5. False operation of the entrance
sensor or the transport sensor
(An error may occur when the
entrance sensor or the transport
sensor does not perform proper
detection.)
B. Check if the actuators of the entrance sensor and the transport sensor are operating smoothly. If they are not,
remove the actuator and check if there is any paper dust or foreign matter between the shaft and the hole. Clean if
there is.
Transport sensor actuator
Entrance sensor actuator
Transport sensor actuator
Hook this to the actuator.
Hook this onto the bracket.
Transport sensor actuator
Finishing tray
Paper exit guide
Gap
Side wall
Normal Abnormal
Paper
㪊
Error code Phenomenon Possible cause Items to confirm / Countermeasures Precautions / Remarks
EA20
When replacing, be sure not to scratch the shaft (ASYB-SFT-EXT-RLR-DRV-
BUF).
B. Check if the gear teeth of GEAR-IDLER-EXT-BUF, GEAR1-EXT-RLR-BUF and GEAR2-EXT-RLR-BUF mesh
correctly. If any of them does not mesh correctly, replace ASYB-SFT-EXT-RLR-DRV-BUF, ASYS-LVR-E-RLR-
BUF, GEAR-IDLER-EXT-BUF, GEAR1-EXT-RLR-BUF or GEAR2-EXT-RLR-BUF.
- Paper jams at the
entrance section of
the Finisher (or the
Hole Punch Unit)
- Folded paper edge
- Paper jams C2in the
buffer tray section
- C2Paper exit
problems on the
finishing tray
8. Drive not transmitted from the
gear in the paper transport
section
A. Check if there is any rattling on ASYS-LVR-E-RLR-BUF. If there is, replace ASYB-SFT-EXT-RLR-DRV-BUF,
ASYS-LVR-E-RLR-BUF, GEAR-IDLER-EXT-BUF, GEAR1-EXT-RLR-BUF and GEAR2-EXT-RLR-BUF.
GEAR1-EXT-RLR-BUF
GEAR-IDLER-EXT-BUF
GEAR2-EXT-RLR-BUF
ASYS-LVR-E-RLR-BUF
ASYB-SFT-EXT-RLR-DRV-BUF
Check that there is no rattling.
GEAR1-EXT-RLR-BUF
GEAR-IDLER-EXT-BUF
GEAR2-EXT-RLR-BUF
ASYS-LVR-E-RLR-BUF
ASYB-SFT-EXT-RLR-DRV-BUF
Do not scratch this area.
LVR-E-RLR-BUF
ASYB-SFT-EXT-RLR-DRV-BUF
SFT-EXT-RLR-DRV-BUF
Scratch on the shaft
㪋
Error code Phenomenon Possible cause Items to confirm / Countermeasures Precautions / Remarks
EA40 Pa
p
er
j
ammin
g
2. Stationary tray opening/closing
switch actuator deformed
(A cover-open error occurs if the
actuator is deformed because the
stationary tray opening/closing
switch cannot be turned and
performs false detection.)
Replace PLT-OPEN-SW-BUF if the actuator is deformed.
Close the stationary tray securely if it is open.1. Stationary tray left open
(A cover-open error occurs if the
stationary tray is left open
because the stationary tray
opening/closing switch performs
false detection during operation.)
Replace HNDL-DOOR if the actuator is deformed or damaged.3. Front cover switch actuator
deformed (MJ-1101)
(A cover-open error occurs if the
actuator is deformed because the
front cover switch cannot be
turned and it performs false
detection.)
Replace COVER-F-DOOR-P if the actuator is deformed or damaged.3. Front cover switch actuator
deformed (MJ-6101)
(A cover-open error occurs if the
actuator is deformed because the
front cover switch cannot be
turned and performs false
detection.)
Actuator
Stationary tray
Tray closed Tray opened
MJ-1101
Actuator
Actuator
MJ-6101
㪌
Error code Phenomenon Possible cause Items to confirm / Countermeasures Precautions / Remarks
EA70
EA60
CC30
CC41
Turn the power OFF. Then check the gap between rollers on the buffer roller guide and the buffer tray while the
buffer roller is left lowered. If the gap does not reach 0.3 mm, replace the buffer roller guides (LVR-E-RLR-BUF)
on both front and rear sides.
3. Improper roller gap on the
buffer roller guide and buffer tray
2. Catching pad link arm
deformed, damaged or removed
(Paper is not aligned properly
because the link arm of the
catching pad is deformed,
damaged or removed.)
Check the gap within the range 7 mm from the edge of the buffer roller guide.
- When more than one
sheet of paper is
loaded on the buffer
tray, the first sheet is
pushed out of the tray
by the second sheet.
- When more than one
sheet of paper is
loaded on the buffer
tray, the leading edge
of the second sheet is
caught and thus a
paper jam occurs.
- When paper is
transported from the
buffer tray to the
finishing tray, the
paper is run on the
front or rear alignment
plate.
- When paper is
loaded on the finishing
tray, the front and rear
alignment plates
excessibly push the
paper.
- When paper is
transported from the
finishing tray to the
movable tray, the
paper exit guide
catches the paper and
thus a motor error
occurs because the
paper cannot exit.
Check if the catching pad in the Finisher paper exit section is properly attached. If its link arm is deformed,
damaged or removed, replace ARM-SOL-ALIGN (6LB100080).
Check if the catching pad in the Finisher paper exit section is properly attached. Replace it if it is deformed or
dama
g
ed.
1. Catching pad deformed or
damaged
(Paper is not aligned properly due
to the deformed or damaged
catching pad.) Abnormal
Facing down
Catching pad link arm
Normal
Catching pad
0.3 mm or
more
Within the range 7 mm
from the edge
Buffer roller
RLR-EXIT-BUFFER
Roller on the buffer tray
RLR-EXIT-TRY
Buffer roller guide
LVR-E-RLR-BUF
Buffer tray
Buffer roller guide
Buffer roller guide
㪍
Error code Phenomenon Possible cause Items to confirm / Countermeasures Precautions / Remarks
EA70
EA60
CC30
CC41
4. Improper spacing on the edge
section of the buffer roller guide
and the buffer tray upper section
- When more than one
sheet of paper is
loaded on the buffer
tray, the first sheet is
pushed out of the tray
by the second sheet.
- When more than one
sheet of paper is
loaded on the buffer
tray, the leading edge
of the second sheet is
caught and thus a
paper jam occurs.
- When paper is
transported from the
buffer tray to the
finishing tray, the
paper is run on the
front or rear alignment
plate.
- When paper is
loaded on the finishing
tray, the front and rear
alignment plates
excessibly push the
paper.
- When paper is
transported from the
finishing tray to the
movable tray, the
paper exit guide
catches the paper and
thus a motor error
occurs because the
paper cannot exit.
Turn the power OFF and pull the plunger of the buffer roller lift solenoid by hand. Then check the spacing on the
edge section of the buffer roller guide and the buffer tray upper section while the buffer roller is lifted up. If the
edge section of the buffer roller guide is not lower than the buffer tray upper section, replace STAY-BUFFER.
- If the joint surfaces of the stationary tray and the rear lower cover (or the
control panel unit) are shifted 4 mm or more, the motor bracket may be
deformed.
- Do not hold the stationary tray when unpacking.
5. Motor bracket deformed
(The bracket of the buffer tray
guide motor or the buffer roller
drive motor is deformed and thus
drive is not transmitted.)
If the buffer tray guide motor bracket (HLDR-TRAY-BUF) or the buffer roller drive motor bracket (HLDR-MOTR-
BUFFER) is deformed, replace it.
Buffer roller lift solenoid
STAY-BUFFER
Buffer roller
RLR-EXIT-BUFFER
Buffer tray upper section
RLR-EXIT-TRY
Buffer roller edge section
LVR-E-RLR-BUF Buffer tray
A gap appears due to the
deformed bracket.
Buffer tray guide motor
Buffer roller drive motor
Normal Abnormal
Normal
㪎
Error code Phenomenon Possible cause Items to confirm / Countermeasures Precautions / Remarks
EA70
EA60
CC30
CC41
- When more than one
sheet of paper is
loaded on the buffer
tray, the first sheet is
pushed out of the tray
by the second sheet.
- When more than one
sheet of paper is
loaded on the buffer
tray, the leading edge
of the second sheet is
caught and thus a
paper jam occurs.
- When paper is
transported from the
buffer tray to the
finishing tray, the
paper is run on the
front or rear alignment
plate.
- When paper is
loaded on the finishing
tray, the front and rear
alignment plates
excessibly push the
paper.
- When paper is
transported from the
finishing tray to the
movable tray, the
paper exit guide
catches the paper and
thus a motor error
occurs because the
paper cannot exit.
8. Stack transport motor belt out
of gear
If the stack transport motor belt is loose, retighten it, or replace the motor bracket (BRKT-MOTR-SF) to retighten
the belt.
7. Improper installation of
alignment plates
6. STAY-BUFFER deformed Remove the bracket of the buffer roller lift solenoid. Then check that STAY-BUFFER is not deformed using a
scale or other straight tool. Replace it if it is deformed.
If the front or rear alignment plate is removed or its installation is improper, reinstall it. (The alignment plates must
not be risen even if they are tilted to the right or left.)
STAY-BUFFER
Scale
A gap appears if it is deformed.
AbnormalNormal
Alignment plate Rising of the plate
㪏