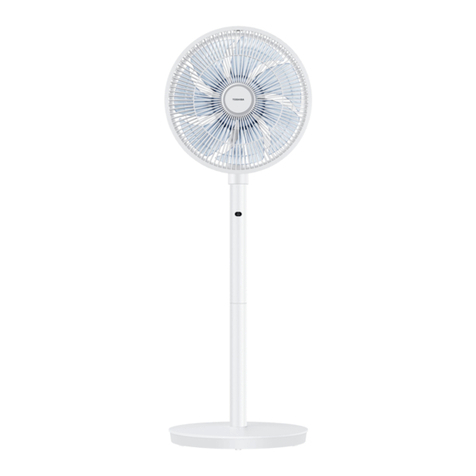
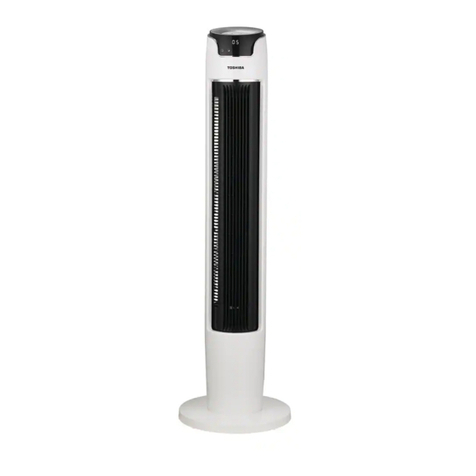
Toshiba F-LSA20(W) PH User manual

English
AC STAND FAN
F-LSA20(W) PH
CONTENTS
IMPORTANT SAFETY INSTRUCTIONS..........2-5
INSTALLATION....................................................6-7
CONTROL PANEL ...................................................8
DISPLAY PANEL......................................................8
OPERATION..............................................................9
TURN ON/OFF .....................................................................9
PROGRAMMED MODE .....................................................9
OSCILLATION.......................................................................9
TIMER .....................................................................................9
HOW TO PACK .....................................................10
SPECIFICATIONS..................................................11
TROUBLE SHOOTING......................................... 12
Thank you very much for purchasing Toshiba fan.
yllufotlaunamnoitcurtsnisihtdaerylluferacesaelp,ylefasdnayltcerrocnafsihtesuotredronI•
understand the content before using it.
• After reading the manual, keep it handy for easy reference.

2
IMPORTANT SAFETY INSTRUCTIONS
Safety precautions
Always follow these instructions!
This manual provides instructions that must be observed when using the fan in order to
prevent danger to the user, other persons, and property.
WARNING
Stop using the fan immediately in case of abnormal operation or failure.
(Risk of re, electrical shock, or other injury)
Disconnect the power plug immediately and contact the store of purchase or Toshiba home appliances customer
support center.
<Example abnormality or failure>
•The blades do not spin even after the power button is pressed.
•The blades spin but too slow or at an irregular speed.
•The blades make an abnormal noise when they spin.
•The motor or other operational part is abnormally hot or produces a burning smell.
•The fan periodically stops when the cord is moved.
Operation and handling
•Do not operate the fan without the base attached. (Risk of injury due to the fan toppling)
•Do not operate the fan without the blades or guard attached. (Risk of injury)
•Do not clean the fan in its stand-up position. (Risk of injury due to the motor falling out as a result of accidentally)
•Do not spray ammable aerosols and the like or place aerosol cans nearby. Risk of re or explosion if ammable
aerosols or chemicals are placed nearby.
•Do not hold the handle to swing the fan. (Risk of breakage or injury)
•Do not pour water over the fan or immerse it in water. (Risk of short-circuit or electrical shock)
•Store the plastic bags for packaging out of reach of children. (Risk of suocation if they cover the head)
•Do not disassemble, repair, or modify fan components.
(Risk of re, electrical shock, or other injury)
For repairs, contact the store of purchase or Toshiba home appliances customer support center.
•When assembling the fan, properly tighten the fastening rings and the spinner.
•Follow the instruction manual when assembling or cleaning the fan. (Risk of injury due to parts becoming
detached)
IMPORTANT SAFETY INSTRUCTIONS

English
3
Power plug or cord
•Use an AC 230V power outlet. (Risk of re or electrical shock)
Do not use an extension cord or overload the electrical circuit.
•Be sure to fully insert the power plug into the outlet.
(Risk of electrical shock or re due to generation of heat)
•When disconnecting the power plug, always grasp the plug (Risk of re, electrical shock, or short-circuit due to
the cord breaking as a result of being pulled)
•If the blades of the power plug or the surface on which they are mounted are dusty, wipe them with a dry cloth.
(Risk of re due to insulation failure)
•Disconnect the power plug from the outlet when assembling, cleaning, or carrying the fan.
(Risk of electrical shock or injury)
•In case of a thunder storm, turn the fan o and disconnect the power plug from the outlet.
(Risk of re, electrical shock, or failure)
•When the fan is not in use, disconnect the power plug from the outlet.
(Risk of re or electrical shock due to insulation deterioration)
•Do not use the fan if the power plug or cord is damaged or hot, or if the outlet is loose.
(Risk of re, electrical shock, injury, or short-circuit)
•Avoid damaging the power plug or cord. (Risk of re, electrical shock, or short-circuit)
•Do not modify.
•Do not place close to heat-generating devices.
•Do not subject to strain, place underneath heavy objects, or pinch.
•Do not forcibly bend or twist or apply current when coiled.
•Do not place the cord under the base of the fan. (Risk of re or electrical shock)
•Do not pull the cord when carrying or storing the fan.
(Risk of re or electrical shock due to short-circuit or damage to the cord)
•Do not use the fan while the cord is under tension.
(Risk of re or electrical shock due to short-circuit or damage to the cord)
•Do not use cable clips,nails, or the like to x the cord in place.
•Do not handle the power plug with wet hands. (Risk of electrical shock, or other injury)
•Do not replace batteries within sight of children.
•Keep the spinner and the batteries for the remote control out of reach of children.
(Risk of suocation, chemical burns including damage to digestive tract, or illness if swallowed accidentally)
In the case of ingestion, see a doctor immediately.
•Do not use within reach of children. (Risk of electrical shock or injury)

4
Batteries for remote control
•Do not leave expired or used batteries in the remote control.
•Insert batteries with correct polarity of + and - in accordance with the polarity instructions.
•Do not recharge, heat, disassemble or short the batteries or expose them to re.
(Risk of burns or other injury due to leakage or rupture)
In the case of contacting the uid, wash the body part thoroughly and consult with a doctor. If uid is spilled on
the fan, wipe it o while avoiding direct contact with the uid.
CAUTION
Operation and handling
•If the main body produces abnormal vibrations, stop using the fan immediately.
(Risk of injury due to the blades or guard detaching and falling)
•Use the remote control unit provided with the fan. (Risk of illness or injury due to unintended operation)
•Do not apply oil or other lubricants to the extension tube. (Risk of injury due to the tube suddenly slipping)
•Do not drag the fan. (Risk of rubber feet being broken o or damage to the oor)
•Do not adjust the height and wind direction (up/down or right/left) while the fan is operating. (Risk of injury)
•Do not use when parts such as blades or guard are damaged. (Risk of injury)
•Do not touch blades or guard when the start timer is set. (Risk of injury when blades start spinning)
•Do not insert ngers or objects into the guard or any moving parts. (Risk of injury or failure)
•Keep hair and clothing away from the guard. (Risk of injury due hair or clothing becoming caught)
•Disassemble the fan before transporting it. (Risk of breakage) When transporting the fan, store it in its box.
•Keep your eyes and face away from the motor shaft when assembling the fan. (Risk of injury due to contact with
the edge of the shaft)
•Use only neutral kitchen detergents. (Risk of deterioration and discoloration of the resin, or injury due to
cracking of the blades)
Usage environment
•Do not use the fan in the following locations.
(Risk of poisoning, electrical shock, or re due to ame being extinguished, ignition or explosion, or short-
circuit; risk of injury due to broken parts becoming detached and falling)
•Locations with ames, such as near gas cookers
•Locations where ammable gas may be present
•Locations prone to wetness due to rain and splashing water
•Locations subject to high temperatures (40° Celsius or more) or high humidity (e.g. bathrooms)
•Locations subject to large amounts of oil, dust, or metal powder
•Locations subject to direct sunlight
•Do not use the fan on unstable surfaces or near obstacles. (Risk of damage to the blades, personal injury, or
material damage due to the fan falling)
•Avoid exposing your body to the wind from the fan for extended periods. (Risk of ill health)
For sleeping children, elderly or ill people in particular, the fan should be used under the supervision of a family
member or caregiver.
English
5
IMPORTANT INFORMATION
Operation and handling
•Only plug the fan into a standard indoor wall-socket.
Do not use the fan by connecting it to a DC-AC power transformer. Use of such devices may cause smoke or
lead to a re.
•This refers to the typical type of outlet, not its location for example the wall, oor, or the ceiling.
•Do not pour uid on the remote control, drop it, or stand on it.
Doing so may cause the fan to stop functioning.
•Do not force the guard back to the front-facing position.
Doing so may damage the fan. When the guard does not return to the front-facing position within the manual
adjustment range for the wind direction, adjust the position by operating the fan in swing mode.
•Do not attach a protection net to the guard.
Such products may be sucked into the guard, which may cause damage to the blades or personal injury.
•After waxing a wooden oor, wait until the oor dries completely before placing the fan on it. Otherwise, it may
leave undesired marks on the oor or cause the wax to peel o.
Cleaning
•Dilute a neutral kitchen detergent with water in accordance with the instructions on its packaging.
•Wait for 30 minutes or more after using the fan before cleaning it to allow time for the motor shaft to cool down.
•Avoid subjecting the blades, guard, and other parts to strong shocks.
Usage environment
•Do not use the fan near curtains or below clothes hanging to dry.
Such products may be sucked into the guard, which may cause damage to the blades or personal injury.
•Do not use the fan near a TV, radio, hearing aid, or other such devices.
Doing so may cause noise interference when radio waves are weak or an indoor antenna is used. Move these
devices away until such eect ceases.

6
INSTALLATION
Body Installation
Loosen Nut1 (counterclockwise) to remove it from Pole.
Attach Pole to Base by inserting the Convex into Concave.
Tighten Nut1 (clockwise) to x Pole rmly on Base.
Loosen Knob.A (counterclockwise).
Tighten Knob.A (clockwise) rmly after inserting Pole.
Remove Spinner and Nut2 from Body.
Lock Rear Guard with Nut2 after attaching it to Body. (Refer to Fig. A)
Lock Blade with Spinner after attaching it to Body. (Refer to Fig. B)
Attach Front Guard to Rear Guard (Refer to Front Guard Installation)
Front Guard Installation
Align the hook of Front Guard
with Rear Guard as shown
below.
Press guards sequentially until
clipping.
Fix the clip using screw after
locking.
1
2
3
1
2
3
Guard Clip
Height Adjustment
Loosen Knob.B (counterclockwise).
Adjust the height by lifting up the body.
Tighten Knob.B (clockwise) to lock.
Pole
Knob.B
Base
Nut1
Body
Knob.A
Concave
Convex
<Bottom view>
Knob. B
INSTALLATION
Body Installation

English
7
Rear Guard Nut2
Blade
Spinner
Front Guard
Hooks
Fig. A
Insert the groove of the
blade in correct direction.
Fig. B
Battery Installation
Open the battery cover. Insert AAA type battery in
correct direction.
Close the cover.
ecnatsidm5nihtiwetarepootelbaliavasirellortnoCetomeR:»etoN« with 30 degrees angle in front of fan.

8
CONTROL PANEL
Body Control Panel
TIMER
MODE
SPEED
SWING
ON/OFF
TIMER : For on/o timer setting
MODE : For selection
NORMAL/NATURE/
SLEEP/SILENT
SPEED : Adjustment for NORMAL
mode
SWING : For oscillation
ON/OFF : For turning on/o
Remote Control Panel
SPEED ON/OFF
SWING
SILENT MODE
TIMER
SPEED : Adjustment for
NORMAL mode
ON/OFF : For turning on/o
TIMER : For on/o timer setting
MODE : For selection
NORMAL/NATURE/SLEEP
SWING : For oscillation
SILENT : For SILENT mode
DISPLAY PANEL
SLEEP
SPEED
NORMAL
NATURE
TIMER
SILENT

English
9
OPERATION
TURN ON/OFF
Press “ON/OFF” to turn on or turn o the fan.
PROGRAMMED MODE
Press “MODE” in Body control panel repeatedly, the programmed mode in the display will light on.
ICON
PROGRAMMED MODE
OPERATION
NORMAL Select wind power with pressing “SPEED” repeatedly.
(Speed 1) (Speed 2) (Speed 3)
NATURE Natural program is available, “ ” will display.
SLEEP Sleep program is available, “ ” will display.
SILENT Silent program is available, “ ” will display.
«Note» : For Remote control operation,
a)
Press “MODE” repeatedly, the programmed mode will work for “NORMAL”, “NATURE” and “SLEEP”.
b) Press “SILENT”, the function will work.
«Note» : When is lighted o, “SPEED” is not available.
OSCILLATION
Press “SWING” repeatedly, FAN start and stop oscillation accordingly.
TIMER
OFF TIMER
Press “TIMER” repeatedly when the fan is working, the time will go every 0.5h up to 7.5h.
«Note» : Timer will count total time on the display.
Ex) To set the timer for 3.5h, press “TIMER” 7 times for total 3.5h on the display.
Total 3.5h
«Note» : Press “TIMER” once after counting 7.5h, the timer will cancel with no display.
ON TIMER
Press “TIMER” repeatedly when the fan is stopping, the time will go every 0.5h up to 7.5h.
«Note» : Timer will count total time on the display.
Ex) To set the timer for 2.5h, press “TIMER” 5 times for total 2.5h on the display.
Total 2.5h
«Note» : Press “TIMER” once after counting 7.5h, the timer will cancel with no display.
The fan will start to work with the previous setting after the timer is over.
«Note» : The previous mode will be default if long time will pass.

10
HOW TO PACK
Base
Front Guard
Remote Controller
Rear Guard
Pole
Body with Nut & Spinner
Blade

English
11
SPECIFICATIONS
Model: F-LSA20(W)PH
Rated Voltage: 230V
Rated Frequency 60Hz
Power Consumption 60W
Blade Diameter ø400mm
Unit Dimensions W : 465mm
D : 405mm
H : 1130-1350mm
Net Weight: Approx. 7.2 kg
Accessories Remote Controller
Battery (AAA)

12
TROUBLE SHOOTING
In the case of any abnormality when using this fan, please check the following points before requesting repair.
Trouble Check the following Ref.
page
The blades do not spin.
• Is the Fan blade installed properly?
•Is the power plug properly inserted into the outlet?
•Are any of the blades contacting guard?
7
The blades spin but make a
strange sound.
•Is the spinner properly holding the blades in position?
•Are the front and rear guard sections properly mounted?
•Are any of the blades contacting guard?
7
•Are the blades and guard clean? −
The remote control does not
work.
•Is the remote control pointing toward the receiver? −
•Do the batteries need changing?
•Are the batteries inserted correctly ( polarity)? 7
The on timer does not work.
• Is the power plug properly inserted into the outlet?
• Is the fan operating.
Does the appear on the display?
9
Operation automatically stops. • Is the o timer set? 9
Operation is not normal after a
power cut. •Disconnect the power plug and then reconnect it to the outlet. −
Table of contents
Other Toshiba Fan manuals

Toshiba
Toshiba VN-U00151SY-E User manual

Toshiba
Toshiba VN-250SE User manual

Toshiba
Toshiba F-ATW60(W)US User manual

Toshiba
Toshiba VN-250SE User manual

Toshiba
Toshiba F-LYA20HKG User manual

Toshiba
Toshiba VN-250TE User manual

Toshiba
Toshiba F-TSA20(G)MY User manual

Toshiba
Toshiba MMD-AP0304H2UL Quick start guide

Toshiba
Toshiba VN-U00151SY-E User manual

Toshiba
Toshiba MMD-AP 1HF2UL Series User manual