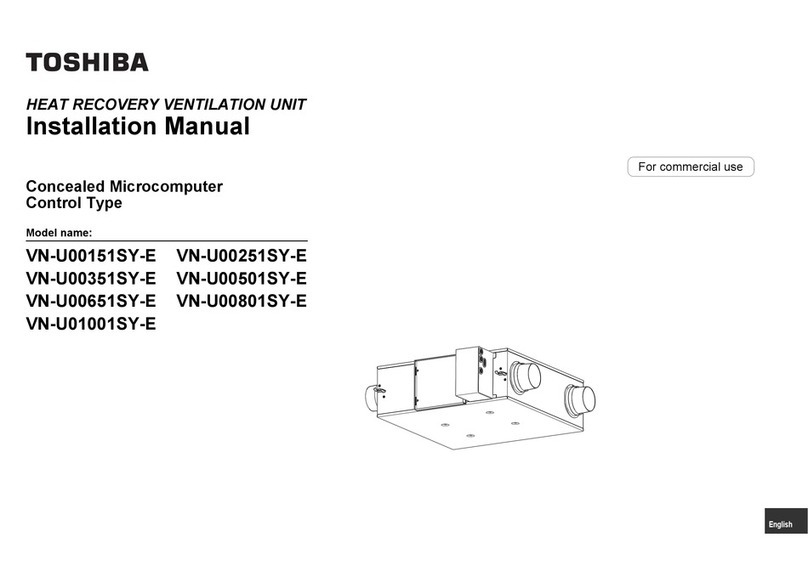
Toshiba VN-U00151SY-E User manual

Model name:
VN-U00151SY-E
VN-U00351SY-E
VN-U00651SY-E
VN-U01001SY-E
VN-U00251SY-E
VN-U00501SY-E
VN-U00801SY-E
English
Concealed Microcomputer
Control Type
HEAT RECOVERY VENTILATION UNIT
Owner’s Manual
For commercial use

–1–
Original instruction
Contents
1 Precautions for safety . . . . . . . . . . . . . . . . . . . . . . . . . . . . . . . . . . . . . . . . . . . . . . . . . . 2
2 Features . . . . . . . . . . . . . . . . . . . . . . . . . . . . . . . . . . . . . . . . . . . . . . . . . . . . . . . . . . . . . 6
3 Standard installation example . . . . . . . . . . . . . . . . . . . . . . . . . . . . . . . . . . . . . . . . . . . 6
4 System configuration. . . . . . . . . . . . . . . . . . . . . . . . . . . . . . . . . . . . . . . . . . . . . . . . . . .7
5 Part names and functions . . . . . . . . . . . . . . . . . . . . . . . . . . . . . . . . . . . . . . . . . . . . . . . 8
6 How to use . . . . . . . . . . . . . . . . . . . . . . . . . . . . . . . . . . . . . . . . . . . . . . . . . . . . . . . . . .10
7 Timer operation . . . . . . . . . . . . . . . . . . . . . . . . . . . . . . . . . . . . . . . . . . . . . . . . . . . . . . 15
8 Maintenance . . . . . . . . . . . . . . . . . . . . . . . . . . . . . . . . . . . . . . . . . . . . . . . . . . . . . . . . . 17
9 Specifications . . . . . . . . . . . . . . . . . . . . . . . . . . . . . . . . . . . . . . . . . . . . . . . . . . . . . . . . 18
10 Before calling for service . . . . . . . . . . . . . . . . . . . . . . . . . . . . . . . . . . . . . . . . . . . . . . 19
11 Troubleshooting . . . . . . . . . . . . . . . . . . . . . . . . . . . . . . . . . . . . . . . . . . . . . . . . . . . . . . 19
Thank you very much for purchasing TOSHIBA Heat recovery ventilation unit.
Please read this owner’s manual carefully before using your Heat recovery ventilation unit.
• Obtain the “Owner’s manual” and “Installation manual” from constructor (or dealer).
Request to constructor or dealer
• Please clearly explain the contents of the Owner’s manual and hand over it.
This appliance can be used by children aged from 8 years and above and persons with reduced physical,
sensory or mental capabilities or lack of experience and knowledge if they have been given supervision or
instruction concerning use of the appliance in a safe way and understand the hazards involved. Children shall
not play with the appliance. Cleaning and user maintenance shall not be made by children without supervision.
Please read carefully through these instructions that contain important information which complies with the “Machinery
Directive” (Directive 2006/42/EC), and understand them.
Generic Denomination: Heat recovery ventilation unit
Definition of Qualified Installer or Qualified Service Person
The Heat recovery ventilation unit must be installed, maintained, repaired and removed by a qualified installer or qualified
service person. When any of these jobs is to be done, ask a qualified installer or qualified service person to do them.
A qualified installer or qualified service person is an agent who has the qualifications and knowledge described in the table
below.
These safety cautions describe important matters concerning safety to prevent injury to users or other people and
damages to property. Please read through this manual after understanding the contents below (meanings of
indications), and be sure to follow the description.
Agent Qualifications and knowledge which the agent must have
Qualified installer
(*1)
• The qualified installer is a person who installs, maintains, relocates and removes the Heat recovery
ventilation units made by Toshiba Carrier Corporation. He or she has been trained to install, maintain,
relocate and remove the Heat recovery ventilation units made by Toshiba Carrier Corporation or,
alternatively, he or she has been instructed in such operations by an individual or individuals who have been
trained and is thus thoroughly acquainted with the knowledge related to these operations.
• The qualified installer who is allowed to do the electrical work involved in installation, relocation and removal
has the qualifications pertaining to this electrical work as stipulated by the local laws and regulations, and
he or she is a person who has been trained in matters relating to electrical work on the Heat recovery
ventilation units made by Toshiba Carrier Corporation or, alternatively, he or she has been instructed in such
matters by an individual or individuals who have been trained and is thus thoroughly acquainted with the
knowledge related to this work.
• The qualified installer who is allowed to work at heights has been trained in matters relating to working at
heights with the Heat recovery ventilation units made by Toshiba Carrier Corporation or, alternatively, he or
she has been instructed in such matters by an individual or individuals who have been trained and is thus
thoroughly acquainted with the knowledge related to this work.
Qualified service
person (*1)
• The qualified service person is a person who installs, repairs, maintains, relocates and removes the Heat
recovery ventilation units made by Toshiba Carrier Corporation. He or she has been trained to install, repair,
maintain, relocate and remove the Heat recovery ventilation units made by Toshiba Carrier Corporation or,
alternatively, he or she has been instructed in such operations by an individual or individuals who have been
trained and is thus thoroughly acquainted with the knowledge related to these operations.
• The qualified service person who is allowed to do the electrical work involved in installation, repair,
relocation and removal has the qualifications pertaining to this electrical work as stipulated by the local laws
and regulations, and he or she is a person who has been trained in matters relating to electrical work on the
Heat recovery ventilation units made by Toshiba Carrier Corporation or, alternatively, he or she has been
instructed in such matters by an individual or individuals who have been trained and is thus thoroughly
acquainted with the knowledge related to this work.
• The qualified service person who is allowed to work at heights has been trained in matters relating to
working at heights with the Heat recovery ventilation units made by Toshiba Carrier Corporation or,
alternatively, he or she has been instructed in such matters by an individual or individuals who have been
trained and is thus thoroughly acquainted with the knowledge related to this work.
Indication Meaning of Indication
WARNING Text set off in this manner indicates that failure to adhere to the directions in the warning could result in
serious bodily harm (1) or loss of life if the product is handled improperly.
CAUTION Text set off in this manner indicates that failure to adhere to the directions in the caution could result in
slight injury (2) or damage (3) to property if the product is handled improperly.
1: Serious bodily harm indicates loss of eyesight, injury, burns, electric shock, bone fracture, poisoning, and other
injuries which leave aftereffect and require hospitalization or long-term treatment as an outpatient.
2: Slight injury indicates injury, burns, electric shock, and other injuries which do not require hospitalization or long-
term treatment as an outpatient.
3: Damage to property indicates damage extending to buildings, household effects, domestic livestock, and pets.
1-EN 2-EN
–2–
MEANINGS OF SYMBOLS DISPLAYED ON THE UNIT
Warning indications on the Heat recovery ventilation unit
Read the OWNER’S MANUAL carefully before operation.
Service personnel are required to carefully read the OWNER’S MANUAL and INSTALLATION MANUAL
before operation.
Further information is available in the OWNER’S MANUAL, INSTALLATION MANUAL, and the like.
Warning indication Description
WARNING
ELECTRICAL SHOCK HAZARD
Disconnect all remote electric power supplies before servicing.
WARNING
Moving parts.
Do not operate unit with inspection cover removed.
Stop the unit before the servicing.
CAUTION
High temperature parts.
You might get burned when removing this cover.
WARNING
ELECTRICAL SHOCK HAZARD
Disconnect all remote
electric power supplies
before servicing.
WARNING
Moving parts.
Do not operate unit with
inspection cover removed.
Stop the unit before the servicing.
CAUTION
High temperature parts.
You might get burned
when removing this cover.
1Precautions for safety
The manufacturer shall not assume any liability for the damage caused
by not observing the description of this manual.
General
• Carefully read Owner’s Manual before starting the Heat recovery
ventilation unit. There are many important things to keep in mind for
daily operation.
• Ask for installation to be performed by the dealer or a professional.
Only a qualified installer (*1) is able to install an Heat recovery
ventilation unit. If a non-qualified person installs an Heat recovery
ventilation unit, it may result in problems such as fire, electric shock,
injury, water leakage, noise and vibration.
Transportation and storage
• When transporting the Heat recovery ventilation unit, wear shoes with
protective toe caps, protective gloves, and other protective clothing.
• When transporting the Heat recovery ventilation unit, do not take hold
of the bands around the packing carton. You may injure yourself if the
bands should break.
• When stacking the packing cartons for storage or transportation,
heed the precautions written on the packing cartons. Failure to heed
the precautions may cause the stack to collapse.
• The Heat recovery ventilation unit should be transported in stable
condition. If any part of the product broken, contact your dealer.
• Use a hand track or forklift to carry the unit. When carrying it by
human power, have four persons or more otherwise, you may strain
your back.
Installation
• Only a qualified installer (*1) or qualified service person (*1) is
allowed to carry out the electrical work of the Heat recovery
ventilation unit. Under no circumstances must this work be done by
an unqualified individual since failure to carry out the work properly
may result in electric shocks and/or electrical leaks.
• After the installation work has been completed, have the installer
explain about the circuit breaker positions. In the event that trouble
has occurred in the Heat recovery ventilation unit, set the circuit
breaker to the OFF position, and contact a service person.
WARNING
3-EN 4-EN

–3–
• Do not install the Heat recovery ventilation unit in a location that may
be subject to a risk of exposure to a combustible gas. If a combustible
gas leaks and becomes concentrated around the unit, a fire may
occur.
• Use the company-specified products for the separately purchased
parts. Use of non-specified products may result in fire, electric shock,
water leakage or other trouble. Have the installation performed by a
professional.
• Confirm that earthing is performed correctly.
Operation
• Before opening the electrical control cover or inspection cover of the
Heat recovery ventilation unit, set the circuit breaker to the OFF
position. Failure to set the circuit breaker to the OFF position may
result in electric shocks through contact with the interior parts. Only a
qualified installer (*1) or qualified service person (*1) is allowed to
remove the electrical control cover or inspection cover of the Heat
recovery ventilation unit and do the work required.
• Inside the Heat recovery ventilation unit are high-voltage areas and
rotating parts. Due to the danger of electric shocks or of your fingers
or physical objects becoming trapped in the rotating parts, do not
remove the electrical control cover or inspection cover of the Heat
recovery ventilation unit. When work involving the removal of these
parts is required, contact a qualified installer or a qualified service
person.
• Do not move or repair any unit by yourself. Since there is high voltage
inside the unit, you may get electric shock when removing the cover
and main unit.
• Use of a stand more than 50 cm high to clean the filter or heat
exchange element of the Heat recovery ventilation unit or to carry out
other such jobs constitutes working at heights. Due to the danger of
falling off the stand and injuring yourself while working at heights, this
kind of work should not be done by unqualified individuals. When this
kind of work must be carried out, do not do it yourself but ask a
qualified installer or a qualified service person to do it for you.
• Do not place any combustion appliance in a place where it is directly
exposed to the wind of Heat recovery ventilation unit, otherwise it may
cause imperfect combustion.
• Do not insert your finger or a stick into the air intake or discharge.
Doing so may result injury as the fan is rotating at high speed inside
the unit.
Repairs
• When you have noticed that some kind of trouble (such as when a
check display has appeared, there is a smell of burning, abnormal
sounds are heard, water is leaking) has occurred in the Heat recovery
ventilation unit, do not touch the Heat recovery ventilation unit
yourself but set the circuit breaker to the OFF position, and contact a
qualified service person. Take steps to ensure that the power will not
be turned on (by marking “out of service” near the circuit breaker, for
instance) until qualified service person arrives. Continuing to use the
Heat recovery ventilation unit in the trouble status may cause
mechanical problems to escalate or result in electric shocks or other
trouble.
• If there is a danger of the Heat recovery ventilation unit’s falling, do
not approach the Heat recovery ventilation unit but set the circuit
breaker to the OFF position, and contact a qualified installer or a
qualified service person to refit the unit. Do not set the circuit breaker
to the ON position until the unit has been refitted.
• Do not modify the products. Do not also disassemble or modify the
parts. It may cause a fire, electric shock or injury.
Relocation
• When the Heat recovery ventilation unit is to be relocated, do not
relocate it yourself but contact a qualified installer or a qualified
service person. Failure to relocate the Heat recovery ventilation unit
properly may result in electric shocks and/or a fire.
(*1) Refer to the “Definition of Qualified Installer or Qualified Service Person”.
5-EN 6-EN

–4–
Cautions about installation (confirm the following cautions.)
• Connect the Heat recovery ventilation unit to an exclusive power
supply of the rated voltage, otherwise the unit may break down or
cause a fire.
Cautions about operation
• Do not use this Heat recovery ventilation unit for special purpose such
as preserving food, precision instruments, art objects, breeding
animals, car, vessel, etc.
• Do not touch any switches with wet finger, otherwise you may get an
electric shock.
• If the Heat recovery ventilation unit will not be used for a considerably
long time, turn off the main switch or the circuit breaker, for safety.
• Prevent any liquid from falling into the remote controller. Do not spill
juice, water or any kind of liquid.
• Do not pour or spray water or detergent on the electric parts.
Doing so may cause electric leakage and result in a fire, electric
shocks and/or injury.
• Do not install the unit and inside air intake in a place such as a
machine factory, chemical plant, or research institute, where acids,
alkaline, organic solvents, or coating materials are handled and toxic
gases and/or corrosive gases may be produced.
Otherwise, gas poisoning may occur and/or the inside of the unit may
be eroded or deteriorated. The deterioration and erosion may result
in a fire.
• Do not use “Bypass mode” when heating the room in winter.
Water condensed on the unit may drip onto the ceiling board and may
soil the ceiling.
• Do not use the unit in a place where it is hot (40°C or higher) or where
much oily smoke is produced, and do not directly expose the unit to
flame.
Doing so may result in a fire.
• Do not expose animals or plants to the wind from the unit.
Doing so may harm the animal or plant.
• Do not use a flammable spray near the unit or inside air intake.
Doing so may result in a fire.
CAUTION
Disposal
Dispose of Heat recovery ventilation unit in accordance with the Directive 2012/19/EU WEEE (Waste Electrical and
Electronic Equipment).
7-EN 8-EN

–5–
Information on the transportation, handling and storage of the
carton
Examples of indication on the carton
Symbol Description Symbol Description
Keep dry Do not drop
Do not lay down
Stacking height
(3 cartons can be stacked in this
case)
This side up Do not step
Handle with care Weight
Do not roll Do not clamp
Other cautions Description
CAUTION
Injury possibility.
Don’t handle with packing band, or may get injured in case of broken band.
Stacking notice.
In case that cardboard boxes protrude out of pallet when stacking.
Lay a 10 mm thick plywood over the pallet.
2 cartons
66
kg
9-EN 10-EN

–6–
2Features
Main features
Power saving ventilation
The cost of cooling and heating is reduced thanks to
the unit efficiently retrieving thermal energy (outdoor
air load) which has been lost during ordinary
ventilation.
Space saving
Significant reduction of outdoor air load and the ability
to retrieve thermal energy enable the production of
smaller air conditioning devices.
Humidity control
When cooling, highly humid outdoor air is conditioned
to near the humidity of the dehumidified (cooled) indoor
air before being supplied.
When heating, moisture from the indoor air is
transferred to the dry outdoor air before the outdoor air
is supplied.
Comfortable ventilation
Ventilation without big changes in temperature is
realized.
In addition, stable ventilation is possible even in an air
tight room due to simultaneous air intake and
expulsion.
Sound insulation
Air trunks and heat exchange elements provide sound
insulation.
They reduce the incoming of outdoor noise and the
outward flow of sounds indoor and help keep the office
or shop, and their surroundings quiet.
Fan control
This unit has “Constant input power control” (or
“Constant air flow control”).
This fan control is strong to the pressure loss. For
example, when dust accumulates on the filter, it
reduces the decrease in airflow.
About ventilation modes
The unit has three ventilation modes.
Heat exchange mode
Exchanging heat between the outdoor and indoor air
and making the temperature and humidity of the
outdoor air closer to those of the indoor air before
supplying it.
Bypass mode
Outdoor air is taken into a room as it is. This mode is
mainly used in spring and summer.
Automatic mode
1. For a Heat recovery ventilation unit system
The heat exchange mode and the bypass mode are
automatically switched between following the
information from the indoor and outdoor temperature
sensors in the unit.
2. For a Heat recovery ventilation unit system linked
with Air conditioners
The heat exchange mode and the bypass mode are
automatically switched between depending on the
operation status of the Air conditioner (cooling,
heating, dry, fan, or temperature setting) and the
information from the indoor and outdoor temperature
sensors in the unit.
CAUTION
If the outdoor temperature becomes about to 15°C or
less in [Automatic mode] or [Bypass mode], the system
will automatically start to run in [Heat exchange mode]
regardless of the mode setting to prevent condensation
in the Heat recovery ventilation unit.
* The indication of the ventilation mode setting does not
change.
3Standard installation example
Concealed microcomputer control type
NOTE
The printed indications on the unit become upside-down when the unit is installed upside-down.
Outdoor air
intake duct
Pipe hood Hanging bolt
Supply air duct
SA (Supply
air)
RA (Return
air)
Indoor supply opening
(Supply / Exhaust air grille)
Room intake
opening
(Supply /
Exhaust air
grille)
Return air
intake duct
Heat insulation
material
Exhaust air
duct
EA (Exhaust air)
OA (Outdoor air)
11-EN 12-EN

–7–
4System configuration
The control method of this product differs depending on the system configuration. Operate it following the methods
explained in the system configuration examples below.
• For the actual system configuration, ask your dealer or the installer of the product for information.
• Refer also to the installation manuals and owner's manuals of the remote controllers.
• If you use the central remote controller, refer also to its installation manual and owner's Manual.
System example Operation Notes
A. Heat recovery ventilation unit system • The wired remote controller
RBC-AW(M)SU5* can be used
the start / stop of the Heat
recovery ventilation unit and the
ventilation fan speed and select
ventilation mode.
* Remote controllers other than
RBC-AW(M)SU5* are not
compatible with heat recovery
ventilation systems.
(Some functions cannot be
available.)
For how to use the remote
controller, refer to “6. How to use”.
If two remote
controllers are used,
the latter operation
overrides the former
and their indications
always reflect the result
of the latter operation.
B. Heat recovery ventilation unit system linked with Air
conditioners
• The wired remote controller
RBC-AW(M)SU5* can be used
the start / stop of the Heat
recovery ventilation unit and the
ventilation fan speed and select
ventilation mode.
* Remote controllers other than
RBC-AW(M)SU5* are not
compatible with heat recovery
ventilation systems.
(Some functions cannot be
available.)
• In the case of Heat recovery
ventilation unit system linked Air
conditioner, the type of
ventilation fan speed that you
can select from the remote
controllers are less than Heat
recovery ventilation unit ONLY
system.
• About separate operation of Air
conditioner and Heat recovery
ventilation, it is possible from
remote controllers RBC-
AW(M)SU5*.
* However, setting modifications are
required for separate control.
Contact your dealer for more
information.
If two remote
controllers are used,
the latter operation
overrides the former
and their indications
always reflect the result
of the latter operation.
Heat recovery
ventilation unit
Remote controller
RBC-AW(M)SU5*
Outdoor
unit
Air
conditioner
Air
conditioner
Heat recovery
ventilation
unit
Heat recovery
ventilation
unit
Remote controller RBC-AW(M)SU5*
NOTE
The heat exchange element may smell during the initial period of use. However, this is not a malfunction and the smell is harmless.
C. Central control system
(When controlling the Air conditioner group and the Heat
recovery ventilation unit group separately)
• The central controller can be
used to start / stop the whole
system and separately start /
stop groups of Air conditioners
and the Heat recovery
ventilation units. (In this system,
the Air conditioners and the Heat
recovery ventilation units are not
linked in operation.)
• The functions that can control
Heat recovery ventilation from
central controller may differ
depend on the of central
controller.
• The wired remote controller
RBC-AW(M)SU5* can be used
the start / stop of the Heat
recovery ventilation unit and the
ventilation fan speed and select
ventilation mode.
* Remote controllers other than
RBC-AW(M)SU5* are not
compatible with heat recovery
ventilation systems.
(Some functions cannot be
available.)
If three control devices
are used;
• About the central
controller and the
remote controllers for
Air conditioner or the
central controller and
the remote controllers
for Heat recovery
ventilation units, the
latter operation
overrides the former
and their indications
always reflect the
result of the latter
operation.
• About the remote
controllers for Air
conditioner and Heat
recovery ventilation
units are not affected
by each other's
operations.
D. Central control system
(When controlling the Air conditioners and the Heat
recovery ventilation units together)
• The central controller can be
used to start / stop the whole
system. About separate
operation of Air conditioner and
Heat recovery ventilation, it is
impossible from central
controller, but possible from
remote controllers
RBC-AW(M)SU5*.
* However, setting modifications are
required for separate control.
Contact your dealer for more
information.
• The central controller cannot be
used to control the Ventilation
fan speed or ventilation mode of
the Heat recovery ventilation
unit.
* Central controller cannot recognize
Heat recovery ventilation. (Heat
recovery ventilation does not appear
in central controller.)
• The wired remote controller
RBC-AW(M)SU5* can be used
the start / stop of the Heat
recovery ventilation unit and the
ventilation fan speed and select
ventilation mode.
* Remote controllers other than
RBC-AW(M)SU5* are not
compatible with heat recovery
ventilation systems.
(Some functions cannot be
available.)
If three control devices
are used;
• About the central
controller and the
remote controllers for
the Heat recovery
ventilation unit and
the Air conditioner,
the latter operation
overrides the former
regardless of which
device is used.
System example Operation Notes
Central controller
BMS-CT2560U*
Remote controller
RBC-ASCU1*,
RBC-AMTU3*,
RBC-AW(M)SU5*
Air
conditioner
Air
conditioner
Heat recovery
ventilation
unit
Heat recovery
ventilation
unit
Remote controller
RBC-AW(M)SU5*
Outdoor
unit
Central controller
BMS-CT2560U*
Remote controller RBC-AW(M)SU5*
Air
conditioner
Air
conditioner
Heat recovery
ventilation
unit
Heat recovery
ventilation
unit
Outdoor
unit
13-EN 14-EN

–8–
5Part names and functions
Concealed microcomputer control type (main unit)
Inspection cover
Heat exchange
element (two)
SA
(Supply air)
OA
(Outdoor air)
Filter
(Two for each element)
RA
(Return air)
EA
(Exhaust air)
Model No.
indication
Electrical control cover
5-1. Remote controller
RBC-AWSU5*, RBC-AMSU5*
For RBC-AW(M)SU5* remote controller operation, refer also to the Owner’s Manual of RBC-AW(M)SU5*.
Detailed display mode
Main screen
This screen is for monitoring the state of the air and for setting the ventilation fan speed and ventilation mode.
You can check the current state according to the setting items on the bottom of the screen.
You can switch the setting items by pushing [ ] and [ ], and change them by pushing [ ] and [ ].
(*1) Indoor temperature
(*2) Indoor humidity
(*3) Supply air temperature
(*4) Outdoor temperature
NOTE
• The “Ventilation monitor” screen is the main screen.
• Functions and items that cannot be set are not shown, according to the model.
• While changing settings, if you push [ Return] or if there are no button operations for about 60 seconds, the main screen
returns.
• The displayed value (*1, *2, *3, *4) is the value detected at the intake port (RA) of the Heat recovery ventilation unit. Actual
values may differ. It cannot be used as a measuring instrument.
Setting items
• The currently selected item is highlighted in black.
• You can switch the items by pushing [ ] and [ ].
(*3)
(*4)
(*1)
(*2)
“ Preparing to operate ventilation”
Displayed while the Heat recovery ventilation is on standby.
While this is being displayed, the Heat recovery ventilation remains
stopped.
15-EN 16-EN

–9–
▼Ventilation icon list
(*1) Refer to the Installation Manual of the Wired remote controller.
Automatic Displayed when it is time for filter maintenance.
Bypass
When “Supply air > Exhaust air” is set
The volume of supply air to the inside is larger
than the volume of exhaust air to the outside.
Heat exchange
When “Supply air < Exhaust air” is set
The volume of exhaust air to the outside is
larger than the volume of supply air to the
inside.
24-hour ventilation
Displayed when the Bluetooth®function is
“ON”. Refer to the Owner’s Manual of the
Bluetooth®function regarding Bluetooth®
functions.
Nighttime heat purge Displayed when a check code occurs. (*1)
Displayed when “Timer” is “ON”. Displayed when a notice code occurs. (*1)
For details, contact your dealer.
Operation button section
Preparation
Turn on the circuit breaker
When the power is turned on, “ ” appears on the remote controller display.
* The remote controller will not work for about 3 minute after turning on the power. This is not a malfunction.
REQUIREMENT
• Keep the circuit breaker turned on during use.
• When you resume using the Heat recovery ventilation unit after a long period of disuse, turn on the circuit breaker at
least 12 hours before starting operation.
* The screens shown here are examples. The content that is displayed may differ, depending on the environment
settings being used.
1[ Menu] button
Shows the “Menu”.
2[ Set/Fix] button
Fixes and applies settings.
Ways to use it are shown on screen.
3[ Return] button
Deletes selections.
Ways to use it are shown on screen.
4[ ] and [ ] buttons
Changes settings and selects items.
5[ ] and [ ] buttons
Selects setting items.
Other ways to use it are shown on screen.
6[ ON/OFF] button
Starts and stops connected devices.
1
2
3
6
4
5
Temperature sensor
Operating LED
Lights while operating.
Model name label
17-EN 18-EN

–10–
Main screen types and configuration
• When connected to an air conditioner, the main screen of the air conditioner is displayed, and when connected
to an Heat recovery ventilation unit, the main screen of the Heat recovery ventilation unit is display on screen.
• When connected to both air conditioners and Heat recovery ventilation units, you can switch screens by pushing
[ ] or [ ] in either of the main screens.
Menu items
Push the [ Menu] button to display the main menu screen.
Select items with the [ ] and [ ] button to set.
In addition to the operations on the main screen, there are also items related to setting Heat recovery ventilation
in the menu “11. Ventilation”.
Air conditioner main screen
Heat recovery ventilation unit main
screen
Push the [ ] or [ ] button.
Menu
11. Ventilation
1. Ventilation operation
2. Fan speed
3. Mode
4. 24h ventilation off
5. Schedule timer
6How to use
When the Heat recovery ventilation is used for the first time or change the settings, operate the remote following
the procedure below.
From the next time, the unit starts running following the set operation conditions by just pressing the [ ON/
OFF] button.
Operations
1Push [ ON/OFF] to start operations
The operation LED lights.
2Push [ ] and [ ] to select the item you want to
change
You can change the following items.
1. Adjusting fan speed
2. Ventilation mode settings
3. Humidification setting
4. Ventilation menu
3To stop operations, push [ ON/OFF] again
19-EN 20-EN

–11–
1. Adjusting fan speed
NOTE
The factory default setting for fan speed unbalance (“Supply air > Exhaust air” or “Supply air < Exhaust air”) is disabled.
Disabled setting items are not shown. To enable it, contact your supplier (dealer).
1Push [ ] and [ ] to switch to the “Fan speed”
screen
2Push [ ] and [ ] to select ventilation fan speed
(*1) When “Supply air > Exhaust air” is set
The volume of supply air to the inside is larger than the volume of
exhaust air to the outside.
(*2) When “Supply air < Exhaust air” is set
The volume of exhaust air to the outside is larger than the volume of
supply air to the inside.
(*3) The display differs depending on the system.
If Heat recovery system linked with Air conditioner, display is “ ”.
(*4) This “ ” display appears only when an optional sensor is connected.
Consult your dealer to change the setting to active.
(*3)
(*4)
Auto
(*1)
High
Medium
Low
(*2)
Unbalance
High
Unbalance
Medium
(*1) (*2)
2. Ventilation mode settings
3. Humidification setting
4. Ventilation menu
1Push [ ] and [ ] to switch to the “Mode” screen
2Push [ ] and [ ] to select a ventilation mode
1Push [ ] and [ ] to switch to the “Humidification”
screen
2Push [ ] and [ ] to select “Auto” or “OFF”
1Push [ ] and [ ] to switch to the menu function
setting screen
2Push [ ] and [ ] to select menu functions
3Push [ Set/Fix]
A screen to confirm appears.
4Push [ Set/Fix]
Return to the menu function setting screen.
BypassAutomatic
Heat
exchange
21-EN 22-EN

–12–
Functions
About ventilation modes
* For details, see “About ventilation modes”.
[Heat exchange mode], [Bypass mode] or
[Automatic mode] can be selected.
About unbalanced ventilation fan speed
( [SA>EA]/ [SA<EA])
For normal ventilation High, Medium and Low:
The volumes of the indoor air supply and outdoor air
exhaustion are set to the same level.
For unbalanced ventilation fan speed:
• When [SA>EA] is selected: the volume of the
indoor air supply is larger than that of the outdoor air
exhaustion.
(Inflow of humidity and smells from the toilet and
kitchen is reduced.)
• When [SA<EA] is selected: the volume of the
outdoor air exhaustion is larger than that of the
indoor air supply.
(Outflow of smells and floating bacteria into a
corridor or other places is reduced.
* Consult your dealer if the setting of the imbalanced
ventilation fan speed seems incorrect.
About 24-hour ventilation
• When the 24-hour ventilation setting is active,
push the [ ON/OFF] button while the
system is running and the operation lamp turns
off, “ ” appears on the display, and 24-hour
ventilation starts.
• From “Ventilation menu” of main screen or in the
menu “11. Ventilation”, you can stop 24-hour
ventilation temporarily.
The “ ” indicator turns off and 24-hour
ventilation stops temporarily.
NOTE
• The setting of 24-hour ventilation is “OFF” As factory
default. Consult your dealer to change the setting to
“ON”.
• The ventilation setting of fan speed or mode cannot be
changed during 24-hour ventilation. Their indicators
are not displayed.
* During 24-hour ventilation, the unit is running under the
settings [LOW] ventilation fan speed and [Heat
exchange mode].
• If interval 24-hour ventilation operation mode is set,
the “”indicator stays lit even during the intervals.
About nighttime heat purge operation
•Nighttime heat purge is a function to reduce the
room air conditioning load in the morning in
summer by exhausting the air indoor which has
become warm while the Air conditioner is
stopped in the night automatically in the Bypass
mode.
•The nighttime heat purge operation functions if
night purge is activated and the last operation
mode of the Air conditioner before stopping is
, or in an Heat recovery ventilation
unit system linked with Air conditioners.
If the [ ON/OFF] button is pushed while the
system is running, the operation lamp turns off, “ ”
appears on the display, and the nighttime heat purge
operation turns on-standby.
After the operation becomes on-standby, the unit
automatically starts ventilation in [Low] ventilation
fan speed and [Bypass mode] when the conditions to
start the nighttime heat purge operation below are
fulfilled.
The nighttime heat purge operation is paused for half
an hour if any of the conditions to pause the
operation are detected.
If the conditions to start the nighttime heat purge
operation are fulfilled half an hour after the pause,
the operation will start again. If not, the operation will
remain paused for once more half an hour.
This cycle is repeated until the conditions to stop
(end) the nighttime heat purge operation below are
fulfilled.
NOTE
• The setting of the nighttime heat purge operation is
“OFF” As factory default.
Consult your dealer to change the setting to “ON” or
the setting of the time until the monitoring operation
starts.
• The ventilation setting of fan speed or mode cannot be
changed during the nighttime heat purge operation.
Their indicators are not displayed.
•The
“”indicator stays lit while the operation is on-
standby or paused.
• The nighttime heat purge operation cannot be
activated if 24-hour ventilation is activated.
CAUTION
The nighttime heat purge operation is not executed if the
outdoor temperature becomes about 15°C or less to
prevent condensation in the Heat recovery ventilation
unit, but the “”indicator is still lit.
The conditions to start the nighttime heat purge
operation
The unit compares temperatures indoor and outdoor
using the monitoring operation (for about 5 minutes)
and will start the nighttime heat purge operation if the
following conditions are fulfilled.
1. A certain amount of time has passed between the
nighttime heat purge operation becoming on-
standby and the monitoring operation starting. (The
time is set between 1- 48 hours in 1 hour steps.)
2. The indoor temperature is 3°C or more higher than
the outdoor temperature and the indoor
temperature is 2°C or more higher than the
temperature set for the operation.
The conditions to pause the nighttime heat purge
operation (the operation pauses for half an hour.)
1. The indoor temperature is the same or lower than
the outdoor temperature, the indoor temperature is
the same or lower than the temperature set for the
operation, or 48 hours has passed since the
nighttime heat purge operation started.
The conditions to stop (end) the nighttime heat
purge operation
The nighttime heat purge operation ends and the “ ”
indicator disappears if any of the following conditions
are fulfilled.
1. The Air conditioner or Heat recovery ventilation unit
is started.
2. 48 hours has passed since the monitoring
operation started.
23-EN 24-EN

–13–
How to operate menus
1Push [ Menu]
2Push [ ] and [ ] to select an item
The selected item is highlighted in black.
3Push [ Return]
“Menu” is displayed or return to the main screen.
Ventilation
You can set the ventilation items.
NOTE
• Depending on the system, there are items that can be set or cannot be set.
• Depending on the settings, there are items that change the displayed content.
Ventilation operation (ON or OFF for ventilation)
NOTE
• If no ventilation unit is connected, or if settings to enable “Individual ventilation” operations are not set, “Impossible” is
displayed.
• “Fan speed”, “Mode”, and “24h ventilation off” can only be set when our Heat recovery ventilation of the VN-M*HE* Series
or VN-*SY-E is connected to your system. “Schedule timer” can only be set when our Heat recovery ventilation of the
VN-*SY-E Series is connected alone to your system.
• When a setting is configured to enable “Individual ventilation” operation with an Heat recovery ventilation other than the
VN-M*HE* or VN-*SY-E Series connected, “ ” is displayed in the Details screen during ventilation operation.
1In “Menu”, select “Ventilation”, and push [ Set/Fix]
2Push [ ] and [ ] to select an item
3Push [ Set/Fix]
Item Description
1. Ventilation operation Do “ON” or “OFF” for ventilation.
2. Fan speed Select the “Fan speed”.
3. Mode Select the “Mode”.
4. 24h ventilation off Stop 24 hour ventilation operation.
5. Schedule timer Set the schedule for ventilation.
* This can only be set when a Heat recovery ventilation is connected alone.
1In the “Ventilation” screen, push [ ] and [ ] to
select “Ventilation operation”, and then push [ Set/
Fix]
2Push [ ] and [ ] to select “ON” or “OFF”
3Push [ Set/Fix]
Return to the “Ventilation” screen.
25-EN 26-EN

–14–
Fan speed
Mode
24h ventilation off
1In the “Ventilation” screen, push [ ] and [ ] to
select “Fan speed”, and then push [ Set/Fix]
2Push [ ] and [ ] to select “Fan speed”
3Push [ Set/Fix]
Return to the “Ventilation” screen.
1In the “Ventilation” screen, push [ ] and [ ] to
select “Mode”, and then push [ Set/Fix]
2Push [ ] and [ ] to select “Mode”
3Push [ Set/Fix]
Return to the “Ventilation” screen.
1In the “Ventilation” screen, push [ ] and [ ] to
select “24h ventilation off”, and then push [ Set/Fix]
A screen to confirm appears.
2Push [ Set/Fix]
Return to the “Ventilation” screen.
Schedule timer
NOTE
• The items that are displayed vary depending on the model setting of the Heat recovery ventilation.
• For details on setting “week”, refer to Owner's Manual of the wired remote controller.
1In the “Ventilation” screen, push [ ] and [ ] to
select “Schedule timer”, and then push [ Set/Fix]
2Push [ ] and [ ] to select “Condition setting”, and
then push [ Set/Fix]
3Push [ ] and [ ] to select “every day”, and then
push [ Menu]
4Push [ Set/Fix]
5Push [ ] and [ ] to select “--” (not set), “ON”,
“OFF” or a ventilation mode
6Push [ ] to select start time and fan speed
If “--” (not set) is displayed, the fan speed and time cannot be set.
7Push [ ] and [ ] to change the time and fan speed
Push [ ] to switch to an item you want to change.
8Push [ ] to move to the next pattern
Up to a total of 8 patterns can be set.
Do the settings in steps 5to 7to set each pattern.
9Push [ Set/Fix]
A screen to confirm changes appears.
10 Push [ Set/Fix]
Return to the “Schedule timer” screen.
27-EN 28-EN

–15–
7Timer operation
For Timer operation in the remote controllers for RBC-AW(M)SU5* refer to the Owner's Manual of the
respective remote controllers.
Select a timer type from the following three: (Max. 168 hours)
Timer (Setting a timer to start or stop operation)
Selecting a timer type
NOTE
About “Off timer” and “On timer” operations
• “Off timer” and “On timer” are enabled for only 1 time.
• “Off timer” and “On timer” do not operate in the following conditions.
When “Off timer” and “On timer” are disabled, during function settings, during central control (if “ON/OFF” is prohibited)
• When 2 remote controllers are connected, settings cannot be done on the “Follower remote controller”.
• The setting range of “Off timer” and “On timer” is a minimum of 30 minutes and a maximum of 168 hours (7 days).
• Push [ Return] to not fix the changes, so conditions are as before changes, and return to the “Timer” screen.
• If there is a power outage, the “Off timer” and “On timer” settings are cancelled. (They become “OFF”.)
• When “Off timer” and “On timer” are “ON”, then “ ” is displayed in the detailed display.
OFF timer : Stops running after a specified period.
Off reminder timer : Stops running after a specified period every time the unit is used.
On timer : Starts running after a specified period.
1In “Menu”, select “Timer”, and push [ Set/Fix]
2Push [ ] and [ ] to select the timer you want to set
3Push [ Set/Fix]
Off timer
You can set the timer to the time at which to stop operation of a Heat recovery ventilation unit.
NOTE
• The Heat recovery ventilation unit stops operating after the time set in “Off timer” has elapsed.
• In the period until the Heat recovery ventilation unit operation is stopped by the “Off timer”, countdown of the “Off timer”
continues even if the Heat recovery ventilation unit is stopped and started.
1In the “Off timer” screen, push [ ] and [ ] to select
“Off timer”
2Push [ ]
Pushing [ ] cancels the settings.
3Push [ ] and [ ] to select “Timer”
4Push [ ] and [ ] to change the time
The time can be set in 30 minute intervals for up to 24 hours, and
at 1 hour intervals after that.
5Push [ Set/Fix]
Return to the “Timer” screen.
Countdown of “Off timer”
Operating Stop
Set “Off
timer”
Stopped
manually
Operating Stop
No time remaining in
“Off timer”
Operated
manually
29-EN 30-EN

–16–
On timer
You can set the timer to the time at which to start operation of a Heat recovery ventilation unit.
NOTE
• The Heat recovery ventilation unit starts operating after the time set in “On timer” has elapsed.
• The Heat recovery ventilation unit stops operating as soon as a time is set in “On timer”.
• When the Heat recovery ventilation unit operation is started during the countdown of “On timer”, the “On timer” becomes
“OFF”.
1In the “On timer” screen, push [ ] and [ ] to select
“On timer”
2Push [ ]
Pushing [ ] cancels the settings.
3Push [ ] and [ ] to select “Timer”
4Push [ ] and [ ] to change the time
The time can be set in 30 minute intervals for up to 24 hours, and
at 1 hour intervals after that.
5Push [ Set/Fix]
Return to the “Timer” screen.
Countdown of “On timer”
Operating Stop
Stopping operation by setting
“On timer”.
Operating
No time remaining in
“On timer”
Stopping operation by
setting “On timer”.
Stopped
manually
Operated
manually
Operating
Countdown of “On timer” Stop countdown of “On timer”
Stop Operating Stop
Off reminder timer
You can set the timer from the Heat recovery ventilation unit operation start time to the stop time.
NOTE
• The Heat recovery ventilation unit starts operating, and after the set time has elapsed, the Heat recovery ventilation unit
stops operating.
• “Off reminder timer” does not operate in the following conditions.
When “Off reminder timer” is disabled, during abnormalities, in test mode, during function settings, while a timer is set, and
during central control (if “ON/OFF” is prohibited)
• When 2 remote controllers are connected, settings cannot be done on the “Follower remote controller”.
• The setting range of “Off reminder timer” is a minimum of 30 minutes and a maximum of 240 minutes.
• Push [ Return] to not fix the changes, so conditions are as before changes, and return to the “Timer” screen.
• When “Off reminder timer” is “ON”, then “ ” is displayed in the detailed display.
1In the “Off reminder timer” screen, push [ ] and
[ ] to select “Off reminder timer”
2Push [ ]
Pushing [ ] cancels the settings.
3Push [ ] and [ ] to select “Timer”
4Push [ ] and [ ] to change the time
Times can be set in 10 minute intervals.
5Push [ Set/Fix]
Return to the “Timer” screen.
Countdown of “Off reminder timer”
Operating Stop
Starting
operation
No time remaining in
“Off timer”
31-EN 32-EN

–17–
8Maintenance
Maintenance of the filter and heat exchange element
WARNING
Cleaning the filter and heat exchange element involves dangerous work in high places, have a qualified
installer or qualified service person to do it.
Do not attempt it by yourself.
CAUTION
Do not push buttons with wet hands.
Doing so may result in electric shock.
Cleaning the filters
When “ ” is displayed on the detailed display, clean the filters.
• Clogged filters may cause lower performance.
Filter sign reset
“ ” appears on the detailed display to tell the time for cleaning the filter.
When the filter check mark is displayed (filter check reset)
CAUTION
Cleaning remote controller
• Use a dry cloth to wipe the remote controller.
• Do not use a damp cloth on the remote controller.
• Do not use a chemically-treated duster for wiping or leave such materials on the
unit for long.
It may damage or fade the surface of the unit.
• Do not use benzene, thinner, polishing powder, or similar solvents for cleaning.
These may cause the plastic surface to crack or deform.
• When “ ” is displayed, be sure to clean the filters and then do
a reset.
• If the Heat recovery ventilation units are operated while “ ” is
displayed, then “Filter check.” is displayed. Push an operation
button while it is displayed or leave it for at least 5 seconds and
the display will disappear.
1In “Menu”, select “Filter sign reset”, and push [ Set/
Fix]
2Push [ Set/Fix]
33-EN 34-EN

–18–
9Specifications
Concealed microcomputer control type
Item Model No. VN-U0***1SY*
Fan Speed 015 025 035 050 065 080 100
Power Supply 220 - 240 V~, 50 Hz
Power consumption
(W)
Heat Exchange
Mode
Extra high 56 75 152 174 306 328 541
High 43 57 92 105 176 196 291
Medium 35 39 59 60 96 114 151
Low 28293951556274
Bypass Mode
Extra high 56 75 152 174 306 328 541
High 45 62 92 114 191 215 320
Medium 37 41 59 64 105 126 165
Low 29303954586780
Current
(A)
Heat Exchange
Mode
Extra high 0.61 0.77 1.17 1.32 2.16 2.26 3.48
High 0.47 0.61 0.75 0.85 1.33 1.43 2.04
Medium 0.40 0.42 0.48 0.51 0.78 0.86 1.12
Low 0.32 0.32 0.32 0.43 0.46 0.48 0.57
Bypass Mode
Extra high 0.61 0.77 1.17 1.32 2.16 2.26 3.48
High 0.51 0.67 0.75 0.93 1.46 1.59 2.25
Medium 0.43 0.45 0.48 0.55 0.86 0.95 1.24
Low 0.34 0.34 0.32 0.47 0.50 0.53 0.63
Maximum running
Current
(A)
Heat Exchange
Mode
Extra high 0.61 0.77 1.17 1.32 2.16 2.26 3.48
High 0.47 0.61 0.75 0.85 1.33 1.43 2.04
Medium 0.40 0.42 0.48 0.51 0.78 0.86 1.12
Low 0.32 0.32 0.32 0.43 0.46 0.48 0.57
Bypass Mode
Extra high 0.61 0.77 1.17 1.32 2.16 2.26 3.48
High 0.51 0.67 0.75 0.93 1.46 1.59 2.25
Medium 0.43 0.45 0.48 0.55 0.86 0.95 1.24
Low 0.34 0.34 0.32 0.47 0.50 0.53 0.63
Air Volume (m³/h)
Extra high 150 250 350 500 650 800 1000
High 120 210 280 400 520 640 800
Medium 95 145 210 300 390 480 600
Low 73 100 140 260 260 320 400
External Static
Pressure
(Pa)
Heat Exchange
Mode
Extra high 90 75 160 125 150 145 170
High 60 53 100 80 100 92 110
Medium 43 30 57 45 58 53 60
Low 26162639292830
Bypass Mode
Extra high 90 75 160 125 150 145 170
High 60 53 100 80 100 92 110
Medium 43 30 57 45 58 53 60
Low 26162639292830
* Sound pressure level is less than 70 dBA.
Sound pressure
level
(dB(A))
Heat Exchange
Mode
Extra high 28.0 28.0 34.0 36.0 39.0 39.0 41.0
High 25.0 27.0 31.0 31.0 35.0 35.0 38.0
Medium 22.0 24.0 26.0 27.0 30.0 30.0 33.0
Low 20.0 20.0 21.0 25.0 24.0 23.0 24.0
Bypass Mode
Extra high 28.0 28.0 34.0 36.0 39.0 39.0 41.0
High 26.0 27.0 31.0 32.0 36.0 36.0 39.0
Medium 23.0 25.0 26.0 28.0 31.0 31.0 34.0
Low 21.0 21.0 21.0 26.0 25.0 24.0 25.0
Temperature
Exchange Efficiency
(%)
average
Extra high 77.0 75.0 74.0 74.0 70.0 72.5 70.5
High 80.0 76.0 75.0 74.5 72.0 74.5 71.0
Medium 81.0 78.5 79.5 76.0 74.5 80.5 76.0
Low 81.5 80.5 83.5 77.0 76.0 88.5 84.0
for heating
Extra high 83.0 80.0 81.0 79.0 77.0 78.0 78.0
High 83.5 80.5 81.5 79.5 77.5 79.0 78.5
Medium 84.5 82.0 84.0 80.0 78.0 84.0 80.0
Low 85.0 84.0 87.0 80.5 79.0 91.0 87.0
for cooling
Extra high 71.0 70.0 67.0 69.0 63.0 67.0 63.0
High 76.5 71.5 68.5 69.5 66.5 70.0 63.5
Medium 77.5 75.0 75.0 72.0 71.0 77.0 72.0
Low 78.0 77.0 80.0 73.5 73.0 86.0 81.0
Enthalpy exchange
Efficiency
(%)
for heating
Extra high 76.0 75.0 73.0 73.0 70.0 73.0 72.0
High 80.0 76.0 76.0 74.0 72.0 74.0 73.0
Medium 81.0 78.0 80.0 75.0 74.0 80.0 75.0
Low 82.0 81.0 84.0 76.0 76.0 88.0 83.0
for cooling
Extra high 66.0 65.0 64.0 64.0 60.0 64.0 62.0
High 73.0 68.0 67.0 66.0 62.0 67.0 63.0
Medium 75.0 71.0 71.0 68.0 66.0 73.0 68.0
Low 77.0 75.0 76.0 69.0 69.0 81.0 77.0
External dimensions
(Length × Width × Height) (mm) 778 × 735 × 278
880 ×
880 ×
305
920 × 1020 × 337 1130 × 1230 × 386
Product weight (kg) 29 29 40 47 47 63 63
Applicable duct nominal diameter (mm) 100 150 150 200 200 250 250
Product information of ecodesign requirements. (Regulation (EU) 2016/2281)
http://ecodesign.toshiba-airconditioning.eu/en
Item Model No. VN-U0***1SY*
Fan Speed 015 025 035 050 065 080 100
35-EN 36-EN

–19–
10 Before calling for service
Check the points described below before asking for repair servicing.
Symptom Cause
Operation does not start after pressing
the button.
• Is the circuit breaker turned off?
• Has a power failure occurred?
• Does the “ ” indicator light up?
(The ventilation delay setting is set to “ON” and it is not malfunction. The Heat
recovery ventilation unit will start running after the time set has passed. Consult
your dealer for details.)
The unit runs though the operation lamp
does not turn on.
Does the “ ” or “ ” indicator appear on the display?
The nighttime heat purge operation or 24-hour ventilation is set to “ON”.
Refer to “Functions” for details. Consult your dealer to change the setting to
“OFF”.
The unit starts running without any
operation of the remote controller.
Has the unit just recovered from a power failure or have you just turned on the
circuit breaker?
(The settings concerning recovering from power failure are set to “ON”. Consult
your dealer for details.
11 Troubleshooting
CAUTION
If any of the following conditions occur, turn off the main power supply switch and immediately contact the dealer:
• Switch operation does not work properly.
• The main power fuse often blows out, or the circuit breaker is often activated.
• A foreign matter or water fall indoor the Heat recovery ventilation unit.
• When the Heat recovery ventilation unit does not operate even after the cause of the protective device activation has
been removed.
(The operation lamp and on the remote controller are flashing. When and a combination of , , , , or
and a number are displayed on the remote controller, also inform a qualified service person of the display content.)
• Any other unusual conditions are observed.
Confirm and check
Contact information for repairs
You can look for contact information for repairs.
When a trouble occurs in the Heat recovery ventilation
unit, the check code and the Heat recovery ventilation
unit number flash on the display of the remote
controller.
* The check code is only displayed during the
operation.
When the check code and Heat recovery ventilation unit
number are displayed, pushing [ Return] opens the
“Check” screen.
In the “Check” screen, push [ Set/Fix] to show the
contacts.
Push [ Menu] to display “Model information”.
1In the “Information” screen, push [ ] and
[ ] to select “Service information”, and
then push [ Set/Fix]
Check code
Indoor unit number
or Heat recovery
ventilation unit
number
37-EN 38-EN
Other manuals for VN-U00151SY-E
1
This manual suits for next models
6
Table of contents
Other Toshiba Fan manuals

Toshiba
Toshiba MMD-AP0304H2UL Quick start guide

Toshiba
Toshiba MMD-AP 1HF2UL Series User manual

Toshiba
Toshiba F-ATW60(W)US User manual

Toshiba
Toshiba VN-250SE User manual

Toshiba
Toshiba VN-250SE User manual

Toshiba
Toshiba VN-250SE User manual

Toshiba
Toshiba VN-250TE User manual

Toshiba
Toshiba VN-U00151SY-E User manual

Toshiba
Toshiba F-LYA20HKG User manual

Toshiba
Toshiba F-TSA20(G)MY User manual