Total TGT250105 User manual

GASOLINE PRESSURE WASHER
TGT250105
208cc 6.0HP
totaltoolsworld
TOTAL TOOLS WORLD

SOAPSOAP
PRESSURE WASHER FEATURES
A - High Pressure Hose
B - Fuel Tank
C - Choke
D - Fuel Valve Lever
E - Soap Tank
F - Handle
G - Spray Gun
H - Locking Trigger
I - Pull Cord
J - Engine Switch
K - Dipstick
L - No Flat Foam Filled Tires
M - High Pressure Hose Outlet
N - Water Inlet
M
N
A
B
C
D
E
G
H
I
L
J
K
F
TGT250105
• Max Output: 6.0HP
• Max. Pressure: 214Bar(3100PSI)
• Flow Rate: 8.7L/min(2.3GPM)
• Engine Type: OHV 4-stroke
• Displacement: 208CC
• Starting System: Recoil
• Engine Speed: 3600/min
• Fuel volume: 3.6L
• Oil Volume: 0.6L
• Fuel Type: Unleaded Gasonline
2

ASSEMBLY
• Parts needed - 1 foot, 1 M8 lock nuts.
• Raise or tilt pressure washer so you can line up foot with the hole located at the centre of the frame.
• Align the rubber foot with the hole in the frame where the foot is to be located. Attach foot by inserting the bolt from the
bottom up and install the acorn nut. Wrench tighten until there is a slight crush on the frame tube. (Do not over tighten)
Attaching Foot Assembly (See fig 1)
Install Handle (See fig 2)
• Install upper frame (handle) onto the lower frame by sliding the handle over the two upright tubes on the lower frame
and pressing down firmly until the handle is seated and the two detent pins snap in place.
FIG 2FIG 1
• Attach the upper gun hook, install two plastic rivets, until the plastic rivets are snug, you may need to tap with a mallet
or small hammer to seat the lock pin.
• Attach the lower gun hook, install the M6 screw & lock nut, wrench tighten until the nut is snug, do not over tighten.
Attaching Upper and Lower Gun Hooks (See fig 3)
• Attach the accessory hook.
• Install two plastic rivets, until the plastic rivet is snug.
• You may need to tap with a mallet or small hammer to seat the lock pin.
Attaching Accessory Hook (See fig 4)
FIG 4FIG 3
3

ASSEMBLY
• Screw the spray wand and the trigger handle together until they are secure.
•nut on by turning clockwise until it is hand tight.
FIG 5 FIG 6
Attaching the Spray Gun (See fig 5 & 6)
4

ASSEMBLY
• Place pressure washer on a level surface.
•
• Carefully add between 520 ml (17.6 oz) of 4-Cycle engine oil (SAE10W30) to empty reservoir until oil reaches
• Be sure to replace both dipsticks before attempting to start the engine.
• To check oil, set pressure washer on a level surface, wipe dipstick clean, then reinsert dipstick without re-threading.
FIG 7
Adding / Checking Engine Oil (See fig 7)
• Set pressure washer on a clean and level surface in an area that is well ventilated.
• Remove fuel cap.
• Insert a funnel into the fuel tank and carefully pour gasoline into the tank until fuel level reaches 1 1/2 inches below the
top of the neck.
CAUTION!
CAUTION!
Adding Fuel (See fig 8)
FIG 8
Unleaded
Gasoline
10W30 OIL
5

ASSEMBLY
•
• Inspect inlet screen and remove any debris.
• Connect hose to water inlet and tighten by hand. There must be a minimum of 10 feet of unrestricted hose between
pressure washer and faucet or shut off valve.
• Turn on water.
• Purge the system’s pump of air by releasing the safety and squeezing the trigger of the spray gun.
Do not run pump without connecting to the water supply and turning water on. Failure to
do so could damage the pressure washer. Failure to follow these instructions will void
product warranty. The unit is not suitable for use with a drinking water supply!
CAUTION!
Connect High Pressure Hose to Pump (See Fig 10)
• Attach end of high pressure hose to the high pressure outlet on pump.
• Follow the same procedure with opposite end to attach high pressure hose to spray wand.
Connecting Garden Hose to Pressure Washer (See fig 9)
FIG 9
FIG 10
6

Pre-Operation Check List
• Read and understand this operator manual in its entirety before operating pressure washer.
• Check oil level and add oil to the proper level if low.
• Check fuel level and add fuel if needed.
• Check connections of handle and all hoses to make sure they are secure.
• Check all hoses for kinks and damage.
Check flow of water supply and make sure it is adequate (2.8 - 5.6bar).
•
Do not run pressure washer with a damaged hose. Do not run pressure washer without
.YTNARRAWTCUDORPDIOVLLIWSNOITCURTSNIESEHTWOLLOFOTERULIAF.tluser
CAUTION!
Starting Pressure Washer (See Fig 11-12)
• Place pressure washer on a level surface.
• Turn on water.
• Purge the system’s pump of air by releasing the safety and squeezing the trigger of the spray gun.
• Attach wand/lance to spray gun.
• Turn fuel valve to the ON position.
• Slide the choke lever to the “Choke” position.
• Turn the engine OFF/ON switch to the “ON” position.
• Holding the machine with your hand, pull the recoil handle (starter cord) slowly until resistance is felt, then pull rapidly.
Squeeze the Gun trigger and release the pressure after every failed attempt to start the pressure washer (This will
reduce the back pressure).
• Let engine run for several seconds and then gradually slide the choke lever to the RUN position as the engine warms
up until the choke is fully slid to the RUN position.
OPERATION
• Carbon monoxide gas is a poisonous, odorless gas that can cause headache, confusion, fatigue, nausea, fainting,
sickness, seizures, or death. If you start to experience any of these symptoms, IMMEDIATELY get fresh air and seek
medical attention.
•
•
• When working in areas where vapors could be inhaled, use a respirator mask according to all of its instructions.
WARNING! from dissipating.
FIG 11 FIG 12
CHOCK
RUN
OFF ON
ON
OFF
CHOCK RUN
7

Stopping Pressure Washer (See Fig 13)
• Turn the on/stop switch to the OFF position.
• Turn the fuel valve to the OFF position.
• Turn off water and squeeze the trigger handle to release all water pressure.
OPERATION
• Always relieve pressure from spray gun before pulling starter cord, including every failed attempt to start engine.
• To avoid recoil, pull starter cord slowly until resistance is felt, then pull rapidly.
WARNING! Pull cord recoils rapidly and pulls arm towards engine faster than you can let go which
WARNING! Kickback forces result from pressing the trigger! Therefore, always hold the spray gun with
both hands! Pay attention to safe posture! Improper handling can lead to injuries!
could result in injury.
Using the Spray Gun (See Fig 14 - 15)
• Flip the lock tab behind the trigger up or down until it clicks to apply or remove the safety. Pull back on the trigger to
begin operating pressure washer.
To stop water flow, release trigger.
•
FIG 14 FIG 15
TRIGGER
SLOT
LOCK OUT
Using Spray Nozzle (See fig 16-17)
• To connect or disconnect spray tip, pull back on the quick-connect collar. Insert or remove spray tip then release collar.
• When spray tip is connected, pull on the spray tip to make sure it is secured.
• For general cleaning use the 40° spray tip. This option is for cement walkways.
FIG 13
ON
OFF
8

• For stripping, spot cleaning, blasting, and hard to reach areas use the 15° spray tip. This option is for removing paint,
rust, mildew, marine growth off boats, or grease stains. This option can be used for reaching second story surfaces, or
for the removal of paint, rust, oil stains, tar, gum, and other stubborn substances. Use extreme caution when using this
nozzle.
• For applying pressure washer safe detergent, use the black soap nozzle.
• The angle of the nozzles shown indicates the spray “fan shape” projected from the nozzle when the trigger of the spray
gun is pulled and high pressure water is passing through the nozzle. The pressure and flow will not change significantly
due to the various fan patterns (Nozzles).
OPERATION
FIG 16 FIG 17
SPRAY
WAND
NOZZLE
“CLICK”
Applying Detergent
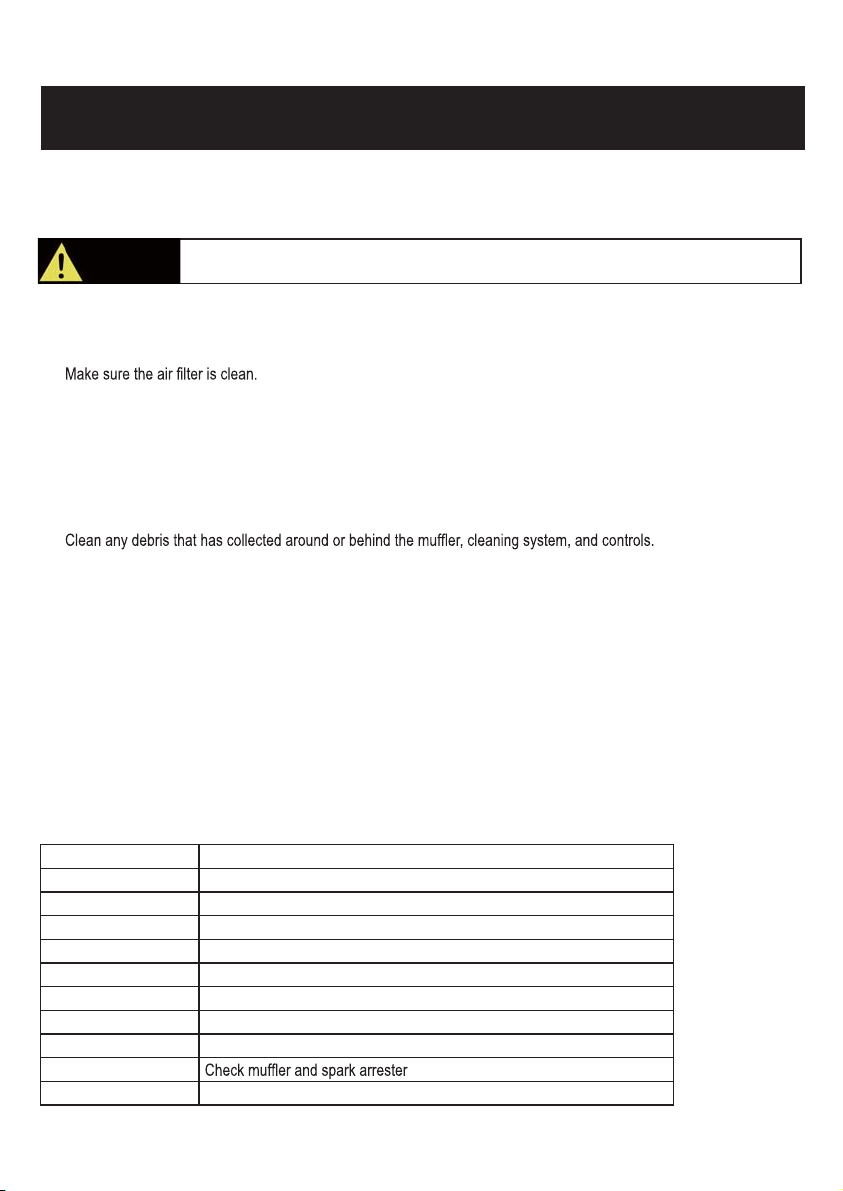
• Rinse surface with cool water before applying cleaner.
• Prepare detergent as required by job. For best results follow detergent directions as supplied from manufacturer.
• Remove cap from detergent container and fill.
• Spray detergent on surface. For best results use long, even, and overlapping strokes. Allow detergent to set for about
3 minutes before rinsing, but do not allow detergent to dry on surface or it may cause streaking or cause damage to the
surface. Use good judgment.
•a bucket of clean water to remove detergent.
Only use mild, environmentally friendly detergents intended for use in pressure washers.
Ask at your specialist dealer about these special products. Never use aggressive chemicals
(eg bleach), abrasive detergents or similar to avoid damage to your health, the product and
the environment.
WARNING!
Avoid skin contact with detergents, in particular contact with eyes! If detergents gets in
your eyes flush your eyes with clean water and seek immediate medical attention!
WARNING!
Rinsing with the Pressure Washer
•
• Rinse from top to bottom using long, overlapping strokes.
Test a small area first to avoid surface damage.
Moving the Pressure Washer
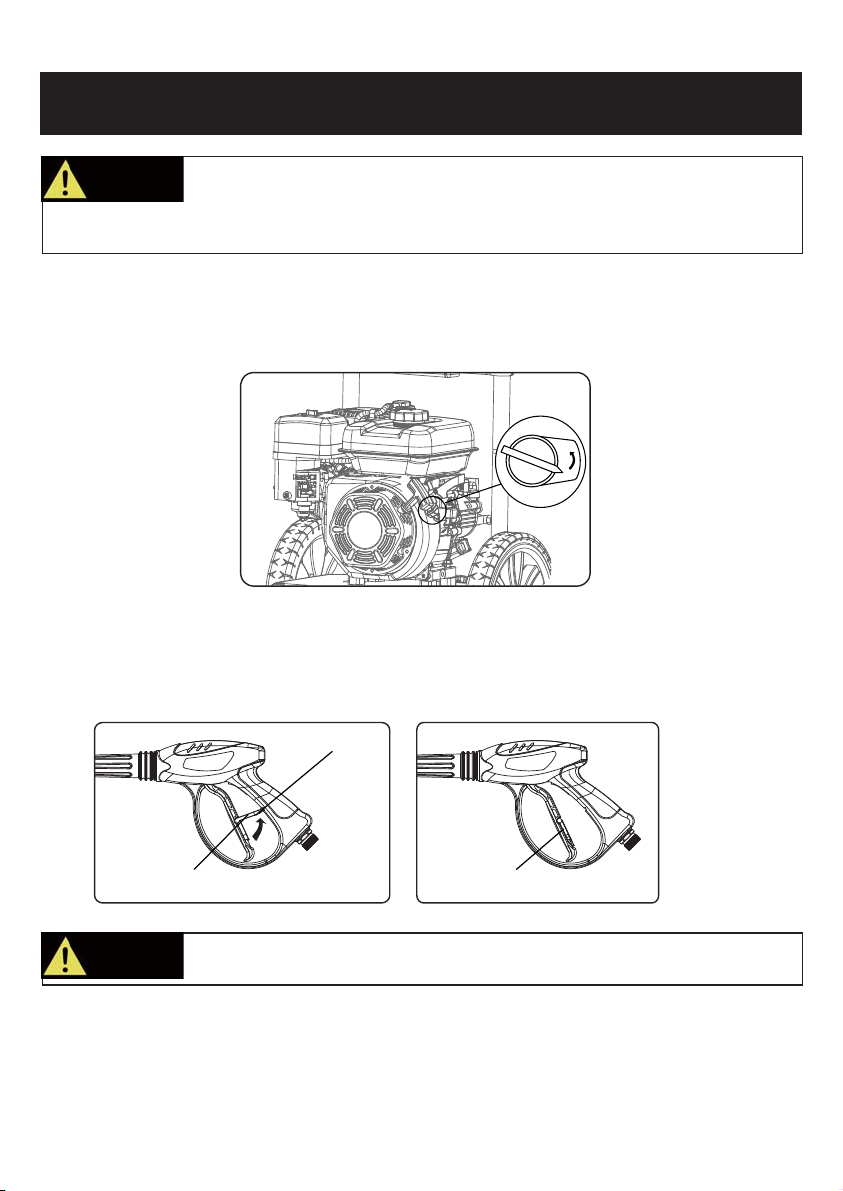
• Turn the pressure washer off.
• Tilt unit towards you until it is balanced on its wheels.
• Roll machine to desired location.
0° 15° 25° 40° Soap
9

Regular maintenance will extend the life of this pressure washer and improve its performance. The warranty does not
cover items that result from operator negligence, misuse, or abuse. To receive full value from the warranty, operator must
maintain the pressure washer as instructed in this manual, including proper storage.
Before inspecting or servicing this machine, make sure the engine is off and no parts are
moving. Disconnect the spark plug wire and move it away from the spark plug.
Pre-operation Steps
Before starting the engine, perform the following pre-operation steps:
• Check the level of the engine oil and the fuel tank level
•
• Remove any debris that has collected on the pressure washer.
• Check water inlet screen for damage. Clean inlet screen if it is clogged.
• Check high pressure hose for damage.
Briefly run garden hose to flush out any debris or insects.
•
• Inspect the work area for hazards.
Remove Debris
•
• Use a damp cloth to wipe exterior surfaces. If dirt is caked on, use a soft bristle brush.
After Each Use
Follow the following procedure after each use:
• Shut off engine and turn off water supply. Release water pressure by pointing spray gun in a safe direction and
squeezing the trigger.
• Disconnect high pressure hose, spray gun, and nozzle. Drain water from items and use a rag to wipe down the outside
of the hose and spray gun.
• Empty the water from the pump by pulling the recoil starter 6 times.
• Store unit in a clean and dry area.
• Use of a pressure washer pump conditioner is recommended, follow the instructions provided by the manufacturer of
the pump conditioner.
WARNING!
MAINTENANCE
After First 5 Hours Change Engine Oil
After Each Use Check and Clean Water Inlet screen
Check High Pressure Hose
Check and Clean Detergent Siphoning Tube
Check Spray Gun for Leaks
Clean Debris
Check Engine Oil Level before starting
Annually (20 hr Use) Change Engine Oil (Service more often under dirty or dusty conditions)
Annually (50 hr Use) Check and CleanAir Filter
Annually (100 hr Use) Service or Replace Spark Plug
Maintenance Schedule
10

High Pressure Hose
• Inspect hose for cuts, bulges, or leaks which can develop from kinking or wear. If damage is found, immediately replace
hose.
• Inspect couplings for damage. Immediately replace hose if damage is found.
Spray Gun
• Make sure the spray gun is connected securely.
• Inspect the spray gun safety and make sure the spray gun trigger springs back upon release.
Spray Nozzle
If a pulsing sensation is felt while squeezing the trigger, the spray nozzle may be dirty or clogged and should be cleaned
immediately.
• To clean the nozzle, shut off the engine and turn off the water.
• Remove the nozzle from the spray wand making sure that the nozzle is pointing away from you and in a safe direction.
• Use the nozzle cleaner or a small paper clip to dislodge any foreign materials which are clogging or restricting the
spray tip.
•
• Reconnect the nozzle to the spray wand.
• Turn the water supply back on and start engine.
Never repair high pressure hose or use unit if hose is damaged. If hose is damaged replace
with identical Ducar part.
WARNING!
MAINTENANCE
Changing Engine Oil
Engine oil will drain better if the engine is still warm, but not hot.
• Shut off engine.
•
• Place an oil pan on the ground to catch oil. Remove oil plug then tilt pressure washer back and to the side to empty out
Oil Drain Plug
the oil from the crankcase.
• engine with new oil as instructed earlier in this manual underAdding/Checking Oil.
Once oil is completely drained, return the pressure washer to a level position and install the oil drain plug. Refill the
Clean the area around the oil fill cap/dipstick to keep out debris then remove oil fill cap/dipstick.
Checking Detergent Siphoning Tube
• Check the detergent siphoning tube for clogs, leaks, or tears.
•
• Replace siphoning tubes if damaged.
Nozzle Cleaner
11

Checking Spark Plug
• Disconnect the spark plug wire from the spark plug.
• Before removing the spark plug, clean the area around its base to prevent debris from entering the engine.
• Clean carbon deposits off the electrode with a wire brush.
• Check the electrode gap and slowly adjust to 0.80mm (0.031in.) if necessary.
• Reinstall spark plug and tighten to Torque 22.0 – 26.9 Nm (16-20 ft-lb).
• Reconnect spark plug wire.
• If spark plug is worn replace only with an equivalent replacement part. Spark plug should be replaced annually.
Repairing Leaking Connections
• Purchase O-Ring / Maintenance kits through the nearest authorized service center and follow instructions provided with
kit.
Air Filter
•
•
•
• .
.
WARNING!
Storing Pressure Washer
If storing pressure washer for 30 days or more follow the procedures below:
• Add fuel stabilizer to gasoline to keep gasoline from going stale and to prevent gum deposits from forming on the
carburetor. Run engine for a couple of minutes to circulate the fuel stabilizer.
• Add PumpSaver to protect pump from freezing or damage caused by mineral deposits.
•
• Disconnect the spark plug wire and clean the spark plug. Leave spark plug wire disconnected.
•
• Cover unit with a suitable protective cover to keep unit dry.
• Store unit in a frost-free area.
MAINTENANCE
• Never attempt to repair high pressure hose, always replace.
• Never attempt to repair leaks with sealant, always replace O-ring or seal.
WARNING! Water pressure produced by this unit can cut through skin and tissue leading to serious
injury and possible amputation.
12

Engine does not start 1. Out of fuel
2. Engine oil low
3. Spark plug wire disconnected
from spark plug
4. Bad spark plug
5. Spark plug wire has shorted
6. Ignition inoperative
1. Fill fuel tank
2. Add engine oil
3. Connect spark plug wire
4. Replace spark plug
5. Contact service center
6. Contact service center
1. Stale fuel or water in fuel
2. Spark plug producing weak spark
3. Excessively rich fuel mixture
1.
1. gasoline.
2. Contact service center
3. Contact service center
1.
Engine hard to start
Engine lacks power and vibrates
excessively
1. Out of fuel 1. Fill fuel tank
Engine quits during operation
PROBLEM CAUSE SOLUTION
1. Engine speed is too slow 1. Move throttle to fast. If this does
not correct problem, contact
service center.
Engine loses power when load is
added
Water pressure is weak 1. Water supply is restricted.
2. Water not turned on to full power
3. Not using high pressure nozzle
1. Inspect garden hose for kinks or
leaks. Make sure you are using
a large enough garden hose
(min. ¾ inch diameter)
2. Open water source all the way.
3. Change nozzle
TROUBLE SHOOTING
Detergent and spray do not mix 1. Detergent hose is not submerged
or has disconnected
2. Black soap nozzle needed
1. Make sure hose is connected
2. Install soap nozzle
and submerged in the detergent.
Pump fails to produce pressure or
pressure is inconsistent 1. Water supply is restricted
2. Water not turned on full power
3. Nozzle is clogged
4. Spray gun leaks
5. Air in line
6. Inlet hose screen is clogged
7. Water supply is over 100°F
8. Pump is faulty
1. Inspect garden hose for kinks or
leaks. Make sure you are using a
large enough garden hose (Min.
¾ inch diameter)
2. Open water source all the way.
3. Clean nozzle
4. Check spray gun connection or
replace spray gun
5. Squeeze trigger handle to
remove air
6. Clean inlet
7. Use cool water supply
8. Contact service center
13

DIAGRAMS
14

TGT250105 Exploded view
SOAP
15

TGT250105 Spare part list
No. Part Description Qty
1Engine 1
2 Soap Tank Cap 1
3 Soap Tank 1
4 FRAME BASE 1
5 LOCK NUT M8 1
6 Foot, Frame Isolating 1
7 boltM6X45 5
8 SEAL RING 4
9 Upper Gun Hook 1
10 LOCK NUT M6 5
11 NUT M8 8
12 Engine Mount, Vibration Isolator 4
13 Wheel Axle 2
14 WHEEL 2
15 Hair Pin 2
16 CLIP 3
17 detent spring 2
18 Upper Gun Hook 1
19 Plastic Rivets 6
20 Nozzle Holder 4
No. Part Description Qty
21 HANDLE, FRAME 1
22 Foam Grip 1
23 Buckle lock 1
24 rope 1
25 Panel 1
26 Siphon Tube 1
27 WATER PUMP 1
28 BOLT M8X20 4
29 FLAT KEY 1
30 Wand 1
31 Spray Gun 1
32 Nozzle Cleaner 1
33 sheath Nozzle Cleaner 1
34 High Pressure Hose 1
35 Nozzle 1
36 Nozzle 1
37 Nozzle 1
38 Soap Nozzle Nozzle 1
39 Water inlet connector M) 1
40 Water inlet connector F) 1
16

SOAP
T0719.V02
MADE IN CHINA
www.totaltools.cn
TOTAL TOOLS CO., PTE. LTD.
GASOLINE PRESSURE WASHER
208cc 6.0HP
Table of contents
Other Total Pressure Washer manuals