manuals.online logo
Brands
  1. Home
  2. •
  3. Brands
  4. •
  5. Toto
  6. •
  7. Toilet
  8. •
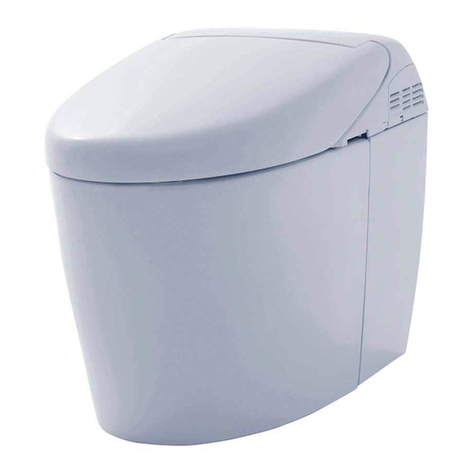
  9. Toto CS761 Series User manual

Toto CS761 Series User manual

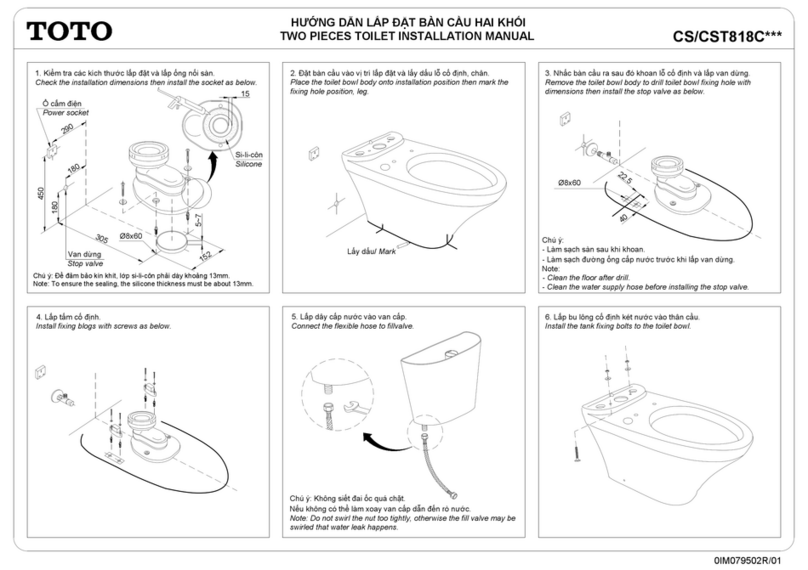
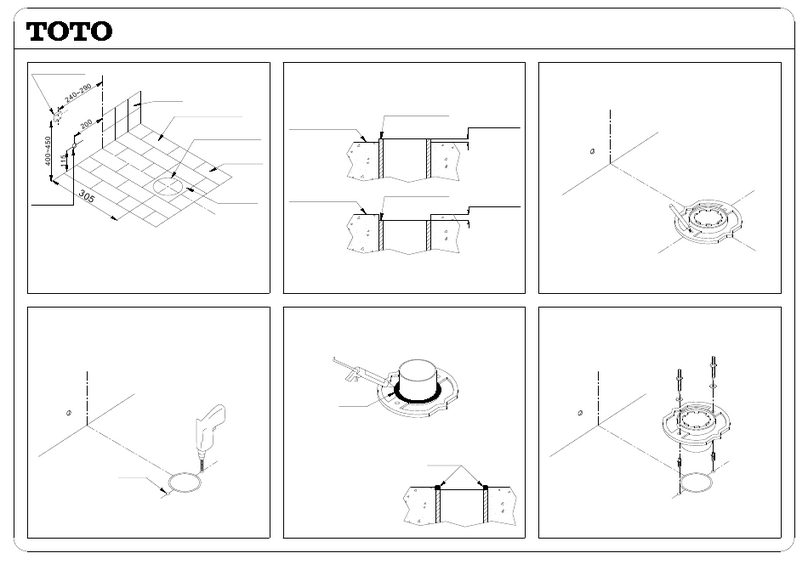
1. Kiểm tra kích thước lắp đặt.
Checking the installation dimensions.
2. Kiểm tra bề mặt ống thải/ Checking top surface of the outlet pipe.
Ống thải chỉ được cao hơn 1mm hoặc thấp hơn 2mm so với mặt
sàn/ The outlet pipe is only allowed taller 1mm or lower 2mm than the
floor.
Tối đa 1mm
Maximum 1mm
Ống thải Ø110
Outlet pipe Ø110
Vữa
Mortar
Tối đa 2mm
Maximum 2mm
Chú ý: Trường hợp khi cắt gạch không làm kín khít xung quanh
ống thải thì phải làm phẳng với vữa và cao bằng mặt sàn hoàn
thiện. Vữa phải khô mới được tiến hành các bước tiếp theo.
Note: If the flooring tile does not fit tightly around the outlet
pipe, it must be leveled that area by the mortar so that same as
the finished floor. Let wait the mortar dry, then doing next steps.
Mặt sàn hoàn thiện
Finished floor
Ống thải Ø110
Outlet pipe Ø110
Chú ý: Nếu không làm đúng theo yêu cầu, có thể gây mùi khi sử
dụng.
Note: Be sure that making right, otherwise it may cause of the
smell nasty.
Ống thải Ø110
Outlet pipe Ø110
Tường
Wall
Gạch lát nền
Flooring tile
305
52
775
Mặt sàn hoàn thiện
Finished floor
Mặt sàn hoàn thiện
Finished floor
0IM047002S/08
CS761***
CST761***
5. Bôi si-li-côn vào phần rãnh ở mặt dưới bích nối sàn.
Nếu không có thể gây mùi hôi khi sử dụng.
Paste silicone to the groove on the underside of the floor flange.
Otherwise may cause of the smell nasty.
6. Lắp cố định bích nối sàn.
Install the floor flange.
3. Lấy dấu lỗ cố định bích nối sàn.
Marking the fixed holes of the floor flange.
Lấy dấu
Mark
Với trường hợp ống thải thấp hơn mặt sàn, phải bôi si-li-côn vào
ống thải.
If the outlet pipe is lower than the floor surface, you must apply
silicone to the outlet pipe.
Si-li-côn
Silicone
Si-li-côn
Silicone
4. Khoan lỗ.
Drill the fixed holes.
Ø8x60
Chú ý: Làm sạch sàn sau khi khoan.
Note: Clean the floor after drill.
Lỗ cấp nước
Water supplied
hole
01
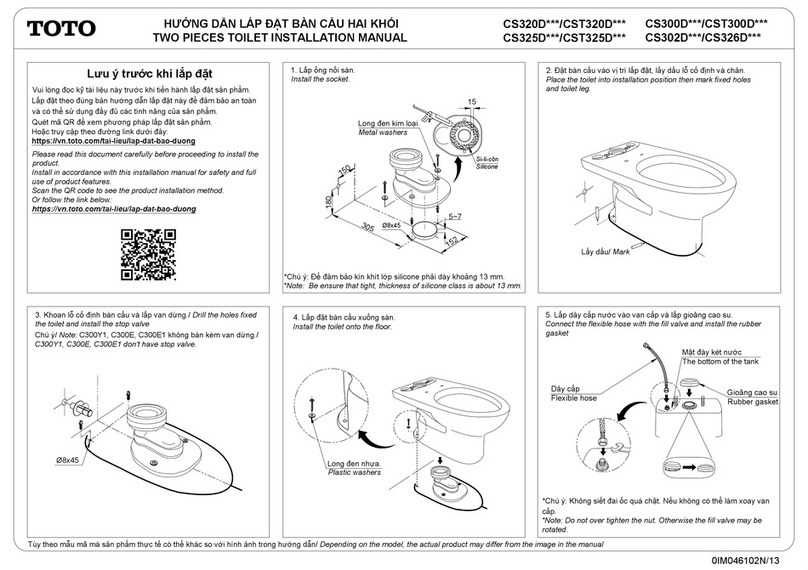
HƯỚNG DẪN LẮP ĐẶT BÀN CẦU HAI KHỐI
TWO PIECES TOILET INSTALLATION MANUAL
305
8. Lấy dấu vị trí lắp bàn cầu.
Mark the position to install the toilet.
9. Khoan lỗ lắp tấm cố định.
Drill to install fixed plate.
10. Lắp tấm cố định.
Install the fixed plate.
Chú ý: Làm sạch sàn sau khi khoan.
Note: Clean the floor after drill.
Chú ý: Làm sạch sàn sau khi khoan.
Note: Clean the floor after drill.
Lấy dấu/ Mark
130
267
Ø6x45
Ø6x45
Gioăng cao su non
P-seal
1
Chú ý:
- Phải lắp gioăng cao su non nếu không có thể gây ra rò nước
- Đối với phụ kiện số (1, 2, 3, 4) nếu khách hàng không mua kèm. Xin
vui lòng chuẩn bị trước khi lắp đặt.
Note:
-You must use P-seal to seal, otherwise water leak happens.
-With (1, 2, 3, 4) parts, if you do not buy together with toilet bowl. Please
prepare before the installtion.
2
3
4
7. Lắp ống nối sàn.
Install the socket.
50
45
11. Lắp bu lông vào thân cầu/ Install the bolt with the body toilet.
Lắp bệ ngồi và nắp đậy/ Install the seat & cover.
Chi tiết xem hướng dẫn lắp đặt đi kèm bệ ngồi và nắp đậy.
Refer installation manual attached to seat & cover.
0IM047002S/08
CS761***
CST761***
02
HƯỚNG DẪN LẮP ĐẶT BÀN CẦU HAI KHỐI
TWO PIECES TOILET INSTALLATION MANUAL
16. Lắp dây cấp với van dừng.
Connect the flexible hose with the stop valve.
17. Lắp vít cố định thân cầu và làm kín chân bằng si-li-côn và đậy nắp.
Install the screw to fix the toilet then close leg by silicone and up lid.
12. Lắp đặt bàn cầu xuống sàn.
Install the toilet onto the floor.
13. Lắp két nước vào thân cầu.
Install the tank with the toilet body.
HƯỚNG DẪN LẮP ĐẶT BÀN CẦU HAI KHỐI
TWO PIECES TOILET INSTALLATION MANUAL
15. Lắp van dừng.
Installation the stop valve.
Băng tan
Seal tape
Chú ý: Phải cuốn băng tan khi lắp ráp cút nối với van dừng.
Note: Have to use the seal tape when assembling the connector
with the stop valve.
14. Lắp cút nối vào van dừng.
Assembling the connector into the stop valve.
Gioăng cao su
Rubber gasket
Chú ý: Phải đặt gioăng cao su vào đúng tâm lỗ thải. Nếu không
có thể rò nước khi lắp đặt.
Note: Have to place the rubber gasket right into center of outlet
hole. Otherwise may be water leakage.
0IM047002S/08
CS761***
CST761***
03
Chú ý: Làm sạch đường ống cấp nước trước khi lắp van dừng.
Note: Clean the water supply hose before installing the stop valve.
Si-li-côn
Silicone

This manual suits for next models

1

Other Toto Toilet manuals

Toto CST244EF User manual

Toto

Toto CST244EF User manual

Toto NEOREST Hybrid User manual

Toto

Toto NEOREST Hybrid User manual

Toto CWT426CMFG User manual

Toto

Toto CWT426CMFG User manual

Toto NEOREST 600 MS990CGR User manual

Toto

Toto NEOREST 600 MS990CGR User manual

Toto USWN900 Series User manual

Toto

Toto USWN900 Series User manual

Toto CST484CEMF Installation instructions

Toto

Toto CST484CEMF Installation instructions

Toto UT105U User manual

Toto

Toto UT105U User manual

Toto NEOREST MS950CG User manual

Toto

Toto NEOREST MS950CG User manual

Toto Aquia CT418F User manual

Toto

Toto Aquia CT418F User manual

Toto CST474CEFG User manual

Toto

Toto CST474CEFG User manual

Toto CS767 Series User manual

Toto

Toto CS767 Series User manual

Toto washlet User manual

Toto

Toto washlet User manual

Toto NEOREST User manual

Toto

Toto NEOREST User manual

Toto CST646F Installation instructions

Toto

Toto CST646F Installation instructions

Toto TCW07S User manual

Toto

Toto TCW07S User manual

Toto washlet User manual

Toto

Toto washlet User manual

Toto UWN926EBS User manual

Toto

Toto UWN926EBS User manual

Toto CW542HME5UNW1 User manual

Toto

Toto CW542HME5UNW1 User manual

Toto CT447CFG01 User manual

Toto

Toto CT447CFG01 User manual

Toto MS604114 Series User manual

Toto

Toto MS604114 Series User manual
Toto Washlet TCF4914E Series User manual

Toto

Toto Washlet TCF4914E Series User manual

Toto DuoFit WT171M Installation instructions

Toto

Toto DuoFit WT171M Installation instructions

Toto CST748 User manual

Toto

Toto CST748 User manual

Toto SoftClose SS117 User manual

Toto

Toto SoftClose SS117 User manual

Popular Toilet manuals by other brands

Kohler K-5401TW-2-0 installation guide

Kohler

Kohler K-5401TW-2-0 installation guide

agape 750 ACER0750WRRS Assembly instructions

agape

agape 750 ACER0750WRRS Assembly instructions

American Standard Champion 4 MAX 2586.128ST owner's manual

American Standard

American Standard Champion 4 MAX 2586.128ST owner's manual

American Standard Ultima VorMax 203AA.104 owner's manual

American Standard

American Standard Ultima VorMax 203AA.104 owner's manual

Purus V131 Installation instructions & maintenance

Purus

Purus V131 Installation instructions & maintenance

Delta C43907 quick start guide

Delta

Delta C43907 quick start guide

GoodHome minho 5059340081557 manual

GoodHome

GoodHome minho 5059340081557 manual

Sanela SLWN 11 Mounting instructions

Sanela

Sanela SLWN 11 Mounting instructions

SPX Johnson Pump AquaT Series instruction manual

SPX

SPX Johnson Pump AquaT Series instruction manual

DXV AT200 Questions and answers

DXV

DXV AT200 Questions and answers

Roca DAMA SENSO COMPACT manual

Roca

Roca DAMA SENSO COMPACT manual

STUDIOLUX SLi5200 manual

STUDIOLUX

STUDIOLUX SLi5200 manual

DAX BSN-CL12243 installation guide

DAX

DAX BSN-CL12243 installation guide

American Standard Right Height Elongated Toilet Triumph Cadet... owner's manual

American Standard

American Standard Right Height Elongated Toilet Triumph Cadet... owner's manual

VITRA Falcon D59000-002 manual

VITRA

VITRA Falcon D59000-002 manual

Laufen Alessi H830971 manual

Laufen

Laufen Alessi H830971 manual

Raita MINI manual

Raita

Raita MINI manual

IFO Cera 3875 Maintenance Instruction

IFO

IFO Cera 3875 Maintenance Instruction

manuals.online logo
manuals.online logoBrands
  • About & Mission
  • Contact us
  • Privacy Policy
  • Terms and Conditions

Copyright 2025 Manuals.Online. All Rights Reserved.