manuals.online logo
Brands
  1. Home
  2. •
  3. Brands
  4. •
  5. Toto
  6. •
  7. Toilet
  8. •
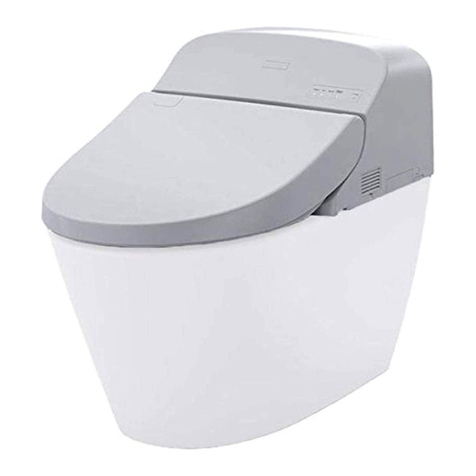
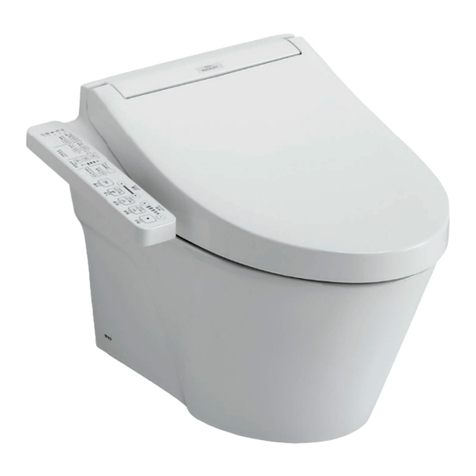
  9. Toto NEOREST A User manual

Toto NEOREST A User manual

[Howtocheckthewaterpressure]
Allowthewatertoflowintothebucketfor10secondsand
measurethewatervolume.
Therequiredminimumwaterpressurecanbe
securedifthewatervolumeis5.5Lormore
underthefullyopenconditionofwatershutoff
valveincludedwiththisproduct.
Preparetwobucketsto
holdthewater.
■Beforeinstallation,measurethewaterpressure
Therequiredminimumwaterpressureis0.07MPa(for20L/minflow).Notethat
theproductcouldnotworkproperlyunlessthiswaterpressureissecured.The
maximumwaterpressureis0.75MPastatic.Itisnecessarytoinstallthewater
shutoffvalve(anglestop)providedwiththeNEOREST.Thiswillassuretheproper
flowratioisachievedandallowforoptimumperformanceoftheunit.
Caution1:Evenwhenanyotherapplianceswithfaucetsareusedatthe
sametimeinalavatoryandbathroom,thewaterpressureand
flowratestatedabovearealsorequired.
Caution2:Forthepipe,besuretouseapipe13ormoreinnominalbore
diameter
(tosecurethewaterpressureandflowratestatedabove).
Centerlinefortoiletbowlinstallation
Centerlinefordrainpipe
drainpipe drainpipe
Water-supplyportR1/2
(Forwallwater-supply)
Water-supplyportR1/2
(Forfloorwater-supply)
Partsincludedintheinstallationkit
2
※Beforeinstallation,confirmthatthepartslistedbelowareincludedinthekit.
Remarks
Quantity
Toiletbowl
Installationinstruction
SidePanel
Watersupply
jointassembly
Openingandclosingtool
Watershutoffvalve
(withpacking)
Water-supplyhose
Drainpaking
Self-tappingscrew
Grayexpansiontube
Installation
Hardware
1
1
1
1
1 Mounted
Mounted
1
1
1 Thisinstruction
2
2
Weight:30kg
φ6.2×63
Partsname Drawing
BeforeinstallingtheNEOREST
3
450
drainpipe
(IncaseofTOTO
Y9207)
115±10
100±10
120
175±10
60±10
AlwaysFollowThisPrecaution
1
NEORESTA(Walldrain)
TheinstallationofthetoiletbowlfortheNEORESTdiffersfrominstallationofconventionaltoiletbowls.
Besuretoreadthefollowinginstallationinstructionandinstalltheproductonlyasdescribedinthisinstruction.
InstallationInstruction
Beforeinstallation,besuretohaveagoodunderstandingofthecontentsinAlwaysFollowThisPrecaution
andinstalltheproductasdescribedintheinstructions.Precautionarysymbolsareusedintheseinstructions
toensuresafeandproperinstallationoftheproductandtopreventinjurytoend-useranddamageto
personalproperty.Thedefinitionsoftheseprecautionarysymbolsareasfollows.
Therearetwotypesofprecautionarysymbols.Thesymbolsanddefinitionsappearbelow.
Warning
Whenthissymbolappears,precautionshouldbetakentoensure
properandsafeuseoftheproduct.Ignoringthisprecautioncould
resultininjuryordamagetopersonalproperty.
Symbol Definition
Thissymbolindicatesaprohibited
useoftheproduct.
ThissymbolmeansAlways
followthisprecaution.
Donotbendthewater-supplyhoseexcessivelyordonot
damageitbyastuborblade;
otherwisethewater-supplyhosemaybebroken,resulting
in the defacement of household goods or damage to
propertiesduetoawaterleakage.
Avoiddirectimpacttotheceramiccomponentsasthiswill
breaktheceramicandcouldresultinjuryorproperty
damageduetoawaterleakage.
Alwaysusetheprovidedordesignatedpartsforthe
installationprocess.
Warning
Whenthewatershutoffvalveisopened,donotdisconnect
thewaterfilter;
otherwisewaterwillbelchout.
SidePanel(left)
SidePanel(right)
Withhook-and-loop
fastener
※Besuretohandtheopeningandclosingtooltoend-user.
115±10
Installationdrawing
150
389
115±10
104(Fullopen)
78(Fullopen)
900
1140
(Bowllidfullopen)
30
60±10
542
120
175±10
115±10
695
Forfloorwater-supply
Forwallwater-supply
(unit:mm)
(unit:mm)
H06928 2007.12
■Confirmthatthereisenoughfloorspacetoinstallthetoiletunitand
thatthebathroomdoorwillopen/closewithoutobstruction.
※Becarefulaboutinterferencebetweenthewindowframe,shelf,storagecase
andtoiletbowllid.Acontactwiththetoiletbowllidmaymakeitimpossibleto
openthelidfully.
(Thereferencedistancebetweentheshelforthestoragecaseandthefloor
surfacemustbebottomFL+1200mm)
■Beforeinstallation,checkthatthewater-supplyportanddrainpipe
areinspecifiedpositionasshowninthefigurebelow.
Partsandinstallationinstructions
4
Installationprocedures
5
Continuetoback-side
Toilet bowl flush valve
Flushvalveconnector
Drainpipe
Drainpacking
Washer
Self-tappingscrew
Watersupplyhose
Watershutoffvalve
Forwallwater
supply
Forfloorwater
supply
■Confirmthepositionofthewater-supplyport/drainpipeinthe
 specifiedposition.
Confirmthepositionofthewater-supplyport/drainpipe
1
Note③
Aftertheinstallationof
themainunit,besureto
installtheSidePanel.
7
()
Note①
Thedrainpipemusthaveagradient
of1/50ormore. 4
()
Note②
Forthemountingdirectionoftheconnecting
packing,refertothefigurebelow.Applysoapy
watertothedrainpackingorthedrainpipe
beforeinsertion.
4
()
Drainpipeside
Crosssectionofdrainpacking
Toiletbowlside
Installingthewatershutoffvalve
■Installingthewatershutoffvalveinthespecifiedposition.
①UseI-shapewater-supplypipe .
②InstalltheDecorativecover.
2
Forfloorwater-supply:
①UseL-shapewater-supplypipe .
②InstalltheDecorativecover.
Forwallwater-supply:
I-shapewater-supplypipe
Decorativecover
L-shapewater-supplypipe
Decorativecover *Donotmistake
 themountingdirection.
Hook-and-loopfastener
Toolrack
Waterfilter
Toiletbowl
Grayexpansiontube
Openingandclosingtool
※Waterfiltercleaningtool
 Afterusethistool,putitbackonthetoolrack.
Watershutoffvalve
Watershutoffvalve
SidePanel(right)
SidePanel(left)
Centerlinefortoiletbowlinstallation
Centerlinefordrainpipe
drainpipe drainpipe
Water-supplyportR1/2
(Forwallwater-supply)
Water-supplyportR1/2
(Forfloorwater-supply)
450
drainpipe
(IncaseofTOTO
Y9207)
115±10
100±10
120
175±10
60±10
115±10
(unit:mm)
※Putthesealingtapeonthethreadpartofthewater-supplypipe.
a
a
b
b
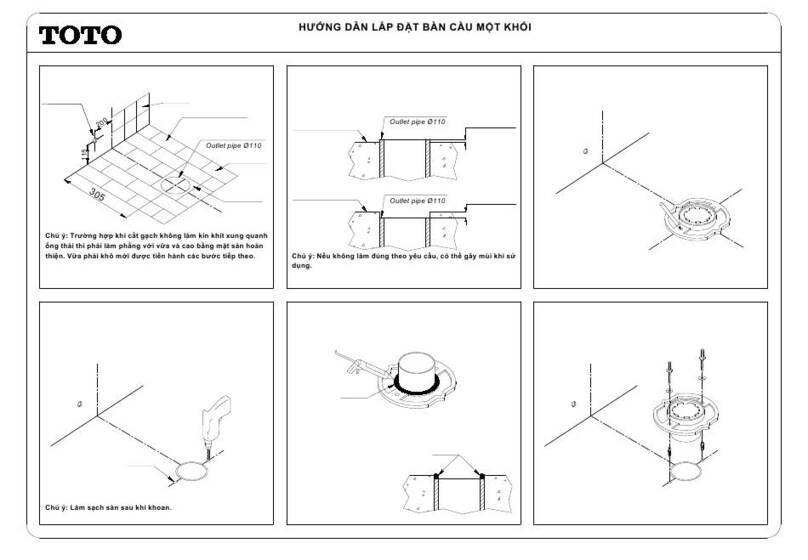
3Putthetoiletbowltemporarily
4Installationoftoiletbowl
①First,drawthecenterlinefortoiletbowlinstallation.
②Asshowninthefigurebelow,putthetoiletbowltemporarily
accordingtothepositionofdrainpipe. 
※Payattentionthatthecenterlinefortoiletbowlinstallation
alignsbasicallywiththecenterlineofthetoiletbowl.
③Drawthetwopositionsofself-tappingscrewsformountingthe
toiletbowl.
④Movethetoiletbowlandmakeholes8mmindiameterinthe

markedpositionsofself-tappingscrewsformountingthetoiletbowl.
⑤Putthegrayexpansiontubeintotheholes.
①Installthedrainpackingforthetoiletdrainhorn.
 ※Forthemountingdirectionoftheconnectingpacking,refertothefigurebelow.
  Applysoapywatertothedrainpackingorthedrainpipebeforeinsertion.
②Insertthetoiletdrainhornwithdrainpackingtothedrainpipe.
③Securethetoiletbowltothefloorsurfaceusingself-tappingscrews.
 ※Pleasetightenself-tappingscrewswithwashersecurely.
 ※Thedrainpipemusthaveagradientof1/50ormore.
147
147
120
φ89
100
450
Positionsofself-tappingscrews
formountingthetoiletbowl
Positionsofself-tapping
screwsformountingthe
toiletbowl
Centerlinefortoilet
bowlinstallation
Drainpipe
(IncaseofTOTOY9207)
(
Gradientof1/50ormore
)
Washer
Self-tapping
screw
Installaftersoapywaterisapplied
Drainpacking
Crosssectionofdrainpacking
Drainpipe
Drainpipe
side
Toiletbowl
side
Drainpipe
Toiletdrainhorn
Water-supplyhose
Thedrainpipemustnothaveanycounter-gradient.
Thecounter-gradientcausesthebackwardflowofdirty
waterorthelowefficiencyofwashing.
Warning
Pleasetightenallscrews
andnutssecurely.

Pleasebecarefulnotto
over-tightenthescrewsand
crackthetoiletbowl.
Self-tappingscrew
Washer
Toiletbowl
Warning
Beforeinstallingthetoiletbowlto
thedrainpipe,checkthatthetipof
water-supplyhoseexistsoutofthe
toiletbowl.
(unit:mm)
Warning
(Fordrainpipeprotrusionmargin:100mm)
220
Howtoholdthetoiletbowl
Grayexpansiontube
■Themanufacturerrecommendsthatsiliconecaulkingbeappliedaroundthebottomofthetoiletbowlbasetopreventwaterandurinefrom
seepingundertheflooringmaterials,resultinginastainedfloor.
■Refertotheinstallationinstructionincludedinthepackageofthe
mainunit.
Forbetterresults
5Installingthewater-supplyhose
6Installationandtrialrunofthemainunit
Siliconcaulking
Interiorwall
oftoiletbowl
Exteriorwall
oftoiletbowl
Packing
Water-supplyhose
Watershutoffvalve
7InstallingtheSidePanel
■Putthepackinginto
 thehexagoncapnutof
thewater-supplyhose
andsecuretothewater
shutoffvalve.
※Thepackingisincluded
inthewatershutoffvalve
package.
MountingreferencelinefortheSidePanel
SidePanel
■Afteratrialoperationandleakcheck,installtheSidePanelaligned
withthemountingreferenceline(red)fortheSidePanel.
※Pressthehook-and-loopfastenerpositions(fourpoints)securely.
SidePanel
Hook-and-loop
fastener

Other Toto Toilet manuals

Toto MS642 User manual

Toto

Toto MS642 User manual

Toto CS761P Series User manual

Toto

Toto CS761P Series User manual

Toto CT970CEMFG User manual

Toto

Toto CT970CEMFG User manual

Toto washlet User manual

Toto

Toto washlet User manual

Toto WASHLET+ RX CWT4474047CMFGA MS Series User manual

Toto

Toto WASHLET+ RX CWT4474047CMFGA MS Series User manual

Toto CST703X.10 User manual

Toto

Toto CST703X.10 User manual

Toto CS761 Series User manual

Toto

Toto CS761 Series User manual

Toto CST746 User manual

Toto

Toto CST746 User manual

Toto CS680 Series User manual

Toto

Toto CS680 Series User manual

Toto NEOREST User manual

Toto

Toto NEOREST User manual

Toto CST423SF User manual

Toto

Toto CST423SF User manual

Toto NEOREST 750H User manual

Toto

Toto NEOREST 750H User manual

Toto NEOREST AC SN996MX CWT996CEMFX User manual

Toto

Toto NEOREST AC SN996MX CWT996CEMFX User manual

Toto MS614114CEFG User manual

Toto

Toto MS614114CEFG User manual

Toto CST423SF User manual

Toto

Toto CST423SF User manual

Toto TCF802 Series User manual

Toto

Toto TCF802 Series User manual

Toto CS761 Series User manual

Toto

Toto CS761 Series User manual

Toto MS642 User manual

Toto

Toto MS642 User manual

Toto Washlet SG User manual

Toto

Toto Washlet SG User manual

Toto WASHLET SW3074T40 User manual

Toto

Toto WASHLET SW3074T40 User manual

Toto CS767 Series User manual

Toto

Toto CS767 Series User manual

Toto Aquia CST412MF Installation instructions

Toto

Toto Aquia CST412MF Installation instructions

Toto CST446CUMFG Installation instructions

Toto

Toto CST446CUMFG Installation instructions

Toto CWT4263074CMFG User manual

Toto

Toto CWT4263074CMFG User manual

Popular Toilet manuals by other brands

Tecma Nano ECO Owners and installation manual

Tecma

Tecma Nano ECO Owners and installation manual

Kohler K-3506 Homeowner's guide

Kohler

Kohler K-3506 Homeowner's guide

BERNSTEIN Dusch basic Operator's manual

BERNSTEIN

BERNSTEIN Dusch basic Operator's manual

Timago KING-10-20 user manual

Timago

Timago KING-10-20 user manual

DAX BSN-CL12243 installation guide

DAX

DAX BSN-CL12243 installation guide

Sanela SLW 53 manual

Sanela

Sanela SLW 53 manual

Clou Hammock CL/04.01060.01 installation instructions

Clou

Clou Hammock CL/04.01060.01 installation instructions

TECE TECEone operating instructions

TECE

TECE TECEone operating instructions

Kohler ADAIR K-8699T installation instructions

Kohler

Kohler ADAIR K-8699T installation instructions

noken URBAN C quick start guide

noken

noken URBAN C quick start guide

Porcelanosa N3301512843 manual

Porcelanosa

Porcelanosa N3301512843 manual

Reece Laufen Pro A 1813059 installation instructions

Reece

Reece Laufen Pro A 1813059 installation instructions

YitaHome BFTLPT-1000 user manual

YitaHome

YitaHome BFTLPT-1000 user manual

Blooming NB-R770 manual

Blooming

Blooming NB-R770 manual

Wellis CLEMENT MONOBLOCK WF00031 installation manual

Wellis

Wellis CLEMENT MONOBLOCK WF00031 installation manual

JABSCO 37045 Series manual

JABSCO

JABSCO 37045 Series manual

GREEN LOO CF 4 manual

GREEN LOO

GREEN LOO CF 4 manual

Kohler GABRIELLE CLASS FIVE S-EB K-3322T-W installation instructions

Kohler

Kohler GABRIELLE CLASS FIVE S-EB K-3322T-W installation instructions

manuals.online logo
manuals.online logoBrands
  • About & Mission
  • Contact us
  • Privacy Policy
  • Terms and Conditions

Copyright 2025 Manuals.Online. All Rights Reserved.