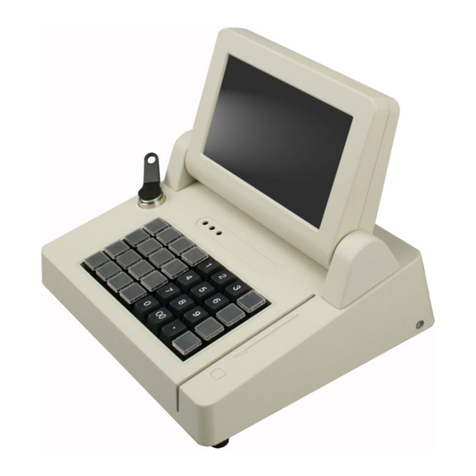
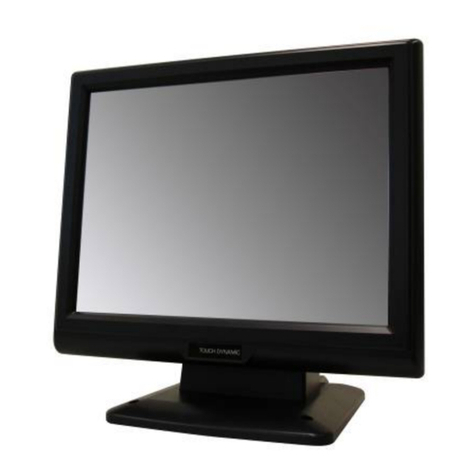
Touch Dynamic Atlas All-in-one User manual

1
Atlas All-in-one
User Manual Version:0.2
Version:1.0
Version: 1.0

2
Copyright
Copyright 2018 Touch Dynamic. All Rights Reserved.
This manual, software and firmware described in it are copyrighted by their respective owners and
protected under the laws of the Universal Copyright Convention. You may not reproduce, transmit,
transcribe, store in a retrieval system, or translate into any language, in any form or by any means,
electronic, mechanical, magnetic, optical, chemical, biological, molecular, manual, or otherwise,
any part of this publication without the express written permission of the publisher.
All products and trade names described within are mentioned for identification purpose only. No
affiliation with or endorsement of the manufacturer is made or implied. Product names and brands
appearing in this manual are registered trademarks of their respective companies.
The information published herein has been checked for accuracy as of publishing time. No
representation or warranties regarding the fitness of this document for any use are made or
implied by the publisher. We reserve the right to revise this document or make changes in the
specifications of the product described therein at any time without notice and without obligation to
notify any person of such revision or change.

3
Safety Instructions
1. Read these instructions carefully. Keep these instructions for future reference.
2. Please disconnect this equipment from AC outlet before cleaning. Don’t use liquid or sprayed
detergent for cleaning. Use moisture sheet or cloth for cleaning.
3. Please keep this equipment from humidity.
4. Lay this equipment on a reliable surface when install. A drop or fall could cause injury.
5. Make sure power cord such a way that people cannot step on it. Do not place anything over
the power cord.
6. All cautions and warnings on the equipment should be noted.
7. If the equipment is not used for long time, disconnect the equipment from main to avoid being
damaged by transient over voltage.
8. Never pour any liquid into opening; this could cause fire or electrical shock.
9. If one of the following situations arises, get the equipment checked by a service personnel:
a. The power cord or plug is damaged.
b. Liquid has penetrated into the equipment.
c. The equipment has been exposed to moisture.
d. The equipment does not work well or you cannot get it work according to user manual.
e. The equipment has dropped and damaged.
10. Do not leave this equipment in an environment unconditioned, storage temperature below -
20°C or above 60°C, it may damage the equipment.
11. Unplug the power cord when doing any service or adding optional kits.
Lithium Battery Caution:
1. Danger of explosion can happen if the battery is incorrectly replaced. Replace only the original
or equivalent type recommended by the manufacture. Dispose used batteries according to the
manufacturer’s instructions.
2. Do not remove the cover, and ensure no user serviceable components are inside. Take the
unit to the service center for service and repair.

4
CE Notice
This device complies with the requirements of the CE directive.
FCC Notice
This equipment has been tested and found to comply with the limits for a Class A digital device,
pursuant to Part 15 of the FCC rules. These limits are designed to provide reasonable protection
against harmful interference in a residential installation. This equipment generates uses and can
radiate radio frequency energy and, if not installed and used in accordance with the instructions,
may cause harmful interference to radio communications. However, there is no guarantee that
interference will not occur in a particular installation. If this equipment does cause harmful
interference to radio or television reception, which can be determined by turning the equipment off
and on, the user is encouraged to try to correct the interference by one or more of the following
measures:
Reorient or relocate the receiving antenna.
Increase the separation between the equipment and receiver.
Connect the equipment into an outlet on a circuit different from that to which the receiver is
connected.
Consult the dealer or an experienced radio/TV technician for help.
Shielded interface cables must be used in order to comply with emission limits.
Changes or modifications not expressly approved by the party responsible for compliance could
void the user’s authority to operate the equipment.
WEEE Notice
This appliance is labeled in accordance with European Directive 2002/96/EC concerning waste
electrical and electronic equipment (WEEE). The Directive determines the framework for the
return and recycling of used appliances as applicable throughout the European Union. This label
is applied to various products to indicate that the product is not to be thrown away, but rather
reclaimed upon end of life per this Directive.

5
1-1 Standard Accessories
a.
b.
a. System (with Stand)
b. Power Cord and power
supply (3-pin)
Packing List
1

6
2-1 I/O View
2-2 Back View
☆
Please make sure 19V DC plug in the right direction before plugging in DC jack.
System View
2

7
2-4 Specification
Display
Display Size
15" TFT LCD
Resolution
1024 X 768
Brightness / Color
300 cd/㎡, 16.7M colors
Backlight
LED
Touch Panel
Type
Projected Capacitive Touch
Processor
CPU/ Chipset
Intel® Celeron J1900 Quad-Core 2.0Ghz up to 2.42Ghz
Memory
X 1 DDR3L SO-DIMM, up to 8GB
Storage
X 1 (2.5” SATAII HDD or SSD)
I/O Connectors
USB 2.0
X 4 (Rear X 3, Side X 1)
USB 3.0
X 1 (Rear)
Powered COM (RS232)
X 2 (DB9 powered COM 5V/ 12V selected by jumper)
Cash Drawer Port
X 1 (24V RJ11 Cash Drawer port)
Audio Port
Line-out
X 1
LAN
x 1 (RJ45 10/100/1000 Base-T)
VGA
X 1 (DB15)
DC In
Lockable 3-pin DC 19V input
Optional Peripherals
VFD, MSR, Fingerprint reader, Printer base
Power Supply
90W 19V lockable 3-pin Power Adaptor
OS Support
POSReady 7 / Win 10 IoT Enterprise, Windows 10 Pro
Environment
Temperature
Operation
32°to 95°F (0°to 40° C)
Storage
-4° to 140° F (-20° to 60° C)
Relative Humidity
20% to 80% non-condensing
Dimension (W x H x D) mm
364 x 410 x 257
Certifications
CE / FCC / LVD
Protection
IP64 on front bezel

8
2-4 Internal Layout
M/B PCBA
MSR
Touch
POWER BUTTON
SATA II
LVDS
DDR3L Slot
Panel Back light
DC IN 19V
VGA
COM
COM
RJ45
RJ11
LINE OUT
USB2.0
USB2.0&3.0
19V DC OUT
POWER LED
VFD

9
1. LVDS connector
No.
Definition
No.
Definition
1
6-bit/8-bit selection
2
GND
3
DATA3+
4
DATA3-
5
GND
6
CLK+
7
CLK-
8
GND
9
DATA2+
10
DATA2-
11
GND
12
DATA1+
13
DATA1-
14
GND
15
DATA0+
16
DATA0-
17
GND
18
GND
19
+3.3V
20
+3.3V
2. SATA
No.
Definition
No.
Definition
S1
GND
P1
N/C
S2
SATA_TX0_P
P2
N/C
S3
SATA_TX0_N
P3
N/C
S4
GND
P4
GND
S5
SATA_RX0_N
P5
GND
S6
SATA_RX0_P
P6
GND
S7
GND
P7
+5V
P8
+5V
P9
+5V
P10
GND
P11
GND
P12
GND
P13
N/C
P14
N/C
P15
N/C
Pin Definition
3

10
3. Power On/Off connector
No.
Definition
1
+5V Standby
2
+5V Status
3
Power On#
4
GND
4. Projected capacitive touch connector
No.
Definition
1
+5V
2
USB D-
3
USB D+
4
GND
5. Resistive touch connector
No.
Definition
1
+5V
2
RxD
3
TxD
4
GND
6. Sideward MSR connector Pin Definition
No.
Definition
1
+5V
2
USB D-
3
USB D+
4
GND

11
7. VFD connector
No.
Definition
1
RTS#
2
DSR#
3
TxD
4
RxD
5
CTS#
6
DTR#
7
+5V
8
USB D-
9
USB D+
10
GND
8. CN1: MB to small card connector
No.
Definition
1
+19V
2
+19V
3
GND
4
GND

12
System
1. DC Jack Pin Definition
No.
Definition
1
+19V
2
Ground
3
+19V
2. 2-Layer USB2.0 connector Pin Definition
No.
Definition
No.
Definition
1
+5V
5
+5v
2
D-
6
D-
3
D+
7
D+
4
GND
8
GND
3. 2-Layer USB3.0+2.0 connector Pin Definition
No.
Definition
No.
Definition
1
+5V
8
TX-
2
D-
9
TX+
3
D+
10
+5V
4
GND
11
D-
5
RX-
12
D+
6
RX+
13
GND
7
GND
Rear I/O Interface
4

13
4. LAN: RJ45 Pin Definition
No.
Wire color(T568B)
Definition
1
White / Orange
Transmit
2
Orange
Transmit
3
White / Green
Receive
4
Blue
1000Base-T
5
White / Blue
1000Base-T
6
Green
Receive
7
White / Brown
1000Base-T
8
Brown
1000Base-T
5. COM connector Pin Definition
No.
Definition
1
DCD#
2
RxD
3
TxD
4
DTR#
5
GND
6
DSR#
7
RTS#
8
CTS#
9
+5V/+12V/Ring
You can change the com port voltage by jumper

14
6. RJ11 (Cash Drawer) connector Pin Definition
No.
Definition
1
GND
2
C/D_OPEN#
3
C/D Status
4
+24V
5
N/C
6
GND
7. Line-out Jack Pin Definition
No.
Definition
1
GND
2
GND
3
LINE_OUT
4
LINE_OUT
5
Detect
8. JS1: Small card to printer connector Pin Definition
No.
Definition
1
+24V
2
+24V
3
GND
4
GND
4. Cash Drawer
No.
Definition
1
FC
2
Drawer 1
3
DRSW
4
VDR
5
Drawer 2
6
GND
Electrical characteristics
.Driving voltage : DC 24V;
.Driving current : Maximum 0.8A (In 510 ms)

15
5-1. HDD
1. Loosen the 2 screws.
2. Pull out the hard tray case in an outward direction to remove it from the system.
3. Install the hard drive in the hard drive case and fasten 4 hard drive case screws.
System Assembly & Disassembly
5

16
5-2. Memory
1. Loosen 11 screws and remove the back cover.
2. Insert the RAM into the RAM slot.
5-4. VFD / 8”/ 9.7” or 10” 2nd Display
1. Remove top cover.
2. Either plug the VFD cable into the VFD connector or plug the 8” or 10” 2nd display cable into the
1
2
3

17
2nd display’s connector (note: display connector can only be connected to one device at a time).
3. Install VFD with 2 screws / Install 8”or 10”2nd display with 2 screws.
5-5. 1D/2D Barcode Scanner
1. Install the barcode scanner with bracket attached by tightening the 2 screws
2. Plug the barcode scanner Type-A Male USB cable into a USB port
1
2

18
6-1. VFD
1. Power on VFD and waiting test page of EEPROM test, Baud rate and Command page. Set up
the customer display by " VFDset.exe”
2. Setup VFDset.exe software.
Device Driver Installation
6

19
3. To execute “VFDset.exe” for setting up communication between software and VFD module.
Please then follow the steps as shown in the above figure, the baud rate will show on states page
of VFD module (Note: You may check it when power on VFD module), then click “Open COM”
button.
4. “Get Setting from VFD” button to get all the settings from TD and it’ll refresh the “VFDset.exe”
software.
5. Select “Character Type”/ “Command Mode”/ “Baud Rate Select”/ “pass thru Mode”.
1
2
3

20
6. Click “Set All Default” button to show default setting, the Default table is
Character Type :USA
Command Type :EPSON/EURPOPE
Baud Rate Setting :9600/n/8/1
Pass-through Mode :None
Welcome msg line1 :*** VFD DISPLAY ***
Welcome msg line2 :**HAVE A NICE DAY AND THANK YOU **
7. Welcome Message
Welcome Message line1 maximum 20 characters, line 2 maximum 20 characters, total of 40
characters.
a. ASCII mode
You can type the character by keyboard (0x20h ~ 0x7Fh), if you press clear icon, it will clear
the all Message characters on AP.
b. Hex mode
Hex mode can define the character from 0x20h to0xFFh,the range 0x80~0XFF which
depends on the code page table.
Table of contents
Other Touch Dynamic Touch Terminal manuals
Touch Dynamic
Touch Dynamic Breeze Touch User manual

Touch Dynamic
Touch Dynamic Breeze User manual
Touch Dynamic
Touch Dynamic Quest Tablet User manual

Touch Dynamic
Touch Dynamic CS-200 User manual
Touch Dynamic
Touch Dynamic Saturn All-in-one User manual
Touch Dynamic
Touch Dynamic Breeze User manual
Touch Dynamic
Touch Dynamic CP200 User manual
Touch Dynamic
Touch Dynamic Jupiter PC User manual
Popular Touch Terminal manuals by other brands
Siemens
Siemens FT2080 Mounting & installation
Muller Elektronik
Muller Elektronik SMART570 Installation and operating instructions
ROSE DISPLAYS
ROSE DISPLAYS ROPOLE-OMNI HEAD instructions

Baracoda
Baracoda 1D CMOS Specifications
ZKTeco
ZKTeco PA22 quick start guide
VeriFone
VeriFone Tranz 330 Reference manual
