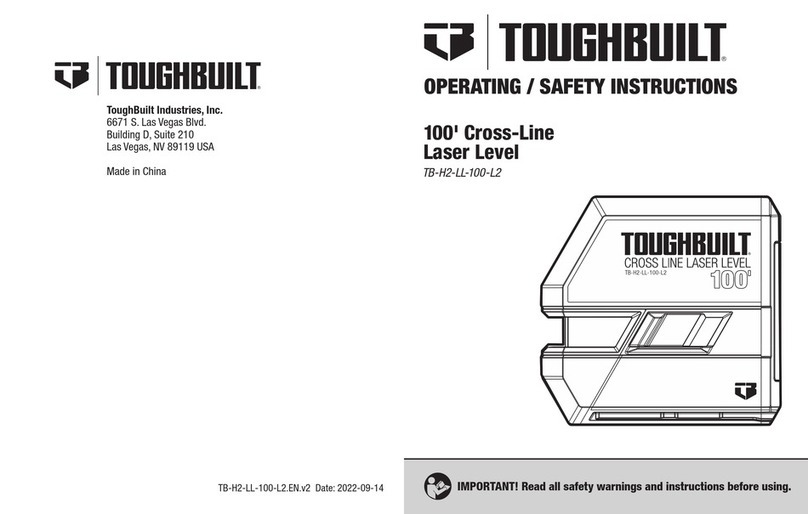
TOUGHBUILT TB-H2-LL-100-L2 Assembly instructions

100' Cross Line
Laser Level
English, see page 5
Español, consulte la página 22
Nivel láser
de línea transversal
de 30.5 m (100 ft)
TB-H2-LL-100-L2
OPERATING / SAFETY INSTRUCTIONS
INSTRUCCIONES DE FUNCIONAMIENTO / SEGURIDAD
IMPORTANT:
READ BEFORE USING IMPORTANTE:
Leer antes de usar

2
Before using this product, read, study and familiarize yourself with the contents
of this manual. The specifications and general appearance of the tool are
subject to change without notice and without obligation by ToughBuilt®
Industries, Inc., and may differ from those appearing in this manual.
Some of the diagrams may have been simplified.

3
1. Safety, Warnings and Precautions
2. Product Specifications
3. What is in the Box
4. Set-up and Assembly
5. Operation
6. Cleaning
7. Maintenance
8. Storage
9. Troubleshooting
10. Warranty
TABLE OF CONTENTS

4
GENERAL SAFETY WARNINGS:
WARNING! Read all safety warnings and all instructions. Failure to follow the
warnings and instructions listed below may result in electric shock, fire and/or serious
injury. SAVE THESE INSTRUCTIONS.
The following information has been prepared to protect you and bystander. Read and
familiarize yourself with all the signs, warnings, cautions and notifications.
The label on your laser may include the following symbols:
WARNING! Magnets used on mounting brackets may interfere with the operation of
pacemakers and implantable cardioverter defibrillators.
•A laser measuring tool is a sensitive and precision tool, and should be treated as such.
•This tool is intended to determine horizontal and vertical lines.
•Eye exposure to laser beam increases for people wearing prescription glasses or
contact lenses.
•DO NOT stare into or direct the laser beam into the eyes of people or pets.
•ALWAYS make sure that all bystanders are made aware of laser in use. Make
sure no one stares into the light, directly or indirectly.
•Keep away from direct sunlight, heat sources and freezing conditions.
•DO NOT allow people who are unfamiliar with the procedures of this tool to operate it.
1. SAFETY, WARNINGS AND PRECAUTIONS
Display Meaning
CAUTION Ignoring the given directions could result in personal injury
or property damage.
Symbol Meaning Symbol Meaning
V Volts To reduce the risk of injury, user must
read instruction manual.
mW Milliwatts Warning / Caution / Precaution
Laser Warning Risk of eye injury. Wear ANSI-approved
safety goggles with side shields.
nm Wavelength in Nanometers Do Not Stare Into Beam.
Class 2 Laser Product Laser Radiation.

5
•DO NOT allow children to play with this tool.
•Keep the work area clean and well lit.
•Keep children, bystanders and pets away from the work area.
•Maintain steady balance and footing at all times.
•ALWAYS wear eye protection, non-skid safety shoes, hard hat, ear protection and
safety attire. These will reduce the chance of personal injury in the work environment.
•ALWAYS wear ANSI approved safety goggles.
•DO NOT drop, bump into, or subject the tool to shock.
•DO NOT operate in a wet or moist environment. Keep the tool dry at all times.
•DO NOT operate tools and machinery when under the influence of alcohol or
medication, or when tired or nauseated.
•DO NOT move or relocate the tool with the Pendulum Switch in the ON position.
•DO NOT operate the tool if the ON/OFF switch is damaged or faulty.
•DO NOT use the tool if the Pendulum Switch is faulty or inoperative.
•DO NOT use this tool for anything other than its intended purpose.
•ONLY use accessories specifically outlined in this manual.
•DO NOT remove, cover or deface any warning labels on this tool. They are there for
your safety.
•DO NOT set the laser light at eye level.
•DO NOT aim the beam at reflective surfaces.
•DO NOT leave the tool in the ON position when the tool is unattended.
•DO NOT dismantle the tool. Any tampering with this tool will automatically
void all warranties. There are no end user serviceable parts inside this tool.
•DO NOT modify this tool in any manner. Any modification to this tool may
expose you to laser radiation.
•DO NOT operate a faulty tool.
•DO NOT use laser viewing glasses, when supplied, for any other purpose, such as
sun glasses or safety glasses.
•To avoid damage to the tool, store it in its original container and at a secure location,
away from heat and moisture.
•Use ONLY recommended attachments. DO NOT throw Laser Equipment and their
attachments into trash bin. To RECYCLE, contact your area’s waste management
center for proper disposal directions.

6
BATTERIES:
•ALWAYS use AA Alkaline batteries as a substitute for the chargeable Li-Ion batteries.
•ALWAYS replace all depleted batteries at the same time.
•DO NOT store or use in locations where the temperature may reach or exceed
105°F (40.5°C) such as outside sheds or metal buildings in
summer. For best life, store in a cool, dry location.
•DO NOT charge non-rechargeable batteries.
•DO NOT mix old and new batteries, or different brands of batteries.
•DO NOT throw batteries into the fire, as they will explode, and cause serious
damage or personal injury.
•DO NOT use wet or moist batteries.
•ALWAYS when inserting batteries, observe their polarity.
•DO NOT throw batteries into the trash bin.
•DO NOT charge non-rechargeable batteries.
•ALWAYS remove batteries if the tool will not be used for an
extended period.
When using or replacing batteries, ALWAYS follow the instructions od the battery
manufacturer.
IMPORTANT! Recycle used batteries and equipment properly. Contact your area’s
waste management center for proper disposal directions.

7
The TB-H2-LL-100-L2 Cross Laser Level is an up-to-date multi-prism tool designed for
checking horizontal and vertical lines in an indoor environment.
* Measuring Accuracy depends on the current conditions: Under favorable conditions (good
target surface and room temperature) up to 100 ft (30.5 m). Under unfavorable conditions (bright
sunlight, a very weak reflecting target surface, or large temperature fluctuations), the error can
increase by ± 0.003 in/ft (± 0.25 mm/m) for distances over 100 ft (30.5 m).
Laser Beam Function Cross Laser
Range Up to 100 ft (30.5 m)
Laser Light Color Green
Laser Safety Class Class 2, <1 mW
Light Sources 2 Laser Diodes with Laser Emission Wave Length
of 510 ~ 530 nm
Accuracy* ± 0.125 in @ 33 ft (±3.18 mm @ 10.1 m)
Self-Leveling Range ± 3.5° degrees
Operating Temperature 14 °F ~ 122 °F (-10 °C ~ +50 °C)
Power Source 3 x AA Alkaline batteries
Auto Shut-Off No
Operating Time 5.5 hours (Both laser beams lit)
Tripod Thread 1/4 in – 20 Threads
Measurements (L x W x H) 4.33 x 2.28 x 4.13 in (110 x 58 x 105 mm)
Weight (Tool only) 0.80 lb (0.36 kg)
2. SPECIFICATIONS
Book shelves Doors and windows Slopes
Cabinets Drop ceilings Stairways and railings
Ceiling light fixtures Electrical sockets Studs
Chair railing Floors and tiles Walls
Curtain rods Picture frames
SOME INTENDED USES

8
1 x 100' Cross Line Laser Level
1 x Quickset Rotating Mount - TB-H2-LLA-10
1 x Ceiling Bracket - TB-H2-LLA-12
1x Laser Target - TB-H2-LLA-32
1 x Carrying Pouch
3 x AA Alkaline Batteries*
A
B
C
D
E
F
3. WHAT IS IN THE BOX
F
* Alkaline batteries
that ship with the tool
are not warranted by
ToughBuilt®.
A B C
DE

9
To set up the tool:
• Inspect the box for damage.
• Remove the contents of the box and lay everything on a flat, clean and dry surface.
Check the contents against the packaging list, and familiarize yourself with their names.
• Write the requested information on the Registration Form found at the end of the
manual. Keep this information at a safe location. When contacting
ToughBuilt®Industries, Inc. for assistance or for possible warranty claims,
the information on the registration form will be required.
• Keep the box for storing the tool.
• Read, study and familiarize yourself with all aspects of this manual before attempting
to power the tool on.
• The work area should be clear of obstructions.
• Floor surface where the Cross Line Laser is to be placed should be hard, level and stable.
• A tripod, a pole or any other tool onto which this Cross Laser would mounted should
be able to support the tool’s weight safely.
• When using a tripod, the legs should be placed on a hard/solid surface to prevent
shifting or sinking. Make sure to extend and lock all legs, and secure the tool to the
mounting hardware. DO NOT over-tighten the mounting screw.
• DO NOT USE IF DAMAGED.
• ALWAYS STAY ALERT AND USE COMMON SENSE. Follow all safety warnings and
precautions in the manual as well as those on the product.
• AVOID distractions.
• Before turning the tool on, ALWAYS familiarize yourself with the controls and their
functions before use.
• DO NOT open or dismantle the tool, or attempt to make modifications to the tool.
Personal and property damage may occur.
• DO NOT force any component to do a job. If it does not move, there might be a reason.
4. SET-UP AND ASSEMBLY

10
1Horizontal Laser Beam Outlet 7H/V Laser Beam Selector Push Button
2Vertical Laser Beam Outlet 8Battery Compartment Latch
3Pendulum Switch Lock/Unlock 9Tripod Mount
4Battery Charge Level Indicator LED 10 Dovetail Mount Bracket
5Pendulum Lock Indicator LED
6ON/OFF Push Button
GENERAL INFORMATION: Product controls identification:
1
2
4
5
7
6
3
10
9
8
5. OPERATION

11
Out of the box, the very first thing you must do is verify calibration of the tool. A laser
level which is not calibrated and level itself is of no use. Thereafter, to safeguard your
investment and work, you should always verify the calibration, as outlined below:
CAUTION! ANYTIME the tool is to be moved, MAKE SURE that the pendulum is in its
LOCKED position.
CAUTION! When moving the tool from a warm environment into a cool environment,
moisture may accumulate on the laser output lenses 1 and 2. Allow the tool to stabilize to
the new environment first. DO NOT turn on a wet or damp tool. To wipe the Laser Reflector,
use ONLY a lint-free cloth. DO NOT USE A PAPER TOWEL.
Before replacing the batteries, make sure that the Pendulum is in the LOCKED position,
and the power is turned off.
To open the battery cover, push the battery compartment latch 8
and lift the cover slightly. Pull the lid away from the compartment
until the two securing pins on the lid are clear of the case. The
positive pole of each battery should face in the same direction,
toward the topside of the compartment (see + markings in the
compartment). Insert the first battery in the center well over
the removal band. Fold the band over the battery and insert the
remaining two batteries. While holding the end of the band down, insert the lid-alignment
pins into the compartment edge and close the lid. Make sure the latch snaps in place,
indicating that the lid is secured.
Position and secure the Cross Laser on a leveled pedestal, Ceiling Bracket C , Mounting
Bracket D , or a tripod (DO NOT overtighten the mounting screw).
WARNING! DO NOT position the tool at eye level.
With the Pendulum Switch 3 in the Locked position, push the ON button to activate the
laser. Elevated the horizontal beam to the deired height. Slide the Pendulum Switch 4 to
the UNLOCK position. The laser beam will be activated and may fluctuate at first. Allow
time for the self-leveling system to stabilize within its operating tolerance of ±3.5°
degrees. Should the laser beam keep fluctuating, it is an indication that the tool is tilted
beyond its seld-leveling limits. It may also be an indication of low battery power.
DANGER
LASER IN OPERATION
TRAINED
PERSONNEL ONLY

12
Should the laser beam keep fluctuating, it is an indication that the tool is tilted beyond
its self-leveling limits. It may also be an indication of low battery power.
PLEASE NOTE: Green laser expands as the distance between the tool and the target
increases. Therefore, always take measurements in the center of the beam.
Before and during work intervals, wipe the laser lens with a lint-free cloth. Any dirt on
the reflector surface may cause laser deflection and lead to false readings.
When not in use, slide the Pendulum Switch to its LOCKED position to prolong battery life.
Prior to removal of the tool from its current location, ALWAYS slide the Pendulum
Switch 3 to the LOCK position to prevent damage to the pendulum during transportation.
IMPORTANT REMINDER! At the beginning of each job, mark an index point so that all
future measurements will be based on that index point.
CALIBRATION PROCEDURES:
First step to verify LEVEL (Horizontal) laser beam calibration
To verify the calibration, use a large room (at least 12 x 16 ft).

13
1. At the long end of the room, place the tool one foot from side wall “A” and
8 feet from the facing wall. Slide the Pendulum Switch 3 to the UNLOCK position.
Allow a few seconds for the pendulum to stabilize.
2. Cut four pieces of painters tape or masking tape, each piece at least two inches long.
Adhere the tape strips on the walls over the laser beam at locations A, B, C and D.
3. Using a ruler, scribe a line at the center of the laser beam on each piece of tape.
Scribe lines underneath the laser beam on the remaining pieces of tape.
4. Push the compensator lock button to the LOCK position. Relocate the tool
across the room and position it one foot from the wall at position “D” at the same
distance from the front wall as in the previous step. Slide the Pendulum Switch 3 to
the UNLOCK position and wait until the beam stabilizes. Adjust the height of
the tool until the laser beam is centered on the prescribed line at position “D”.
5. Inspect the laser beam impression on every piece of tape. Scribe a line at
the beam’s center and the beam’s underside on all every piece of tape. If the
distance variation between the two lines is less than the specified accuracy
(1/8 in (3.2 mm) at 33 ft (10 m)), the tool is within the required calibration
specifications and is ready for use. NOTE: 1/8 in @ 33 ft = 0.004 in @ 1 ft
(3.18 mm @ 10.06 m) the level laser beam is calibrated.

14
Second step is to verify the PLUMP (Vertical) laser beam calibration
An 8 ft clear floor space is required for this procedure.
A door jamb is ideal for this leg of the procedures. It eliminates the requirement of
accessing the ceiling for calibration verification, and the use of a ladder. However, if a
ladder is to be used, please refer to the ladder manufacturer’s instructions for its use,
safety and precautions. When using door jamb for this leg of the operation, identify a plump
spot on the floor and mark it with a painter’s tape for future reference.
1. Place the Laser Level on the floor and push the Power Buttom 5 (Pendulum stays in
LOCKED position for now). Make sure to see a solid laser line on the floor. If the floor
surface is reflective, laser beam may not easily be seen. In this case, adhere a
6 ft long painter’s blue tape on the floor, in front of the beam.
2. Slide the Pendulum Switch 2 to the UNLOCK position and allow time for the beam to
stabilize. Use a marker and draw a 1 in long line in the center of the beam in front of the tool.
3. Walk to the other side and draw a 1 in long line at the center of the laser beam at
the other end of the tape.
4. Cut a 2 in long strip of painter’s blue tape. Draw a solid 1 in long line at the center of
the tape strip. Place this tape strip over the laser beam on top of the door jamb or the
ceiling. The drawn line should coincide with the center of the laser beam.
5. Slide the Pendulum Switch 2 to the LOCK position.
6. Relocate the tool to the opposite side and place it at the adge of the painter’s blue
tape. Slide the Pendulum Switch 2 to the UNLOCK position and allow time for
the beam to stabilize.
7. Align the beam with the two pre-scribed lines on the tapes. Inspect the beam position
and the scribed line on the overhead tape. Measure the distance between the
scribed line and current beam (center of the beam) and if the deviation is withing
the tolerances, the Plumb (vertical) laser is also within the calibration limits.
8. The tool is ready for use.
9. For slope alignment, the pendulum should be in the LOCKED position. Press the
ON/OFF switch to activate the laser beam. You can safely tilt the tool.
PLEASE NOTE: In the LOCKED position, the laser beam will flash once every 5 sec.
10. With the Pendulum in the OFF position, you can press the ON/OFF button 6 to
turn on the laser beam in either one of the three positions: Cross, Level or Plumb.
When the laser beam is switched ON, it will always default to the previous setting mode.

15
Before and after each use, thoroughly inspect the tool for damage.
IMPORTANT! DO NOT use a damaged tool.
After completion of each work cycle, or at the end of the day, slide the Pendulum
Switch 3 to its LOCKED position.
If the tool is soiled, wipe with a damp cloth. DO NOT USE CHEMICALS. Laser reflectors
should be wiped with a lint-free cloth only. DO NOT USE PAPER TOWEL.
• DO NOT allow the tool to get wet. Damage to internal circuits may result.
Tool is not waterproof.
• DO NOT leave tool in direct sunlight or expose it to high temperatures. The
housing and some internal parts are polymeric materials and may
become deformed at high temperatures.
• DO NOT store the tool in a cold environment. Moisture may form on interior parts
when warming up. This moisture could fog up laser windows and/or cause
corrosion of internal circuit boards.
NOTE: When working in dusty locations, some dirt may collect on the laser
window. Remove moisture or dirt with a soft, dry cloth.
• DO NOT use aggressive cleaning agents or solvents.
IMPORTANT! To assure product SAFETY and RELIABILITY, repairs, maintenance
and adjustments (other than those listed in this manual) should be
performed by authorized service centers or qualified service personnel, always using
identical replacement parts.
Repairs should be carried out by an authorized after-sales service center for
ToughBuilt®tools. Customer Service Number (US): 1 (800) 228-4695
ACCESSORIES:
IMPORTANT! To reduce the risk of injury, only ToughBuilt®accessories should be
used with this product. ToughBuilt® offers a large selection of accessories available at
your local dealer at extra cost.
6. CLEANING
7. MAINTENANCE

16
• ALWAYS store the tool in its original container.
• Before storage, make sure the tool is turned off. DO NOT store a damp or wet tool.
• To prevent damage to the Laser mechanism, the Pendulum Switch 3 must be in the
LOCKED (OFF) position prior to handling, relocation or storage.
• For extended storage, remove the batteries and store the tool in a cool, dry place,
away from reach of children. DO NOT place objects on the tool container.
END OF PRODUCT LIFE
Separate collection
This product must not be disposed of with normal household waste.
Please sort it out for separate recycling.
Separate collection of used products and packaging allows materials to be
recycled and used again. Reuse of recycled materials helps prevent environmental
pollution and reduces the demand for raw materials.
Some local governments may require local or municipal waste disposal centers or retailers of
new products to provide households with electronic product recycling services.
8. STORAGE

17
Problem Possible Cause Solution
No Laser Beam
Batteries are not inserted Insert 3 x AA Alkaline batteries
Incorrect battery polarity Check battery polarity
Low charge or dead batteries Replace batteries with fresh
Alkaline batteries
Corroded battery terminals Clean battery terminals
Pendulum Switch 3 is in the LOCK
position
Slide the Pendulum Switch 3 to
the UNLOCK position
Defective Tool Have the tool repaired
Fluctuating
Beam
Tool tilted beyond its ± 3.5°
self-leveling range Reposition the tool
Depleted batteries Replace with fresh batteries
Temperature variation Allow time to stabilize
Flashing Beam Tool is turned on in the locked
position
In locked and tilted mode, it is
normal for the laser beam to
fluctuate once every 5 seconds
Cannot Switch
the tool Off Pendulum is in UNLOCK position.
Slide the Pendulum to the LOCK
position, then press the ON/OFF
button 6 .
Erroneous
Results
Dirty reflector Clean the reflector
Temperature variation Allow temperature to stabilize
Verify calibration
Tool is bumped Allow laser to stabilize
Laser rebounds off reflective surface Re-aim the laser
Only one laser
beam is visible H/V Selector buttom 7 is activated Push H/V Selector buttom 7 to
access cross laser
When contacting ToughBuilt®Industries, Inc. for customer service or warranty
claims, the information on your registration form will be required.
9. TROUBLESHOOTING

18
3 YEAR LIMITED WARRANTY. 1 YEAR / 2 YEARS WITH REGISTRATION WITHIN 30
DAYS OF PURCHASE.
IMPORTANT: Alkaline batteries that ship with the tool are not warranted by
ToughBuilt®.
For warranty details visit, www.toughbuilt.com
For Product Registration Form go to our website, toughbuilt.com/register-your-product
or scan QR code to register your product. If you choose not to register your product, only
one (1) year limited warranty will apply to your product.
Repairs should be carried out by an authorized-after-sales service center for
ToughBuilt®tools. Customer Service Number (US): 1 (800) 228-4695
IMPORTANT: Specifications are subject to change without notice.
10. WARRANTY

19
MOUNTING AND SEPARATING THE TOOL
FROM CEILING BRACKET / TB-H2-LLA-12
C4 C5
C1 C2 C3

20
MOUNTING AND SEPARATING THE TOOL
FROM QUICKSET ROTATING MOUNT / TB-H2-LLA-10
B1 B2 B3
B4
Other manuals for TB-H2-LL-100-L2
1
Table of contents
Languages:
Other TOUGHBUILT Laser Level manuals
TOUGHBUILT
TOUGHBUILT TB-H2-LL-100-L2 Assembly instructions
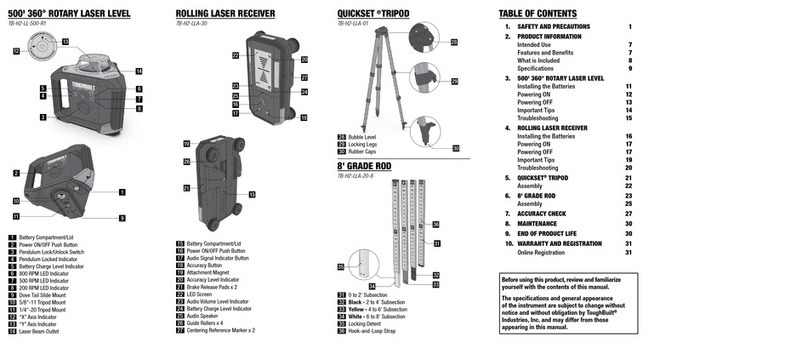
TOUGHBUILT
TOUGHBUILT TB-H2-LL-500-R1 User manual
TOUGHBUILT
TOUGHBUILT TB-H2-LL-30-L2 Assembly instructions

TOUGHBUILT
TOUGHBUILT TB-H2-LL-M10-L2 Assembly instructions
TOUGHBUILT
TOUGHBUILT TB-H2S4-LL-M150-R1 Assembly instructions
TOUGHBUILT
TOUGHBUILT TB-H2-LL-M30-L2 Assembly instructions
