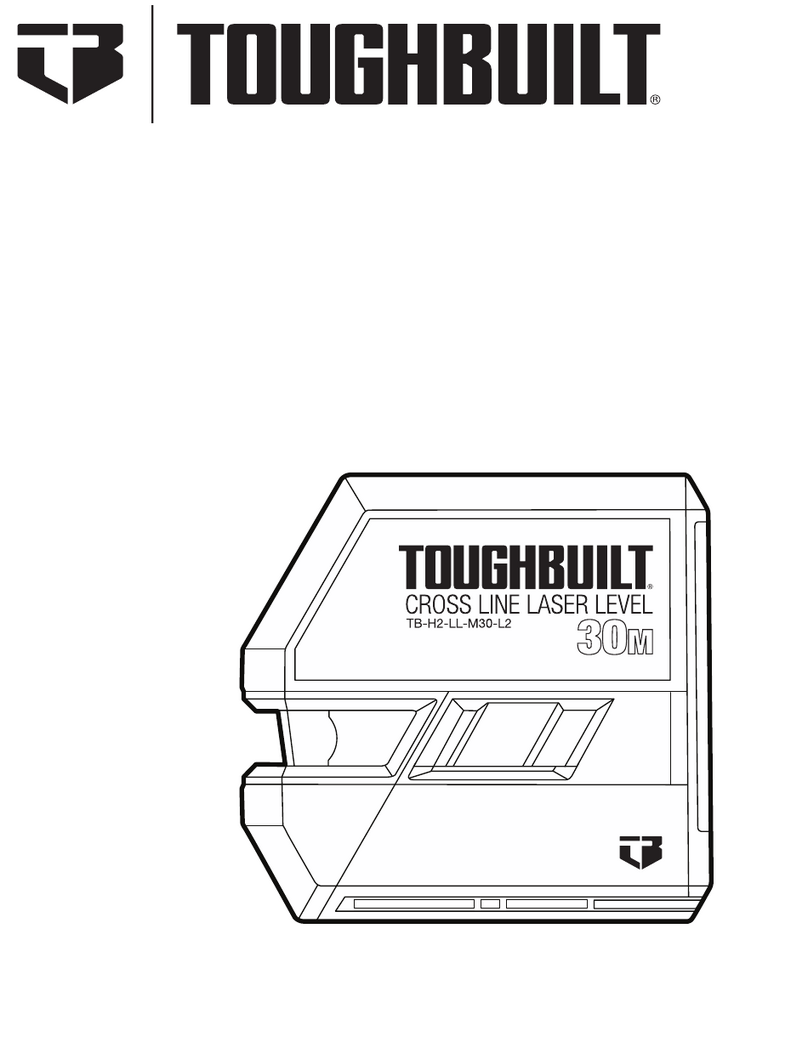
TOUGHBUILT TB-H2-LL-30-L2 Assembly instructions

30' Cross-Line
Laser Level
TB-H2-LL-30-L2
OPERATING / SAFETY INSTRUCTIONS
IMPORTANT! Read all safety warnings and instructions before using.
ToughBuilt Industries, Inc.
6671 S. Las Vegas Blvd.
Building D, Suite 210
Las Vegas, NV 89119 USA
Made in China
TB-H2-LL-30-L2.EN.v2 Date: 2022-09-14

1Laser Beam Window 8 Threaded Mount
2Pendulum Switch 9 QuickSet®Mount
3Battery Charge Level Indicator 10 Positioning Knob
4Pendulum Locked Indicator 11 Clamping Knob
5Power ON/OFF Button 12 QuickSet®Rails
6Battery Compartment Latch 13 QuickSet®Release Button
7Battery Compartment Cover
1
34
5
2
8
6
7
9
Before using this product, review and familiarize yourself with the contents of this manual.
The specications and general appearance of the instrument are subject to change
without notice and without obligation by ToughBuilt®Industries, Inc. and may differ
from those appearing in this manual.
TABLE OF CONTENTS
1. SAFETY AND PRECAUTIONS 1
2. PRODUCT INFORMATION
Intended Use 6
What is Included 6
Specifications 7
3. HOW TO OPERATE
Installing the Batteries 8
Powering ON/OFF 9
Using QuickSet®Multi-Position Bracket 11
4. ACCURACY CHECK 12
5. TROUBLESHOOTING 22
6. CARE AND MAINTENANCE
Cleaning 23
Storage 23
7. DISPOSAL 24
8. WARRANTY AND REGISTRATION
Warranty Information 25
Online Registration 25
10
13 12
11

1 2
1. SAFETY AND PRECAUTIONS
SAVE ALL WARNINGS AND INSTRUCTIONS FOR FUTURE REFERENCE
General Safety Rules
This instrument is a sensitive, precision instrument and should be treated as such.
WARNING! Read and understand all instructions. Failure to follow all instructions below
may result in exposure to hazardous radiation, electrical shock, fire, and/or serious injury.
WARNING! THIS DEVICE IS A CLASS 2 LASER PRODUCT IN ACCORDANCE WITH
IEC 60825-1:2014 AND EMITS VISIBLE LASER BEAMS.
DO NOT allow persons who are unfamiliar with this device, the device operating
manual, and these safety instructions to operate this device.
DO NOT stare directly into a beam or use any optical instruments to view the laser
beam. Serious eye injury could result.
If a laser beam strikes your eyes, immediately close your eyes, and turn away.
DO NOT direct it at others. Serious eye injury could result.
DO NOT set the laser beam at eye level.
CAUTION! Eye exposure to laser beam increases for people who are wearing
prescription glasses/lenses.
DO NOT use this laser device for anything other than its intended purpose.
DO NOT disassemble or modify the device. Tampering with this device may result in
hazardous laser radiation exposure and will automatically void all warranties.
DO NOT leave the device turned on when unattended. Always turn off the device when
it is not in use.
DO NOT operate the laser device around children nor allow children to operate the laser device.
ALWAYS position the laser device securely. Damage to the laser device and/or injury
to the user could result if the laser device falls.
ALWAYS use ToughBuilt accessories specifically designed for this product.
The use of any other accessories may create a risk of injury.
The following label is on your laser device:
WARNING! DO NOT remove or deface warning labels.
The label may include the following symbols:
Symbol Meaning Symbol Meaning
V Volts Read the instruction manual
mW Milliwatts Warning / Caution
Laser Warning Risk of eye injury. Wear ANSI-approved
safety goggles with side shields
nm Wavelength in Nanometers DO NOT Stare Into Beam
Class 2 Laser Product Laser Radiation

3 4
Battery Safety Instructions
WARNING! Batteries can explode or leak and cause injury or fire if installed backward,
disassembled, or exposed to water, fire, or high temperature. To reduce this risk:
ALWAYS follow the instructions and warnings on the battery label and packaging.
ALWAYS keep batteries out of reach of children.
DO NOT charge alkaline batteries.
ALWAYS insert batteries correctly noting the polarity (+ and –) marked on the battery
and the equipment.
DO NOT mix old and new batteries. Replace all batteries at the same time, with the
same make, brand, and charge level.
DO NOT mix rechargeable and non-rechargeable batteries.
DO NOT mix battery chemistries.
DO NOT short battery terminal.
ALWAYS check battery posts in the battery compartment for corrosion.
Clean the posts before use.
DO NOT use batteries with corroded terminals.
DO NOT incinerate or dismantle batteries.
DO NOT dispose of batteries in fire.
DO NOT store or use in locations where the temperature may reach or exceed
105 °F (40,5 °C), store in a cool, dry place.
ALWAYS remove batteries if the device will not be used for an extended period.
In storage, batteries may corrode and self-discharge.
Under abusive conditions, liquid may be ejected from the battery, avoid contact. If
contact accidentally occurs, flush with water. If liquid contacts the eyes, additionally
seek medical help. Liquid ejected from the battery may cause serious injury.
Work Area Safety
AVOID dangerous environments.
ALWAYS make sure that any bystanders in the vicinity of use are made aware of
the dangers of staring directly into the laser beam.
AVOID extended exposure to damp or wet locations.
DO NOT use in the presence of explosive atmospheres (gaseous fumes, dust,
or flammable materials).
KEEP the work area clean and well lit. Cluttered or dark areas invite accidents.
Safety Symbols
The denitions below describe the level of severity for each signal word.
Please read the manual and pay attention to these symbols.
This is the safety alert symbol. It is used to alert you to potential personal injury
hazards. Obey all safety messages that follow this symbol to avoid possible
injury or death.
DANGER DANGER: Indicates an imminently hazardous situation which, if not avoided,
will result in serious injury or death.
WARNING WARNING: Indicates a potentially hazardous situation which, if not avoided,
could result in serious injury or death.
CAUTION CAUTION: Indicates a potentially hazardous situation which, if not avoided, may
result in minor or moderate injury.
IMPORTANT!Indicates a practice not related to personal injury which, if not avoided, may
result in malfunction or property damage.

5 6
Personal Safety
Stay alert, watch what you are doing, and use common sense when operating the device.
Secure loose clothing, jewelry, and long hair.
DO NOT use the device while you are tired. A moment of inattention while operating
a device may result in serious personal injury or incorrect measurement results.
DO NOT operate devices and machinery when under the influence of alcohol,
medication, or drugs.
Use safety equipment. Always wear ANSI-approved safety goggles. Safety
equipment such as dust masks, non-skid safety shoes, hard hats, or hearing
protection used for appropriate conditions will reduce the risk of personal injuries.
FCC Cautions
This equipment has been tested and found to comply with the limits for a Class B digital
device, pursuant to Part 15 of the FCC Rules. These limits are designed to provide
reasonable protection against harmful interference in a residential installation. This
equipment generates, uses and can radiate radio frequency energy and, if not installed
and used in accordance with the instructions, may cause harmful interference to radio
communications.
However, there is no guarantee that interference will not occur in a particular installation.
If this equipment does cause harmful interference to radio or television reception, which
can be determined by turning the equipment off and on, the user is encouraged to try to
correct the interference by one or more of the following measures:
Reorient or relocate the receiving antenna.
Increase the separation between the equipment and receiver.
Consult the dealer or an experienced radio/TV technician for help.
2. PRODUCT INFORMATION
Intended Use
This instrument is a self-leveling cross-line laser that projects a horizontal and vertical
line for leveling and alignment applications. It can be used for: leveling/aligning suspended
objects such as pipes, cable trays, air ducts, and acoustical ceilings; leveling electrical
outlets; leveling/aligning doors, windows, and cabinets; transferring heights.
Additionally, when the Pendulum Switch 2 is in the locked position, the instrument can
project a tilted line for inclined applications, such as hand rails, staircases, etc.
What is Included
1x 30' Cross-Line Laser Level
1x QuickSet®Multi-Position Bracket
3x AA Batteries*
A
B
C
A B C
* Batteries that ship
with the instrument
are not warranted
by ToughBuilt®.

7 8
Specifications
Laser Beam Function 1 Vertical / 1 Horizontal Cross-Lines
Working Range* Up to 30' (9m)
Laser Beam Color Green
Laser Type Emission Wave Length of 510 ~ 530 nm, Class 2, <1 mW
Accuracy* ±5/16" @ 30' (8mm @ 9m)
Self-Leveling Range ± 4°
Operating Temperature 14 °F ~ 122 °F (-10 °C ~ +50 °C)
Power Source 3 x AA alkaline or rechargeable batteries
Operating Time 17 hr
Mounting Options a) QuickSet®mount
b) 1/4"-20 thread
Instrument Dimensions
(L x W x H) 3.7" x 2.28" x 3.38" (94 x 58 x 86mm)
Instrument Weight
(without batteries) 0.7 lb (0,3 kg)
Bracket Clamp Capacity 1/4"- 2-3/8"(6mm - 60mm)
* Measuring accuracy and working range are dependent on lighting conditions
of the work environment.
3. HOW TO OPERATE
CAUTION! When moving the instrument from a warm environment into a cool environment,
moisture may accumulate on the Laser Beam Window 1 . Allow the instrument to adapt
to the new environment first. DO NOT turn on a wet or damp instrument. To wipe the
Laser Beam Window 1 , use ONLY a lint-free cloth. DO NOT USE A PAPER TOWEL.
PLEASE NOTE: Laser beam expands as the distance between the instrument and the
target increases. Therefore, always take measurements in the center of the laser line.
Installing the Batteries
Before installing or replacing the batteries, make sure that the Pendulum Switch 2
is in the LOCK position, and the power is turned OFF.
1. Open the Battery Compartment Cover 7 by pushing the latch 6 and lifting it.
2. Insert the batteries observing the polarity. Ensure that the removal band is
positioned under the batteries.
3. Close the Battery Compartment Cover 7 until it engages.

9 10
Powering ON/OFF in the Pendulum-Locked Mode:
In this mode, the self-leveling capability is disabled, and the laser level can be tilted to
project horizontal and vertical laser lines at an incline.
1. Press the Power ON/OFF button 5 for three seconds to activate the laser.
2. Pendulum Locked Indicator 4 will flash and the laser beam will slowly flash
(approx. every 6 seconds).
3. To power OFF, press the Power ON/OFF Button 5 .
Powering ON/OFF:
The instrument can be used in either a Self-Leveling Mode (for level applications) or
Pendulum-Locked Mode (for inclined applications).
Powering ON/OFF in the Self-Leveling Mode:
In this mode, the laser beam self-levels within ± 4° to project horizontal and vertical laser lines.
1. Before powering ON, place the instrument on a firm and level surface.
2. Slide the Pendulum Switch 2 to the UNLOCK position to activate the laser
and wait until it stabilizes.
NOTE: If the instrument is tilted beyond its self-leveling limits (± 4°), the Pendulum
Locked indicator 4 will flash and the laser beam will rapidly flash. Reposition the
instrument until the beam stabilizes and the indicator stops flashing.
3. To power OFF, slide the Pendulum Switch 2 to the LOCK position and press the Power
ON/OFF button 5 .

11 12
Using The QuickSet®Multi-Position Bracket
The QuickSet®Multi-Position Bracket allows mounting the instrument onto various objects
ranging in thickness between 1/4"and 2-3/8"(6mm and 60mm). The instrument mounted
onto the bracket can be positioned in various orientations and project either a leveled or a
tilted line.
1. To attach the bracket to the desired object, loosen the Clamping Knob 11 , mount the
bracket, and tighten the Clamping Knob 11 . DO NOT overtighten.
2. To attach the instrument to the bracket using the QuickSet®Mount 9 , slide the rear
side of the instrument towards the QuickSet®Release Button 13 along the QuickSet®
Rails 12 , until a click sound is heard.
3. To change the position of the instrument, loosen the Positioning Knob 10 and adjust
the bracket until the instrument is in the desired position. Tighten the Positioning Knob 10
to secure the instrument position. DO NOT overtighten.
4. Power-ON and verify the line position by following the Power-ON procedures.
Make additional adjustments if necessary.
5. To dismount the instrument from the bracket, press the QuickSet®Release Button 13 ,
and pull the instrument until it is completely separated from the bracket.
Only use ToughBuilt accessories that are designed for this product.
Contact ToughBuilt®Customer Service for additional support.
4. ACCURACY CHECK
This instrument requires no calibration. The regular accuracy checks ensure that the
instrument's accuracy has not been impaired by falls or heavy impacts.
It is recommended to check the laser level accuracy each time before beginning workday
usage. The accuracy check procedure includes three steps: the horizontal line height check
(step 1), the horizontal line leveling check (step 2), the vertical line leveling check (step 3).
If, during one of the tests, the measured deviation exceeds the allowable deviation, repeat
the test procedure. Should the readings persist over the allowable deviation, the instrument
is out of calibration and must be serviced.
Contact ToughBuilt®Customer Service for additional support.
It is recommended to conduct the accuracy check on a wall distance close to the distance
of the applications for which the instrument will be used.
The following accuracy check procedure suggests the most practical scenarios at
the recommended distance.
The surface of the area where the accuracy check procedure is conducted must be
sufficiently level, so that the instrument remains within the self-leveling range of ± 4°
from the 0° level position.

13 14
Step 1: Checking the Height Accuracy of the Horizontal Line
For this check, a minimum measuring distance of 16'(5m) from the instrument to
the opposite wall in a dimly lit room is required.
1. Place the instrument on a firm and level surface or mount the instrument onto
a tripod close to wall A.
2. Turn on the instrument in the self-leveling mode by sliding the Pendulum Switch 2
to the UNLOCK position.
3. Direct the laser beam against wall A and allow a few seconds for the visible line
to stabilize. Mark the center of the horizontal line projected by the instrument on
wall A (point a1).
BA
a1
16' (5m)
4. Rotate the instrument by 180°, allow it to self-level, and mark the center
of the horizontal line on the opposite wall B (point b).
BA
a1 b

15 16
5. Slide the Pendulum Switch 2 to the LOCK position.
6. Without turning the instrument, place it close to wall B.
7. Slide the Pendulum Switch 2 to the UNLOCK position and allow the visible line to
stabilize.
8. Align the height of the horizontal laser line (using the tripod or by placing objects
underneath the instrument as required) with the previously marked
point b on wall B.
BA
b
a1
9. Without changing the height, rotate the instrument 180° to direct the laser beam
toward wall A.
10. Allow the instrument to self-level and mark the center of the horizontal line on wall A
(point a2).
BA
a2
b
a1
11. Measure the vertical distance between a1 and a2 that indicates the actual height
deviation of the instrument.
If the actual deviation is greater than the Allowable Deviation for the corresponding
Distance Between Walls in the table below, the instrument must be serviced.
Distance Between Walls Allowable Deviation
16'(5m) 5/32"(4mm)
30'(9m) 5/16"(8mm)

17 18
Step 2: Checking the Leveling Accuracy of the Horizontal Line
For this check, a 16'(5m) or 30'(9m) distance to the opposite wall in a dimly lit room
is required.
1. Place the instrument on a firm and level surface or mount the instrument onto a tripod
at the specified distance from wall A.
2. Turn on the instrument in the self-leveling mode by sliding the Pendulum Switch 2
to the UNLOCK position.
3. Direct the laser beam against wall A (Pos.1) and allow a few seconds for the visible line
to stabilize. Mark the center of the horizontal line projected by the instrument on wall A
(point a1).
A
16' (5m)
a1
Pos.1
4. Swivel the instrument 45° to the right to position 2 (Pos.2) and mark the horizontal
line projected by the instrument on wall A (point a2).
5. Swivel the instrument 90° to the left to position 3 (Pos.3) and mark the horizontal line
projected by the instrument on wall A (point a3).
A
a2
a1
a3
Pos.2
Pos.3 Pos.2Pos.3
a2
a1
a3
d1
d2

19 20
6. Measure the vertical distances between marks d1=a1-a2, d2=a1-a3 that indicate the
actual deviation of the instrument.
If any of the actual deviations is greater than the Allowable Deviation for the corresponding
Distance to Wall in the following table, the instrument must be serviced.
Distance to Wall Allowable Deviation
16'(5m) 5/32"(4mm)
30'(9m) 5/16"(8mm)
Step 3: Checking the Leveling Accuracy of the Vertical Line
For this check, the most practical recommendation is to consider a door opening with
at least 7'(2m) of height clearance and 8'(2,5m) of space to each side of the opening.
1. Position the instrument directly on a firm, level floor surface 8'(2,5m) away from
the door opening.
2. Turn on the instrument in the self-leveling mode by sliding the Pendulum Switch 2
to the UNLOCK position.
3. Direct the vertical laser beam to the center of the opening and allow a few seconds
for the visible laser line to stabilize.
4. Mark the center of the vertical laser line projected by the instrument in three locations:
on the floor at the center of the door opening (point a), at an 8'(2,5m) distance beyond
the other side of the door opening (point b), and at the upper edge of the door opening
(point c1).
8
'(2,
5
m)
8
'(2,
5
m)
b
c1
a
7'(2m
)

21 22
5. Position the instrument on the other side of the door opening directly behind point b. Allow
the instrument to self-level and ensure the vertical laser line aligns with points a and b.
6. Mark the center of the vertical line at the upper edge of the door opening (point c2).
c2
c1
b
a
7. Measure the distance between points c1 and c2 at the upper edge of the door opening
that indicates the actual deviation of the instrument from the vertical plane.
If the actual deviation is greater than the allowable deviation for the corresponding Ceiling
Hight in the table below, the instrument must be serviced.
Ceiling Height Allowable Deviation
7' (2,1m) 1/16" (1,6mm)
10'(3m) 1/8"(3,2mm)
15' (4,5m) 3/16" (4,78mm)
5. TROUBLESHOOTING
Problem Possible Cause Solution
No Laser
Beam
Batteries are not inserted Insert 3 x AA batteries
Incorrect battery polarity Check battery polarity
Low charge or depleted batteries Replace with new batteries
Corroded battery terminals Clean the battery terminals
Defective Instrument Contact ToughBuilt®Customer Service
Fluctuating
Beam
Instrument tilted beyond its ± 4°
self-leveling range Reposition the instrument
Depleted batteries Replace with new batteries
Temperature is too low or too high Allow the instrument to cool down
or warm up
Debris on the Laser Beam Window 1 Clean the window with a damp lint-free cloth
Does Not
Self-Level
Instrument is placed on an inclined
surface (beyond ± 4°) Place the instrument on a level surface
Cannot
Power-OFF
Pendulum Switch 2 is in
the UNLOCK position.
Slide the Pendulum Switch 2
to the LOCK position, then press
the Power ON/OFF button 5 .
Out of Level
Laser Beam
Laser Beam out of leveling
calibration
Perform the accuracy check
(see the Accuracy check section)

23 24
6. CARE AND MAINTENANCE
Cleaning
Before and after each use, thoroughly inspect the instrument for any damage.
If the instrument is soiled, wipe with a damp cloth.
Blow the debris from the Laser Beam Window 1 .
If necessary, wipe the Laser Beam Window 1 with a damp lint-free cloth.
DO NOT use aggressive cleaning agents or solvents.
DO NOT USE PAPER TOWEL.
DO NOT touch the Laser Beam Window 1 with fingers.
Storage
IMPORTANT! To prevent damage to the laser mechanism, Pendulum Switch 2
must be in the LOCK position prior to relocation or storage.
Before storage, make sure the instrument is turned OFF.
ALWAYS store the instrument in its original container (if one is available).
DO NOT leave the instrument in direct sunlight or expose it to high or cold temperatures.
(see the recommended Operating temperatures).
DO NOT store a damp or wet unit.
For extended storage, remove the batteries and store the instrument in a dry, cool place.
7. DISPOSAL
This product must not be disposed of with household waste.
Please sort it out for separate recycling.
Separate collection of used products and packaging allows materials
to be recycled and used again.
Reuse of recycled materials helps prevent environmental pollution and reduces
the demand for raw materials.
Some local governments may require local or municipal waste disposal centers or retailers
of new products to provide households with electronic product recycling services.

25 26
8. WARRANTY AND REGISTRATION
3-YEAR LIMITED WARRANTY.
(Proof of purchase is required to register the product).
Alkaline batteries that are shipped with the instrument are not warranted by ToughBuilt®.
For warranty details, visit www.toughbuilt.com
Online Registration
1. Visit https://toughbuilt.com/register-your-product or scan the QR code below
to begin the product registration.
2. Fill in the form and upload the proof of purchase.
For product registration support, please call our Customer Service Line:
US: 1 (800) 288-4695
Mexico: +52 55 9225 6212
Canada: +1 844 5751923
Have product and purchase information available when contacting ToughBuilt®
Industries for product support.
Specifications are subject to change without notice.

27 28
Other manuals for TB-H2-LL-30-L2
1
Table of contents
Other TOUGHBUILT Laser Level manuals
TOUGHBUILT
TOUGHBUILT TB-H2-LL-500-R1 User manual

TOUGHBUILT
TOUGHBUILT TB-H2-LL-100-L2 Assembly instructions

TOUGHBUILT
TOUGHBUILT TB-H2-LL-100-L2 Assembly instructions
TOUGHBUILT
TOUGHBUILT TB-H2S4-LL-M150-R1 Assembly instructions

TOUGHBUILT
TOUGHBUILT TB-H2-LL-M10-L2 Assembly instructions
TOUGHBUILT
TOUGHBUILT TB-H2-LL-M30-L2 Assembly instructions
