Tower Hobbies BEACH BUM User manual

OWNER’S MANUAL
BEACH BUM & BEACH BABE
CONNECT WITH US
toll-free: (866) 622-4477 | phone (858) 362-4082
social: @towerebikes | email: [email protected]
Join our owners group on facebook: facebook.com/groups/towerebikeowners

TABLE OF CONTENTS
Introduction
Assembly Instructions 3
Installing / Removing the Battery 5
Seat Adjustment 6
Start Up Procedure 7
Safety
Basic Safety 8
Riding Safety 8
Wet Weather 8
Night Riding 9
Mechanical Safety Check 9
Changing or Adding Accessories & Components 9
Technical
Battery Guide 10
LCD Display Guide 12
Wheels 14
Brakes 14
Pedals 15
Throttles 15
Service
Maintenance Guide, Post Crash Maintenance 16
Appendix
Intended Use 17
Component Lifespan 17
Metal Fatigue 17
Torque Fastening Specifications 18
1

Introduction
Welcome to Tower Electric Bikes
At Tower, we have a relentless focus on getting our products right. Do that and
business success naturally follows. We’ve been doing this for over a decade in the
direct to consumer space and have thrived because of that singular focus.
We do our customer’s homework for them on what’s important and what’s not, and
then we design the best product out there. When we combine that with our direct to
consumer only business model (eliminating the middlemen), our consumers get the
best value. We don’t settle for anything less than the best quality at a great value.
That’s our formula.
Not surprisingly, the first eBike we ever rolled out, our Tower Beach Bum, was
named the “Best Cruiser Electric Bike of 2020” in the all important value category by
Electric Bike Review. Not bad for our first horse out of the gate!
We never rest on our laurels, however, at Tower. For our second act launched in
late 2020, the Beach Bum 2 and the Beach Babe, we took a giant leap forward with
improved eBike functionality, quality, and safety across the board. We kept asking
the question, “How can we make this better? I don’t care what it costs.” Where most
brands ask, “How can we do this cheaper?”, we focused on “How can we do this
better?” The result is we made over 20 specific improvements. We proactively
increased our production costs by over 20% because, after cost-benefit analysis,
we’re confident these changes will better serve our customers long term needs.
Enjoy the ride,
The Tower Electric Bike Team
2

Assembly Instructions
This ebike should be adjusted by a professionally trained bicycle.
Most of the critical components on the Beach Bum eBike will come pre-assembled.
This includes the rear wheel, motor, gear system, and all cabling. The following
steps are the best practices for completing the assembly.
Note: With the exception of the pedals, all fasteners are tightened with a clockwise
motion, and loosened with a counterclockwise motion.
Required Tools For Assembly:
● M4 Hex Key/Driver
● M5 Hex Key/Driver
● M6 Hex Key/Driver
● Crescent Wrench
● Adjustable Spanner/Wrench (recommended)
● Calibrated Torque Wrench (recommended)
Handlebar Installation
Your Tower ebike has a threadless headset with an adjustable handlebar stem. The
stem can rotate up or down a full 40 degrees to better accommodate different height
riders and riders with different arm length reach. There is a 4 bolt configuration that
secures and tightens the handlebars to the stem.
When your eBike
arrives, your
handlebars will not
be installed in the
stem, but rather zip
tied to the side of the
frame. Cut the zip es
to remove the
handlebars from the
frame and then undo
the 4 bolts on the
stem with an M4 hex
wrench. Position the
handlebar and
tighten the screws.
3

Front Wheel Installation
Remove all packaging from the wheel and front fork. Loosen the nuts on the wheel
frame axle, so that it can easily fit onto the fork. Insert the wheel into the fork so that the
brake rotor slides into the caliper, and the axle fully seats into the forks. Evenly tighten
the nuts on the wheel axle to secure the front wheel. Only unscrew, then screw in the
side axle nuts. There is no need to tighten or untighten the Tektro braking system.
Lift and spin the front wheel to make sure there is no friction against the disc brake. If
there is wobble, loosen the axle nuts and double check to ensure the axle is fully seated
into the frame. Tighten the nuts.
Pedal Installation
Installing the pedals on the correct side of the ebike is critical. It is also one of the most
common mistakes consumers make when assembling their own ebikes. At Tower, we
take extra caution to very prominently label the left and right pedal as well as the left and
right crank. They are threaded specifically to only fit on one side of the bike. “L” for
rider’s left, “R” for rider’s right. Ensure you match the clearly labeled right pedal to the
right crank (on the right side of the bike if you were sitting on the seat).
Begin the installation by twisting the pedal into
the correct pedal arm by hand. Once the pedal
becomes too difficult to twist by hand, further
tighten with an M6 hex wrench.
Note: The left pedal is threaded in the opposite
direction, and needs to be tightened by twisting
counterclockwise.
4

Front Light Installation
Loosen and remove the headlight attachment point nut, bolt and washer from the fork.
Thread the bolt through the hole on the headlight and secure with the washer and nut.
Tighten using a
crescent wrench and a
M4 hex wrench to
ensure a secure fit.
There will be a cable
with a red connector
dangling from the wiring
harness near the head
tube. Connect your
headlight cable to this
red connector, ensuring
you very carefully align
all three prongs. Make
sure the cable is routed
on the side to allow
movement of the forks.
Installing / Removing the Battery
Your Tower electric bike comes with the battery installed, locked, padded for shipment,
and secured by zip ties in addition to the battery’s own locking functionality. All you have
to do is remove the packaging and your battery is properly installed and locked for use.
Two keys will be taped to the packaging. Set those aside and don’t lose them.
To remove the battery, rotate the
key counterclockwise to unlock
the battery from the controller
dock. It is not removable when
locked. Use one hand at the
bottom of the battery to lift it from
the base position of the dock
upwards. Pull the battery upwards
and away from the dock, then
remove it by lowering it out and
back down and tilting the bottom
to the left and out to clear the rear
frame triangle.
5

IMPORTANT - Before re-installing your battery, ensure that the battery power switch is
turned off and that the battery and controller dock are dry. The universal off symbol is
when the “o” is depressed, indicating there is a gap/hole in the connection. The universal
on symbol is when the “-” is depressed, indicating a solid line of electrical connection.
To re-install the battery, insert the battery into the frame at an angle from the bottom left
side (to avoid the chain) with the charge port on top. Slide the battery upwards and
inwards onto the dock, square things up, then pull down to fully seat it into the dock
grooves. Once fully seated, turn the key 180 degrees clockwise to lock it into place. If
you can’t fully lock the battery, it’s not properly seated.
Seat Installation & Adjustment
During shipment, Tower eBike seats (also referred to as “saddles” on ebikes) are
attached to the seatpost, but are not inserted into the frame downtube. It’s an easy
installation from there. Just release the seat clamp on the down tube, insert the seat
post to your desired seat height, and close the seat clamp. You may have to adjust the
tension of the seat clamp by adjusting the attached screw. Ensure the seat post clamp is
really tight so your seat doesn’t move around on your while riding.
A correctly positioned saddle will make the riding experience more comfortable,
controlled and efficient. It is important to spend time finding the correct saddle position.
6

You can adjust the angle of the seat on the seat post with a M6 hex wrench, but it is
easiest to adjust with the seat removed from the ebike. Adjust, insert the seat post, try it
out for fit, then redo as needed until you have a comfortable fit.
To check the saddle height, begin by sitting on the saddle. Place one foot on the center
of a pedal and the other on the ground for stabilization. Rotate the pedal until it is in the
lowest position. In this position, the leg on the pedal should be almost straight, with a
slight bend in the knee. The rider should also be able to reach the lowest part of the
pedal’s rotation comfortably, without needing to shift any weight.
Start Up Procedure
1. If the battery is not already locked, insert and turn the key clockwise to lock
2. Remove the key and confirm that the battery is locked correctly.
3. Turn the battery on by depressing the red switch to the on position “-”.
4. Press the power button on the LCD display for 2 seconds, to turn on the ebike
and display.
5. Use the [+] and [-] buttons to select the desired pedal assistance level. The
default is level 0, or no pedal assist. Level 5 is the highest.
6. Ride safely and have fun!
7

Safety
Basic Safety
⚠ Warning: It is the responsibility of the rider to know the local laws & rules
of the road. These laws may be different in each area and extend to safety
equipment, lighting, licensing, areas to ride and specific bike traffic laws.
⚠ Warning: Always wear a helmet. Having an accident while not wearing a
helmet may result in serious injury or death.
● This electric bike is designed for use by riders of age 18 and over.
● Riders should have the mental capability, reaction time and physical condition to
ride and manage themselves and this eBike in traffic and other road conditions.
● Ensure that the eBike is the correct size before riding. Control may be
compromised if the eBike is not fitted correctly.
● Perform a quick mechanical safety check before every ride.
● Tower Electric Beach Cruisers are not designed for jumping or off-road use.
● The Beach Bum and Beach Babe are pre-governed at 18 mph. This can be
adjusted in the advanced settings. See the Tower KD58C LCD manual for
instructions on how to remove the speed limit.
● Always ride at a comfortable speed, and obey local traffic laws.
Riding Safety
● When possible, ride in bike lanes or to the far right side of the street.
Always ride in the same direction as the flow of traffic.
● When riding on the street, use hand signals to indicate turns and
slowing/stopping.
● Do not ride with objects that may impair vision or control of the eBike.
● Do not hitch off the back of another vehicle.
● Do not ride while under the influence of alcohol or drugs.
● Do not ride at dawn, dusk or in darkness without adequate lighting.
Wet Weather
⚠ Warning: Wet conditions are a source of many bicycle accidents.
Visibility, braking distance and traction all become impaired.
When the road surface is wet, the stopping power of all vehicles will be reduced
and all tires will lose grip much more easily. Apply the brakes earlier and more
gently in order to avoid wheel lock and safely stop in wet conditions.
8

Night Riding
Riding at night can be dangerous because visibility for both cyclists and other road
users is considerably reduced. It is highly important for people who decide to ride at
night to have the right equipment and follow these best practices:
● Always have functional front and rear lights when cycling at night. Reflectors
are not an adequate substitute.
● Routinely check the working condition of the reflectors and lights.
● Only remove reflectors when replacing them, they are required by law.
● Wear bright colored clothing to increase vilibility.
Mechanical Safety Check
●Nuts, Bolts & Screws: To check for loose components, straddle the eBike and
lift the front tire 2-3 inches off the ground. Release the eBike, and allow the front
wheel to drop and bounce. Listen for any rattling; this may indicate that some
parts are loose. Repeat the same process for the rear tire.
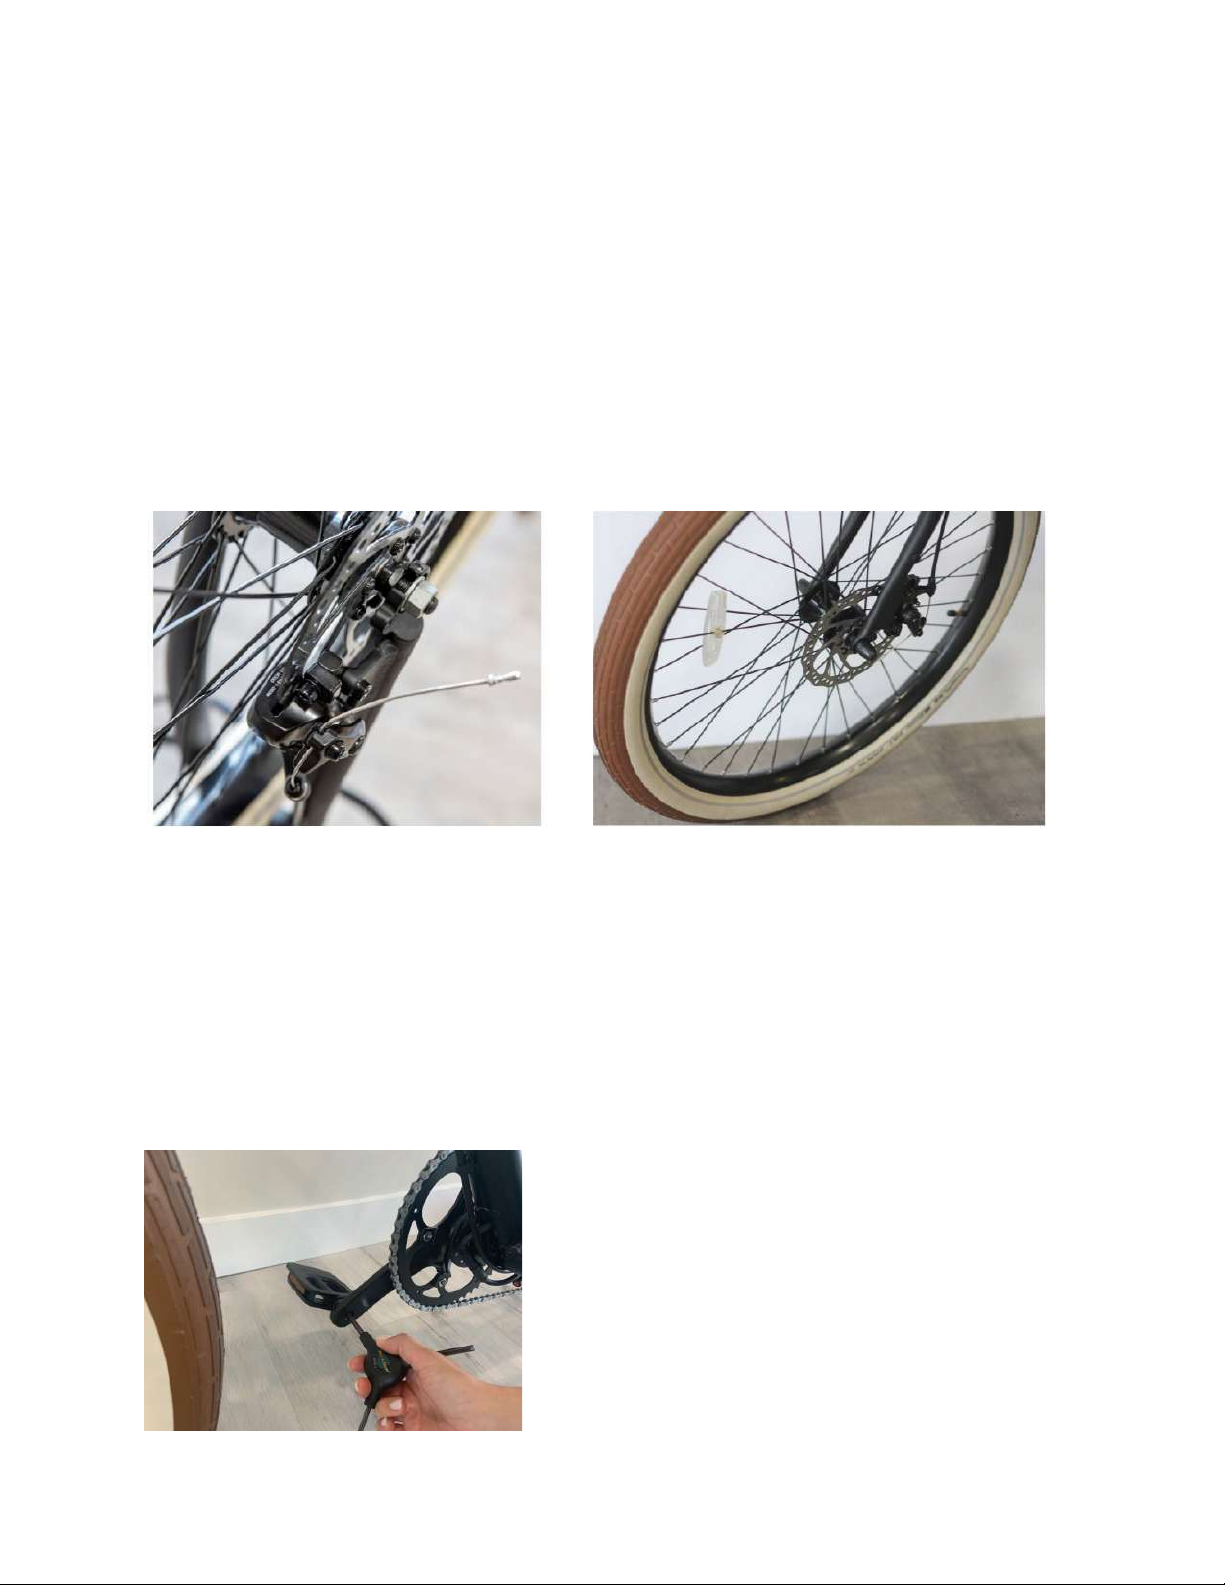
●Tires: Ensure that the tires are inflated to the proper pressure and in good
condition before riding. Slowly rotate the wheel while examining the side walls
and threads. Look out for cracks and objects that may be stuck in the outer layer.
If the wheel wobbles or appears to be off-center, the tire needs to be trued. Bring
it to a bicycle maintenance professional for them to take a look.
●Wheels: Make sure that the wheel rim is undamaged before setting off on a ride.
Damage to the rim will cause weak spots and may become faulty over time.
●Brakes: While stationary, squeeze each brake lever to make sure that there is
resistance. (Rider’s right is the rear brake and left is the front brake). If there is no
resistance, the brakes will need to be tightened. If there is too much resistance,
or the brakes make a squealing sound, the brakes will need to be loosened.
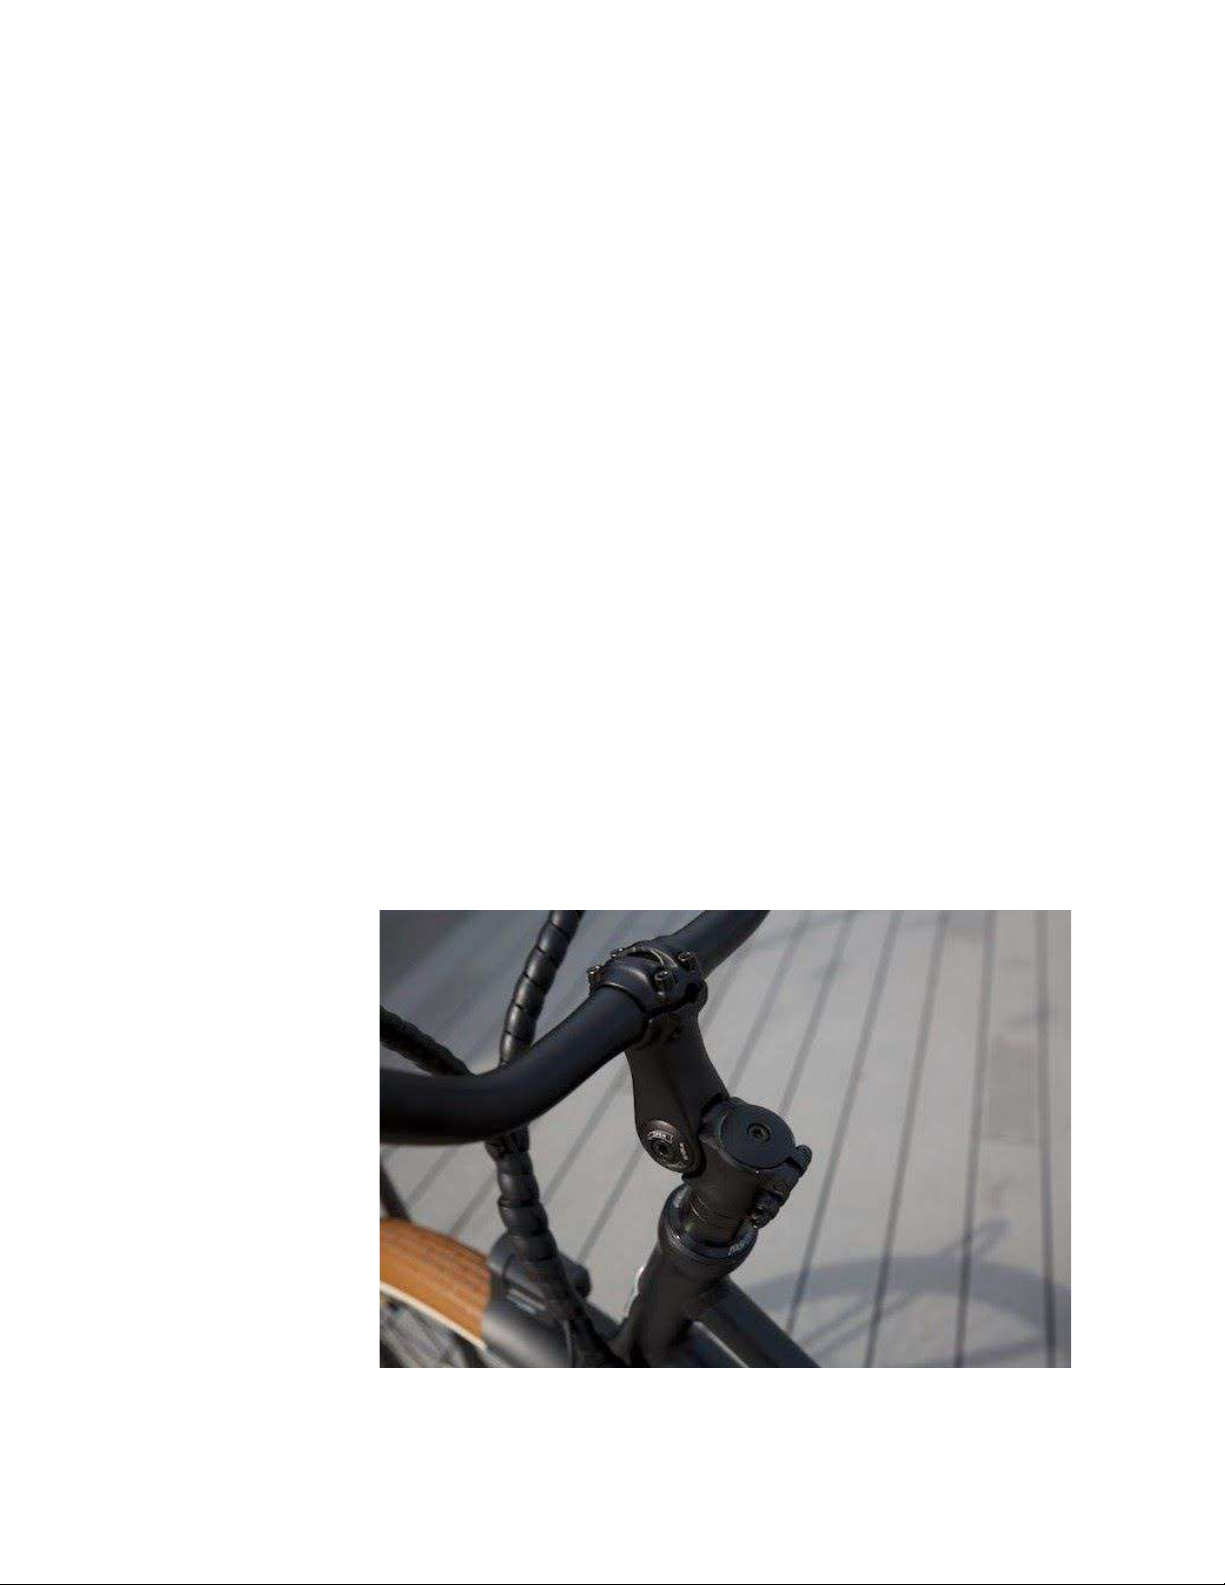
●Handlebar grips: Check for cracks, cuts or wear as these can all have an impact
on how well the grip will bond to the handlebars. Loosely fitted handlebar grips
can slip off, potentially resulting in loss of control and falling.
●Battery: Double check that the battery is securely connected, and locked to the
frame.
●Cables: Check the exposed cables and wiring to make sure there are no
disconnections.
Changing or Adding Accessories & Components
⚠ Warning: Adding aftermarket parts to the Beach Bum or Beach Babe
may compromise the construction of the bike and the safety of the rider.
All third-party accessories such as luggage racks, trailers, child seats, baskets or
tires that can be installed are at the risk of the owner. If it is necessary to install
additional accessories, make sure the installation is performed and inspected by a
bicycle maintenance professional.
9

Technical & Critical Components
Battery Guide
Tower Electric Bikes are powered by a high-capacity 48V, 14Ah lithium-ion
battery with premium Samsung cells. We spared no expense. The battery is the
most expensive component on your ebike and represents roughly one-third the
value of your eBike. Most of the time, a quality battery is what separates quality
ebikes from the cheap imitators. When it comes to your battery capacity and
battery longevity, you are going to be very thankful that you bought a Tower
ebike.
At Tower, we only sell quality. Tower’s batteries are designed to last 500-1000
charge cycles. You can charge almost everyday for years. An expectation of
usability of 5-9 years is not unreasonable. Equally important, your power and
battery charge capacity will not diminish quickly. Your battery will operate almost
like new for many years.
10

Cheap batteries, which are omnipresent in the ebike market, suffer from two
issues: First, they very quickly realize a diminished capacity - after just 6 months
or a couple dozen charge cycles you will find your range and power massively
diminished. Second, the number of charges until your battery needs to be
completely replaced is far lower than a quality battery, so you will have to replace
it relatively quickly.
Charging Time
Because you have a high quality battery, you can charge the battery after every
use to ensure a maximum range for every ride, or you can charge only when you
need to and extend the life of your battery to a quite impressive length of time.
Frequent charging will not materially diminish the power and longevity of your ebike
battery. The batteries in Tower Electric Bikes do not have any memory effect, so
charging the battery after short rides will not cause any damage.
From a completely exhausted battery, the charge time is between 7-8 hours. Once
the battery is 100% charged, the charger will disengage and the LED light on the
charger will turn from red to green. Some charging rules:
● Inspect charger cables and the battery for any cracks or other damage
● The battery does not need to be connected to the bike during charging.
● Always charge the battery indoors and out of direct sunlight.
● Do not cover the charger or battery while charging. Both will be cooled by
the air and should be left with some space for the air to circulate.
Charging Safety
● Do not leave the battery charging in a house or building unattended. Never
charge the battery near flammable materials. Both the charger and battery
will get hot and may present a fire risk.
● Always charge in a dry environment. If a battery is stored/charged in a moist
environment, moisture may get into the housing and damage the cells in the
battery.
● After riding in the rain, dry all battery components before charging.
● Only use the included Tower charger for the battery. It is calibrated to
provide the correct amount of amperage required for safe charging.
● Never charge the battery with damaged charger cables. Exposed copper or
wiring will result in a greater fire risk.
● Store any extra/unused batteries in a cool, dry place.
11

LCD Display Guide
The LCD display unit will come pre-mounted to the handlebars of the Tower Beach Bum
and Beach Babe. This section covers the general operation of the LCD display unit. A
more comprehensive manual for the unit is included in the eBike packaging, and on
towerelectricbikes.com.
Switching the ebike On/Off - To switch the system on and off, simply hold the [power]
button for 2 seconds. The ebike will automatically turn off when parked for 10 minutes.
Display interface - The default interface that the LCD display will show is “running
speed.” Repeatedly press the [power] button to scroll through the additional interfaces
including: “current trip distance”, “odometer”, “current ride time”, “average speed”, and
“max speed”. Each will display for 2 seconds before returning to the default interface, so
“running speed”.
Switching the headlight off and on - By default, and for safety reasons, the front
headlight turns on when you power up your ebike and LCD screen. We recommend
riding day and night with the front light on so others can see you better. To toggle the
headlight off and back on again, hold the “+” button for 2 seconds. Note that the LCD
display will automatically dim when the headlight is engaged.
12

Pedal assistance level selection - By default, and for safety reasons, your ebike will be
in PAS 0 (“Pedal Assist Level 0”) when you power up your ebike and LCD screen. In the
default interface on the LCD screen (so when you first turn it on), press “+” to increase
the level of pedal assistance and “-” to reduce the level. There are 5 levels of pedal
assistance (1-5) and zero, which is no pedal assistance at all. PAS levels 1-5 offer
between 40% and 96% pedal assistance.
Error code indication - If there are errors in the electronic control system, an error code
will appear automatically on your LCD screen upon startup. Please refer to the “Error
code definitions” in the LCD manual for more detailed information on LCD screen error
codes.
General settings - The general settings function on your LCD screen allows you to
clear the trip odometer, change the unit of speed from MPH to KPH, enable a “slow
start” feature, and access the advanced settings interface. Once the ebike and LCD
screen is powered on, hold down the “+” and “-” buttons together for 2 seconds to
access the general settings.
A password is required to access the general settings. The default password is
1,2,3,4. Scroll to each digit position and press the “+” button to increment thru each
number, then press [power] to both select and move to the next digit position. This
password can be changed in the Advanced Settings (termed “Specific Set” on the
LCD interface).
Once you are past the password screen, press the “+” button to browse the menu
and the [Power] button to select the highlighted setting. This is a very rarely
accessed area. A more detailed description of the settings is outlined in the LCD
manual.
Advanced settings - From within the general settings area (after you’ve entered the
password for entry), press & hold [+] & [-] buttons for 2 seconds a second time to access
the advanced settings. Here you can change the pedal assist percentage levels, reduce
or increase the speed limiter, and set a new password so others can’t get into your
setting interface with the default 1,2,3,4 password.
Recover default settings - Note that this will reset the LCD screen completely and
erase your custom password if you have one. The LCD screen will be reverted to
the factory settings. Press and hold the “+” and [power] buttons for 2 seconds to
recover the default LCD screen settings. YOu will have to confirm by navigating to
“Y” using the “+” button, then press and hold the [power] button for 2 seconds while
“Y” is selected to return the system to the default factory settings.
13

Wheels
Front wheel assembly - The front wheels on the Tower Beach Bum and Beach Babe
are mounted thru “drop-outs” in the steering fork. The front fork is equipped with a
secondary retention device. This is a backup measure to prevent the wheel from
disengaging due to ill fitting bolts. The secondary retention device is not substitute for
correctly securing the front wheel.
⚠ Warning: Replacing the factory bolts may compromise the secondary
retention device.
Removing the wheels - To remove the front wheel, loosen the axle nuts a
few times until the wheel has come loose and the nuts have cleared the
secondary retention device. Slowly and carefully lift the frame until the brake
disc has cleared the caliper.
Do not remove the rear wheel unless absolutely necessary. There are critical
cables that run from the battery to the motor via the rear axle, so it’s best to
leave this task to an ebike maintenance professional.
Tires and inner tubes - The pressure rating is indicated on the sidewalls of
the tires. The Schwalbe Fat Frank tires that come standard on the Beach Bum
and Beach Babe have an operational air pressure range of 22-60psi. A higher
tire pressure will result in a faster acceleration, while a lower tire pressure will
result in a more comfortable ride. Since the Beach Bum and Beach Babe
models do not come with a suspension system, the recommended tire
pressure is 30psi.
We prefill our tires with flat-resistant tire slim and puncture resistant tire liners at the
factory. This massively reduces the frequency of flat tires on Tower ebikes.
⚠ Warning: Never inflate a tire beyond the maximum pressure indicated
by the manufacturer. Over inflation can cause dangerous tire blowouts.
Brakes
The brakes on the Beach Bum and Beach Babe are Tektro HD-E350
hydraulic disc brakes specifically designed for ebikes. Like a traditional
bicycle, activate the brakes by pulling the brake levers located on the
handlebars. The right brake lever activates the rear brake and the left lever
activates the front brake.
Disc brake adjustment - Because they are hydraulic disc brakes, both the
front and rear brake pads are self adjusting. If the hand brake lever does not
have enough resistance just pump the lever once or twice and everything will
adjust. If the brakes are making noise, or if the wheel can’t rotate freely, the
14

alignment of the brakes should be checked.
⚠ Warning: Improperly installed or worn brakes are dangerous and can
cause an accident resulting in injury or possible death.
Hydraulic disc brake function - The ebike control system is equipped with a
kill switch that automatically cuts off all power assistance when the brakes are
activated. Also, do not hold the brakes when you are powering up the ebike
and LCD screen as you will cause an error code 25. If this happens, just turn
off the ebike and turn it on again without engaging the brakes simultaneously.
Do not apply the brakes too sharp as this can cause wheel lock and loss of
control. When breaking in new disc brakes begin at a slow speed and
gradually apply the brakes. It is important to have a feel for how the brakes
respond at different levels of pressure.
Pedals
The barefoot pedals on the Tower Beach Bum and Beach Babe are
specifically designed to be used with or without shoes. Otherwise, they
operate the exact same way as a regular bicycle.
⚠ Warning: Beware of toe overlap. This is when the rider’s toe touches
the front wheel when making a turn while the pedal is in the forwardmost
position. This can be avoided by keeping the inside pedal upright and
the outer pedal fully down during a turn.
Pedal assist function - The PAS function on the Tower Beach Bum and
Beach Babe is a “cadence assist” which means the power assist is informed
by the speed of the crankshaft, not the force of pedaling. Thus the rider can
engage the motor assist function by just freely rotating the crankshaft when at
speed without applying any meaningful force on the chain and rear hub.
Throttle
The throttle is located on the right handlebar and will activate when twisted
back. Unlike the pedal assist, there is no delay option. The acceleration is
immediate. There is a small black toggle button below the throttle that can be
used to disconnect the throttle functionality. This can be useful to prevent
accidental acceleration.
⚠ Warning: The throttle combined with the high torque motor creates
extremely fast acceleration. New riders should familiarize themselves
with the pedal assist modes before using the throttle.
15

Service
Tower Electric Bikes Maintenance Guide
The Tower Beach Bum was designed and built to require as little maintenance as
possible. The highest quality components, combined with rust-proof aluminum,
remove the majority of maintenance required for most eBikes. With that being
said, in order to minimize the risk of an accident and/or potential injury, it is
imperative to follow these maintenance practices:
● Perform a mechanical safety check before every ride.
●Ride conservatively for the first 20-30 rides. There are several components
that need to be broken in before the bike can be ridden at full capacity.
●Monitor the bike for signs of damage or discoloration. Discoloration could
be a sign of stress fatigue, which can lead to breakage.
● Do not submerge any parts of the Tower eBike in water.
● Check the wiring every once in a while to ensure all connections are tight
and clean.
● To clean the frame, wipe with a damp cloth and then dry any excess water
that remains.
● Store the bike under shelter whenever possible to minimize exposure to
sun and rain.
● Frequently lubricate and clean the chain to prevent rust.
● If a part of the bike becomes scratched or chipped, use some paint (or
clear nail polish) to touch it up and prevent corrosion.
● Make cleaning and lubricating the eBike a monthly routine.
⚠ Warning: All bicycles are subject to wear and tear. The various
materials on the bike will wear at different rates, so it is important to do a
full check up routinely. If a particular part has gone past its useful life
cycle, it could fail unexpectedly.
Post-Crash Maintenance
A crash or impact can put unexpected stress on the bike in areas that are not
built to withstand such stress. It is important to conduct a thorough check of the
entire bike after an accident. IN the event of an accident:
● First, check for injuries and seek medical help if necessary
● Next, inspect the bike for damage. If there is structural damage to any of
the critical components, do not ride the bike until it has been inspected
by a bicycle maintenance professional.
16

Appendix
Intended Use
The Tower Beach Bum and Beach Babe ebikes are designed for general
purpose riding on paved roads, bike paths and gravel or dirt roads on which
there is not too much loose terrain and the wheels do not lose contact with the
ground.
Maximum weight capacity: 350 lbs
Not Intended Use
The Tower Beach Bum and Beach Babe are not intended for off-road or mountain
use, or any kind of jumping. The Tower Beach Bum does not have suspension or
a frame built to withstand the force of jumping. The standard tires are flat-resistant
and can perform on loose terrain, however this is not their intended use. They are
designed to withstand everyday road use and to add a level of comfort to the ride.
Bicycle and Component Lifespan
All of the components on every bicycle have a limited useful life. The length of
time before the Tower Beach Bum reaches the point of failure depends on:
● How aggressively the eBike is ridden
● The conditions in which the eBike is ridden
● The level of maintenance conducted
Metal Fatigue
The more use the bike gets, the closer it will come to the end of its life cycle. This is
because the metal frame will experience fatigue, which is the accumulated damage
due to repeated loading. Discoloration or staining of a certain part could be a sign
that a crack is present. Cracks begging on a microscopic level and may not be
visible to the naked eye for a while. Over time, cracks will become so prominent
that the frame will not be able to carry the expected loa anymore and will result in
failure. Scratches, dents and gouges create “stress risers”. These are weak points
on the bike where stress will be increased. Pay close attention to the ese spots and
replace the part if the damage is significant. If large cracks squeak and/or make
noise during riding this is a serious red flag. A bike in good condition should be
quiet and free of squeaking and creaking.
17

⚠ Warning: Do not ride a bicycle with any form of crack, bulge or dent.
Riding a bike with cracks in the critical components could lead to
sudden failure and may result in serious injury or death.
Torque Fastening Specifications
Always use a correctly calibrated torque wrench to tighten the critical fasteners on
the Tower Beach Bum and Beach Babe. The recommended torque levels for each
fastener are as follows:
● Wheel nuts - 20-25 Nm
● Pedals - 25-30 Nm
● Seat post clamp bolt - 5-8 Nm
● Saddle clamp - 5-8 Nm
● Handlebar stem bolt - 14-18 Nm
● Handlebar stem pinch bolt - 12-14 Nm
For more information check out the Tower ebike YouTube channel or see the
Tower LCD manual
18
Other manuals for BEACH BUM
1
This manual suits for next models
1
Table of contents