manuals.online logo
Brands
  1. Home
  2. •
  3. Brands
  4. •
  5. TP-Link
  6. •
  7. Controllers
  8. •
  9. TP-Link Omada OC400 User manual

TP-Link Omada OC400 User manual

Installation Guide
Note: OC400 is used as an example throughout the Guide. Images may dier from the actual product.
Omada Hardware Controller
For technical support and other information, please visit
https://www.tp-link.com/support, or simply scan the QR code.
To ask questions, find answers, and communicate with TP-Link users or engineers,
please visit https://community.tp-link.com to join TP-Link Community.
© 2023 TP-Link 7106510840 REV1.0.1
Hardware Overview
1
• Front Panel • Back Panel
Kensington
Security Slot
Power
Socket
Grounding
Terminal
LED Indication
PWR1* On: The device is powered by PWR1.
O: PWR1 is disconnected or it works improperly,or the device is powered o.
PWR2
Green On: The device is powered by PWR2.
Yellow On**: PWR2 are connected,but the device is powered by PWR1.*
O: PWR2 is disconnected or it works improperly,or the device is powered o.
FAN
CLOUD
USB1/USB2 Green On: A USB storage device is inserted and identied.
O: No USB storage device is inserted,or it is corrupted or incompatible.
SFP+ (Port 1-2)
RJ45 (Port 3-6)
Green On: Running at 10 Gbps,but no activity.
Green Flashing: Running at 10 Gbps and transmitting or receiving data.
Yellow On: Running at 1000 Mbps,but no activity.
Yellow Flashing: Running at 1000 Mbps and transmitting or receiving data.
O: No device is linked to the corresponding port.
Green On: The fan works properly.
Yellow On: The fan works improperly.
On: The device is bound to a TP-Link ID.
Slow Flashing: The device is connected to cloud but not bound to a TP-Link ID.
Quick Flashing: The device is being reset to its factory settings.
O: The device is disconnected from cloud.
*PWR1 is the primary power supply and it takes priority over PWR2.
**When both PWR1 and PWR2 work properly and the device is powered by PWR1, it takes 10-20
seconds for the LED PWR2 (yellow) to go out.
Green On: Running at 1000 Mbps, but no activity.
Green Flashing: Running at 1000 Mbps and transmitting or receiving data.
Yellow On: Running at 100/10 Mbps, but no activity.
Yellow Flashing: Running at 100/10 Mbps and transmitting or receiving data.
O: No device is linked to the corresponding port.
SFP+ slot is designed to install the 10 Gbps SFP+ module.
USB 3.0 ports connecting to USB storage devices.
USB1/USB2
Connect with a computer for monitoring the device.
DescriptionInterface
RJ45 ports connecting to local PCs or switches.
Secure the lock (not provided) into the security slot to prevent the device
from being stolen.
The device comes with a lightning protection mechanism.
Connect to the power outlet via the provided power cord.
Ethernet
(Port 3-6)
SFP+ (Port 1-2)
Console
Kensington
Security Slot
Grounding
Terminal
Power Socket
LEDs
After the device is initialized, press and hold the button for 5s to reset the
device to its factory default settings.
Reset
DescriptionButton
• Desktop Installation
1. Set the device on a at surface to support the entire weight of the device with
all ttings.
2. Remove the adhesive backing papers from the supplied rubber feet.
3. Turnover the device and attach the rubber feet to the recessed areas on the
bottom at each corner of the device.
Feet
Bottom of the device
Notch
• Rack Installation
1. Check the grounding and stability of the rack.
2. Secure the supplied rack-mounting brackets to each side of the device with
supplied screws.
Screw
Rackmounting Bracket
3. After the brackets are attached to the device, use suitable screws (not
provided) to secure the brackets to the rack.
Rack
Hardware Installation
2
• Remote Management
1. Make sure that your mobile device and Hardware Controller can access the
internet.
2. Download the Omada app on your mobile device. It can be downloaded from
App Store or Google Play:
3. Launch the app and go to Cloud Access. Then log in with your TP-Link ID.
4. Tap the + button on the upper-right to add your controller.
5. Follow the step-by-step instructions to complete the Quick Setup.
Via Omada App
Scan for Omada Omada App
or
Software Conguration
4
1. Make sure that your management device and Hardware Controller can access
the internet.
2. Launch a web browser and type https://omada.tplinkcloud.com in the address
bar, then press Enter (Windows) or Return (Mac).
https://omada.tplinkcloud.com
Via a Web Browser
3. Enter your TP-Link ID and password to log in.
4. Click Controller on the left column, and then click + Add Controller and
choose Hardware Controller to add your controller.
5. Click Let’s Get Started and follow the step-by-step instructions to complete
the conguration wizard.
1. Download the Omada app on your mobile device. It can be downloaded from
App Store or Google Play:
2. Make sure that your mobile device and Hardware Controller are in the same
subnet.
3. Launch the app and go to Local Access. Then tap the +button on the
upper-right corner to add your controller.
4. Choose the auto-detected device or manually add your device by entering its
IP address/URL and port number. Follow the step-by-step instructions to
complete the Quick Setup.
• Local Management
Via Omada App
Scan for Omada
or
Omada App
1. Make sure that your management device and Hardware Controller are in the
same subnet.
2. Check the DHCP server (typically a router) for your controller’s IP Address. The
default fallback IP address is 192.168.0.253.
Via a Web Browser
• If you have downloaded the Omada app, you can also check the app for your
controller’s IP address.
• The fallback IP address is used when the controller fails to get dynamic IP
address from the DHCP server.
3. Launch a web browser and type your controller’s IP address in the address bar,
then press Enter (Windows) or Return (Mac).
4. Click Let’s Get Started and follow the step-by-step instructions to complete
the conguration wizard.
https://<IP_address>
Configure and manage locally.Configure and manage via cloud access.
EU Declaration of Conformity
TP-Link hereby declares that the device is in compliance with the essential requirements and other
relevant provisions of directives 2014/30/EU, 2014/35/EU, 2011/65/EU and (EU)2015/863.
The original EU declaration of conformity may be found at https://www.tp-link.com/en/support/ce/.
UK Declaration of Conformity
TP-Link hereby declares that the device is in compliance with the essential requirements and other
relevant provisions of the Electromagnetic Compatibility Regulations 2016 and Electrical Equipment
(Safety) Regulations 2016.
The original UK declaration of conformity may be found at https://www.tp-link.com/support/ukca/.
For detailed configurations, please visit https://www.tp-link.com/support to download the
User Guide in the download center.
A DHCP server (typically a router) with DHCP function enabled is required to assign IP addresses to the EAPs and Hardware Controller in your local network.
Hardware Connection
3
Router
PoE Switch
Wall Plate APCelling Mount APManagement Device Outdoor AP
Hardware ControllerAC Power Cord
Caution
注意
Shock hazard
為避免電擊危險
Disconnect all power sources
請在維修前斷開所有電源線
Safety Information
• Keep the device away from water, re, humidity or hot environments.
• Do not attempt to disassemble, repair, or modify the device. If you need service, please contact us.
• Place the device with its bottom surface downward.
• The plug on the power supply cord is used as the disconnect device, the socket-outlet shall be easily
accessible.
Other TP-Link Controllers manuals

TP-Link TL-PA4022P KIT User manual

TP-Link

TP-Link TL-PA4022P KIT User manual

TP-Link omada OC200 User manual

TP-Link

TP-Link omada OC200 User manual

TP-Link AC50 User manual

TP-Link

TP-Link AC50 User manual

TP-Link AC50 User manual

TP-Link

TP-Link AC50 User manual

TP-Link omada OC200 User manual

TP-Link

TP-Link omada OC200 User manual

TP-Link omada OC200 User manual

TP-Link

TP-Link omada OC200 User manual

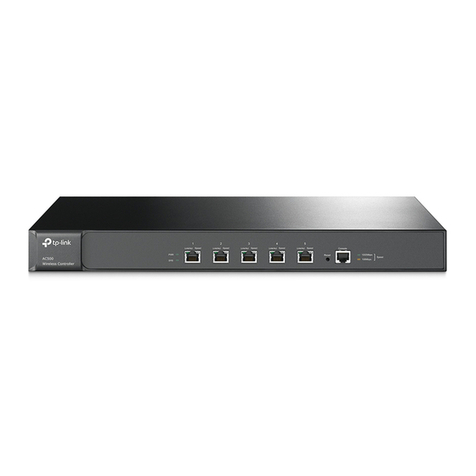
TP-Link AC500 User manual

TP-Link

TP-Link AC500 User manual

TP-Link KS230Kit User manual

TP-Link

TP-Link KS230Kit User manual

TP-Link AC50 V1 Quick start guide

TP-Link

TP-Link AC50 V1 Quick start guide

Popular Controllers manuals by other brands

Buderus RC20 operating instructions

Buderus

Buderus RC20 operating instructions

Inovance Easy521 user guide

Inovance

Inovance Easy521 user guide

Chziri ZJR1 Series user manual

Chziri

Chziri ZJR1 Series user manual

Seada G88 HDMI user guide

Seada

Seada G88 HDMI user guide

Evco EV3B33N7VXRX04 instruction sheet

Evco

Evco EV3B33N7VXRX04 instruction sheet

Smartrise C4 user manual

Smartrise

Smartrise C4 user manual

Martin DMX Controller 2518 user manual

Martin

Martin DMX Controller 2518 user manual

CaryMart WF-8-1R manual

CaryMart

CaryMart WF-8-1R manual

Siemens REV13 series instruction manual

Siemens

Siemens REV13 series instruction manual

maxon motor EPOS 24/1 Getting started

maxon motor

maxon motor EPOS 24/1 Getting started

HTW HTW-KJR86A1E Installation and operation manual

HTW

HTW HTW-KJR86A1E Installation and operation manual

NMI DSP56F803 user manual

NMI

NMI DSP56F803 user manual

Truma SecuMotion Operating instructions & installation instructions

Truma

Truma SecuMotion Operating instructions & installation instructions

CLIMAVENETA life2 Installation

CLIMAVENETA

CLIMAVENETA life2 Installation

NTN K-EGA57 instruction manual

NTN

NTN K-EGA57 instruction manual

Smartgen HAT163 user manual

Smartgen

Smartgen HAT163 user manual

PumpSmart PS220 Operation manual

PumpSmart

PumpSmart PS220 Operation manual

ETC P-ACP Configuration manual

ETC

ETC P-ACP Configuration manual

manuals.online logo
manuals.online logoBrands
  • About & Mission
  • Contact us
  • Privacy Policy
  • Terms and Conditions

Copyright 2025 Manuals.Online. All Rights Reserved.