Traceable JUMBO User manual

◄
SPECIFICATIONS
Integrated radio receiver for reception of time signal
Temperature Range: 23.0 to 122.0° F
-5.0 to 50.0°C
OPERATION
The unit contains a pre-tuned internal radio
receiver that receives a 60 kHz frequency signal
generated by the U.S. Atomic Clock. The U.S.
Atomic Clock is located in Boulder Colorado and is
operated by NIST (National Institute of Standards
and Technology).
Upon installation of the batteries, the unit
automatically activates its receiver.
The unit may not receive a signal immediately. It
may take as long as 72 hours to receive a complete
signal from the Atomic Clock. The clock will
attempt a signal reception for 10 minutes every 3
hours until it successfully receives the signal from
the atomic clock. While the unit is attempting
to receive a complete signal for the rst time, the
clock may be set manually (see the “Manual Clock
Setting” section). Best reception often occurs
between midnight and 4 am.
The successful reception of the Atomic Clock
signal is dependent upon the positioning and
location of the unit. Insufcient signal strength or
external electrical interference may prevent the
unit from receiving a complete signal. The main
causes for poor reception are heavily reinforced
concrete and steel structures and/or placement of
the unit close to video or PC monitors. There are
certain areas of the Eastern United States where
urban interference or signals from the United
Kingdom’s Atomic Clock may distort or interfere
with the signal from the U.S. Atomic Clock.
Upon successful reception of the Atomic Clock
signal, set the Time Zone to the desired setting
(see the “Setting the Time Zone and DST Status”
section).
SETTING THE TIME ZONE AND DST STATUS
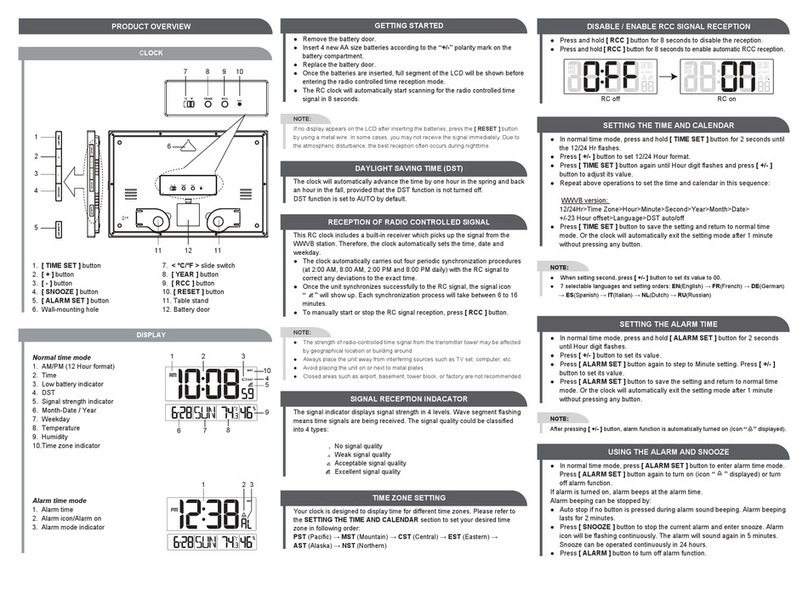
Press and hold the SET/WAVE for 3 seconds, the
Daylight Saving (DST) status (On/OFF) and Time
Zone will ash.
Press the +button to toggle through the four (4)
user-selectable time zones:
P = Pacic Standard Time (when selected, “P” will
appear to the left of the Signal Strength Indicator.)
M = Mountain Standard Time (when selected,
“M” will appear to the left of the Signal Strength
Indicator.)
C = Central Standard Time (when selected, “C” will
appear to the left of the Signal Strength Indicator.)
E = Eastern Standard Time (when selected, “E” will
appear to the left of the Signal Strength Indicator.)
Daylight Saving Time
Each time the
–
button is pressed, Daylight
Saving Time will be turned on/off.
With the desired Time Zone and DST setting
selected, press the SET/WAVE button ve (5)
times to conrm the entry and exit from the setting
mode.
SELECTING °F/°C AND TIME FORMAT
1. Press and hold the SET/WAVE for 3 seconds,
the Daylight Saving (DST) status (On/OFF) and
Time Zone will ash.
2. Press the SET/WAVE button four (4) times, the
time format (24Hr/12Hr) and temperature will
ash on the display.
3. Each press of the
–
button will change the
temperature display mode between °F and °C.
4. Each press of the +button will change the time
format mode between AM/PM (12Hr) and
24 hour (24Hr).
5. With the desired temperature unit of measure
and time format selected, press the SET/WAVE
button to conrm the entry and exit the setting
mode.
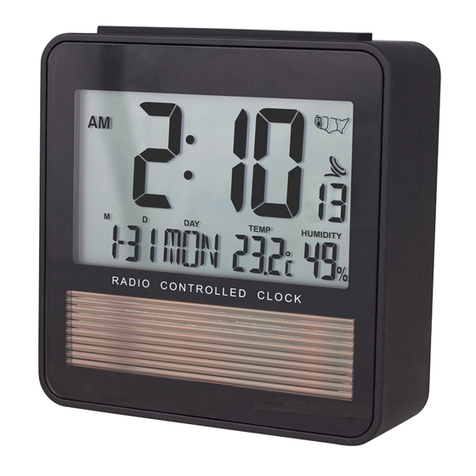
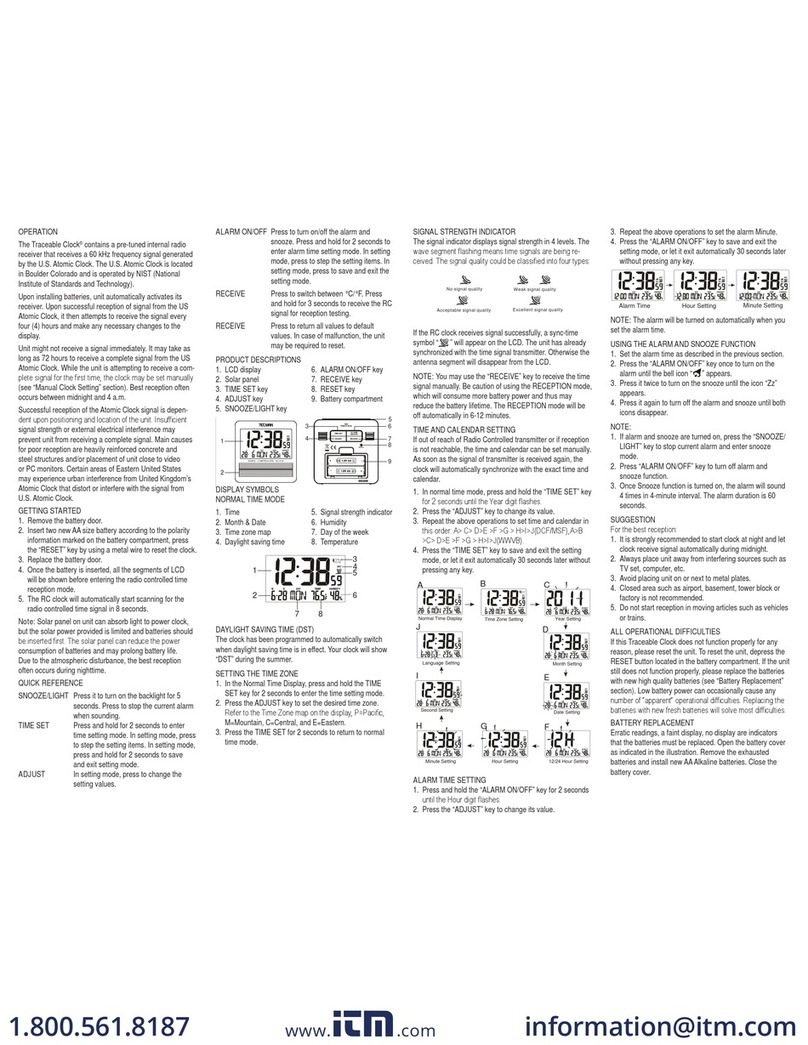
SIGNAL STRENGTH INDICATOR
Appearing under Indicates completed
signal reception and synchronization with the
Atomic Clock.
Flashing indicates that the unit is attempting
to receive the signal from the Atomic Clock. If this
condition continues for more than 72 hours, the
unit should be repositioned for better reception.
Not ashing and not appearing indicates
no signal has been received. If this condition
continues for more than 72 hours, the unit should
be repositioned for better reception.
Upon successful reception of the Atomic Clock
signal, the unit will perform an automatic update
every night at midnight and will make any time
adjustments that might be necessary. If this
update is not successful, the indicators will
disappear and the unit will try to receive the signal
again every hour for up to 4 hours. If signal
reception is still unsuccessful, the clock will attempt
a signal reception for 10 minutes every 3 hours
until it successfully receives the signal from the
atomic clock.
MANUAL CLOCK SETTING
1. Press and hold the SET/WAVE for 3 seconds,
the Daylight Saving (DST) status (On/OFF) and
Time Zone will ash.
2. Press the SET/WAVE button, the year will ash
on the display.
3. Set the desired year by pressing the +or
–
button.
Press and hold the button to change the display
rapidly.
4. With the desired year on the display, press the
SET/WAVE button. The date will ash.
5. Set the desired date by pressing the +or
–
button. The date will cycle through the day
number rst and as the day number passes to
the next month, the month will change. Press
and hold the +or
–
button to change the date
rapidly.
6. With the desired date on the display, press the
SET/WAVE button. The time-of-day will ash.
7. Set the desired time-of-day by pressing the
+or
–
button.
8. With the desired time-of-day on the display,
press the SET/WAVE button. The 12/24 hour
time format and temperature will ash.
9. Set the desired time format by pressing the
+button.
10.Set the desired temperature display by pressing
the
–
button.
11. With the desired time format and temperature
unit on the display, press the SET/WAVE button
to conrm the entry and exit the setting mode.
NOTE: Any manual changes made will be
automatically overridden with the next completed
signal reception from the Atomic Clock.

TRACEABLE
JUMBO
ATOMIC
WALL CLOCK
INSTRUCTIONS
®
MANUALLY INITIATING SIGNAL RECEPTION
If the unit has been moved from a location where
it was receiving a strong complete signal, it is
recommended that you manually initial signal
reception to insure that the unit will receive a
complete signal in its new location.
To manually initiate signal reception:
Press and release the SET/WAVE button will
begin ashing on the display, indicating that the
unit is attempting to receive the signal from the
Atomic Clock.
RESET BUTTON
This button is only used when the unit is operating
in an unfavorable way or malfunctioning, most
commonly caused by ESD (electrostatic discharge)
or radio interference. To reset the unit, press and
hold down the button for 2 seconds. All settings
will return to default values. Pressing the RESET
button has a similar effect as removing and re-
installing the batteries.
Control Company Cat. No. 1080
Traceable®is a registered trademark of Control Company.
©2013 Control Company. 92-1080-00 Rev. 0 070913
ALL OPERATIONAL DIFFICULTIES
If this unit does not function properly for any
reason, replace the batteries with new high quality
batteries (see “Battery Replacement” section).
Low battery power can occasionally cause any
number of “apparent” operational difculties.
Replacing the batteries with new fresh batteries will
solve most difculties.
BATTERY REPLACEMENT
Erratic readings, faint readings, or no display are
all indications that the batteries must be replaced.
Remove the battery cover. Remove the exhausted
batteries and replace them with a two (2) new
AA alkaline batteries. Replace the battery cover.
Upon initial installation of the battery, the unit
automatically initiates signal reception. (See the
“Operation” section for more details.)
WARRANTY, SERVICE, OR RECALIBRATION
For warranty, service, or recalibration, contact:
CONTROL COMPANY
4455 Rex Road
Friendswood, Texas 77546 USA
Ph. 281 482-1714 • Fax 281 482-9448
Control Company is ISO 9001 Quality-Certied by DNV and
ISO 17025 accredited as a Calibration Laboratory by A2LA.
This manual suits for next models
1
Other Traceable Clock manuals
Popular Clock manuals by other brands
Velleman
Velleman WTPC108 user manual
Turbolock
Turbolock TL-201 user manual
Datcon
Datcon DT9102 I4 operating instructions
Emperor Clock Company
Emperor Clock Company 200M Operation manual

Hammacher Schlemmer
Hammacher Schlemmer NC-1000 Use & care manual
Bad Dog Designs Nixie Clocks
Bad Dog Designs Nixie Clocks 6 TUBE NIXIE CLOCK How to operate
