Tracer BP2564 User manual

www.tracerpower.com
LiFePO4Battery Packs
With Spring loaded grab-handle.
Operating instructions (12V &24V)
INST250
ISSUE 1 - OCT 2021
www.tracerpower.com
Tracer
Cell Pack Solutions Ltd, 6 West Walpole Street,
South Shields, Tyne and Wear, NE33 5BY, UK.
T: +44 191 496 9999
E: info@tracerpower.com
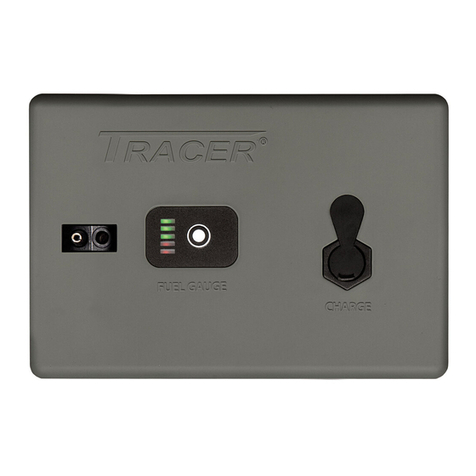
Battery fuel gauge operation
IMPORTANT: The battery Fuel Gauge must be
operated AT LEAST 2 minutes after the load
has been switched o. The battery will recover
slightly and ONLY then will the Fuel Gauge
give an accurate battery state indication.
After 2 minutes of no load - press and hold the
fuel gauge push button to observe the battery
charge status.
Warranty
Your new battery has a 12 month warranty
(from the date of purchase) against premature
failure due to defects in materials and/
or workmanship, subject to the following
conditions:
• The warranty does not cover failure due
to use outside of the specication and
parameters outlined in the previous sections
• The warranty does not cover failure due to
damage caused by abuse*
• The warranty does not cover failure from
excessive wear and tear even within the
warranty period
• A till or computer-generated proof of
purchase must accompany your claim
• The warranty is limited to the original owner
and is not transferable
Should any original defect appear, please
log your warranty claim with your retailer or
at tracerpower.com
The warranty is void if:
•The serial number is removed from the product
•The battery or connection system has been
modied in any way
•The battery has been left in a discharged state.
This warranty is limited to the original purchaser
and is in addition to your statutory rights.
*Charge your battery directly after each use.
Leaving your battery in a discharged state
will seriously and permanently damage its
performance. Please note we cannot uphold
warranty claims in these circumstances.
Supplied with
• Tracer LiFePO4 battery pack
• Tracer mains Charger
• Tracer TR8404 (0.5m lead)
Please visit tracerpower.com to see a full list
of available accessories.
Light Indicator Battery Charge Status
3 green and 2 red Battery fully charged
2 green and 2 red Over 50% capacity
1 green and 2 red Over 20% capacity
2 red Less than 20% capacity
1 red Less than 10% capacity
1 red ashing USB mode Active
No lights Battery empty

Features
• Lightweight – Approximately 1/2 of the
weight of equivalent capacity Sealed Lead Acid
batteries
• Flat discharge curve – Constant power for
longer
• Fuel Gauge – Displays battery power status
• Dierent connection options
• Folding carry handle
• Protected against:
overcharge, over temperature, over current,
deep discharge, short circuit.
Precautions in use
• DO NOT attempt to dismantle the battery pack
in any way
• DO NOT short circuit your battery pack – it
could overheat and cause re or explosion
• DO NOT use as a cranking battery or for start-
ing an engine
• Your battery pack will need to be charged fully
before use
• If storing your battery pack, store in a charged
state. Recharge every 4 months
• Charge your battery directly after each use.
Leaving your battery in a fully discharged state
will seriously and permanently damage its per-
formance
• It is recommended to recharge the battery pack
within 12 hours if fully discharged
• Excess heat will degrade the battery pack
rapidly. Always store your battery pack in a cool
dry place
• DO NOT leave for long periods in the sun or in
a hot vehicle
• DO NOT immerse your battery pack in water
• DO NOT dispose of in normal household refuse.
USB connectors operation
The battery is tted with three USB outputs.
These need to be turned on to give an output.
These are turned on and o as follows:
• Press and hold the fuel gauge button for
at least 3 seconds (the fuel gauge will show
the status of the battery during these three
seconds) until the bottom red LED starts
ashing, then release holding the button.
• The USB outputs are now turned on and the
red LED will keep ashing to indicate this.
• Whilst these USB outputs are activated,
to observe the battery status then just
momentarily press the Fuel Gauge push
button.
• The USB outputs will draw a small amount of
current from the battery and must be turned
o when not in use.
• To turn the USB outputs o then press
and hold the fuel gauge button for at least
3 seconds until the bottom red LED stops
ashing.
Optional Accessories
The following optional accessories are available
TR8125 - Eyelets to 12V Socket
TR8405 - EC5 to 2.5 DC Plug
TR8409 - EC5 to 2.1 DC Plug
TR8100/1 - Neoprene carry case
Please visit tracerpower.com to see a full
list of available accessories.
Congratulations on purchasing the latest in portable battery pack technology from Tracer Power.
Please take a moment to read carefully the following instructions to get the best performance
from your Lithium battery pack.
LITHIUM IRON PHOSPHATE BATTERY PACKS (LiFePO4)
With spring loaded grab-handle.
Recharging the battery pack
• Only use the LiFePO4 charger supplied with
the battery pack, or a Tracer approved charger.
Visit tracerpower.com for information on more
chargers.
• Do not use this charger for any other purpose.
It has been designed to be used with Tracer
LiFePO4 battery packs only.
1. Plug the charger into AC mains – the LED light
on the charger will glow GREEN
2. Plug the charger lead rmly into the battery
pack’s Charge port – the LED light on the charger
will change to RED to indicate charging
3. When the LED light changes back to GREEN the
battery pack is fully charged
4. Disconnect the charger from the battery pack
and from the AC mains
Additional charging information
DO NOT leave the charger connected to the
battery for long periods after the battery is
charged.
Charging voltage: 27.6V – 29.2V
Charge time: 4-6 hours (with supplied charger)
Uninterrupted Power Supply (UPS): It is
possible to use the battery pack whilst on
charge. The application’s current requirement
must not exceed the charger’s current, i.e. 2A
with supplied charger.
Code Model Dimensions (mm) Weight Charge Time (hrs) Run time(hrs) Max discharge current
A B C D 12V 4A 12V 10A 100W Continuous Peak (for 10ms)
BP2564 12V 16Ah 165 125 110 35 2 4-6 2-3 2 30A 90A
BP2568 12V 24Ah 165 160 110 35 2.9 6-8 3-4 3 30A 90A
BP2578 24V 8Ah 165 125 110 35 2 4-6 2-3 2 15A 30A
A
B
C
BP2564 BP2568 BP2578
D
BP2568 12V 24Ah 165 125 110 46 2.9 24V 2A 24V 5A
Other manuals for BP2564
1
This manual suits for next models
2
Other Tracer Batteries Pack manuals
Popular Batteries Pack manuals by other brands
W-Tec
W-Tec IN 20908 user manual
EGO
EGO BACKPACK LINK BH1001-FC Operator's manual
UPOWER Ecoline
UPOWER Ecoline NauticBattery NA-12Li100BL quick start guide
True blue power
True blue power TB40 Series Installation manual and operating instructions
ToughTested
ToughTested TT-PBW-SW8 user manual
CyberPower
CyberPower CS150U48V3 Installation & operation manual
