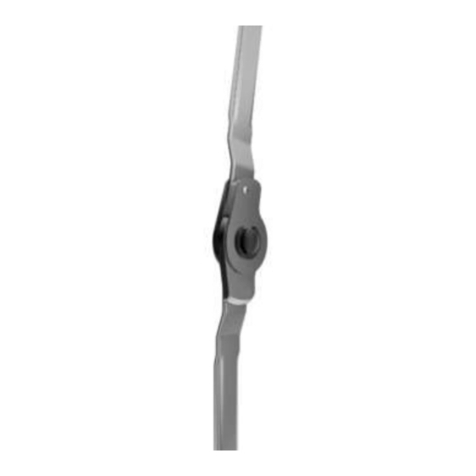
Tracoe experc Set twist User manual

Gebrauchsanweisung
TRACOE®experc Set twist / Set twist plus / Set vario
und TRACOE®experc Dilatations-Set für die perkutane Tracheotomie
Istruzioni per l’uso
TRACOE®experc set twist / set twist plus / set vario
e TRACOE®experc set per tracheotomia percutanea dilatativa
Instrucciones de uso
it TRACOE®experc twist / it twist plus / it vario
y it de dilatación TRACOE®experc para la traqueotomía percutánea
Instruções de uso
Conjunto TRACOE®experc twist / Conjunto twist plus / Conjunto vario
e Conjunto TRACOE®experc de dilatação para traqueotomia percutânea
Bruksanvisning för
TRACOE®experc set twist / set twist plus / set vario
och TRACOE®experc dilatations-set för perkutan trakeotomi
Használati utasítás
TRACOE®experc twist készlet / twist plus készlet / vario készlet
és TRACOE®experc tágító készlet perkután tracheosztómiához
äyttöohje
TRACOE®experc-sarja twist / sarja twist plus / sarja vario
sekä TRACOE®experc-laajennussarja ihonläpäisevän trakeostooman tekoa varten
Brugsanvisning til
TRACOE®experc sæt twist / sæt twist plus / sæt vario
og TRACOE®experc dilatations-sæt til perkutan trakeotomi
Instructions for Use
TRACOE®experc Set twist
(REF 320, REF 321, REF 322, REF 888-322),
TRACOE®experc Set twist plus
(REF 330, REF 331, REF 332, REF 888-332),
TRACOE®experc Set vario
(REF 420, REF 421, REF 422, REF 423, REF 424, REF 425)
and TRACOE® experc Dilation Set (REF 520)
for Percutaneous Tracheostomy
Mode d’emploi
it TRACOE®experc twist / it twist plus / it vario
et it de dilatation TRACOE®experc pour trachéotomie percutanée
TRACOE medical mbH
Reichelsheimerstr. 1/3, D-55268 Nieder-Olm / ermany
Tel. +49-6136-9169-0, Fax +49-6136-9169-200
E-Mail: [email protected], http://www.tracoe.com
Bruksanvisning
TRACOE®experc sett twist / sett twist plus / sett vario
og TRACOE®experc dilatasjonssett (REF 520) for perkutan trakeotomi
5
14
24
34
44
54
65
73
82
91
101
110
131
141
158
120
Gebruiksaanwijzing voor
TRACOE®experc set twist / set twist plus / set vario
en TRACOE®experc dilatatieset voor de percutane tracheotomie
GA_REF 320 425 520_10502_V03_040413_Layout 1 04.04.2013 23:01 Seite 1

GA_REF 320 425 520_10502_V03_040413_Layout 1 04.04.2013 23:01 Seite 2

GA_REF 320 425 520_10502_V03_040413_Layout 1 04.04.2013 23:01 Seite 3

4TRACOE percutan
US RI Atención: Si-
guiendo las leyes federales estadounidenses, la venta de este
dispositivo está sometida a prescripción medica
GA_REF 320 425 520_10502_V03_040413_Layout 1 04.04.2013 23:01 Seite 4

Instru tions for Use
TRACOE®exper Set twist
(REF 320, REF 321, REF 322, REF 888-322),
TRACOE®exper Set twist plus
(REF 330, REF 331, REF 332, REF 888-332),
TRACOE®exper Set vario
(REF 420, REF 421, REF 422, REF 423,
REF 424, REF 425)
and TRACOE®exper Dilation Set
(REF 520)
for Per utaneous Tra heostomy
General Information
The TRACOE®experc sets for percutaneous
tracheostomy are used for the percutaneous inser-
tion of a tracheostomy tube applying the one-step
dilation technique according to the Ciagla method
with the Seldinger guide wire.
REF 320, 321, 322, 888-322, 330, 331, 332, 888-332,
420, 421, 422, 423, 424 and 425 each consists of a
separately packed dilation set, containing an equip-
ment for the percutaneous placement of a tracheo-
stoma, and an individually packed tube set with
atraumatic inserter (twist) or atraumatic insertion
system (twist plus/vario). Both sets are supplied
either together in one combined outer package or
separately.
The dilation set can be obtained separately as
REF 520. It can be used in combination with all
the TRACOE tube sets with REF numbers ending
with the suffix P. The suffix –P means that a pre-
assembled atraumatic inserter (twist) or an atrau-
matic insertion system (twist plus/vario) and acces-
sories for percutaneous tracheostomy are supplied
with the tracheostomy tube.
The atraumatic inserter or atraumatic insertion sys-
tem ensures a stepless transition of the conical tip of
the inserter to the tube. This facilitates the introduc-
tion of the tracheostomy tube and avoids trauma to
the trachea (fracture of the tracheal rings).
For the tube sets with TRACOE®twist tubes (REF
301-P, 302-P, 306-P and 888-306-P) the stepless
transition is achieved using a radiopaque, collapsi-
ble silicone sleeve, which is attached to the tip of the
inserter.
For the tube sets with TRACOE®twist plus/vario
tubes (REF 311-P, 312-P, 316-P, 888-316-P, 450-P,
451-P, 460-P, 461-P, 470-P and 471-P) the radi-
opaque, collapsible silicone sleeve is located on the
guiding catheter, which is pre-fitted and enclosed
with the P-tube. Thus the inserter and the guiding
catheter with silicone sleeve together make up the
atraumatic insertion system.
The complete TRACOE®experc sets can be sup-
plied with the following types of tubes:
TRACOE®twist:
REF 320 contains REF 520 and REF 301-P,
REF 321 contains REF 520 and REF 302-P,
REF 322 contains REF 520 and REF 306-P,
REF 888-322 contains REF 520 and REF 888-306-P
TRACOE®twist plus:
REF 330 contains REF 520 and REF 311-P,
REF 331 contains REF 520 and REF 312-P,
REF 332 contains REF 520 and REF 316-P,
REF 888-332 contains REF 520 and REF 888-316-P
TRACOE®vario:
REF 420 contains REF 520 and REF 450-P,
REF 421 contains REF 520 and REF 451-P,
REF 423 contains REF 520 and REF 460-P,
REF 422 contains REF 520 and REF 470-P,
REF 424 contains REF 520 and REF 461-P,
REF 425 contains REF 520 and REF 471-P
For further details see Ordering Information (page
11-13).
ATTENTION: Before using the products read the
instructions for use very carefully. The instructions
refer exclusively to the above-named products. Per-
sons entrusted with the use of the products must be
familiar with these instructions.
When using REF 301-P, 302-P, 306-P, 888-306-P,
311-P, 312-P, 316-P, 888-316-P, 450-P, 451-P, 460-P,
461-P, 470-P and 471-P attention must be paid to the
relevant instructions for use.
Sterilisation: The products are ster-
ilised with ethylene oxide. Sterility is
guaranteed only if the package is intact and seal is
unbroken.
5
TRACOE percutan
TRACOE medical mbH
Reichelsheimerstr. 1/3, D-55268 Nieder-Olm / ermany
Tel. +49-6136-9169-0, Fax +49-6136-9169-200
E-Mail: [email protected], http://www.tracoe.com
GA_REF 320 425 520_10502_V03_040413_Layout 1 04.04.2013 23:01 Seite 5

ATTENTION: The TRACOE®experc tracheostomy
sets REF 320, 321, 322, 888-322, 330, 331, 332,
888-332, 420, 421, 422, 423, 424 and 425 contain
medical single-use products together with a tra-
cheostomy tube, which is intended for one patient
only.
Products for Single-Patient Use: The tracheostomy
tube contained in the tracheostomy set is a medical
product, which is only intended for one patient. Mul-
tiple uses for one and the same patient are permitted.
Useful Life of the tracheostomy tube: The manu-
facturer recommends that TRACOE®twist, TRACOE®
vario and TRACOE®twist plus tracheostomy tubes
should not be used for more than 29 days. Even tubes
that exhibit only minor damage must be replaced.
Frequent replacement of the tracheostomy tubes, in
particular the inner tube, is recommended and should
be supervised by the responsible doctor.
Composition/Disposal: All products described
above consist of materials which are internationally
approved for medical use and contain no latex. Dis-
posal may only occur with the valid national regula-
tions for waste materials.
ATTENTION: Percutaneous tracheostomy should
only be carried out by doctors or under the instruc-
tion and supervision of doctors who are trained and
experienced in this technique. The intervention is
usually carried out by two people. One person car-
ries out the intervention while the second person
administers the anaesthetic, monitors the patient and
also has the responsibility for the bronchoscopic
control throughout the procedure.
Storage: The products must be stored in a cool
and dry location. Temporary storage for ≤ 30 days
at ≤ +50 °C is possible. Protect the product from
sunlight and extreme cold.
Contents of the TRACOE®experc Dilation Set
REF 520 (see Fig. 1):
1. Scalpel
2. Syringe
3. Puncture cannula (14 gauge)
with Teflon catheter
4. uide wire (kink-resistant NiTiNOL)
with inserter
5. Short dilator 14 CH/FR
6. uiding catheter with safety stop
7. TRACOE®experc dilator
with hydrophilic coating
(slides easily after moistening)
8. 4 swabs
TRACOE®Tube Set twist with Atraumatic Inserter
for Percutaneous Tracheostomy:
1. TRACOE®twist tracheostomy tube with
2 inner cannulas and an atraumatic inserter
(see Fig. 2a)
2. Obturator, perforated
3. Neck strap
4. Sterile lubricating gel 2.7 g
5. Recannulation tube
6. REF 321/REF 888-322 also contains an occlu-
sion cap for the fenestrated inner tube with a
15 mm connector.
7. REF 322/REF 888-322 contains in addition 2 con-
nectors for connection to the suction devices.
TRACOE®twist plus/TRACOE®vario Tube Sets with
Atraumatic Insertion System for Percutaneous
Tracheostomy:
1. TRACOE®twist plus with 2 inner cannulas/
TRACOE®vario tracheostomy tube, each with
atraumatic insertion system (consisting of
inserter and guiding catheter with radiopaque,
collapsible silicone sleeve; see Fig. 2b + 2c)
2. Obturator
3. Neck strap
4. Sterile lubricating gel 2.7 g
5. REF 331 also contains an occlusion cap for the
fenestrated inner cannula with 15 mm connector
6. REF 332/REF 888-332, REF 422 and REF 425
contain in addition 2 connectors for connec
tion to the suction devices.
Sizes: The following table indicates which types are
available in which size.
The sizes correspond to the internal diameter of the
tube in millimetres.
For further details please see the Ordering Informa-
tion and the enclosed instructions for use for the
tubes used.
1. Indications
The TRACOE®experc sets for percutaneous tracheo-
stomy are used for the subcricoidal insertion of a
tracheostomy tube into the trachea. Dilation takes
place in one step according to the Ciagla method
using a Seldinger guide wire.
6TRACOE percutan
Type REF Size
twist
twist plus
vario
(without subglottal suction line)
vario
(with subglottal suction line)
320, 321, 322, 888-322
330, 331, 332, 888-332
420, 421, 423, 424
422, 425
07, 08, 09
07, 08, 09,10
07, 08, 09
08, 09
GA_REF 320 425 520_10502_V03_040413_Layout 1 04.04.2013 23:01 Seite 6

2. Contraindications
2.1 Absolute Contraindications
The following count as absolute contraindications:
- positioning the tracheostomy tube in emergencies,
- application in paediatrics,
- existing infections in the area of the tracheostomy,
- existing malignancy in the area of the tracheostomy,
- unstable fracture of the cervical spine and
- uncertainty about the identification of the anatomi-
cal orientation points.
2.2 Relative Contraindications
The following count as relative contraindications in
which the risks have to be considered alongside the
benefits of the procedure:
- an enlarged thyroid gland,
- previous surgical interventions in the neck region
(e.g. thyroidectomy),
- increased tendency to bleed, e.g. in the case of
treatment with anticoagulants,
- unusually deep-seated trachea, e.g. in the case
of obesity, where if necessary an extra-long tub has
to be inserted.
3. Special Instructions and
Precautionary Measures
Attention must be paid to the following instructions
and precautionary measures:
- A tracheostoma which has been created by means
of dilative tracheotomy has the special advantage
that it normally heals independently leaving only
minor scarring.
On the other hand it must be considered that using
the dilative technique in most cases the insertion of
the tracheostomy tube is more difficult; therefore, this
method bears a higher risk, e.g. that the insertion of
the tube might not be carried out quick enough, that
the trachea might be damaged or that bleedings
might occur. Furthermore there is the risk that the
trachestomy tube might erroneously be inserted via
the wrong way (via falsa). Due to these reasons the
insertion of a trachestomy tube should always be
carried out by trained staff only and under the obser-
vance of adequate precautionary measures.
In case of long term users the creation of an epithe-
lial stoma is therefore recommended.
- The first placement of a tracheostomy tube must be
carried out under aseptic conditions.
- It is recommended to carry out the percutaneous
tracheotomy under bronchoscopic control, in order to
monitor the intratracheal position of the puncture can-
nula, the guide wire, the dilators and the tracheosto-
my tube and to avoid the danger of paratracheal
insertion or injury to the trachea. For this purpose it is
highly recommended to use the tracheostomy endo-
scope for dilation tracheostomy according to Klemm
(details see the relevant instructions for use).
- It is recommended, for instance by means of ultra-
sound, to identify tracheal and pretracheal condi-
tions like the thyroid gland isthmus, large vessels as
well as cricoid cartilages to ascertain the optimal
spot for puncture and to avoid bleeding.
ATTENTION: With every percutaneous tracheosto-
my there is a risk of bleeding, hypoxia, subcuta-
neous emphysema and/or pneumothorax.
- During surgery the patient’s breathing must be
guaranteed with an endotracheal tube and constant
oximetric monitoring.
- If there are anomalous vessels present, which can
be identified by ultrasound examination, this can
cause significant bleeding.
- In the event of haemorrhages this can cause air-
way obstructions if the blood is not immediately suc-
tioned off.
- Puncture of the trachea must be checked by the
aspiration of air.
- Following puncture, the tip of the puncture cannu-
la should be angled at approx. 60º vis à vis the ante-
rior wall of the trachea in order to avoid injuries to the
posterior wall of the trachea. This also applies to the
subsequent insertion of the guide wire and dilators.
- To avoid injuries to the posterior wall of the trachea
the distal tip of the guiding catheter must never jut
out over the tip of the guide wire. Therefore the prox-
imal guide wire marking must always be at the prox-
imal end of the guiding catheter.
- The safety stop of the guiding catheter should
always be placed immediately in front of the tip of
the experc dilator or the atraumatic inserter. For con-
trol/checking purposes the guiding catheter has
appropriate markings.
- The experc dilator should not be inserted beyond
the “MAXIMUM INSERTION” mark (skin level) in or-
der to avoid injuries to the trachea at the level of the
carina. This is particularly critical with small patients
(height approx. 150 cm or smaller; body weight 50 kg
or less).
- When inserting the experc dilator or the tracheosto-
my tube with atraumatic inserter or atraumatic inser-
tion system, excessive rotating movements must be
avoided as this can damage the trachea.
- Dilation should be carried out in line with the tube
size so that insertion of the tracheostomy tube is pos-
sible without exerting pressure.
- The atraumatic inserter or the atraumatic insertion
system must be positioned in the tracheostomy tube
such that the collapsible silicone sleeve balances the
sudden change in diameter between the inserter and
7
TRACOE percutan
GA_REF 320 425 520_10502_V03_040413_Layout 1 04.04.2013 23:01 Seite 7

cannula. The stepless transition assures an easier
passage and thus atraumatic insertion of the tube.
- The position of the tracheostomy tube should be
checked by brochoscopic visual inspection and/or
by chest X-ray.
- After ensuring the tube is in the correct position,
ventilation by the endotracheal tube is changed to
the tracheostomy tube; only then the latter is allowed
to be blocked. If there is blocking of the tracheosto-
my tube during ventilation via the endotracheal tube,
there is an acute danger of neck emphysema.
4. Instructions for Use
4.1 Preparation of the TRACOE®experc Sets
(Dilation Set and Tube Set)
1. After removal from the packaging, the dilation set
and the tube set are checked for completeness and
functionality.
2. Check the cuff of the tracheostomy tube for leaks
by a test inflation. If it proves to be airtight, deflate
the cuff completely while pushing it upwards to-
wards the flange in order to facilitate insertion of the
tube.
3. For the TRACOE®vario tubes, after pressing the
spring element, turn the flange to set it in the correct
horizontal position.
To design the flange locking device as safe as pos-
sible, a lever system was developed. If the lever is
pushed upwards, this provides an additional locking
function for the flange on the tube ; If it is pushed
downwards, the locking function is released and
the flange can be pushed along the tube by press-
ing the spring element as described above.
4. Check
- when using the dilation set (REF 520) that the guide
wire can be advanced without obstruction through
the short 14 CH/FR dilator, and
- when using the TRACOE®twist plus/TRACOE®vario
tube sets (REF 330, 331, 332, 888-332, 420, 421,
422, 423, 424 and 425) that the guide wire can also
be advanced without obstruction through the guid-
ing catheter with radio-opaque, collapsible silicone
sleeve.
WARNING: The atraumatic inserter or the atraumat-
ic insertion system contained in the tube must only
be used with its appropriate tracheostomy tube
and with the correct size. The size is marked on the
inserters.
4.2 Patient Preparation
1. The patient should be examined for anatomical
anomalies of the blood vessels in the neck region.
2. Patient position: on back with a pillow beneath the
shoulders with head and neck stretched (see Fig.
3); the head part of the patient’s bed should be
raised by 30-40º.
3. Disinfecting the skin in the neck region and cov-
ering with sterile drapes.
4. Patient sedation and monitoring of vital functions
(oximetry, capnography, EC , blood pressure
measurement).
5. Prior to surgery, the pharynx should be suctioned,
in case an endotracheal tube is used for ventilation
it should be unblocked and the tube with the cuff
area withdrawn as far as the entrance of the larynx
(approx. 1 cm). Withdrawing the tube prevents the
tube cuff from being pierced during tracheal punc-
ture. The cuff of the endotracheal tube is reinflated if
necessary and ventilation adjusted with respect to
volume per minute.
4.3 Implementation
4.3.1 Intervention
1. Palpation of the orientation points (cricoid cartilage,
conic ligament, tracheal ring), where necessary
making skin marking in the planned incision area. The
puncture and subsequent placing of the tube takes
place typically between the 2. and 3. or the 3. and 4.
tracheal ring (see Fig. 4 and 5).
2. After infiltration of a local anaesthetic (e.g. 1%
Lidocaine with adrenaline) a 1.5 – 2 cm long incision
is made across the site of placement (see Fig. 5).
Then careful blunt preparation takes place on to the
anterior wall of the trachea. If necessary, the mid-line
of the trachea is freed of tissue and then the cricoid
cartilage palpated. If necessary, additional local
anaesthetic can be injected into the prepared region.
If the thyroid gland isthmus is located in the prepara-
tion area, this should be carefully pushed downwards.
3. The intervention should take place under broncho-
scopic control. This can reduce the risk of injuries to
the trachea.
4. The puncture of the trachea typically takes place
between the 2. and 3. or the 3. and 4. tracheal ring in
a caudal direction. To do this a puncture cannula is
used with a Teflon catheter and an attached syringe
filled partly with sterile saline solution or sterile water.
Push the puncture tube as far forward in a posterior
and caudal direction until air bubbles can be drawn
in. The tube should now be tilted at an angle of
approx. 60º vis à vis the anterior wall of the trachea
(see Fig. 6).
8TRACOE percutan
GA_REF 320 425 520_10502_V03_040413_Layout 1 04.04.2013 23:01 Seite 8

ATTENTION: Injury of the posterior wall of the tra-
chea must be avoided at all costs (bronchoscopic
control). In addition care must be taken that the cuff
of the endotracheal tube is not pierced with the
puncture cannula.
5. When air can be aspirated freely, the puncture
cannula is withdrawn from the Teflon catheter and
the catheter is pushed forward several millimetres in
a posterior and caudal direction (see Fig. 7). Then
air should be once again aspirated out of the tra-
chea with the syringe in order to check the position
of the catheter tip.
6. Then the guide wire is taken out of its sheath
(approx. 8 cm) until the J-shaped tip is located in the
straight inserter.
7. Then the inserter is put on to the Teflon catheter
and the guide wire carefully pushed through the
Teflon catheter up to its first marking (approx. 10 cm)
into the trachea (see Fig. 8). It should be possible to
easily push the guide wire forward and move it freely
in the catheter. If this manoeuvre causes the guide
wire to kink, then it must be replaced by an undam-
aged one. With the help of the bronchoscope it is
possible to check that the guide wire is being pushed
in a caudal direction. Then, the Teflon catheter can be
completely pulled out over the guide wire, whereby
the guide wire remains in its position in the trachea.
8. The short dilator (14 CH/FR) is inserted over the
guide wire into the trachea and the puncture site
dilated with slight rotations (see Fig. 9). Care must
be taken to ensure that the dilator is not out of align-
ment with the guide wire (to avoid damaging the
tip) and that it is introduced in a way that does not
damage the posterior wall of the trachea (broncho-
scope). Then the dilator is removed. In so doing the
position of the guide wire should remain unchanged.
9. The guiding catheter from the dilation set is
pushed forward with the side of the safety stop (in
the direction of the arrow) along the guide wire as far
into the trachea until the safety stop on the guiding
catheter reaches skin level (see Fig. 10). The proxi-
mal marking of the guide wire should at the same
time be at the proximal end of the guiding catheter.
4.3.2 Single-Step Dilation
1. To activate the lubrication coating of the experc
dilator, the narrow end of the dilator is immersed
immediately prior to dilation in sterile saline solution
or water up to the “MAXIMUM INSERTION” mark.
2. The experc dilator is pushed forward with its dis-
tal tip initially as far as the safety stop and over the
guiding catheter. In order to stretch the puncture
channel, the dilator together with the guiding cathe-
ter are carefully pushed forwards and backwards
into the trachea until the opening is somewhat big-
ger than the external diameter of the selected tra-
cheostomy tube (see Fig. 11). For purposes of ori-
entation, there are markings at 38 CH/FR and 41
CH/FR (“MAXIMUM INSERTION”) on the dilator.
During dilation care should be taken that the position
of the guiding catheter and guide wire remain con-
stant in relation to the dilator.
WARNING: It is recommended not to insert the dila-
tor deeper than the “MAXIMUM INSERTION" mark
(skin level). Otherwise it can cause damage to the
trachea and/or carina. Rotational movements should
be avoided during insertion of the dilator. Likewise,
trauma to the tracheal rings should be avoided at
all costs.
4.3.3 Removing the Dilator
ATTENTION: Please pay attention to the differ-
ences between the sets with the TRACOE®twist
tubes and those with the TRACOE®twist plus and
TRACOE®vario tubes!
With TRACOE®twist Tubes:
The experc dilator is removed and the guiding
catheter remains with the Seldinger guide wire in
situ. Care should be taken that the safety stop of the
guiding catheter is situated at skin level, as is the
case before dilation, and the proximal marking of the
guide wire can be immediately recognised outside
the guiding catheter (see Fig. 12).
For TRACOE®twist plus and/or TRACOE®vario Tubes:
The dilator and the guiding catheter are removed
either one after the other or together at the same
time. The Seldinger guide wire remains in the patient
(see Fig. 12).
4.3.4 Inserting the Tracheostomy Tube
1. The collapsible silicone sleeve and the tracheo-
stomy tube are made to slide easily with the help of
a lubricant.
ATTENTION: Please be aware of the differences
between the sets with TRACOE®twist tubes and
those with TRACOE®twist plus/TRACOE®vario
tubes.
2a. With TRACOE®twist Tubes:
The atraumatic inserter located in the tracheostomy
tube is pushed over the guiding catheter as far as
the safety stop. The unit composed of guiding cathe-
ter and atraumatic inserter with tube is then intro-
9
TRACOE percutan
GA_REF 320 425 520_10502_V03_040413_Layout 1 04.04.2013 23:01 Seite 9

duced with a slight rotational movement into the tra-
chea and pushed as far forward until the flange has
reached skin level (see Fig. 13). It is recommended
that the tube and the handle of the atraumatic insert-
er are grasped together.
During insertion of the tube care should be taken
that the position of the guiding catheter and guide
wire remain constant in relation to the atraumatic
inserter.
The proximal marking of the guide wire should
at the same time be at the proximal end of the guid-
ing catheter.
Then, the atraumatic inserter and the recannulation
tube, the guiding catheter with guide wire respec-
tively, are withdrawn while the tracheostomy tube
remains in the trachea. This is most easily achieved
by fixing the tube flange with one hand and with-
drawing the inserter by pressing against the tube
flange with the thumb of the other hand.
CAUTION: After removing the inserter, check to
ensure that the silicone sleeve is still located
on the inserter (see Figure 14a). If this is not the
case, the radio-opaque silicone sleeve must
immediately be removed from the tube or airways
using a bronchoscope.
2b. For TRACOE®twist plus/TRACOE®vario Tubes:
The unit composed of tube with atraumatic insertion
system is pushed across the guide wire which acts
as a guide rail and is then inserted with a slight rota-
tional movement into the trachea and pushed as
far forward until the flange has reached skin level
(see Fig. 13). During insertion of the tracheostomy
tube care must absolutely be taken that - under no
circumstances - the inserter and the guiding
catheter with silicone sleeve might slip out of the
tube as this would cause the risk that the silicone
sleeve might slip off the tip of the inserter. This would
substantially complicate any further insertion of the
tube. For this reason we recommend to fix the grip
of the inserter and the tube always with one hand
during the whole procedure.
During insertion of the tube care should be taken
that the position of the guiding catheter and guide
wire remain constant in relation to the inserter.
The proximal marking of the guide wire should at the
same time be visible at the proximal end of the guid-
ing catheter.
Next the guide wire and then either first the inserter
and then the guiding catheter or both together are
withdrawn from the tracheostomy tube, leaving the
tube in the trachea.
In case the removal of the inserter of the TRACOE®
twist plus tubes proves to be very rough-running, the
inserter can be removed together with the inner
tube. In this case it is necessary to open the locking
device of the inner tube by turning the white sleeve
nut anti-clockwise by 45°.
CAUTION: On no account should the guiding
catheter be removed first.
The easiest way to remove the inserter and guiding
catheter is by securing the tube with one hand and
withdrawing the atraumatic insertion system by push-
ing against the 15 mm connector or neck flange with
the thumb of the other hand.
CAUTION: After removing the inserter, check to
ensure that the silicone sleeve is still located
on the inserter (see Figure 14b + 14c). If this is not
the case, the radio-opaque silicone sleeve must
immediately be removed from the tube or airways
using a bronchoscope.
3. The trachea and the tube should then be suc-
tioned with care in order to guarantee a clear airway.
4. Before removal of the unblocked endotracheal
tube the position and function of the tracheostomy
tube must be checked. Then, ventilation is changed
to the tracheostomy tube.
5. The low-pressure cuff of the tracheostomy tube is
blocked by means of setting the lowest pressure
needed to achieve a seal (typically 15-25 mbar).
ATTENTION: Once the tracheostomy tube is
blocked, on no account should ventilation with
the endotracheal tube be continued (danger of
emphysema).
6. The tracheostomy tube should be fixed with a
neck strap.
7. To improve hygiene and patient comfort, wound
protection (e.g. TRACOE®purofoam REF 958) should
be applied. After the intervention the head part of the
patient’s bed should remain raised at approx. 30-40ºC
for about 1 hour.
4.3.5 After Care
The tracheostoma should be covered with a sterile
wound dressing as required. A change of the tra-
cheostomy tube within the first few days after the
tracheostomy should only be carried out in excep-
tional cases and only using the Seldinger technique
and intubation equipment.
TRACOE percutan
10
GA_REF 320 425 520_10502_V03_040413_Layout 1 04.04.2013 23:01 Seite 10

Ordering Information TRACOE®twist
TRACOE®experc Dilation Set REF 520 1
TRACOE®twist tracheostomy tube,
unfenestrated, with low-pressure cuff
and atraumatic inserter (REF 301-P)
TRACOE®twist tracheostomy tube,
fenestrated, with low-pressure cuff
and atraumatic inserter (REF 302-P)
TRACOE®twist tracheostomy tube, unfenestrated,
with low-pressure cuff, subglottal suction line
and atraumatic inserter (REF 306-P)
07
08
09
07
08
09
07
08
09
07
08
09
REF 301-07-P
REF 301-08-P
REF 301-09-P
REF 302-07-P
REF 302-08-P
REF 302-09-P
REF 306-07-P
REF 306-08-P
REF 306-09-P
REF 888-306-07-P
REF 888-306-08-P
REF 888-306-09-P
1
1
1
1
1
1
1
1
1
1
1
1
Size Order No. Piece/
Packaging
TRACOE®twist Tracheostomy Tube
with Atraumatic Inserter, consisting of:
Size Order No. Piece/
Packaging
TRACOE®experc Set twist for Percutaneous Tracheostomy,
consisting of:
TRACOE®experc Dilation Set (REF 520) and
TRACOE®twist tracheostomy tube, unfenestrated,
with low-pressure cuff
and atraumatic inserter (REF 301-P)
TRACOE®experc Dilation Set (REF 520) and
TRACOE®twist tracheostomy tube, fenestrated,
with low-pressure cuff
and atraumatic inserter (REF 302-P)
TRACOE®experc Dilation Set (REF 520) and
TRACOE®twist tracheostomy tube, unfenestrated
with low-pressure cuff, subglottal suction line
and atraumatic inserter (REF 306-P)
07
08
09
07
08
09
07
08
09
07
08
09
REF 320-07
REF 320-08
REF 320-09
REF 321-07
REF 321-08
REF 321-09
REF 322-07
REF 322-08
REF 322-09
REF 888-322-07
REF 888-322-08
REF 888-322-09
1
1
1
1
1
1
1
1
1
1
1
1
TRACOE®experc Dilation Set (REF 520) and
TRACOE®twist tracheostomy tube, fenestrated
with low-pressure cuff, subglottal suction line
and atraumatic insertion system (REF 888-306-P)
TRACOE®twist tracheostomy tube, fenestrated
with low-pressure cuff, subglottal suction line
and atraumatic insertion system (REF 888-306-P)
5. Returns
Returns of used products are accepted only if
accompanied by a completed decontamination
certificate. You can obtain the required form either
directly from TRACOE medical or from the website
(www.tracoe.com).
6. General Terms and Conditions
Sales and deliveries of all TRACOE®products are
carried out exclusively according to the eneral
Terms and Conditions which can be obtained direct-
ly from TRACOE medical mbH or from the website
(www.tracoe.com).
11
TRACOE percutan
GA_REF 320 425 520_10502_V03_040413_Layout 1 04.04.2013 23:01 Seite 11

12 TRACOE percutan
Ordering Information TRACOE®twist plus
TRACOE experc Dilation Set (REF 520) and
TRACOE twist plus tracheostomy tube
with low-pressure cuff, unfenestrated
and atraumatic insertion system (REF 311-P)
TRACOE experc Dilation Set (REF 520) and
TRACOE twist plus tracheostomy tube
with low-pressure cuff, fenestrated
and atraumatic insertion system (REF 312-P)
TRACOE®experc Set twist plus
for Percutaneous Tracheostomy, consisting of:
Size Order No. Piece/
Packaging
TRACOE experc Dilation Set REF 520 1
07
08
09
10
07
08
09
10
REF 330-07
REF 330-08
REF 330-09
REF 330-10
REF 331-07
REF 331-08
REF 331-09
REF 331-10
1
1
1
1
1
1
1
1
07
08
09
10
07
08
09
10
REF 332-07
REF 332-08
REF 332-09
REF 332-10
REF 888-332-07
REF 888-332-08
REF 888-332-09
REF 888-332-10
1
1
1
1
1
1
1
1
TRACOE experc Dilation Set (REF 520) and
TRACOE twist plus tracheostomy tube
with low-pressure cuff, unfenestrated,
with subglottal suction line and
atraumatic insertion system (REF 316-P)
TRACOE experc Dilation Set (REF 520) and
TRACOE twist plus tracheostomy tube
with low-pressure cuff, fenestrated,
with subglottal suction line and
atraumatic insertion system (REF 888-316-P)
Piece/
Packaging
TRACOE®twist plus Tracheostomy Tube
with Atraumatic Insertion System, consisting of:
Size Order No.
1
1
1
1
1
1
1
1
TRACOE twist plus tracheostomy tube
with low-pressure cuff, unfenestrated,
with atraumatic insertion system (REF 311-P)
TRACOE twist plus tracheostomy tube
with low-pressure cuff, fenestrated,
with atraumatic insertion system (REF 312-P)
07
08
09
10
07
08
09
10
REF 311-07-P
REF 311-08-P
REF 311-09-P
REF 311-10-P
REF 312-07-P
REF 312-08-P
REF 312-09-P
REF 312-10-P
1
1
1
1
1
1
1
1
TRACOE twist plus tracheostomy tube
with low-pressure cuff, unfenestrated,
with subglottal suction line and
atraumatic insertion system (REF 316-P)
TRACOE twist plus tracheostomy tube
with low-pressure cuff, fenestrated,
with subglottal suction line and
atraumatic insertion system (REF 888-316-P)
07
08
09
10
07
08
09
10
REF 316-07-P
REF 316-08-P
REF 316-09-P
REF 316-10-P
REF 888-316-07-P
REF 888-316-08-P
REF 888-316-09-P
REF 888-316-10-P
GA_REF 320 425 520_10502_V03_040413_Layout 1 04.04.2013 23:01 Seite 12

Ordering Information TRACOE®vario
TRACOE®experc Set vario
for Percutaneous Tracheostomy, consisting of:
Size Order No. Piece/
Packaging
TRACOE®experc Dilation Set REF 520 1
TRACOE®experc Dilation Set (REF 520) and
TRACOE®vario tracheostomy tube
with low-pressure cuff, spiral reinforcement,
and atraumatic insertion system (REF 450-P)
TRACOE®experc Dilation Set (REF 520) and
extra-long TRACOE®vario XL tracheostomy tube
with low-pressure cuff
and atraumatic insertion system (REF 451-P)
TRACOE®experc Dilation Set (REF 520) and
TRACOE®vario extract tracheostomy tube with
low-pressure cuff, subglottal suction line
and atraumatic insertion system (REF 470-P)
07
08
09
07
08
09
REF 420-07
REF 420-08
REF 420-09
REF 421-07
REF 421-08
REF 421-09
1
1
1
1
1
1
07
08
09
REF 423-07
REF 423-08
REF 423-09
1
1
1
TRACOE®experc Dilation Set (REF 520) and
TRACOE®vario tracheostomy tube
with low-pressure cuff
and atraumatic insertion system (REF 460-P)
REF 422-08
REF 422-09
08
09
1
1
TRACOE®vario tracheostomy tube
with low-pressure cuff, spiral reinforcement
and atraumatic insertion system (REF 450-P)
TRACOE®vario XL tracheostomy tube
with low-pressure cuff, spiral reinforcement
and atraumatic insertion system (REF 451-P)
TRACOE®vario tracheostomy tube
with low-pressure cuff and
atraumatic insertion system (REF 460-P)
TRACOE®vario extract tracheostomy tube
with low-pressure cuff, subglottal suction line
and atraumatic insertion system (REF 470-P)
07
08
09
07
08
09
07
08
09
07
08
09
REF 450-07-P
REF 450-08-P
REF 450-09-P
REF 451-07-P
REF 451-08-P
REF 451-09-P
REF 460-07-P
REF 460-08-P
REF 460-09-P
REF 461-07-P
REF 461-08-P
REF 461-09-P
1
1
1
1
1
1
1
1
1
1
1
1
08
09
REF 470-08-P
REF 470-09-P
1
1
TRACOE®vario Tracheostomy Tube
with Atraumatic Inserter, consisting of:
Size Order No. Piece/
Packaging
07
08
09
REF 424-07
REF 424-08
REF 424-09
1
1
1
TRACOE®experc Dilation Set (REF 520) and
TRACOE®vario XL tracheostomy tube
with low-pressure cuff and
atraumatic insertion system (REF 461-P)
REF 425-08
REF 425-09
08
09
1
1
TRACOE®experc Dilation Set (REF 520) and
TRACOE®vario extract XL tracheostomy tube
with low-pressure cuff, subglottal suction line and
atraumatic insertion system (REF 471-P)
TRACOE®vario XL tracheostomy tube
with low-pressure cuff and
atraumatic insertion system (REF 461-P)
TRACOE®vario extract XL tracheostomy tube
with low-pressure cuff, subglottal suction line
and atraumatic insertion system (REF 471-P)
08
09
REF 471-08-P
REF 471-09-P
1
1
13
TRACOE percutan
GA_REF 320 425 520_10502_V03_040413_Layout 1 04.04.2013 23:01 Seite 13

Gebrau hsanweisung
TRACOE®exper Set twist
(REF 320, REF 321, REF 322, REF 888-322),
TRACOE®exper Set twist plus
(REF 330, REF 331, REF 332, REF 888-332),
TRACOE®exper Set vario
(REF 420, REF 421, REF 422, REF 423,
REF 424, REF 425)
und TRACOE®exper Dilatations-Set
(REF 520)
für die perkutane Tra heotomie
Allgemeine Informationen
Die TRACOE®experc Sets für die perkutane Tracheo-
tomie dienen zur perkutanen Einführung einer Tra-
cheostomiekanüle unter Verwendung der einstufigen
Dilatationstechnik nach Ciaglia mit Seldingerdraht.
REF 320, 321, 322, 888-322, 330, 331, 332, 888-
332, 420, 421, 422, 423, 424 und 425 bestehen
jeweils aus einem separat verpackten Dilatations-
Set, das ein Instrumentarium für die perkutane Anla-
ge eines Tracheostomas enthält, und einem einzeln
verpackten anülen-Set mit atraumatischer Einführ-
hilfe (twist) bzw. atraumatischem Einführsystem (twist
plus/vario). Beide Sets werden sowohl in einer ge-
meinsamen Umverpackung als auch separat aus-
geliefert.
Das Dilatations-Set kann separat erworben werden
und hat die Bezeichnung REF 520. Es kann in Kom-
bination mit allen TRACOE®Kanülen-Sets verwendet
werden, deren REF Nummer mit dem Suffix –P endet.
Das Suffix –P bedeutet, dass der Tracheostomieka-
nüle eine vormontierte atraumatische Einführhilfe
(twist) bzw. ein atraumatisches Einführsystem (twist
plus/vario) sowie Zubehör für die perkutane Tracheo-
tomie beiliegt.
Die atraumatische Einführhilfe bzw. das atraumati-
sche Einführsystem gewährleistet einen stufenlosen
Übergang von der konischen Spitze der Einführhilfe
zum Kanülenrohr. Dies erleichtert die Einführung
der Tracheostomiekanüle und vermindert das Trauma
der Trachea (Fraktur der Ringknorpel). Bei den Kanü-
len- Sets mit TRACOE®twist Kanülen (REF 301-P,
302-P, 306-P und 888-306-P) wird der stufenlose
Übergang durch einen röntgendichten, umklapp-
baren Schirm realisiert, der an der Spitze der Ein-
führhilfe befestigt ist.
Bei den Kanülen-Sets mit TRACOE®twist plus/vario
bzw. Kanülen (REF 311-P, 312-P, 316-P, 888-316-P,
450-P, 451-P, 460-P, 461-P, 470-P und 471-P) befin-
det sich der röntgendichte, umklappbare Silikon-
schirm auf dem Führungskatheter, der in der P-
Kanüle vormontiert beiliegt. Dabei bilden die Ein-
führhilfe und der Führungskatheter mit Silikonschirm
gemeinsam das atraumatische Einführsystem.
Die kompletten TRACOE®experc Sets sind mit fol-
genden Kanülentypen erhältlich:
TRACOE®twist:
REF 320 enthält REF 520 und REF 301-P,
REF 321 enthält REF 520 und REF 302-P,
REF 322 enthält REF 520 und REF 306-P,
REF 888-322 enthält REF 520 und REF 888-306-P
TRACOE®twist plus:
REF 330 enthält REF 520 und REF 311-P,
REF 331 enthält REF 520 und REF 312-P,
REF 332 enthält REF 520 und REF 316-P,
REF 888-332 enthält REF 520 und REF 888-316-P
TRACOE®vario:
REF 420 enthält REF 520 und REF 450-P,
REF 421 enthält REF 520 und REF 451-P,
REF 423 enthält REF 520 und REF 460-P,
REF 422 enthält REF 520 und REF 470-P,
REF 424 enthält REF 520 und REF 461-P,
REF 425 enthält REF 520 und REF 471-P
Weitere Details s. Bestellinformationen (Seite 21-23).
ACHTUNG: Vor ebrauch der Produkte sind die
beiliegenden ebrauchsanweisungen sorgfältig zu
lesen. Die Anweisungen beziehen sich ausschließ-
lich auf die oben genannten Produkte. Diese Hinwei-
se müssen den mit der Anwendung der Produkte
betrauten Personen bekannt sein. Bei Anwendung
von REF 301-P, 302-P, 306-P, 888-306-P, 311-P,
312-P, 316-P, 888-316-P, 450-P, 451-P, 460-P, 461-P,
470-P und 471-P müssen die jeweiligen ebrauchs-
anweisungen beachtet werden.
Sterilisation: Die Produkte sind mit
Ethylenoxid sterilisiert. Sterilität ist nur
bei intakter und allseitig geschlossener Verpackung
gewährleistet.
14 TRACOE percutan
14
TRACOE medical mbH
Reichelsheimerstr. 1/3, D-55268 Nieder-Olm / ermany
Tel. +49-6136-9169-0, Fax +49-6136-9169-200
E-Mail: [email protected], http://www.tracoe.com
GA_REF 320 425 520_10502_V03_040413_Layout 1 04.04.2013 23:01 Seite 14

ACHTUNG: Die TRACOE®experc Tracheotomie-
Sets REF 320, 321, 322, 888-322, 330, 331, 332,
888-332, 420, 421, 422, 423, 424 und 425 enthalten
medizinische Einmalprodukte sowie eine Tracheos-
tomiekanüle, die nur für einen Patienten bestimmt
sind.
Einpatientenprodukt: Die im Tracheotomie-Set ent-
haltene Tracheostomiekanüle ist ein Medizinprodukt,
das nur für einen Patienten bestimmt ist. Eine mehr-
fache Anwendung bei ein und demselben Patienten
ist zulässig.
Nutzungsdauer der Tracheostomiekanüle: Der
Hersteller empfiehlt, TRACOE®twist, TRACOE®vario
und TRACOE®twist plus Kanülen nicht länger als 29
Tage zu verwenden. Kanülen, die auch nur gering-
fügige Beschädigungen aufweisen, müssen unbe-
dingt ausgetauscht werden. Häufiges Auswechseln
der Tracheostomiekanüle, insbesondere der Innen-
kanüle, wird empfohlen und sollte vom zuständigen
Arzt überwacht werden.
Bestandteile/Entsorgung: Alle vorstehend beschrie-
benen Produkte bestehen aus Materialien, die für
medizinische Anwendungen international zugelassen
sind. Sie enthalten kein Latex. Die Entsorgung der
Produkte darf nur entsprechend den geltenden
nationalen Bestimmungen für Abfallstoffe vorgenom-
men werden.
ACHTUNG: Die perkutane Tracheotomie sollte nur
von Ärzten oder unter Anleitung und Aufsicht von
Ärzten durchgeführt werden, die in dieser Technik
ausgebildet und erfahren sind. Der Eingriff wird in
der Regel von zwei Personen durchgeführt. Eine
Person führt den Eingriff durch, die zweite Person ist
für Narkose und Überwachung des Patienten sowie
für die bronchoskopische Kontrolle des Eingriffes
verantwortlich.
Lagerung: Die Produkte sind kühl und trocken zu
lagern. Eine kurzzeitige Lagerung für ≤ 30 Tage bei
≤ +50 °C ist möglich. Schützen Sie das Produkt vor
Sonnenlicht und extremer Kälte.
Inhalt von TRACOE®experc Dilatations-Set
REF 520 (siehe Abb. 1):
1. Skalpell
2. Spritze
3. Punktionskanüle (14 ) mit Teflonkatheter
4. Führungsdraht (knickresistentes NiTiNOL)
mit Einführungsaufsatz
5. Kurzer Dilatator 14 CH/FR
6. Führungskatheter mit Sicherheitssperre
7. TRACOE®experc Dilatator mit hydrophiler
Beschichtung (wird nach Benetzung gleitfähig)
8. 4 Kompressen
anülen-Set TRACOE®twist mit atraumatischer
Einführhilfe für die perkutane Tracheotomie:
1. TRACOE®twist Tracheostomiekanüle mit
2 Innenkanülen und atraumatischer Einführhilfe
(siehe Abb. 2a)
2. Obturator, perforiert
3. Kanülenband
4. Steriles leitgel 2,7 g
5. Rekanülierungsschlauch
6. REF 321/REF 888-322 enthält zusätzlich eine
Verschlusskappe für die gefensterte Innen-
kanüle mit 15 mm-Konnektor
7. REF 322/REF 888-322 enthält zusätzlich 2
Konnektoren zur Verbindung für Absauggeräte.
anülen-Set TRACOE®twist plus und
TRACOE®vario mit atraumatischem Einführ-
system für die perkutane Tracheotomie:
1. TRACOE®twist plus mit 2 Innenkanülen/
TRACOE®vario Tracheostomiekanüle, jeweils
mit atraumatischem Einführsystem (bestehend
aus Einführhilfe und Führungskatheter mit
röntgendichtem, umklappbarem Silikonschirm
(siehe Abbildungen 2b + 2c)
2. Obturator
3. Kanülenband
4. Steriles leitgel 2,7 g
5. REF 331 enthält zusätzlich eine Verschluss-
kappe für die gefensterte Innenkanüle mit
15 mm Konnektor
6. REF 332/REF 888-332, REF 422 und REF 425
enthalten zusätzlich 2 Konnektoren zur Verbin-
dung für Absauggeräte
Größen: Die nachfolgende Tabelle zeigt, welche
rößen für welchen Typ erhältlich sind:
Die rößenangabe entspricht dem Innendurch-
messer des Kanülenrohrs in Millimeter.
Weitere Details siehe Bestellinformation und die bei-
liegende ebrauchsanweisung der verwendeten
Kanüle.
15
TRACOE percutan 15
Typ REF Gr ße
twist
twist plus
vario
(ohne Absaugvorrichtung)
vario
(mit Absaugvorrichtung)
320, 321, 322, 888-322
330, 331, 332, 888-332
420, 421, 423, 424
422, 425
07, 08, 09
07, 08, 09,10
07, 08, 09
08, 09
GA_REF 320 425 520_10502_V03_040413_Layout 1 04.04.2013 23:01 Seite 15

1. Indikationen
Die TRACOE®experc Sets für die perkutane Tracheo-
tomie dienen zur subkrikoidalen Einführung einer
Tracheostomiekanüle in die Luftröhre. Die Dilatation
erfolgt einstufig nach Ciaglia über einen Seldinger-
draht.
2. ontraindikationen
2.1 Absolute ontraindikationen
Als absolute Kontraindikationen gelten:
- Platzierung der Tracheostomiekanüle in Notfällen,
- Anwendung in der Pädiatrie,
- bestehende Infektionen im Tracheostomiebereich,
- bestehende Malignität im Tracheostomiebereich,
- instabile Fraktur der Halswirbelsäule und
- Unsicherheit bei der Identifizierung der anatomi-
schen Orientierungspunkte.
2.2 Relative ontraindikationen
Als relative Kontraindikationen, bei denen die Risi-
ken gegenüber dem Nutzen des Verfahrens abge-
wogen werden müssen, gelten:
- eine vergrößerte Schilddrüse,
- vorangegangene chirurgische Eingriffe im Halsbe-
reich (z. B. Thyreoidektomie),
- hohe Blutungsneigung, z. B. bei Behandlung mit
erinnungshemmern,
- ungewöhnlich tiefliegende Luftröhre, z. B. bei Adi-
positas, wobei gegebenenfalls eine extra lange Ka-
nüle eingesetzt werden muss.
3. Besondere Hinweise und
Vorsichtsmaßnahmen
Folgende Hinweise und Vorsichtsmaßnahmen sind
zu beachten:
- Ein dilatativ angelegtes Tracheostoma hat den be-
sonderen Vorteil, dass es nach Entfernen der Kanü-
le in der Regel mit geringer Narbenbildung selbst-
ständig zuheilt.
Demgegenüber ist die Einführung der Tracheosto-
miekanüle nach dilatativ angelegtem Tracheostoma
meist etwas schwieriger. So besteht ein erhöhtes Risi-
ko, dass die Einführung nicht ausreichend schnell
gelingt, bzw. dass die Trachea beschädigt wird oder
Blutungen auftreten. Außerdem besteht das Risiko,
dass die Tracheostomiekanüle versehentlich falsch
eingeführt (via falsa) wird. Aus diesem rund sollte
die Einführung der Tracheostomiekanüle stets von
geschultem Personal unter Anwendung adäquater
Vorsichtsmaßnahmen durchgeführt werden.
Für Langzeit-Kanülenträger empfehlen wir die Anlage
eines epithelisierten Tracheostomas.
- Die Erstplatzierung einer Tracheostomiekanüle
muss unter aseptischen Bedingungen erfolgen.
- Es wird empfohlen, die perkutane Tracheostomie
unter bronchoskopischer Kontrolle durchzuführen,
um die intratracheale Position der Punktionskanüle,
des Führungsdrahtes, der Dilatatoren sowie der Tra-
cheostomiekanüle zu überwachen und die efahr
einer paratrachealen Einführung bzw. eine Verlet-
zung der Trachea zu vermeiden. Hierzu kann bevor-
zugt das Tracheotomie-Endoskop für Dilatationstra-
cheotomien nach Klemm eingesetzt werden (Details
siehe entsprechende ebrauchsanweisung).
- Es wird empfohlen z. B. mit Hilfe von Ultraschall
die trachealen und prätrachealen Strukturen, wie
Schilddrüsenisthmus, große efäße sowie Cricoid
und Knorpelspangen zu identifizieren, um den opti-
malen Punktionsort zu ermitteln und Blutungen zu
vermeiden.
ACHTUNG: Bei jeder perkutanen Tracheotomie
besteht das Risiko von Blutungen, Hypoxie, subku-
tanem Emphysem und/oder Pneumothorax.
- Während des Eingriffes muss die Beatmung des
Patienten mit einem Endotrachealtubus bei ständi-
ger oximetrischer Überwachung gesichert werden.
- Bei anomal verlaufenden efäßen, die durch Ultra-
schall- Untersuchungen identifiziert werden können,
kann es zu signifikanten Blutungen kommen.
- Eventuell auftretende Blutungen können zu Atem-
wegsobstruktionen führen, wenn das Blut nicht sofort
abgesaugt wird.
- Die Punktion der Trachea ist durch die Aspiration
von Luft zu überprüfen.
- Die Spitze der Punktionskanüle sollte nach der
Punktion in einem Winkel von ca. 60° gegenüber der
Trachealvorderwand geneigt werden, um Verletzun-
gen der hinteren Trachealwand zu vermeiden Dies
gilt auch für die nachfolgende Einführung des Füh-
rungsdrahtes und der Dilatatoren.
- Zur Vermeidung von Verletzungen der Luftröhren-
hinterwand darf die distale Spitze des Führungska-
theters nie über die Spitze des Führungsdrahtes
hinausragen. Deshalb muss die proximale Markie-
rung des Führungsdrahtes stets am proximalen
Ende des Führungskatheters liegen.
- Die Sicherheitssperre des Führungskatheters soll-
te stets direkt vor der Spitze des experc Dilatators
bzw. der atraumatischen Einführhilfe platziert sein.
Zur Kontrolle sind am Führungskatheter entspre-
chende Markierungen angebracht.
- Der experc Dilatator sollte nicht über die "MAXI-
MUM INSERTION"-Markierung (Hautniveau) hinaus
eingeführt werden, um Verletzungen der Luftröhre in
Höhe der Carina zu vermeiden. Dies ist besonders
bei kleinen Patienten bedeutsam ( röße ca. 150 cm
oder kleiner; Körpergewicht 50 kg oder weniger).
- Bei Einführung des experc Dilatators bzw. der Tra-
16 TRACOE percutan
16
GA_REF 320 425 520_10502_V03_040413_Layout 1 04.04.2013 23:01 Seite 16

cheostomiekanüle mit atraumatischer Einführhilfe
bzw. mit atraumatischem Einführsystem sind über-
mäßige Drehbewegungen zu vermeiden, da dies zu
Verletzungen der Luftröhre führen kann.
- Die Dilatation ist entsprechend der Kanülengröße
so auszuführen, dass die Einführung der Tracheos-
tomiekanüle ohne großen Druck möglich ist.
- Die atraumatische Einführhilfe bzw. das atraumati-
sche Einführsystem muss so in der Tracheostomie-
kanüle positioniert sein, dass der klappbare Silikon-
schirm den Kalibersprung zwischen Einführhilfe und
Kanüle ausgleicht. Der stufenlose Übergang gewähr-
leistet eine erleichterte Passage und somit eine
atraumatische Einführung der Kanüle.
- Die Position der Tracheostomiekanüle sollte durch
eine bronchoskopische Sichtkontrolle und/oder durch
eine Thorax-Röntgenaufnahme überprüft werden.
- Nach Sicherung der Kanülenposition wird die Venti-
lation vom Endotrachealtubus auf die Tracheostomie-
kanüle umgestellt; erst danach darf diese geblockt
werden. Bei Blockung der Tracheostomiekanüle
während der Beatmung über den Endotrachealtubus
besteht die akute efahr eines Halsemphysems.
4. Gebrauchsanleitung
4.1 Vorbereitung des TRACOE®experc
Tracheotomie-Sets und der anüle
1. Nach der Entnahme aus den Verpackungen sind
das Dilatations-Set und das Kanülen-Set auf Voll-
ständigkeit und Funktionstauglichkeit zu überprüfen.
2. Die Manschette der Tracheostomiekanüle wird
durch Testinflation auf Leckagen überprüft. Bei
Dichtigkeit ist die gesamte Luft aus der Manschette
abzulassen und die Manschette in Richtung des
Schildes hochzustreifen, um das spätere Einführen
der Kanüle zu erleichtern.
3. Bei den TRACOE®vario Kanülen ist das Kanülen-
schild nach Druck auf das Federelement durch Dre-
hung in die korrekte horizontale Position zu bringen.
Um die Schildarretierung so sicher wie möglich zu
gestalten, wurde ein Hebelsystem entwickelt. Wird
der Hebel nach oben geschoben, führt dies zu einer
zusätzlichen Arretierung des Schildes auf der Kanü-
le ; wird er nach unten geschoben, wird die Arre-
tierung gelöst und das Schild kann, wie oben
beschrieben, durch Druck auf den Federkopf in
Längsrichtung auf der Kanüle verschoben werden.
4. Es ist zu überprüfen, dass
- bei Benutzung des Dilatations-Sets (REF 520) der
Führungsdraht ungehindert durch den kurzen Dila-
tator 14 CH/FR geschoben werden kann, bzw.
- bei Benutzung der Kanülen-Sets TRACOE®twist
plus/TRACOE®vario (REF 330, 331, 332, 888-332,
420, 421, 422, 423, 424 und 425) sich der Führungs-
draht ebenfalls ungehindert durch den Führungska-
theter mit röntgendichtem, umklappbarem Silikon-
schirm hindurch schieben lässt.
WARNHINWEIS: Die in der Kanüle enthaltene atrau-
matische Einführhilfe bzw. das atraumatische Ein-
führsystem darf nur für die dazugehörige Tracheos-
tomiekanüle mit der richtigen röße verwendet wer-
den. Die rößenbezeichnung ist jeweils auf der Ein-
führhilfe vermerkt.
4.2 Vorbereitung des Patienten
1. Der Patient sollte hinsichtlich anatomischer Ano-
malien der Blutgefäße im Halsbereich untersucht
worden sein.
2. Lagerung des Patienten: in Rückenlage, mit
einem Kissen unter den Schultern bei Extension von
Kopf und Nacken, (siehe Abb. 3); das Kopfteil des
Patientenbettes sollte um 30-40° erhöht werden.
3. Desinfektion der Haut im Halsbereich und Abde-
ckung mit sterilen Tüchern.
4. Sedierung des Patienten und Überwachung der
Vitalfunktionen (Oximetrie, Kapnographie, EK ,
Blutdruckmessung).
5. Der Pharynx ist vor dem Eingriff abzusaugen;
sofern für die Beatmung ein Endotrachealtubus ein-
gesetzt wird, ist die Manschette des Endotrachealtu-
bus zu entblocken und der Tubus mit dem Manschet-
tenbereich bis zum Kehlkopfeingang zurückzu-
ziehen (ca. 1cm). Durch das Zurückziehen des Tubus
wird verhindert, dass die Tubusmanschette bei der
Trachealpunktion angestochen wird. Die Manschette
des Endotrachealtubus ist ggf. wieder aufzublasen
und die Beatmung evtl. bezüglich Atemzeitvolumen
anzupassen.
4.3 Durchführung
4.3.1 Eingriff
1. Palpation der Orientierungspunkte (Cartilago
cricoideus, Ligamentum conicum, Cartilagines
tracheales), ggf. Anlegen einer Hautmarkierung im
vorgesehenen Inzisionsbereich. Die Punktion und
die spätere Platzierung der Kanüle erfolgen typi-
scherweise zwischen dem 2. und 3. oder dem 3.
und 4. Trachealring (siehe Abb. 4 und 5).
2. Nach der Infiltration eines Lokalanästhetikums
(z.B. 1% Lidokain mit Adrenalin) wird eine 1,5-2 cm
lange Inzision über der Platzierungsstelle durchge-
führt (siehe Abb. 5). Danach erfolgt vorsichtig die
stumpfe Präparation auf die Tracheavorderwand.
gf. wird die Mittellinie der Trachea zusätzlich von
17
TRACOE percutan 17
GA_REF 320 425 520_10502_V03_040413_Layout 1 04.04.2013 23:01 Seite 17

ewebe befreit, danach der Ringknorpel palpiert.
Falls erforderlich, kann zusätzliches Lokalanästheti-
kum in die präparierte Region injiziert werden. Liegt
der Schilddrüsenisthmus im Präparationsbereich,
sollte er vorsichtig nach unten verschoben werden.
3. Der Eingriff sollte unter bronchoskopischer Kon-
trolle durchgeführt werden. Dadurch kann das Risi-
ko von Verletzungen der Trachea vermindert wer-
den.
4. Die Punktion der Trachea erfolgt typischerweise
zwischen dem 2. und 3. oder zwischen dem 3. und
4. Trachealring in kaudaler Richtung. Dafür wird die
Punktionskanüle mit Teflonkatheter und aufgesetz-
ter, teilweise mit steriler Kochsalzlösung oder Steril-
wasser gefüllter Spritze verwendet. Die Punktionska-
nüle nach posterior und kaudal soweit vorschieben,
bis Luftblasen angesaugt werden können. Die Kanü-
le sollte jetzt in einem Winkel von ca. 60° gegenüber
der Tracheavorderwand geneigt sein (siehe Abb. 6).
ACHTUNG: Eine Verletzung der Tracheahinterwand
ist unbedingt zu vermeiden (bronchoskopische Kon-
trolle). Außerdem muss darauf geachtet werden,
dass die Manschette des Endotrachealtubus nicht
mit der Punktionskanüle angestochen wird.
5. Wenn die Luft frei aspiriert werden kann, wird die
Punktionskanüle aus dem Teflonkatheter herausge-
zogen und der Katheter mehrere Millimeter nach
posterior und kaudal vorgeschoben (siehe Abb. 7).
Danach sollte erneut mit der Spritze Luft aus der Tra-
chea aspiriert werden, um die Position der Katheter-
spitze zu überprüfen.
6. Danach wird der Führungsdraht aus seiner Hülle
herausgezogen (ca. 8 cm), bis die J-förmige Spitze
sich in dem geraden Einführungsaufsatz befindet.
7. Sodann wird der Einführungsaufsatz auf den Tef-
lonkatheter gesteckt und der Führungsdraht vor-
sichtig durch den Teflonkatheter bis zu seiner ersten
Markierung (ca. 10 cm) in die Trachea eingescho-
ben (siehe Abb. 8). Der Führungsdraht sollte sich
frei vorschieben lassen und im Katheter ungehindert
beweglich sein. Knickt der Führungsdraht bei die-
sem Manöver ab, muss er durch einen unbeschä-
digten ersetzt werden. Mit Hilfe des Bronchoskops
wird kontrolliert, dass der Führungsdraht in kaudale
Richtung geschoben wird. Dann kann der Teflonka-
theter über den Führungsdraht vollständig heraus-
gezogen werden, wobei der Führungsdraht in seiner
Position in der Trachea verbleibt.
8. Der kurze Dilatator (14 CH/FR) wird über den Füh-
rungsdraht in die Trachea geschoben und die Punk-
tionsstelle mit leichten Drehbewegungen dilatiert
(siehe Abb. 9). Es ist darauf zu achten, dass der
Dilatator gegenüber dem Führungsdraht nicht ver-
kantet wird (Vermeidung der Beschädigung der
Spitze) und dass er so eingeführt wird, dass er die
Tracheahinterwand nicht verletzt (Bronchoskop).
Anschließend wird der Dilatator entfernt. Die Posi-
tion des Führungsdrahtes soll dabei unverändert
bleiben.
9. Der weiße Führungskatheter aus dem Dilatations-
Set wird mit der Seite der Sicherheitssperre (in Pfeil-
richtung) über den Führungsdraht so weit in die
Luftröhre vorgeschoben, bis die Sicherheitssperre
am Führungskatheter das Hautniveau erreicht
(siehe Abb. 10). Die proximale Markierung des
Führungsdrahtes sollte dabei am proximalen Ende
des Führungskatheters liegen.
4.3.2 Einstufige Dilatation
1. Zur Aktivierung der leitbeschichtung des experc
Dilatators wird dessen schmales Ende unmittelbar
vor der Dilatation bis zur "MAXIMUM INSERTION"-
Markierung in sterile Kochsalzlösung bzw. Wasser
eingetaucht.
2. Der experc Dilatator wird mit der distalen Spitze
voran zunächst bis zur Sicherheitssperre über den
Führungskatheter geschoben. Um den Punktionska-
nal aufzudehnen, wird der Dilatator gemeinsam
mit dem Führungskatheter vorsichtig solange in die
Trachea vor- und zurückgeschoben, bis die Öffnung
etwas größer ist als der Außendurchmesser der
gewählten Tracheostomiekanüle (siehe Abb. 11).
Zur Orientierung sind Markierungen bei 38 CH/FR
und 41 CH/FR ("MAXIMUM INSERTION") auf dem
Dilatator angebracht. Während der Dilatation ist
darauf zu achten, dass die Position des Führungs-
katheters und des Führungsdrahtes relativ zum
Dilatator konstant bleiben.
WARNHINWEIS: Es wird empfohlen, den Dilatator
nicht tiefer als bis zur "MAXIMUM INSERTION"- Mar-
kierung (Hautniveau) einzuführen. Ansonsten kann
es zu Schädigungen von Luftröhre und/oder Carina
kommen. Drehbewegungen sind bei der Einführung
des Dilatators zu vermeiden. Ebenso sind Verletzun-
gen des Ringknorpels möglichst zu vermeiden.
4.3.3 Entfernen des Dilatators
ACHTUNG: Bitte achten Sie auf die Unterschiede
zwischen den Sets mit TRACOE®twist anülen
und denen mit TRACOE®twist plus/TRACOE®vario
anülen!
Bei TRACOE®twist anülen wird der experc Dila-
tator entfernt und der Führungskatheter verbleibt mit
18 TRACOE percutan
18
GA_REF 320 425 520_10502_V03_040413_Layout 1 04.04.2013 23:01 Seite 18

dem Seldingerdraht in situ. Es ist darauf zu achten,
dass die Sicherheitssperre des Führungskatheters
wie vor der Dilatation etwa auf Hautniveau liegt
und die proximale Markierung des Führungsdrahtes
unmittelbar außerhalb des Führungskatheters zu
erkennen ist (siehe Abb.12).
Bei TRACOE®twist plus und TRACOE®vario anü-
len werden der Dilatator und der Führungskatheter
entweder nacheinander oder gleichzeitig entfernt.
Der Seldingerdraht verbleibt im Patienten (siehe
Abb. 12).
4.3.4 Einführen der Tracheostomiekanüle
1. Der umklappbare Silikonschirm und die Tracheos-
tomiekanüle werden mit Hilfe von leitgel gleitfähig
gemacht.
ACHTUNG: Bitte achten Sie auf die Unterschiede
zwischen den Sets mit TRACOE®twist anülen
und denen mit TRACOE®twist plus/TRACOE® vario
anülen!
2a. Bei TRACOE®twist anülen wird die in der
Tracheostomiekanüle befindliche Einführhilfe über
den Führungskatheter bis zur Sicherheitssperre
geschoben. Die Einheit aus Führungskatheter, Füh-
rungsdraht und Einführhilfe mit Kanüle wird dann mit
einer leichten Drehbewegung in die Trachea ein-
geführt und so weit vorgeschoben, bis das Kanülen-
schild Hautniveau erreicht hat (siehe Abb. 13).
Es wird empfohlen, die Kanüle und den riff der Ein-
führhilfe dabei gemeinsam zu fassen. Während der
Kanülierung ist darauf zu achten, dass die Position
des Führungskatheters und des Führungsdrahtes
relativ zur Einführhilfe konstant bleiben.
Die proximale Markierung des Führungsdrahtes
sollte dabei am proximalen Ende des Führungs-
katheters liegen.
Danach werden die atraumatische Einführhilfe und
der Rekanülierungsschlauch bzw. Führungskatheter
mit Führungsdraht herausgezogen, während die
Tracheostomiekanüle in der Trachea verbleibt. Dies
geschieht am leichtesten, indem das Kanülenschild
mit einer Hand fixiert und die Einführhilfe durch
Druck mit dem Daumen der anderen Hand gegen
das Kanülenschild herausgezogen wird.
ACHTUNG: Nach Entfernen der Einführhilfe muss
geprüft und sichergestellt werden, dass der Sili-
konschirm sich noch auf der Einführhilfe befindet
(siehe Abb. 14a). Sollte dies nicht der Fall sein,
muss der röntgendichte Silikonschirm umgehend
bronchoskopisch aus der anüle bzw. den Atem-
wegen entfernt werden.
2b. Bei TRACOE®twist plus und TRACOE®vario
anülen wird die Einheit aus Kanüle mit atraumati-
schem Einführsystem über den als Leitschiene die-
nenden Führungsdraht geschoben und mit einer
leichten Drehbewegung in die Trachea eingeführt
und so weit vorgeschoben, bis das Kanülenschild
Hautniveau erreicht hat (siehe Abb. 13). Während der
Einführung der Kanüle ist unbedingt darauf zu ach-
ten, dass die Einführhilfe und der Führungskatheter
mit Silikonschirm niemals aus der Kanüle rausrut-
schen, da ansonsten das Risiko besteht, dass der
Silikonschirm von der Spitze der Einführhilfe ab-
rutscht. Dies würde die weitere Einführung der Kanü-
le deutlich erschweren. Aus diesem rund empfeh-
len wir den riff der Einführhilfe, und die Kanüle stets
während des gesamten Vorgangs mit einer Hand zu
fixieren.
Während der Kanülierung ist darauf zu achten, dass
die Position des Führungskatheters und des Füh-
rungsdrahtes relativ zur Einführhilfe konstant blei-
ben. Die proximale Markierung des Führungsdrah-
tes sollte dabei am proximalen Ende des Führungs-
katheters liegen.
Danach werden zunächst der Führungsdraht und
anschließend entweder zuerst die Einführhilfe und
dann der Führungskatheter oder aber beide gleich-
zeitig aus der Tracheostomiekanüle herausgezogen,
während die Kanüle in der Trachea verbleibt. Sollte
sich die Einführhilfe von TRACOE®twist plus Kanü-
len nur sehr schwergängig entfernen lassen, kann
die Einführhilfe gemeinsam mit der Innenkanüle
entfernt werden. Dazu ist es notwendig, die Arretie-
rung der Innenkanüle durch Drehen der weißen
Überwurfmutter um 45° gegen den Uhrzeigersinn zu
öffnen.
ACHTUNG: Auf keinen Fall darf zuerst der Füh-
rungskatheter entfernt werden.
Die Entnahme von Einführhilfe und Führungskathe-
ter geschieht am leichtesten, indem man die Kanüle
mit einer Hand fixiert und das atraumatische Einführ-
system durch Druck mit dem Daumen der anderen
Hand gegen den 15 mm-Konnektor bzw. das Kanü-
lenschild herauszieht.
ACHTUNG: Nach Entfernen des Einführsystems
muss geprüft und sichergestellt werden, dass der
Silikonschirm sich noch auf dem Führungskathe-
ter befindet (siehe Abb. 14b + 14c). Sollte dies
nicht der Fall sein, muss der röntgendichte Sili-
konschirm umgehend bronchoskopisch aus der
anüle bzw. den Atemwegen entfernt werden.
3. Die Trachea und die Kanüle sollten sodann sorg-
fältig abgesaugt werden, um einen freien Atemweg
19
TRACOE percutan 19
GA_REF 320 425 520_10502_V03_040413_Layout 1 04.04.2013 23:01 Seite 19

zu gewährleisten.
4. Vor der Entfernung des entblockten Endotrache-
altubus muss die Lage und Funktion der Tracheos-
tomiekanüle überprüft werden. Anschließend wird
die Beatmung auf die Tracheostomiekanüle umge-
stellt.
5. Die Niederdruckmanschette der Tracheostomie-
kanüle wird geblockt, dazu wird der geringste Druck,
der zur Abdichtung notwendig ist, eingestellt
(typischerweise 15-25 mbar).
ACHTUNG: Bei geblockter Tracheostomiekanüle
darf keinesfalls mehr über den Endotrachealtu-
bus beatmet werden (Emphysemgefahr).
6. Die Tracheostomiekanüle wird mit einem Kanülen-
band fixiert.
7. Zur Verbesserung der Hygiene und des Patienten-
komforts sollte zwischen Tracheostoma und Kanülen-
schild ein Wundschutz (z.B. TRACOE®purofoam
REF 958) angebracht werden. Nach dem Eingriff soll-
te das Kopfteil des Patientenbettes etwa 1 Stunde
lang ca. 30-40° hochgestellt bleiben.
4.3.5 Nachsorge
Das Tracheostoma sollte je nach Bedarf mit einer ste-
rilen Wundabdeckung versehen werden. Ein Wechsel
der Tracheostomiekanüle innerhalb der ersten Tage
nach der Tracheotomie sollte nur in Ausnahmefällen,
nur unter Anwendung der Seldinger-Technik und in
Intubationsbereitschaft durchgeführt werden.
5. Rücksendungen
Rücksendungen gebrauchter Produkte können nur
entgegen genommen werden, sofern diesen ein aus-
gefülltes Dekontaminations-Zertifikat beiliegt. Dieses
Formular erhalten Sie entweder bei TRACOE®medical
direkt oder über die Website: www.tracoe.com.
6. Allgemeine Geschäftsbedingungen
Verkauf und Lieferung aller TRACOE Produkte
erfolgen ausschließlich aufgrund der gültigen
Allgemeinen eschäftsbedingungen (A B), die bei
TRACOE®medical mbH oder über die Website
www.tracoe.com erhältlich sind.
20 TRACOE percutan
GA_REF 320 425 520_10502_V03_040413_Layout 1 04.04.2013 23:01 Seite 20
This manual suits for next models
3
Table of contents
Languages:
Other Tracoe Medical Equipment manuals
Popular Medical Equipment manuals by other brands
Braun
Braun Aesculap Acculan 4 Instructions for use/Technical description
GE
GE AMX 4+ Technical Publications
Spacelabs Healthcare
Spacelabs Healthcare BleaseSirius user manual
PARCUS MEDICAL
PARCUS MEDICAL SLiK Directions for use
Weinmann
Weinmann JOYCE Full Face vented 40 hPa Instructions for use
PHYWE
PHYWE Cobra SMARTsense EKG operating instructions
