Thermopatch NL-24 PRO User manual

2
BACK TO INDEX For more informaon about our products and how to contact us, please visit thermopatch.com
Copyrights
© 2019 Thermopatch bv, Almere, The Netherlands.
No part of this publicaon may be reproduced by any means without the prior wrien permission of
Thermopatch bv, The Netherlands.
Thermpatch, the Thermopatch logo, Thermo Seal and Thermocrest are registered trademarks of
Thermopatch.
Introducon
The products by Thermopatch are designed with special aenon to your convenience. Should you
discover any fault or damage upon receipt of this product, please contact your local Thermopatch vendor.
The manual has been prepared in accordance with NEN 5509 and in conformity with the Machinery
Direcve 2006/42/EC.
This user manual is intended not only for all users of the machine, but also for those who install and
maintain the NL-24 Pro. The goal is to familiarize you with the operaon, to provide for safe working
instrucons and guidelines for maintenance.
ATTENTION!
In order to make safe and optimal use of the NL-24 Pro, it is important to take note of -
and understand the contents of this manual.

3
BACK TO INDEX For more informaon about our products and how to contact us, please visit thermopatch.com
Copyrights ..........................................................................................................................................2
Introducon........................................................................................................................................2
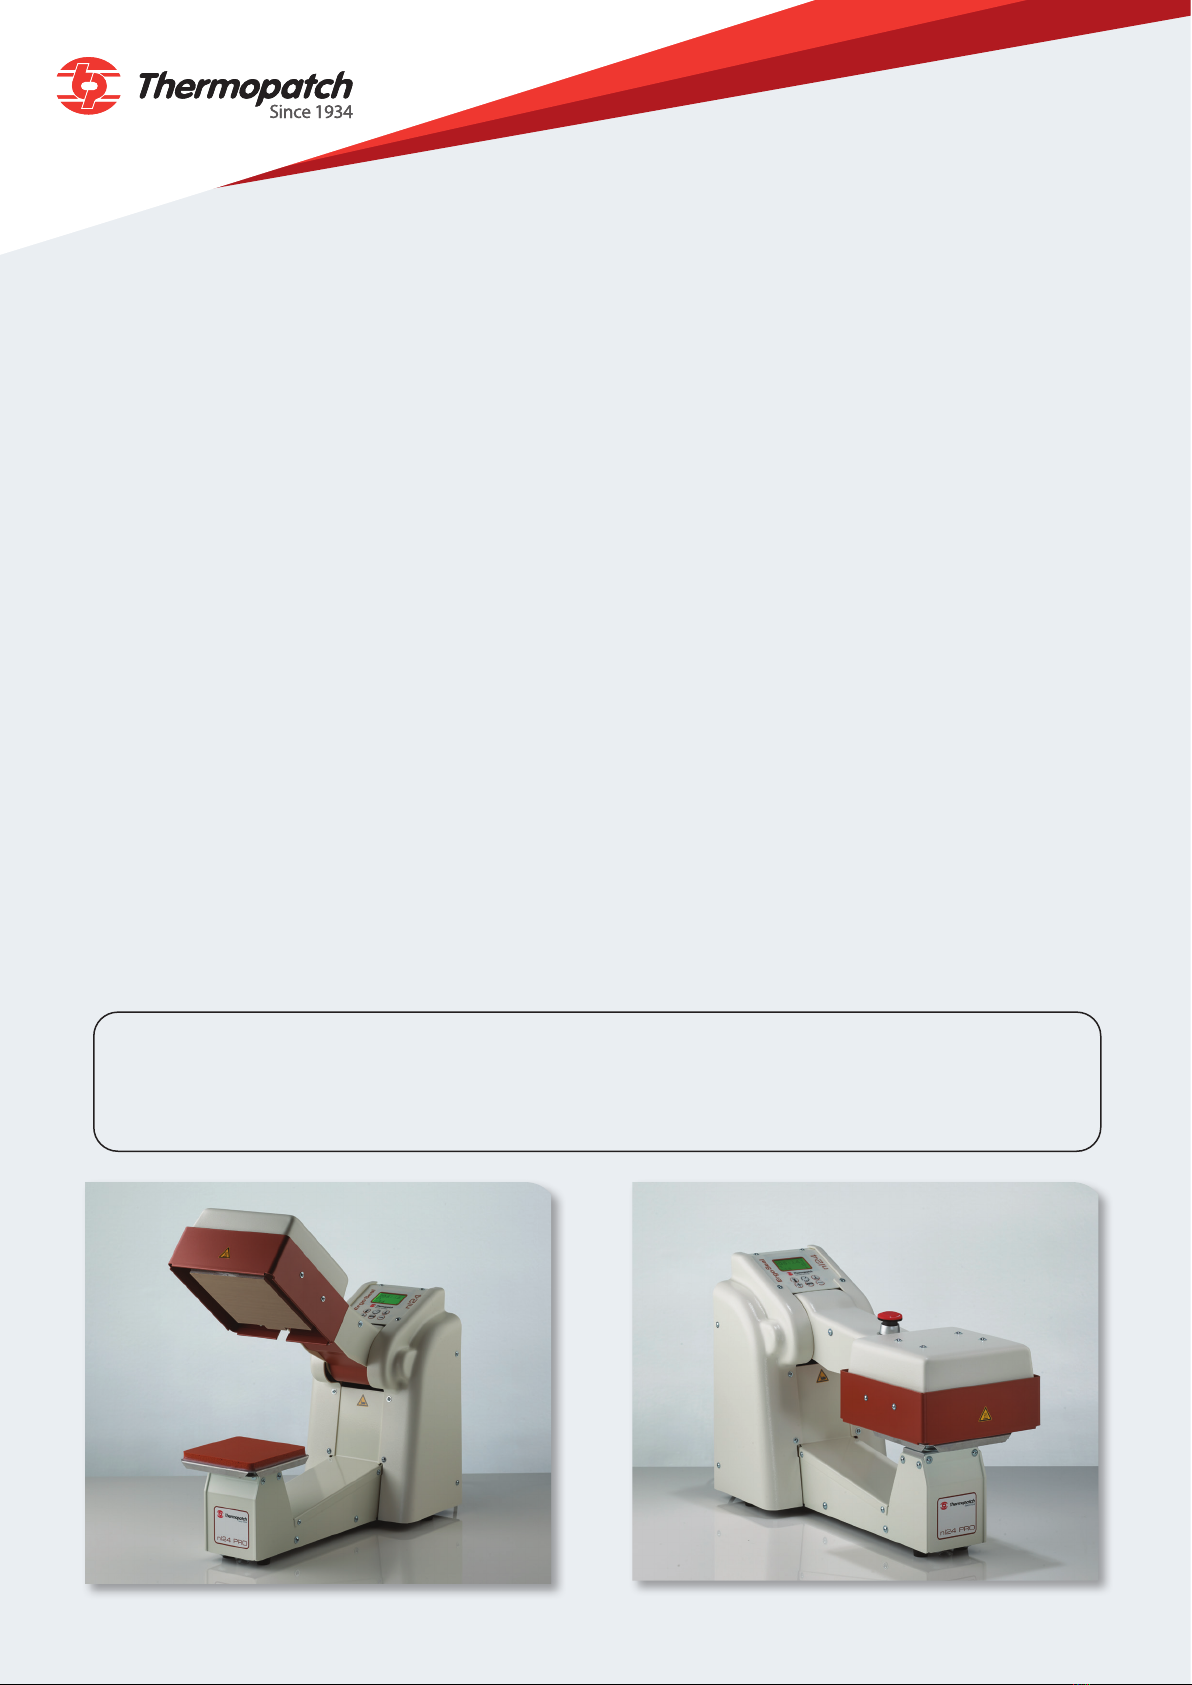
1 GeneralDescripon ..............................................................................................................5
1.1 Levering........................................................................................................................................ 5
1.2 Warranty ...................................................................................................................................... 5
2 Intended use ........................................................................................................................5
3 Assemblyandinstallaon .....................................................................................................6
3.1 Assembly and installaon ............................................................................................................ 6
4 Operanginstrucon............................................................................................................7
4.1 Operang the NL-24 Pro
4.1.1 The control unit and display ........................................................................................................ 7
4.1.2 Sengs......................................................................................................................................... 8
4.1.2.1 Temperature seng..................................................................................................................... 9
4.1.2.2 Time seng.................................................................................................................................. 9
4.1.2.3 Pressure sengs .......................................................................................................................... 9
4.2 Interrupng the work cycle of the NL-24 Pro .......................................................................... 11
4.3 Reading the counters ................................................................................................................. 11
4.4 Error messages........................................................................................................................... 11
4.4 Switching from pedal control to manual control from V 1.52................................................... 12
5 Overview of safety measures and warnings........................................................................15
5.1 Safety.......................................................................................................................................... 15
The safety frame ........................................................................................................................ 15
The emergency stop buon....................................................................................................... 15
6 Technicalspecicaons .......................................................................................................17
6.1 Specicaons of the NL-24 Pro ................................................................................................. 17
7 Transport and storage .........................................................................................................17
7.1 Transport .................................................................................................................................... 17
7.2 Storage ....................................................................................................................................... 17
8 Maintenance.......................................................................................................................18
Temperature...................................................................................................................................
Teon cover....................................................................................................................................
Sealing pad .....................................................................................................................................
Replacement of the Teon protecon and the sealing pad..........................................................
Air lter pressure regulator............................................................................................................
Contents

4
BACK TO INDEX For more informaon about our products and how to contact us, please visit thermopatch.com
9 Technical annexes ...............................................................................................................20
9.1 Spare parts ................................................................................................................................. 20
9.2 Electrical wiring diagram ........................................................................................................... 21
9.3 Pneumacs diagram .................................................................................................................. 22
10 End of life............................................................................................................................23
11 Declaraonsofconformity..................................................................................................23
12 Disclaimer ...........................................................................................................................24
9 20
9.1 20
9.2 21
9.3 22
10 23
11 23
12 24

5
BACK TO INDEX For more informaon about our products and how to contact us, please visit thermopatch.com
1.GeneralDescripon
The NL-24 Pro is a praccal and universally applicable heat seal machine. This machine can be used to apply
patches, texle emblems, heat seal transfers, in short all Thermopatch materials suited for marking and
mending to texles.
1.1 Levering
The NL-24 Pro machines are supplied in a card board box.
The NL-24 Pro contains following items:
• NL-24 Proheat seal machine
• Foot switch
• Power cord
• Ø 6 mm air tube, 2,5 m
1.2 Warranty
Thermopatch points to its warranty and product liability condions as laid down in our terms and condions.
These can be obtained from your Thermopatch supplier.
2. Intended use
The NL-24 Pro heat seal machine is a praccal and universally applicable heat seal machine. The machine has
been designed for the applicaon of repair patches, labels and other Thermopatch heat sealable products.
WARNING!
Any use other than described above can be dangerous and cause damage and thus qualies as ‘misuse’
which excludes Thermopatch bv from any liability.
• CE declaraon of conformity with serial number
• Quick installaon guide
• Quality checklist
• The manual incluiding the CE declaraon of
conformity, on USB

6
BACK TO INDEX For more informaon about our products and how to contact us, please visit thermopatch.com
3.Assemblyandinstallaon
3.1Assemblyandinstallaon
1.Electricalinstallaon
Take the NL-24 Pro from its box and place it on a stable work bench, near an earthed wall socket. Connect
the machine with the supplied power cord to the electrical mains (230V alternang current). The NL-24 Pro
is earthed and provided with two fuses (4A T (slow).
2.Pneumacalinstallaon
It is very important that the NL-24 Pro is provided with clean, dry air.
The water condenser is an addional safety measure.
Provide air pressure of 2 - 6 bar from the compressor or its own local air supply.
Connect the air tubing with a diameter of 6 mm to the compressor or to your own local air supply, and to
the pressure regulator mounted on the back of the machine.
3. Foot switch
The NL-24 Pro has been issued with a foot switch. Connect the foot switch by pushing the connector into
the socket on the back of the machine. Secure the connecon by fastening the ring by hand.
ATTENTION!
All connections are placed on the back side of the machine

7
BACK TO INDEX For more informaon about our products and how to contact us, please visit thermopatch.com
4.Operanginstrucon
4.1OperangtheNL-24Pro
You can start operang the NL-24 Pro as soon as it is connected to both the electricity mains and to an airsupply
which provides clean and dry compressed air set at a maximum of 6 Bar. Switch on the machine by pressing the
on/o (I-0) switch, which is placed on the back of the machine, to “on (I)”. Wait unl the set temperature has
been reached, which will take about one minute.
Starngup:
At start up the display will show the Thermopatch logo.
The element is now heang up to the set temperature and the display will show informaon about the sengs.
Stand-by
When the machine is idle for a longer period than the set me for Stand-by, it will go into power saving mode.
The factory set me for Stand-by is set aer 15 minutes.
The heang element will be deacveted if this funcon is enabled. De fabrieksinstelling voor Stand-by staat op
15 minuten.
4.1.1 The control unit and display
The display of the control unit will show the version number of the rmware on display; this will dissapear
aer about 3 seconds and then it shows the last seng in which the machine was used. If any failures are
found at starng up, these will be shown in the display and the machine will not heat up.
See paragraph 4.4, page 8; the cause of the error code needs to be repaired rst.
The display will show the actual temperature and is ready for use.
Auto on / o
Temperature
Time
Pressure
Increase / up
Decrease / down
ATTENTION!
The NL-24 Pro cannot be in operational mode if you want to change settings.

8
BACK TO INDEX For more informaon about our products and how to contact us, please visit thermopatch.com
Unlock the settings screen
with the 'AUTO' -button
Select the required preset by
pushing the + button
4.1.2Sengs
The seng of the heat sealing me and temperature is dependant on the labour that has to be executed and
the materials to be marked. These can be adjusted by the operator.
By pressing the “AUTO” buon the NL-24 Pro can be entered into and taken out of operaonal mode. Only
when the NL-24 Pro is taken out of opraonal mode, parameters can be altered and presets can be chosen (nr.
1 - 5) by pressing the + buon.
The 24 Ergo Seal has been provided with following 5 preprogrammed presets:
Preset 1, for Thermopatch label products for high temperature applications (up to 95 °C washing):
• Sealing me: 14 seconds
• Temperature: 204 °C
• Energy saving mode: 15 minutes
• Minimum - Maximum pressure: 2.0 - 6.0 bar (0.5 kg cm² minimum)
• Set pressure: 5.0 bar
Preset 2, for emblems and transfers for high temperature applicaons (up to 95 °C washing).
• Sealing me: 14 seconds
• Temperature: 195 °C
• Energy saving mode: 15 minutes
• Minimum - Maximum pressure: 2.0 - 6.0 bar (0.5 kg cm² minimum)
• Set pressure: 5.0 bar
Preset 3: for emblems and transfers for high temperature applicaons (up to 95 °C washing)
• Sealing me: 12 seconds
• Temperature: 185 °C
• Energy saving mode: 15 minutes
• Minimum - Maximum pressure: 2.0 - 6.0 bar (0.5 kg cm² minimum)
• Set pressure: 5.0 bar
Preset 4: for emblems and transfers for medium to low temperature applicaons (tot 60 °C washing)
• Sealing me: 15 seconds
• Temperature: 150 °C
• Energy saving mode: 15 minutes
• Minimum - Maximum pressure: 2.0 - 6.0 bar (0.5 kg cm² minimum)
• Set pressure: 5.0 bar
Preset 5: for emblems and transfers for low temperature applicaons
(up to 40 °C washing)
• Sealing me: 15 seconds
• Temperature: 130 °C
• Energy saving mode: 15 minutes
• Minimum - Maximum pressure: 2.0 - 6.0 bar (0.5 kg cm² minimum)
• Set pressure: 5.0 bar
Presentedinthedisplay:
• The set temperature: see preset in °C
• The supplied air pressure: 5 bar
• The set me: see preset in sec.
• Day counter: 001
• Machine in operaonal mode: Locked

9
BACK TO INDEX For more informaon about our products and how to contact us, please visit thermopatch.com
4.1.2.1Temperatureseng
The standard factory seng is 204 °C. When switched to the stand-by mode, the heang element is
switched o. Stand-by is acvated when the machine is le unused for more than 15 minutes.
The temperature sengs can be adjusted aer the machine is taken out of operaonal mode by using the
AUTO buon.
By pushing the temperatue buon the set temperature will appear on display which can be adjusted by
using the + or - keys.
Push the buon again, or do not touch the keys for more than 3 seconds aer which the set temperature
will be stored.
You can toggle between °C en °F by keeping the temperature buon for 3 seconds.
4.1.2.2Timeseng
The standard factory me seng is 12 seconds. The me sengs can be adjusted aer the machine is
taken out of operaonal mode by using the AUTO buon.
By pushing the me boon once, the set me will appear on display. By pushing the + or - buons the
seng can be adjusted.
Push the me buon again, or do not touch the keys for more than 3 seconds, to store the me sengs.
The Stand-by mer can be set by pushing twice aer which the delay me will appear on display.
By pushing + or - the seng kan be adjusted and the machine will de-acvate when idle aer this me
seng.
When the machine is in Stand-by mode it can be re-acvated by simply pusing any key on the display.
4.1.2.3Pressuresengs
The standard factory seng for pressure is set at 5 bar. The pressure is easily set to your requirements by
turning the air pressure adjustment knob of the air pressure regulator placed on the back of the machine.
The adjusted pressure seng will be on display.
The NL-24 Pro has a pressure guard which is set to a minimum of 2,5 and a maximum of 6,0 bar. At too low
or too high pressure the machine cannot be operated and a failure code will be on display(4 or 5).
The seng of the lower limit for the pressure seng is done as follows:
by pushing the pressure pressure buon once, the set lower limit appears on display. This can be adjusted
by pushing + or -. When the lower pressure limit is set to 0, the the pressure guarding system is de-
acvated.
The seng of the upper limit for the pressure seng is done as follows:
by pushing the pressure buon twice, the set upper limit appears on display. This can be adjusted by
pushing + or -.

10
BACK TO INDEX For more informaon about our products and how to contact us, please visit thermopatch.com
The closing and opening speed of the press arm can be adjusted by means of two throle valves. The
access these, the back platen of the machine has to be removed. One valve is for seng the opening
speed, the other is for seng the closing speed.
By carefully adjusng the required changes in speed can be set.
• Before adjusng, loosen the lock nut on the valve and ghten again aer adjusng of the seng.
• By turning the turning knob of the valve clockwise of the concerning throle valve clock wise, or counter
clockwise, the press arm will open faster, or slower.
WARNING!
Remove the plug from the wall socket before removing any screws and housing parts.

11
BACK TO INDEX For more informaon about our products and how to contact us, please visit thermopatch.com
4.2InterrupngtheworkcycleoftheNL-24Pro
In order to interrupt the work cycle of the machine at any me, push any buon on the key board or the
emergencystopbuon which is placed on the sealing arm on the front end of the machine.
The machine will shut down immediately and will end the started work cycle and open up. To re-acvate
the emergency stop buon has to be turned clockwise (arrow). It will start up again and be ready for use
aer reaching the set temperature.
4.3 Reading the counters
By pushing + or - simultaneously the total counter will appear on display. This value cannot be re-set.
By pushing + or -, either one of the two periodical counters can be entered. These can be re-set by keeping
the concering buon pushed unl 0 appears.
The day counter on display will be automacally reset aer the machine is switched o.
4.4 Error messages
On display the following error codes can appear:
1 = open temperature sensor
2 = temperature sensor short circuit
3 = heang element defecve
4 = pressure too low
5 = pressure too high
6 = safety frame acvated
Emergency stop
buon

12
BACK TO INDEX For more informaon about our products and how to contact us, please visit thermopatch.com
4.4 Switching from pedal control to manual control from V 1.52
The NL-24 is designed for pedal operaon and this is the opmum working method with this type of
machine.
If the pedal no longer works or because you prefer to work with manual operaon, the machine can also be
set to manual operaon from soware version V1.52.
To do this, follow these steps:
• Check the version number of the machine soware (picture 1)
• Machine is standard 'locked' (photo 2: lock closed)
• Short press [AUTO] to release the machine. (photo 3: lock open)

13
BACK TO INDEX For more informaon about our products and how to contact us, please visit thermopatch.com
• Then press the [AUTO] buon for 2 seconds unl you hear a beep. (photo 4)
• Then there is a hand symbol in the display that indicates that the manual funcon is working.
(photo 5 hand: symbol)
• Then briey press [AUTO] again to 'lock' the machine again. (photo 6: lock closed)

15
BACK TO INDEX For more informaon about our products and how to contact us, please visit thermopatch.com
5. Overview of safety measures and warnings
5.1 Safety
De NL-24 Pro is ed with all required safety measures to ensure safe working as required by European
safety guidelines.
The safety frame
The heang platen of the NL-24 Pro is protected by a safety frame. When this frame is touched the
machine will interrupt the work cycle and open up immediately. In order to resume work switch o the
machine and switch it on again.
Theemergencystopbuon
In accordance to the safety measures required by the conformity with the Machinery Direcve, an
emergency stop buon has been installed, to be able to intervene with producon in case of unforeseen
events. See chapter 4, paragraph 4.2.
Warning symbols
For enhanced security following warning symols are mounted on the machine:
WARNING!
Hot surface
WARNING!
Electric voltage
WARNING!
Pinching

16
BACK TO INDEX For more informaon about our products and how to contact us, please visit thermopatch.com
ATTENTION!
Make sure you are informed about the contents of this manual before starting to work with the NL-24
Pro. This ensures an optimal and safe use of the machine.
ATTENTION!
Always turn the power off (unplug it) when you need to carry out maintenance work or when cleaning
the machine.
ATTENTION!
In case of emergency, press the emergency stop button!
ATTENTION!
Take care that there is enough space around the machine. Cables and connections must not get
pinched. Although the heat radiation of the press is low, there should be enough
space for cooling down.
ATTENTION!
Avoid contact with the press and the heating element.
ATTENTION!
Pull the fabrics tight around the lower platenn and ensure that your hands are away from
the machine before operating the machine.

17
BACK TO INDEX For more informaon about our products and how to contact us, please visit thermopatch.com
6.Technicalspecicaons
6.1SpecicaonsoftheNL-24Pro
Energy use at heang up 800 Wa/240 Volt
Voltage 230 Volt
Maximum temperature seng 230°C
Maximum allowed temperature 270°C
Height, open 555 mm
Height, closed 315 mm
Width 225 mm
Depth (with connecons) 510 mm
Net weight 20 kg
Size sealing pad 140 x 140 mm
Fuses 2 x 4A T (slow)
A-weighted noise level < 70 dB(A)
Supplied pressure < 6 bar
Work pressure 4-6 bar
Safety pressure sengs (min/max) 2 / 6 bar
Compressed air use (per cycle, 5 bar) 2,6 l/cycle
Heat sealing me stepless adjustment 3 – 60 seconds
7. Transport and storage
7.1 Transport
When the machine needs to be moved, Thermopatch recommends to use the original packaging.
7.2 Storage
When the machine needs to be stored, Thermopatch recommends to use the original packaging. The
machine should be stored on a pallet, o the oor, in dry condions.

18
BACK TO INDEX For more informaon about our products and how to contact us, please visit thermopatch.com
8. Maintenance
Before starng any maintenance or repairs, make sure that the machine has nished its work cycle.
Depending on the planned job you want to perform both the air - and electrical supply can be
disconnected.
The air cylinder and other parts of the machine are maintenance free and the bearings are self lubricang.
The precondion for a good working performance is the supply of dry and clean compressed air.
The mounted water condenser and pressure regulator is an added safety feature. Moisture and unclean air
disrupt the self lubricang properes of the air cylinder.
Arrange for your maintenance to be performed by qualied sta or a maintenance service.
Temperature:
The temperature of the heang platen can be tested regularly by using temperature indicator strips. These
can be obtained through your Thermopatch supplier.
Teoncover:
The teon sheet that protects the element has to be cleaned regularly to prevent scking of labels and
patches or transfer of dirt to the garments. Clean the teon cover with a dry and clean cloth when the
machine is sll warm. Repeat the procedure regularly as oen as is necessary. Damaged or soiled teon
protecon should be replaced. These can be obtained through your Thermopatch supplier.
Sealingpad:
Clean the sealing pad while sll warm, with a clean lint free piece of cloth. Clean it as oen as is necessary.
Damaged or soiled sealing pads have to be replaced. These can be obtained through your Thermopatch
supplier.
Replacement of the teon protecon and the sealing pad:
The teon protecon sheet and the silicone rubber sealing pad have to replaced regularly. At replacing
these consumable parts the machine should be cooled down suciently to avoid burns from the heang
platenn.
Remove the teon protecon cover like a band aid when the platenn is sll warm to the touch. Remove any
glue residue from the hean element carfully. When placing the new self adhesive teon ensure a smoot
and clean surface in order to have a bubble free adhesion.
The sealing pad can easily be worked loose with a screwdriver aer which the replacement sealing pad can
be clicked into place on the mounng platen.
Both the teon cover and the sealing pad are available through your Thermopatch supplier.
WARNING!
The supplied pressure should not be higher than a maximum of 6 bar
WARNING!
Remove the plug from the wall socket before starting loosening any screws and housing parts

19
BACK TO INDEX For more informaon about our products and how to contact us, please visit thermopatch.com
Airlterpressureregulator:
The air lter pressure regulator (1) has to be checked daily and be cleaned by turning the plasc nut
underneath to open.
Replacing the fuses
Ensure that the NL-24 Pro is disconnected from the electrical supply and the plug is unplugged from the
wall socket. Replace the fuses 4 A (slow) (2) by taking them from the power entry which is mounted on
the back of the machine. Before reconnecng the plug into the wall socket, make sure the power entry
shows the right voltage seng (230V). If the wrong seng is shown, remove the fuse holder, turn it 180°
and insert it back in again. Aer the fuses have been replaced the machine can be reconnected to the wall
socket and switched on again.
ATTENTION!
Please ensure that the right voltage annotation is shown before powering the machine
ATTENTION!
Flip open for access to the fuse holder
make sure the power entry shows the right voltage setting reconnecting the machine!
1
2

20
BACK TO INDEX For more informaon about our products and how to contact us, please visit thermopatch.com
9. Technical annexes
9.1 Spare parts
SPAMA-01-04-VA Sealing pad (other sizes are available)
SPAMA-03-21-V Teon cover element
SPAMA-030-C1 Heang element
SPAMA-03-04 Temperature sensor
SPAES-038 Front cylinder
SPAES-039 Main cylinder
SPA-FUSE-4T Fuse 4A T(slow)
SPA106005 Air valve 24V
SPAPEN-03-02 Thermostat 270
SPAES-04-08 Mainboard
SPAMA-04-02 Display board
hps://www.thermopatch.com/en/products/spare-parts/
Table of contents
Other Thermopatch Power Tools manuals