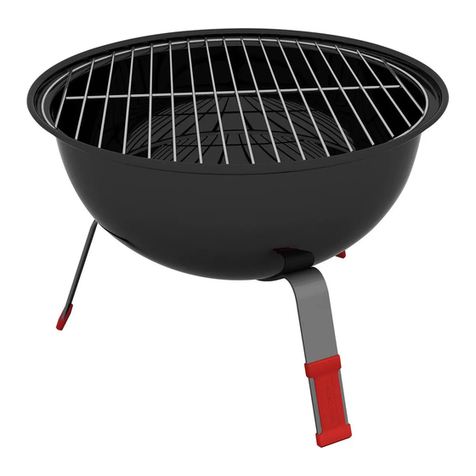
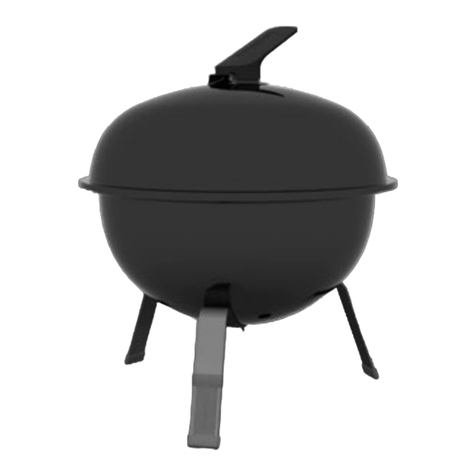
Tramontina TCP 320 Operator's manual

Charcoal Grill
SAFETY AND INSTRUCTION MANUAL
26500/010 - TCP 560
26500/009 - TCP 450L
26500/008 - TCP 450
26500/002 - TCP 320
26500/005 - TCP 320F
26500/003 - TCP 320L


SUMÁRIO
1. INTRODUCTION......................................................................................................................................................................4
2. ASSEMBLED PRODUCT DIMENSIONS ..................................................................................................................................4
2.1. TCP-320........................................................................................................................................................................4
2.2. TCP-320L......................................................................................................................................................................4
2.3. TCP-320F......................................................................................................................................................................4
2.4. TCP-450........................................................................................................................................................................5
2.5. TCP-450L......................................................................................................................................................................5
2.6. TCP-560........................................................................................................................................................................5
3. CHARCOAL GRILL COMPONENTS BY MODEL .....................................................................................................................6
3.1. MODEL TCP-320...........................................................................................................................................................6
3.1.1. Components:.......................................................................................................................................................6
3.1.2. Assembly instructions:.........................................................................................................................................6
3.2. MODEL TCP-320L.........................................................................................................................................................7
3.2.1. Components:........................................................................................................................................................7
3.2.2. Assembly instructions:.........................................................................................................................................7
3.3. MODEL TCP-320F.........................................................................................................................................................8
3.3.1. Components:........................................................................................................................................................8
3.3.2. Assembly instructions:.........................................................................................................................................8
3.4. MODEL TCP-450...........................................................................................................................................................9
3.4.1. Components:........................................................................................................................................................9
3.4.2. Assembly instructions:.......................................................................................................................................10
3.5. MODEL TCP-450L.......................................................................................................................................................11
3.5.1. Components:......................................................................................................................................................11
3.5.2. Assembly instructions:.......................................................................................................................................11
3.6. MODEL TCP-560.........................................................................................................................................................13
3.6.1. Components:......................................................................................................................................................13
3.6.2. Assembly instructions:.......................................................................................................................................14
4. GENERAL SAFETY INFORMATION........................................................................................................................................16
4.1. SAFETY SYMBOLS......................................................................................................................................................16
4.2. RECOMMENDATIONS FOR USE: DANGER..................................................................................................................16
4.3. RECOMMENDATIONS FOR USE: ATTENTION AND CAUTION.....................................................................................16
5. USEFUL GUIDELINES...........................................................................................................................................................16
5.1. STARTING TO USE A CHARCOAL GRILL.....................................................................................................................16
5.2. STEPS TO A GREAT BARBECUE .................................................................................................................................16
6. COOKING METHODS............................................................................................................................................................17
6.1. DIRECT METHOD ........................................................................................................................................................17
6.2. INDIRECT METHOD.....................................................................................................................................................17
7. CLEANING INSTRUCTIONS..................................................................................................................................................18
8. DISCARDING ........................................................................................................................................................................18
9. WARRANTY...........................................................................................................................................................................18
3
A
E
C
B
D
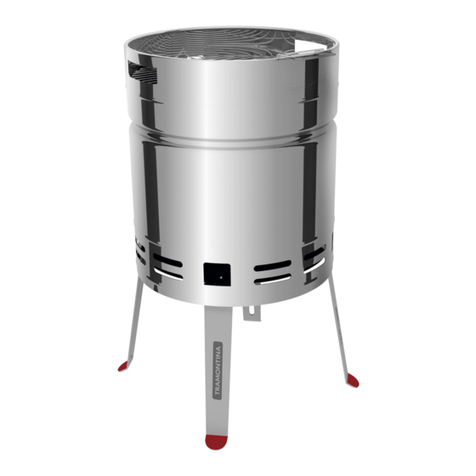
1. INTRODUCTION
This safety and instruction manual must be read and followed prior to operating the
grill for the first time and whenever questions arise.
This is the manual for grill models TCP-320, TCP-320L, TCP-320F, TCP-
450,TCP-450L e TCP-560.Therefore, please do not take into consideration
information that mentions components that are not part of your specific grill model.
Do not discard this manual as it contains important information about the product
(installation, use, maintenance and cleaning), as well as warnings and instructions
for safe and correct usage.
Before assembling your grill, please make sure there are no missing parts.
Identification Measurements (cm)
A Ø36.7
B 25.5
C 12.0
D 8.0
E 55.0
Non-compliance with these warnings and instructions will void the warranty, and
may also result in serious bodily injury or death, as well as in a fire or explosion
causing property damage
To maintain your grill’s smooth performance and make it last longer, follow the
guidelines in this manual.
The pictures in this manual are for illustration only. The manufacturer reserves the
right to make changes to the products when considered necessary for the purpose
of making improvements, without modifying essential characteristics of operation
and safety.
These grills are recommended for outdoor use only. They must not be used indoors.
2. ASSEMBLED PRODUCT DIMENSIONS
2.1. TCP-320 (Ref.: 26500/002):
*The dimensions below are for reference only.
Identification Measurements (cm)
A Ø36.0
B 26,1
C 13,5
D 8,5
2.2. TCP-320L (Ref.: 26500/003):
*The dimensions below are for reference only.
Identification Measurements (cm)
A Ø36.7
B 26,1
C 13.5
D 8,5
E 44.0
2.3. TCP-320F (Ref.: 26500/005):
*The dimensions below are for reference only.
A
A
E
C
C
B
B
D
D
4

Identification Measurements (cm)
A 65.5
B 65.3
C 122.5
D 86.0
E 12.0
F 65.0
2.4. TCP-450 (Ref.: 26500/008):
*The dimensions below are for reference only.
Identification Measurements (cm)
A Ø47.0
B 73.6
C 16.3
D 52.0
A
F
B
E
D
C
A
A
E
C
C
D
D
B
B
2.5. TCP-450L (Ref.: 26500/009):
*The dimensions below are for reference only.
Identification Measurements (cm)
A Ø47.6
B 73.6
C 16.3
D 52.0
E 97.3
2.6. TCP-560 (Ref.: 26500/010):
*The dimensions below are for reference only.
5

3.1.2. Assembly instructions:
3. CHARCOAL GRILL COMPONENTS BY MODEL
3.1. MODEL TCP-320 (Ref.: 26500/002):
3.1.1. Components:
ITEM DESCRIPTION QUANTITY
1LARGE SILICONE SUPPORT 1
2SMALL SILICONE SUPPORT 2
3UTENSIL FOR HANDLING COOKING GRATES 1
4STAINLESS STEEL COOKING GRATE 1
5STAINLESS STEEL CHARCOAL TRAY 1
6ENAMELED STEEL BOWL 1
7PAINTED STEEL TRIPOD 1
8PIN WITH M6 THREAD 1
9M6 WING NUT 1
10 METALLIC WASHER 1
11 INSULATING WASHER 2
Picture 02
STEP 1
Attach the bowl (item 6) to the tripod (item 7) using the pin with M6 thread (item 8),
the metallic washer (item 10), insulating washer (item 11), and the M6 wing nut (item
9) as shown in picture 01.
(The insulating washer that is placed on the inside of the bowl must be between
the bowl and the metallic washer, the washer that is placed on the outside must be
positioned between the bowl and the tripod).
STEP 2
To finish, insert the center hole of the tray (item 5) into the pin with M6 thread (item 8)
and place the cooking grate (item 4) on the edge of the bowl as shown in picture 02.
3
5
8
10
11
11
2
7
1
9
6
4
11
11
7
9
10
8
6
4
5
Picture 01
6

3.2.2. Assembly instructions:
Picture 03
Picture 05
Picture 04
STEP 1
Attach the bowl (item 6) to the tripod (item 7) using the M6 pin with M6 thread
(item 8), a metallic washer (item 10), insulating washer (item 11), and the M6
wing nut (item 9) as shown in picture 03.
(The insulating washer that is placed on the inside of the bowl must be between
the bowl and the metallic washer, the washer that is placed on the outside must be
positioned between the bowl and the tripod).
STEP 2
Insert the center hole of the tray (item 5) into the pin with M6 thread (item 8) and
place the cooking grate (item 4) on the edge of the bowl as shown in picture 04.
STEP 3
Align the M5 screw (item 12), a metallic washer (item 10), and insulating washer
(item 11) in the lid hole (inside) and the holder’s base (item 14) on the outside of the
bowl. Then, position the holder (item 13) on the base and tighten using a cross-head
screwdriver* as shown in pictures 05 and 06.
*The cross-head screwdriver does not come with the product.
3.2. MODEL TCP-320L (Ref.: 26500/003):
3.2.1. Components:
ITEM DESCRIPTION QUANTITY
1LARGE SILICONE SUPPORT 1
2SMALL SILICONE SUPPORT 2
3UTENSIL FOR HANDLING COOKING GRATES 1
4ENAMELED STEEL COOKING GRATE 1
5ENAMELED STEEL CHARCOAL TRAY 1
6ENAMELED STEEL BOWL 1
7PAINTED STEEL TRIPOD 1
8PIN WITH M6 THREAD 1
9M6 WING NUT 1
10 METALLIC WASHER 2
11 INSULATING WASHER 3
12 M5 SCREW 1
13 BAKELITE HOLDER 1
14 HOLDER’S STAINLESS STEEL BASE 1
15 ENAMELED STEEL LID 1
13
14
15
11
11
11
8
10
10
4
3
5
6
29
7
1
12
8
6
4
5
7
13
14
15
11
10
12
9
10
11
11
Picture 06
7

3.3. MODEL TCP-320F (Ref.: 26500/005):
3.3.1. Components:
ITEM DESCRIPTION QUANTITY
1LARGE SILICONE SUPPORT 1
2SMALL SILICONE SUPPORT 2
3UTENSIL FOR HANDLING COOKING GRATES 1
4STAINLESS STEEL COOKING GRATE 1
5STAINLESS STEEL CHARCOAL TRAY 1
6ENAMELED STEEL BOWL 1
7PAINTED STEEL TRIPOD 1
8M4 SCREW 6
9M4 NUT 6
10 STAINLESS STEEL HOLDER FOR COOKING GRATE
AND TRAY
3
11 M6 LARGE SCREW 1
12 METALLIC WASHER 2
13 INSULATING WASHER 2
14 M6 WING NUT 1
15 M5 SCREW 1
16 M6 SMALL SCREW 1
17 M6 NUT 1
18 BAKELITE HANDLE 1
19 BAKELITE HOLDER WITH STAINLESS STEEL BASE 1
20 ENAMELED STEEL LID 1
21 STAINLESS STEEL SKEWERS SUPPORT 1
22 STAINLESS STEEL VENT 1
3.3.2. Assembly instructions:
Picture 07
Picture 08
STEP 1
Attach the bowl (item 6) to the tripod (item 7) using the M6 large screw (item 11), a
metallic washer (item 12), insulating washer (item 13), and the M6 wing nut (item
14) as shown in picture 07.
(The insulating washer must be between the bowl and the metallic washer).
STEP 2
Attach the holders (item 10) to the bowl (item 6) using M4 screws (item 8) and nuts
(item 9) as shown in picture 08.
19
18
22
20
13 21
12
15
17
16
3
4
5
10
11
12
13
6
7
2
14
1
8
9
11
12
13
6
12
7
14
6
9
10
8
8

21
19
20
13
12
15
5
4
5
STEP 3
Place the tray (item 5) on the lower part of the holders and the cooking grate (item 4)
on the upper part of the holders as shown in picture 09. If using the skewer support
(item 21), please remove the cooking grate and attach it on the grill bowl as shown in
picture 10.
3.4. MODEL TCP-450 (Ref.: 26500/008):
3.4.1. Components:
ITEM DESCRIPTION QUANTITY
1STAINLESS STEEL LEG 3
2STAINLESS STEEL OUTER HOLDER 3
3STAINLESS STEEL INNER HOLDER 3
4STAINLESS STEEL COOKING GRATE 1
5ENAMELED STEEL CHARCOAL TRAY 1
6ENAMELED STEEL BOWL 1
7UTENSIL FOR HANDLING COOKING GRATES 1
8CHROME STEEL TRIANGLE 1
9M5 SCREW 3
10 M6 SCREW 6
11 M6 NUT 6
Picture 10
Picture 11
Picture 09
STEP 4
Attach the holder (item 19) to the lid (item 20) using the M5 screw (item 15), a
metallic washer (item 12) and insulating washer (item 13), as shown in picture 11.
(The insulating washer must be between the bowl and the metallic washer).
4
7
5
3
6
10
2
1
8
9
11
9

3.4.2. Assembly instructions:
STEP 1
Align two M6 screws (item 10) with the holes in the outer holder (item 2) according
to picture 12. Insert the holder with the screws into the bowl (item 6), making sure
that the attachment holes for the legs face the center of the grill as shown in picture
13. Align the inner holder (item 3) while holding the screws and secure the M6 nuts
(item 11) tighten them well as shown in picture 14. Repeat the same procedure for
the other two sets of holders.
STEP 2
Hold the existing pin on the leg (item 1) and insert it into the securing hole of the
outer holder (item 2), according to picture 15. Make sure that the hole of the outer
holder is facing the inside of the grill structure. Repeat the same procedure for the
other two legs. To assemble the chrome steel triangle (item 8), align the hole of the
outer holder as well as the leg holes properly.
STEP 4
Place the charcoal tray (item 5) on the supports of the three inner holders according
to picture 17. Then, place the cooking grate (item 4) on the upper supports of these
same holders, as shown in picture 18.
STEP 3
Position the chrome steel triangle (item 8) and secure it with M5 screws (item 9),
as shown in picture 16.
Picture 13
Picture 14
Picture 16
Picture 12
Picture 15
Picture 17
Picture 19
Picture 18
Picture 20
NOTE: The cooking grate (item 4) is double-sided, meaning it can be used on both
of its sides:
• With the channel in a “V” position (picture 19), it reduces flames and results
in closer markings.
• With the channel in a “ ” position (picture 20), it reduces smoke and results in
more spread out markings. Cleaning is easier when the grill is used in this position.
V
10
6
Attachment
hole
3
11
2
2
1
9
8
4
5
10

3.5.2. Assembly instructions:
STEP 1
Align two M6 screws (item 10) with the holes in the outer holder (item 2) according
to picture 21. Insert the holder with the screws into the bowl (item 6), making sure
that the attachment holes for the legs face the center of the grill as shown in picture
22. Align the inner holder (item 3) while holding the screws and secure the M6 nuts
(item 11) tighten them well as shown in picture 23. Repeat the same procedure for
the other two sets of holders.
Picture 22
Picture 23
Attachment hole.
Picture 21
3.5. MODEL TCP-450L (Ref.: 26500/009):
3.5.1. Components:
ITEM DESCRIPTION QUANTITY
1STAINLESS STEEL LEG 3
2STAINLESS STEEL OUTER HOLDER 3
3STAINLESS STEEL INNER HOLDER 3
4STAINLESS STEEL COOKING GRATE 1
5ENAMELED STEEL CHARCOAL TRAY 1
6ENAMELED STEEL BOWL 1
7UTENSIL FOR HANDLING COOKING GRATES 1
8CHROME STEEL TRIANGLE 1
9M5 SCREW 3
10 M6 SCREW 9
11 M6 NUT 9
12 ENAMELED STEEL LID 1
13 LID HANDLE 1
14 THERMOMETER 1
15 AIR OUTLET 1
16 INTERNAL LID HOLDER 1
17 M6 WING NUT 1
18 METALLIC WASHER 1
19 SPLIT LOCK WASHER 1
20 THERMOMETER WASHER 1
13
12
10
15
10 14
20
17
18
19
11
16
411
5
3
6
10
2
9
81
11
7
2
10
6
3
11
11

STEP 2
Hold the existing pin on the leg (item 1) and insert it into the securing hole of the
outer holder (item 2), according to picture 24. Make sure that the hole of the outer
holder is facing the inside of the grill structure. Repeat the same procedure for the
other two legs. To assemble the chrome steel triangle (item 8), align the hole of the
outer holder as well as the leg holes properly.
STEP 3
Position the chrome steel triangle (item 8) and secure it with M5 screws (item 9),
as shown in picture 25.
Picture 24
STEP 4
Place the charcoal tray (item 5) on the supports of the three inner holders according
to picture 26. Then, place the cooking grate (item 4) on the upper supports of these
same holders as shown in picture 27.
STEP 5
Insert the air outlet (item 15) on the lid together with an M6 screw (item 10) according
to picture 30. Then, place the metallic washer (item 18), the split lock washer (item
19) and an M6 nut (item 11), as shown in picture 31.
(The split lock washer must be between the metallic washer and the nut).
STEP 6
Insert two M6 screws (item 10) into the handle holes (item 13), and attach the handle
with the screws on the lid (item 12) according to picture 32. Hold the handle against
the lid and align the inner holder (item 16) with the same screws of the handle. Then,
secure the M6 nuts (item 11) and tighten them, as shown in picture 33.
Picture 26
Picture 28
Picture 32
Picture 30
Picture 29
Picture 33
Picture 31
NOTE: The cooking grate (item 4) is double-sided, meaning it can be used on both
of its sides:
• With the channel in a “V” position (picture 28), it reduces flames and results
in closer markings.
• With the channel in a “ ” position (picture 29), it reduces smoke and results in
more spread out markings. Cleaning is easier when the grill is used in this position.
V
2
1
9
8
15
10
11
19
18
13
12
11
16
10
4
5
Picture 27
Picture 25
12

3.6. MODEL TCP-560
3.6.1. Components:
ITEM DESCRIPTION QUANTITY
1BAKELITE LID HANDLE 1
2STAINLESS STEEL THERMOMETER 1
3ENAMELED STEEL LID 1
4STAINLESS STEEL SKEWER SUPPORT (2 HALVES) 1
5CENTRAL STAINLESS STEEL COOKING GRATE 1
6LARGE STAINLESS STEEL COOKING GRATE 1
7STAINLESS STEEL CHARCOAL GRATE 1
8ENAMELED STEEL BOWL 1
9BAKELITE BOWL HANDLE 1
10 NYLON VENT HANDLE 1
11 PAINTED STEEL FRONT LEG 1
12 PAINTED STEEL LEFT LEG 1
13 PAINTED STEEL RIGHT LEG 1
14 PAINTED STEEL SHELVES 1
15 LOWER METALLIC GRATE 1
16 RUBBER-COATED PLASTIC WHEEL 2
17 PLASTIC WHEEL CAPS 2
18 ENAMELED STEEL ASH TRAY 1
19 PLASTIC ASH TRAY HANDLE 1
20 AIR INLET STAINLESS STEEL RING 1
21 AIR INLET METALLIC RING SHAFT 1
22 ENAMELED STEEL ASH FILTER 1
23 UTENSIL FOR HANDLING COOKING GRATES 1
24 NYLON HANDLE 1
25 STAINLESS STEEL THERMOMETER BASE 1
26 STAINLESS STEEL AIR OUTLET 1
1
2
25
3
4
5
6
7
8
9
11
14
12
15
19
18
20
21
24
13
22
23
10
26
17
16
STEP 7
Attach the thermometer (item 14) using its metallic washer (item 20) and a wing nut
(item 17), as shown in pictures 34 and 35.
The internal holder allows for the lid to be supported on the grill bowl, as shown
in picture 36.
Picture 36
Picture 34
Picture 35
14
17
20
13

ITEM DESCRIPTION QUANTITY
AA M6X12 SCREW 8
BB M6X12 SCREW 6
CC M4X12 SCREW 4
DD M5X10 SCREW 2
EE M6 NUT 3
FF M5 NUT 2
GG COTTER PIN 2
HH METALLIC WASHER 13
II INSULATING WASHER 13
JJ CAP NUT 1
ADDITIONAL ITEM
DESCRIPTION QUANTITY
CROSS HEAD
SCREWDRIVER 6X150mm 1
3.6.2. Assembly instructions:
Follow all instructions in this manual for the correct grill assembly
procedure.
To quickly assemble your grill, please follow the instructions below:
• Remove all parts from the packaging and carefully display all items on a level
surfac(separate small and large parts).
• Check if all listed parts are in the packaging. In order to do so please refer to the
part list.
• Follow the assembly steps indicated in this manual.
• Install all attachment components (screws, nuts, etc.) as shown in the pictures.
• Be careful when assembling your grill since it has many parts and these may have
sharp edges or corners.
• Remove all adhesive tape or protective film from the grill parts. Use a soft cloth
with alcohol to wipe the glue residue.
• This is a two-person job.
BB
HH
II
8
STEP 3
Attach the bowl (item 8) to the legs using M6x12 screws (item BB), metallic
washers, and ceramic washers (items HH and II), as shown in picture 39.
(The ceramic washer must be between the bowl and the metallic washer).
STEP 4
Attach the handle to the bowl (item 9) using M6x12 screws (item AA), metallic
washers, and insulating washer (items HH and II), as shown in picture 40.
(The ceramic washer must be between the bowl and the metallic washer).
GG
15
17
16
CC
CC
13
12
11
AA
15
STEP 2
Attach the wheels (item 16) to the axis of the metallic grate (item 15) using the cotter
pins (item GG) and then attach the wheel caps (item 17), as shown in picture 38.
STEP 1
Attach the front leg (item 11) to the lower metallic grate (item 15) using an M6x12
screw(item AA) and attach the left leg (item 12) and the right leg (item 13) to the
lower metallic grate using M4x12 screws (item CC), as shown in picture 37.
Picture 37
Picture 39
Picture 38
AA
HH
II
9
Picture 40
14

1
2
3
II
HH
AA
Picture 46
JJ
20
21
24
Picture 41
Picture 44
Picture 42
20
EE
8
AA
4
7
Picture 47
Picture 48
LID HOLDER
5
6
7
22
18
8
HOLDER
STEP 5
Attach the handle (item 24) to the shaft (item 21) then attach them to the air inlet
ring (item 20) using a nut (item JJ), as shown in picture 41.
STEP 7
Place the ash filter (item 22) in the center of the bowl (item 8), the charcoal grate
(item 7) on the lower rack supports, the large cooking grate (item 6) on the upper
rack supports, the small cooking grate (item 5) in the center of the large cooking
grate (item 6) and attach the ash tray (item 18) to the air inlet ring (item 20) as
shown in picture 43.
If you are going to use the skewer support (item 4), attach its halves using M5x10
screws (item DD) and M5 nuts (item FF), as shown in picture 44. Remove the
cooking grates, but leave the charcoal grate in place (item 7), and fit the support
on the grill bowl, as shown in picture 45.
STEP 8
Attach the handle (item 1) to the lid (item 3) using M6x12 screws (item AA),
metallic washers, and insulating washer (items HH and II), and then attach the
thermometer (item 2) using the wing nut that has been already attached to it as
shown in picture 46.
(The insulating washer must be between the bowl and the metallic washer).
The TCP-560 grill has a side holder for the lid, as shown in picture 47. This holder
was specifically made to support the lid with internal pins, as shown in picture 48.
STEP 6
Attach the air inlet ring (item 20) to the bowl (item 8) using M6x12 screws (item AA)
and M6 nuts (item EE) as shown in picture 42. If deemed necessary, the screws can
also be attached using the metallic and insulating washer.
Picture 43 Picture 45
LID
PINS
4
4
FF
DD
15

4. GENERAL SAFETY INFORMATION
4.1. SAFETY SYMBOLS
They will draw your attention to important safety information.
• Words such as DANGER, ATTENTION or WARNING will be used with the
SAFETY symbol .
• DANGER identifies more serious situations.
4.2. RECOMMENDATIONS FOR USE: DANGER
• Failure to comply with the “DANGER, ATTENTION and WARNING” messages
contained in this Safety and Instruction Manual may result in serious bodily injury,
as well as in a fire or an explosion causing property damage.
• Only use the grill outdoors. Never use it in enclosed spaces such as garages,
hallways or balconies. If it is used in enclosed spaces, toxic fumes will accumulate,
causing serious bodily injury or death.
• Keep the grill away from combustible materials, vapors, gases and flammable
liquids such as gasoline, alcohol etc.
• Incorrect assembly can be dangerous. Follow this manual’s assembly instructions
as well as the video available on Tramontina’s website. Only use the grill when all
parts are properly assembled according to the manual.
• If your grill model is TCP-560 do not store sharp, flammable or fuel materials on
the lower rack. Make sure the ash tray is correctly fitted to the place indicated in the
manual before you light the grill (do not light or operate the grill without it).
• Do not add charcoal lighter fluids, charcoal soaked in lighter fluid, or any other
highly volatile or flammable fluid (petrol, alcohol, etc...) fluids.t
• Always be careful when using the grill as surfaces will become very hot during
operation.
• Never leave children, pets, or people with reduced physical, sensory, or mental
capabilities unsupervised near a hot grill.
• Keep small parts and plastic bags out of the reach of children.
• The grill should never be used by children or people with reduced capabilities.
• When using skewers with the grill, keep them away from children, pets, and people
with reduced physical, sensory, or mental capabilities.
• Only move the grill when it’s not in use and after all parts have cooled down.
• For models TCP-450, TCP-450L and TCP-560 be extra careful not to lift the
supporting feet excessively, as it can put the grill out of balance.
• Only remove ashes after they have cooled down and the charcoal has finished
burning. Make sure the grill has cooled down.
• The charcoal must always be placed in the specified container never directly at the
bottom of the grill.
• Be careful when handling and storing hot electric lighters.
• Keep wires and electric cables away from the grill’s hot surfaces and away from
areas with foot traffic
• Do not use the grill in strong winds; as they can hinder its performance increase
charcoal consumption, and present risks caused by hot ashes.
4.3. RECOMMENDATIONS FOR USE: ATTENTION AND CAUTION
• During use always keep the grill on a flat, stable and non-tilted surface, away from
combustible or flammable materials.
• If your grill is the TCP-560 the front foot works as a locking device to ensure the
appliance is stable.
• If your grill has a lid, remove or lift it during the process of lighting the charcoal
until the embers are formed.
• When using the TCP-450L without the lid, carefully hang it by correctly attaching
the internal lid support to the edge of the bowl.
• When using your TCP-560 grill without a lid, carefully hang it by attaching the pin
to the side holder.
• Before handling cooking grates, ashes, charcoal or the grill itself, make sure they
are not hot.
• If your grill has a lid use the handles for safety.
• Do not leave the grill unattended while the fire/embers are lit or the ashes and
grill are hot.
• Never use water to control flames or to extinguish the fire as this can damage
the finish of the grill.
• We recommend using Tramontina protective mitts against the heat during use,
when handling the grill, preparing food, adjusting the air inlet/outlet, adding charcoal
or opening/closing the lid.
• We recommend using Tramontina utensils with long handles as they provide a
safe distance from the appliance.
• Never place the hot lid on a surface that might burn easily such as, carpets, fabrics,
grass, wood, plastic, etc. If your model is either TCP-450 or TCP-560 use the side
holder with the appropriate fit.
• Never discard embers in places where they can be stepped on or cause a fire. Never
discard ashes or charcoal before they have cooled down completely.
• Due to variations in temperature, your grill screws may come loose. Tighten them
regularly.
• Before you store your grill, remove the charcoal, ashes, and clean the cooking
grates (see cleaning instructions).
• Never assemble or handle the grill while under the influence or drugs, prescribed
or not, such as alcohol, medication, etc.
• This grill should not be used in or on vehicles and/or boats.
• This grill must never be used as a heater.
• Never fill the bottom of the grill with any material as this will block the air flow.
• Do not wear loose clothing while igniting or using the grill.
• Models TCP-450L and TCP-560 are equipped with a thermometer. Be careful not
to hit or scratch the grill to ensure normal operation of the appliance.
• Never use the grill to support yourself and never let children climb on the appliance.
• Do not move the grill while in use or still hot.
• For the TCP-320F grill we recommend using Tramontina skewers 26499/011 (blade
length: 40 cm).
• For the TCP-560 grill we recommend using Tramontina skewers 75cm.
Attention when handling the cooking grates:
• For TCP-320, TCP -320L, TCP-320F, TCP-450 and TCP450, use the utensil for
the handling grates that come with the product.
• For TCP-560: Remove the metallic ring for skewers. The smaller cooking grate should be
moved with the utensil for handling grates that come with the product. The larger cooking
grate should be moved by its own handles with the Tramontina protective mitts.
5. USEFUL GUIDELINES
5.1. STARTING TO USE A CHARCOAL GRILL
• Remove the lid and open all air inlets and outlets before lighting the fire. Please
disregard this information if your model does not have this feature.
• For adequate air flow, the ashes accumulated in the lower part of the grate/tray
must be removed, but verify the embers have been extinguished before doing so.
• Charcoal needs oxygen to burn which is why the air inlets and outlets must remain
unobstructed.
• Follow the supplier’s instructions on the charcoal package. Observe the charcoal
capacity indicated in this manual according to your grill model.
• Make a pyramid with the charcoal and light according to this manual’s instructions.
• After approximately 15 to 20 minutes of fire, spread the embers with the long
handled tongs according to your chosen cooking method. We recommend using
Tramontina tongs.
5.2. STEPS TO A GREAT BARBECUE
Please follow these guidelines to prepare your barbecue:
• There are two methods of cooking on a grill: direct and indirect. Read the instructions
for preparing your barbecue, consulting the following pages for specific guidelines.
• Do not place the food on the grate before obtaining an ideal brazier. Leave the
charcoal to burn until embers are formed (keep air inlets/outlets unobstructed so the
fire does not die out).
• If your grill has an option to adjust the air flow, the internal intensity of the heat can
be increased or reduced by making these adjustments.
• If your model is equipped with a thermometer it is possible to measure the internal
temperature of the grill, making preparation easier.
• Make sure the food does not touch the lid when you close it.
• In order to keep food juicy, we recommend using Tramontina spatulas or tongs
to prevent creating holes in the food.
• To preserve the natural juices of the foods, avoid pressing them against the grate.
• When using the lid during preparation, remove it by sliding it sideways. This will
prevent ashes from falling on top of the food.
• Do not defrost beef, fish, or chicken at room temperature. Defrost in the fridge.
• Wash hands thoroughly with water and soap before handling, preparing and
consuming food.
• Use different boards for cutting raw and cooked foods.
• Wash all kitchen utensils with warm water and soap, rinsing them well before and
after use.
16

6.2. INDIRECT METHOD
The indirect method is recommended for the TCP-560 model only.
If using the indirect method, use the grate for cooking more slowly, not subjecting
the bottom part of the food to direct contact with the heat from the brazier as shown
on pictures 53 and 54. When preparing for indirect cooking, spread the embers to
both sides. The heat then rises, follows the curve of the grill, is distributed inside,
and wraps around the food.
Due to the use of the metal tray in this method, the fat and juice released from the food
do not drip straight down the grill walls, or into the brazier, which reduces the amount
of smoke and avoids the occurrence of flames. Please see description.
Use indirect cooking for food that requires longer than 25 minutes to prepare, or for
food that might get dry or burnt if exposed directly to the heat source. Examples:
boned pieces of poultry, whole fish, or fish fillets.
6. COOKING METHODS
6.1. DIRECT METHOD
If using the direct method, use the grate for cooking keeping the bottom part of the
food in direct contact with the heat from the brazier, as shown in pictures 49, 50, 51
and 52. The food should be turned at alternating times regardless of what you are
preparing. Use the direct method for food that takes less than 25 minutes to prepare,
such as steak, ribs, vegetables, etc.
Picture 49
Picture 51
Picture 53
Picture 50
Picture 52
Picture 54
DRIP TRAY
FOR FAT.
Using the grill with the lid on will allow the heat to follow its curve, making it circulate
slowly to roast the food evenly.
Follow the stages below for indirect cooking::
1. Open air inlets/outlets;
2. Put the recommended amount of charcoal in the center of the charcoal tray/grate
(refer to the chart for recommended amount of charcoal);
3. Light the charcoal. Keep the grill open until the brazier is formed (approximately
15 to 20 minutes);
4. Spread the embers to the edges of the grill, leaving enough room for a metal drip
tray** with water between the embers to prevent the release of smoke;
Note: The minimum recommended amount of water is half the capacity of the tray.
(** Metal drip tray does not come with the product)
5. Place the cooking grate on the upper rack of the holders;
6. Place the food in the center of the cooking grate (above the drip tray);
7. If necessary, use the grill lid.
GRILL AMOUNT OF CHARCOAL
TCP-560 Approximately 2.0 kg
Make sure the charcoal is not too close to the cooking grate.
The bigger the air inlet, the more the charcoal will burn and be consumed which
will result in quicker cooking. If you want the food to cook more slowly, the air inlet
should be reduced.
ATTENTION
It is not possible to use the indirect cooking method in the TCP-320, TCP-320L,
TCP-320F, TCP-450 and TCP - 450L models.
Follow the steps below for direct cooking:
1. Open air inlets/outlets;
2. Put the recommended amount of charcoal in the center of the charcoal tray/grate
(please refer to the chart for recommended amount of charcoal);
3. Light the charcoal. Keep the grill open until the brazier is formed (approximately
15 to 20 minutes);
4. Spread the embers evenly across all of the tray/grate of the grill;
5. Place the cooking grate(s) according to the assembly instructions. If using skewers*
the cooking grate(s) must be removed. (*Skewers do not come with the product).
6. Place the food on the cooking grate or skewer;
7. If necessary and if the feature is available on your model, use the grill lid.
GRILL AMOUNT OF CHARCOAL
TCP-320, TCP-320L AND TCP-320F Approximately 1.0 kg
TCP-450 andTCP-450L Approximately 2,0 kg
TCP-560 Approximately 2.5 Kg
Make sure the charcoal is not too close to the cooking grate.
The bigger the air inlet, the more the charcoal will burn and be consumed which
will result in quicker cooking. If you want the food to cook more slowly, the air inlet
should be reduced. Please disregard this information if your model does not have
this feature.
17

7. CLEANING INSTRUCTIONS
To maintain your grill’s good performance and make it last longer, follow the cleaning
guidelines below:
DANGER
*Do not touch or carry out any cleaning/maintenance tasks on your grill until it has
completely cooled down and the embers have been extinguished.
• Remove cooking grates (please refer to instructions about handling these).
• Remove ashes.
• Wash the grates using a metal bristled brush, mild detergent, and warm water. Rinse
well with clean water and keep the grill dry. We recommend using a Tramontina
brush with metal bristles.
• It is necessary to clean cooking grates and skewers after each use.
• AThe other parts of your grill must be washed after each use with a soft sponge, mild
detergent, and warm water. Rinse well with clean water and dry the grill immediately.
Always keep the grill dry.
ATTENTION
• In coastal areas where there is high humidity or retention of certain residues (salt,
fat, food, etc), corrosion (rust) may occurt more quickly on the structure of the grill
due to sea spray. Take extra care with cleaning, maintenance and storage.
• Before reusing your grill, verify its attachment systems. If necessary, retighten them.
• The cooking grates can be cleaned with metal brushes which must be used
carefully and exclusively for this purpose..
• Always rinse the grates well after using the metal brushes as they can lose bristles
during use. Brushes should be replaced when bristles start to come loose.
• Never use sharp objects to clean any part of the grill or remove ashes as they can
damage the finish.
• Never use abrasive cleaning products on your grill as this might damage the finish.
• Any damage to the finish will compromise the corrosion resistance of the grill
components.
• The grill must be thoroughly cleaned after use and kept in a sheltered dry place.
• Never wash this products’ parts in a dishwasher.
• Never use products such as ethanol, acid, or solvent on the grill.
8. DISCARDING
Please refer to current legislation in your country regarding the safe disposal of the
packaging, or residue generated by the cooking process, parts and the grill itself.
Never discard/burn domestic waste or any other type of waste in your grill.
9. WARRANTY
Tramontina S/A Cutelaria provides warranty to this product regarding manufacturing
defects for a total period of 12 (twelve) months or 9 (nine) months under contractual
warranty and 90 (ninety) days legal warranty.
The warranty period starts on the date stated on the receipt of purchase which should
be attached to this policy. The warranty will only be valid with a proof of purchase.
This warranty is limited to repairing or replacing defective parts under normal
conditions of use after analysis and confirmation that these are indeed defective.
Please contact your nearest Tramontina Authorized Service (contact information
is available on our website). If the defect and the complaint are verified, the
manufacturer will replace parts free of charge. When returning defective parts, costs
of shipping must be pre-paid by the consumer. When the manufacturer returns parts
to the consumer, shipping must also be pre-paid by the consumer.
There are no other implied warranties except those expressly established in this
document and any warranties are limited to the period stated above.
The warranty (legal and/or contractual) does not cover:
• Defects resulting from non-compliant use and care recommendations in this manual;
• Any faults or operational difficulties as a result of accidents, abuse, inadequate use,
alterations, vandalism, inadequate assembly, failure to comply with routine maintenance
work or incorrect work performed by the user;
• When the product is used for purposes other than those recommended in this
manual;
• Normal/natural wear;
• Color alterations and stains do not hinder the normal operation of the grill. Therefore
they will not be considered for any claims;
• Deterioration or damage caused by severe weather conditions, such as hailstorms,
hurricanes, earthquakes, tornadoes or faded coloring caused by heat and/or exposure
to chemicals, directly or in the atmosphere;
• Occurrence of corrosion (rust) due to exposure to high humidity or retention of
certain residues (salt, fat, food, etc) in coastal areas;
• In case of discontinued parts, the manufacturer reserves the right to offer similar
parts of equal function;
• Damaged parts (crushed or scratched) due to transportation accidents or inadequate
handling, falls, or acts of nature, such as lightning, rain, etc.
• Expenses for service when no defect can be found, related to use guidelines that
can be found in this instruction manual or on the product itself, may be charged to
the consumer.
Other information about technical support:
• A TRAMONTINA S/A CUTELARIAdue to the ongoing development of its products,
reserves the right to alter general, technical, and aesthetic features without prior
warning.
• Any defect that is verified in this product must be immediately communicated to
the nearest Tramontina Authorized Service. Please contact technical support teams
(Brazil only http://www.tramontina.com.br/assistencia-tecnica. For services abroad,
please contact authorized representatives (http://www.tramontina.com under the
Where to Buy section).
• If you need replacement parts or if you have any questions about your grill assembly,
use, or maintenance, please contact technical support (Brazil only - http://www.tramontina.
com.br/assistencia-tecnica-). Services abroad (http://www.tramontina.com under the
Where to Buy section).
• Any other necessary maintenance or adjustment work not covered in this manual
must be performed by qualified personnel. This is why we recommend always
contacting the Tramontina Authorized Service Network, specifying your grill’s brand
and model.
• The manufacturer is not responsible for people or companies that assume any
other duties or liabilities regarding the sales, installation, use, removal, returning or
replacing of their equipment.
18


166624 - R01
www.tramontina.com
Belém: Fone: (91) 4009.7700
Belo Horizonte: Fone: (31) 3223.4026
Curitiba: Fone: (41) 2111.9110
Goiânia: Fone: (62) 3272.2100
Porto Alegre: Fone: (51) 2101.5000
Recife: Fone: (81) 3128.5500
Rio de Janeiro: Fone: (21) 2224.5004
Salvador: Fone: (71) 3215.8266
São Paulo: Fone: (11) 4197.1266
Other manuals for TCP 320
2
This manual suits for next models
11
Table of contents
Other Tramontina Grill manuals

Tramontina
Tramontina TCP-400 Quick guide

Tramontina
Tramontina TCP-400 Operator's manual

Tramontina
Tramontina TCP-400 Operator's manual

Tramontina
Tramontina TCP 320 Operator's manual

Tramontina
Tramontina TGP 6000 Operator's manual

Tramontina
Tramontina TCP-320L Operator's manual

Tramontina
Tramontina TCP-380 User manual

Tramontina
Tramontina TCP 320 Operator's manual

Tramontina
Tramontina TGP-4700/G3543B-SB Operator's manual