manuals.online logo
Brands
  1. Home
  2. •
  3. Brands
  4. •
  5. Transcend
  6. •
  7. Storage
  8. •
  9. Transcend TS0GHDC2 User manual

Transcend TS0GHDC2 User manual

Other Transcend Storage manuals
Transcend SSD18C3 User manual

Transcend

Transcend SSD18C3 User manual

Transcend TS4G-16GSDHC6- S5W User manual

Transcend

Transcend TS4G-16GSDHC6- S5W User manual

Transcend miniSDHC Card Series User manual

Transcend

Transcend miniSDHC Card Series User manual

Transcend TS250GSJ25M-R User manual

Transcend

Transcend TS250GSJ25M-R User manual

Transcend JetFlash 110 Mounting instructions

Transcend

Transcend JetFlash 110 Mounting instructions

Transcend USB JetFlash User manual

Transcend

Transcend USB JetFlash User manual

Transcend StoreJet 2.5 IDE Series User manual

Transcend

Transcend StoreJet 2.5 IDE Series User manual

Transcend USB JetFlash User manual

Transcend

Transcend USB JetFlash User manual

Transcend JetFlash V33p User manual

Transcend

Transcend JetFlash V33p User manual
Transcend StoreJet 18 mobile User manual

Transcend

Transcend StoreJet 18 mobile User manual

Transcend USB JetFlash User manual

Transcend

Transcend USB JetFlash User manual

Transcend Mobile Memory Card TS1GRMMC4 User manual

Transcend

Transcend Mobile Memory Card TS1GRMMC4 User manual

Transcend TS250GSJ25P User manual

Transcend

Transcend TS250GSJ25P User manual

Transcend StoreJet 25M3 USB 3.0 750GB User manual

Transcend

Transcend StoreJet 25M3 USB 3.0 750GB User manual

Transcend JetFlash 150 Series User manual

Transcend

Transcend JetFlash 150 Series User manual

Transcend TS40GHDC2 User manual

Transcend

Transcend TS40GHDC2 User manual

Transcend ExpressCard SSD TS8GSSD34E-M User manual

Transcend

Transcend ExpressCard SSD TS8GSSD34E-M User manual

Transcend StoreJet TS250GSJ25C User manual

Transcend

Transcend StoreJet TS250GSJ25C User manual

Transcend SSD720 User manual

Transcend

Transcend SSD720 User manual

Transcend JetFlash T3 User manual

Transcend

Transcend JetFlash T3 User manual

Transcend Tsonic 320 2GB User manual

Transcend

Transcend Tsonic 320 2GB User manual

Transcend TS120GSJ25T User manual

Transcend

Transcend TS120GSJ25T User manual

Transcend TS2G-8GCF266 Manual

Transcend

Transcend TS2G-8GCF266 Manual

Transcend 32MB4GB User manual

Transcend

Transcend 32MB4GB User manual

Popular Storage manuals by other brands

IBM 40/80 GB HH DLTVS user guide

IBM

IBM 40/80 GB HH DLTVS user guide

Synology DiskStation DS716+II Quick installation guide

Synology

Synology DiskStation DS716+II Quick installation guide

Vantec NexStar-HX4 user manual

Vantec

Vantec NexStar-HX4 user manual

LaCie Christofle Galet datasheet

LaCie

LaCie Christofle Galet datasheet

LaCie Rugged Thunderbolt user manual

LaCie

LaCie Rugged Thunderbolt user manual

OCZ IBIS datasheet

OCZ

OCZ IBIS datasheet

QNAP TS 32PXU Series user guide

QNAP

QNAP TS 32PXU Series user guide

LaCie RUGGED RAID user manual

LaCie

LaCie RUGGED RAID user manual

Freecom CLS DOCK Quick install guide

Freecom

Freecom CLS DOCK Quick install guide

PNY Attache P-FD64MBATT3 install guide

PNY

PNY Attache P-FD64MBATT3 install guide

OWC Mercury Elite Pro Dual mini Assembly manual

OWC

OWC Mercury Elite Pro Dual mini Assembly manual

OLT 6x6 Maximizer Assembly manual

OLT

OLT 6x6 Maximizer Assembly manual

Thunderbolt 600 user manual

Thunderbolt

Thunderbolt 600 user manual

Intel RAID High Availability user guide

Intel

Intel RAID High Availability user guide

LaCie 12big Thunderbolt 3 Quick install guide

LaCie

LaCie 12big Thunderbolt 3 Quick install guide

Spectra Logic T-Series Spectra T50e quick start guide

Spectra Logic

Spectra Logic T-Series Spectra T50e quick start guide

IBM Redbooks ServeRAID-MR10M user guide

IBM

IBM Redbooks ServeRAID-MR10M user guide

HP StorageWorks EML E Series Installation

HP

HP StorageWorks EML E Series Installation

manuals.online logo
manuals.online logoBrands
  • About & Mission
  • Contact us
  • Privacy Policy
  • Terms and Conditions

Copyright 2025 Manuals.Online. All Rights Reserved.




 
!"#
 $
$%# .............................................................................1
& ................................................................................................2
'() *+ )  ...................................................................... 2
, ' -...............................................................................3



%., . ......................5

%/ , 0' ...................................................................5
*) 1/ , 0'................5
%/ , 233324 ......................................................5
*) 1/ , 

233324....5
%*) 1%$5' .....7
%., .'63 .............................7
1"/ , 0' .........................................7
*) 1/ , 0'................8
1.................................................................................. 9
%/ , 233324 ......................................................9
*) 1/ , 

233324.. 10
%*) 1%$5' ... 11
/ %.................................................................................................. 12
'-$"$.................................................................................. 12
5%") ................................................................. 12
/ (
1
*Note: The 2.5” Portable Hard Disk can only be used with newer 2.5”
HDDs that are 9.5mm high with mounting screw holes located
78mm apart. Older HDDs thicker than 9.5mm or with mounting
screws located 38mm apart will not fit properly within the 2.5”
Portable Hard Disk.
 $
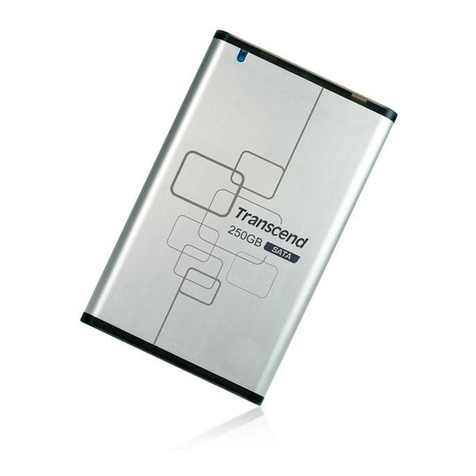
Thank you very much for purchasing the Transcend 2.5” Portable Hard Disk. This
device is designed to expedite exchanging huge amounts of data between a 2.5” hard
disk drive (HDD) installed in the 2.5” Portable Hard Disk and any desktop or
notebook computer. With the astonishing storage capacity and strong data retention
ability available on a 2.5” HDD, the ultra fast data transfer rate, super high mobility,
and impressive appearance of the Transcend 2.5” Portable Hard Disk, you will
enjoy an exciting new user experience.
$%#
The 2.5” Portable Hard Disk package should include the following items:
•
2.5” Portable Hard Disk (no HDD inside for TS0GHDC2)
•
Leather Case
•
IEEE 1394A Cable
•
IEEE 1394A 6pin(F) to 4pin(M) Adaptor
•
USB Cable
•
USB Power Cable
•
Screws
•
Driver CD
•
Quick Installation Guide
2
& 
The 2.5” Portable Hard Disk has the following features:
•
Fully compatible with USB 2.0 specification
•
Fully backward compatible with USB 1.1 specification
•
Fully compatible with IEEE 1394A specification
•
Easy Plug and Play installation
•
LED indicates Power On and Data Access
•
Powered by USB or IEEE 1394A ports
•
High Storage Capacity: Supports up to 160GB HDD
•
High Transfer Rate:

USB 2.0 interface Up to 480Mbps (60MBytes) at high speed
IEEE 1394A interface Up to 400Mbps (50Mbytes) at high speed

*Note: If your desktop or notebook computer only supports the USB 1.1
specification rather than the USB 2.0 specification, the data
transfer rate of the 2.5” Portable Hard Disk will be restricted to
within 12Mbps (1.5MB).
'() *+ ) 
Desktop or notebook computer with USB port or IEEE 1394A port and one of
following operating systems (Some computers may require additional power via a
USB port. Refer to the Note in Hardware Setup.) :
•
Windows
®
98SE (Driver needed for USB2.0)
•
Windows
®
2000 (No driver needed)
•
Windows
®
Me (No driver needed)
•
Windows
®
XP (No driver needed)
•
Mac™ OS 9.2 or above (No driver needed)
3
, ' -
1. Take out the screws and remove the back panel of the 2.5” Portable Hard Disk by
pulling and sliding it slightly until it releases from the case.
2. Plug the HDD into the IDE connector and put the HDD horizontally onto the circuit
board.
3. Insert the screws into the bottom of the circuit board to stabilize the HDD.
4
4. Push and slide the circuit board into the case. The sides of the circuit board should
be put into the tracks.
5. Insert the screws into the back panel of the 2.5” Portable Hard Disk.
6. The 2.5” Portable Hard Disk is now ready for use.
*Note: For some desktop or notebook computers, the 2.5” Portable Hard
Disk may not work properly due to insufficient power availability
from the USB port. In this event, you will need to provide additional
power by connecting the USB power jack of the 2.5” Portable
Hard Disk via the USB power cable to another USB port of your
desktop or notebook computer.
track
5


%., .
%/ , 0'



1. Power on the computer where you will connect the 2.5” Portable Hard Disk and
make sure the IEEE 1394A port is enabled and working properly.
2. Connect the 2.5” Portable Hard Disk to the IEEE 1394A port of your computer;
meanwhile, you will need Windows 98SE source CD to install the files needed to
use this device.
3. The 2.5” Portable Hard Disk is now ready for use. You can find a new drive with
a newly assigned drive letter in the My Computer window.
*) 1/ , 0'
Just disconnect the IEEE 1394A cable of the 2.5” Portable Hard Disk from IEEE
1394A port of your computer.
%/ , 233324
1. Power on the computer where you will connect 2.5” Portable Hard Disk and
make sure the IEEE 1394A port is enabled and working properly.
2. 2.5” Portable Hard Disk could be detect normally without any additional driver.
3. Connect the 2.5” Portable Hard Disk to the IEEE 1394A port of your computer.
Your computer will automatically detect the 2.5” Portable Hard Disk and install
the files needed to use this device.
4. You will see the green arrow icon on the system tray.
5.
T
he 2.5” Portable Hard Disk
will
appear in Windows explorer
and is now ready for
use.
*) 1/ , 233324
1. Locate the green arrow icon on the system tray. Click left button of the mouse
on the icon.
6
2. The Stop TS0GHDC2 IEEE 1394 SBP2 Device pop-up menu will appear. Click to
remove the hardware.
3. The Safe To Remove Hardware window will appear. Click “OK”.
4. Your 2.5” Portable Hard Disk is now ready to be removed.
*Note: If you don’t follow the above steps to remove the 2.5” Portable
Hard Disk in Windows 2000, the Unsafe Removal of Device
message will appear.
7
%*) 1%$5'

1. Complete hardware setup and driver installation.
2. Connect the 2.5” Portable Hard Disk to your Mac. A disk icon will appear on
the desktop. You may use this device as if it were a Mac Hard Disk.
3. If you want to remove the 2.5” Portable Hard Disk, you must first drag and drop
the corresponding disk icon into the trashcan. After the disk icon disappears,
you can disconnect the 2.5” Portable Hard Disk.
%., .'63

1"/ , 0'
1. Power on the computer where you will connect the 2.5” Portable Hard Disk and
make sure the USB port is enabled and working properly.
*Note: If you are using Windows 98SE, please don’t connect your 2.5”
Portable Hard Disk to the computer until the driver is installed.
2. Insert the Driver CD into the CD-ROM drive. Run the Setup.exe program located
within folder D:\TS0GHDC2\Driver\Win98se of the Driver CD (Where “D” is the
CD-ROM drive letter).
3. Click “Yes” to continue driver installation.
4. Click “Finish” to accomplish driver installation.
8
5. Connect the 2.5” Portable Hard Disk to the USB port on your computer. (If
necessary for additional power, also connect the 2.5” Portable Hard Disk to
another USB port on your computer.) Your computer will automatically detect the
2.5” Portable Hard Disk and appear in Windows explorer.
6. The 2.5” Portable Hard Disk is now ready for use.
*) 1/ , 0'
1. Click the “USB-IDE Safe Remover” icon in Start menu.