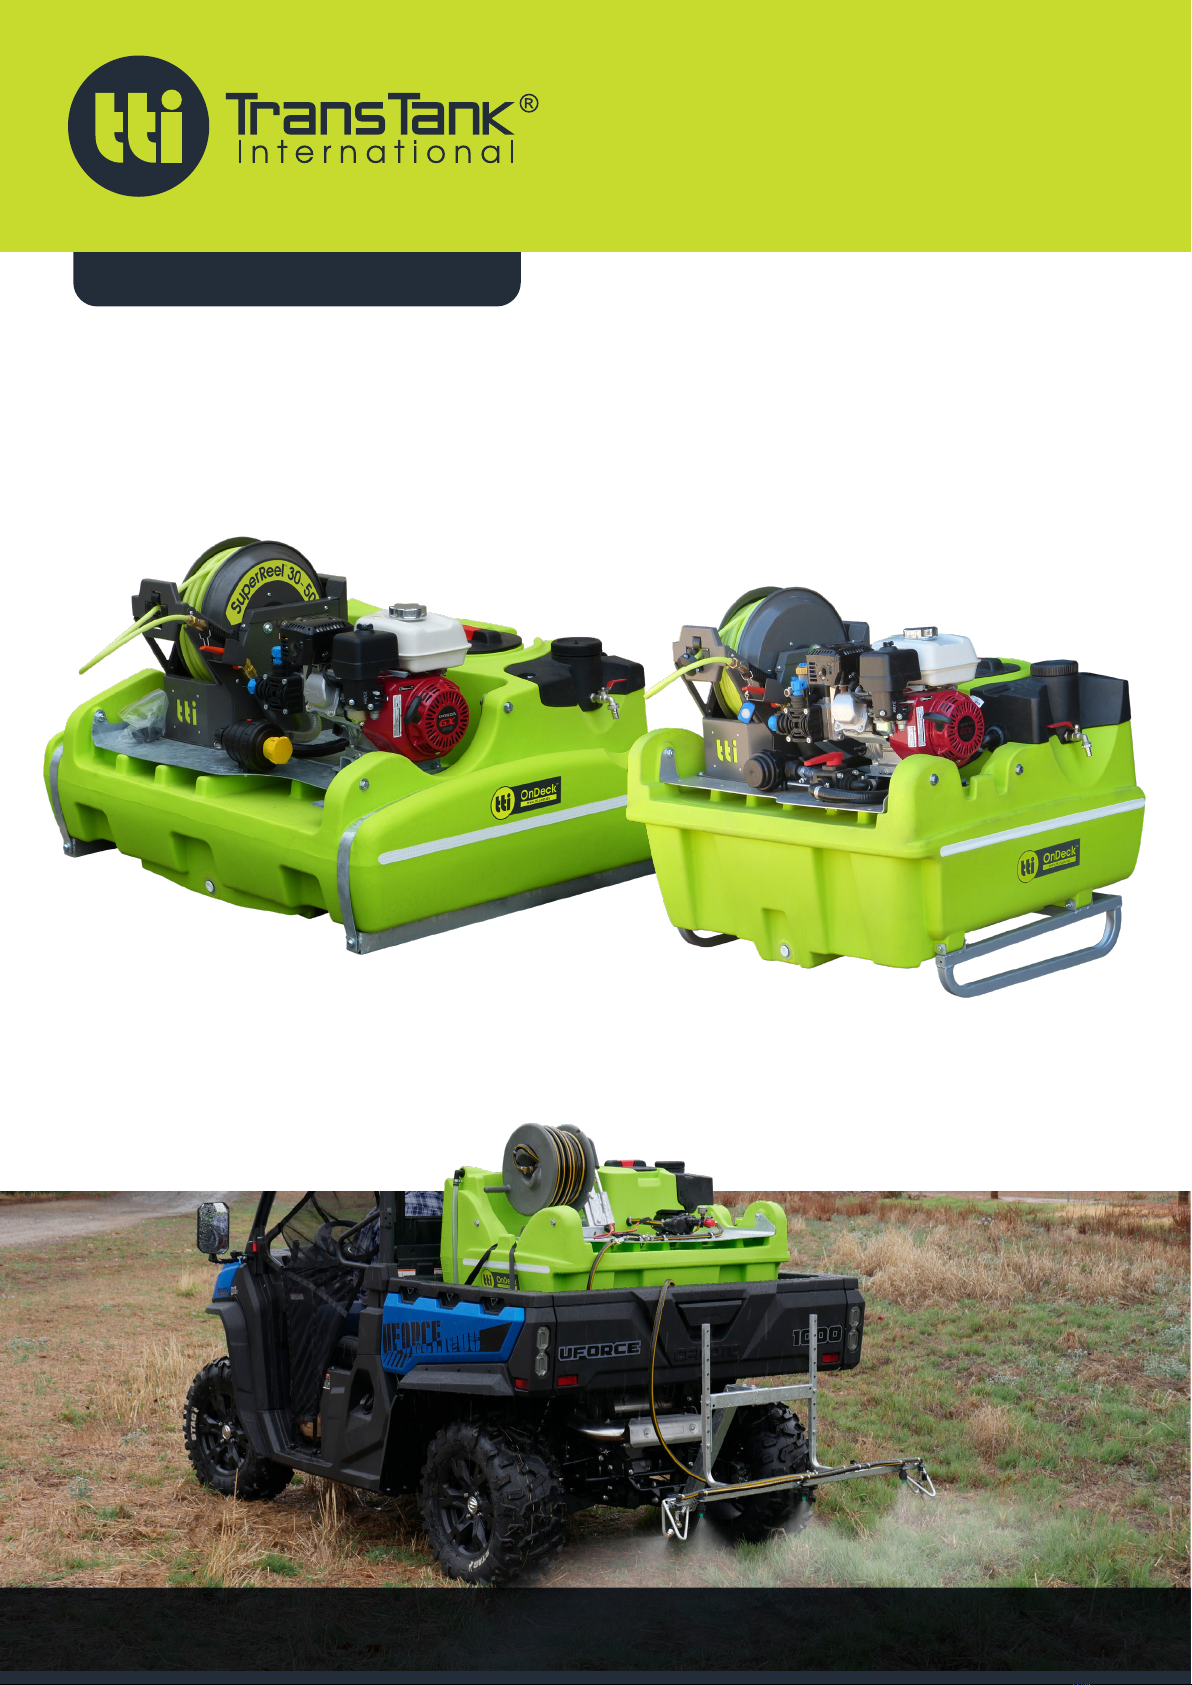
TTi’s OnDeck™HandBook
8Call 1800 816 277www.tti.com.au 8
Spray Maintenance
Maintenance should be carried our regularly.
Pump Maintenance
• Check to make sure that all screws are tightened and that no parts are
missing.
• Check to make sure ther are no loose connections on
hoses, nozzle, lance or valves.
• Thoroughly clean the nozzle and filter (suction). Take
the cap off the filter housing and remove filter screen
for screening. Ensure screen is properly located before
screwing cap back on.
• Water rinse and dry the tips before storing.
INSPECT THE ENGINE
• Check to make sure there are no loose or missing screws in any part of the
engine.
• Clean the air filter regularly - particularly if working in a dusty environment.
• Clean and adjust the spark plug as necessary.
• Clean the cooling far, air intake opening and parts around the muffler.
• Check the engine oil and change it as necessary.
• Inspect the fuel line filter, check for fuel leaks.
LONG TERM CLEANING AND STORING
When storing the sprayer, ensure that it is clean and dry and kept in a ventilated
place where it will not be subjected to freezing temperatures.
• Complete drian any water for the pump
• Pull the recoil starter handle slowly until there is resistance
• After removing fuel from the tank, push the priming pump until fuel in the
line runs out. Remove fuel from the tank once more
• Check the engine oil and change it if necessary
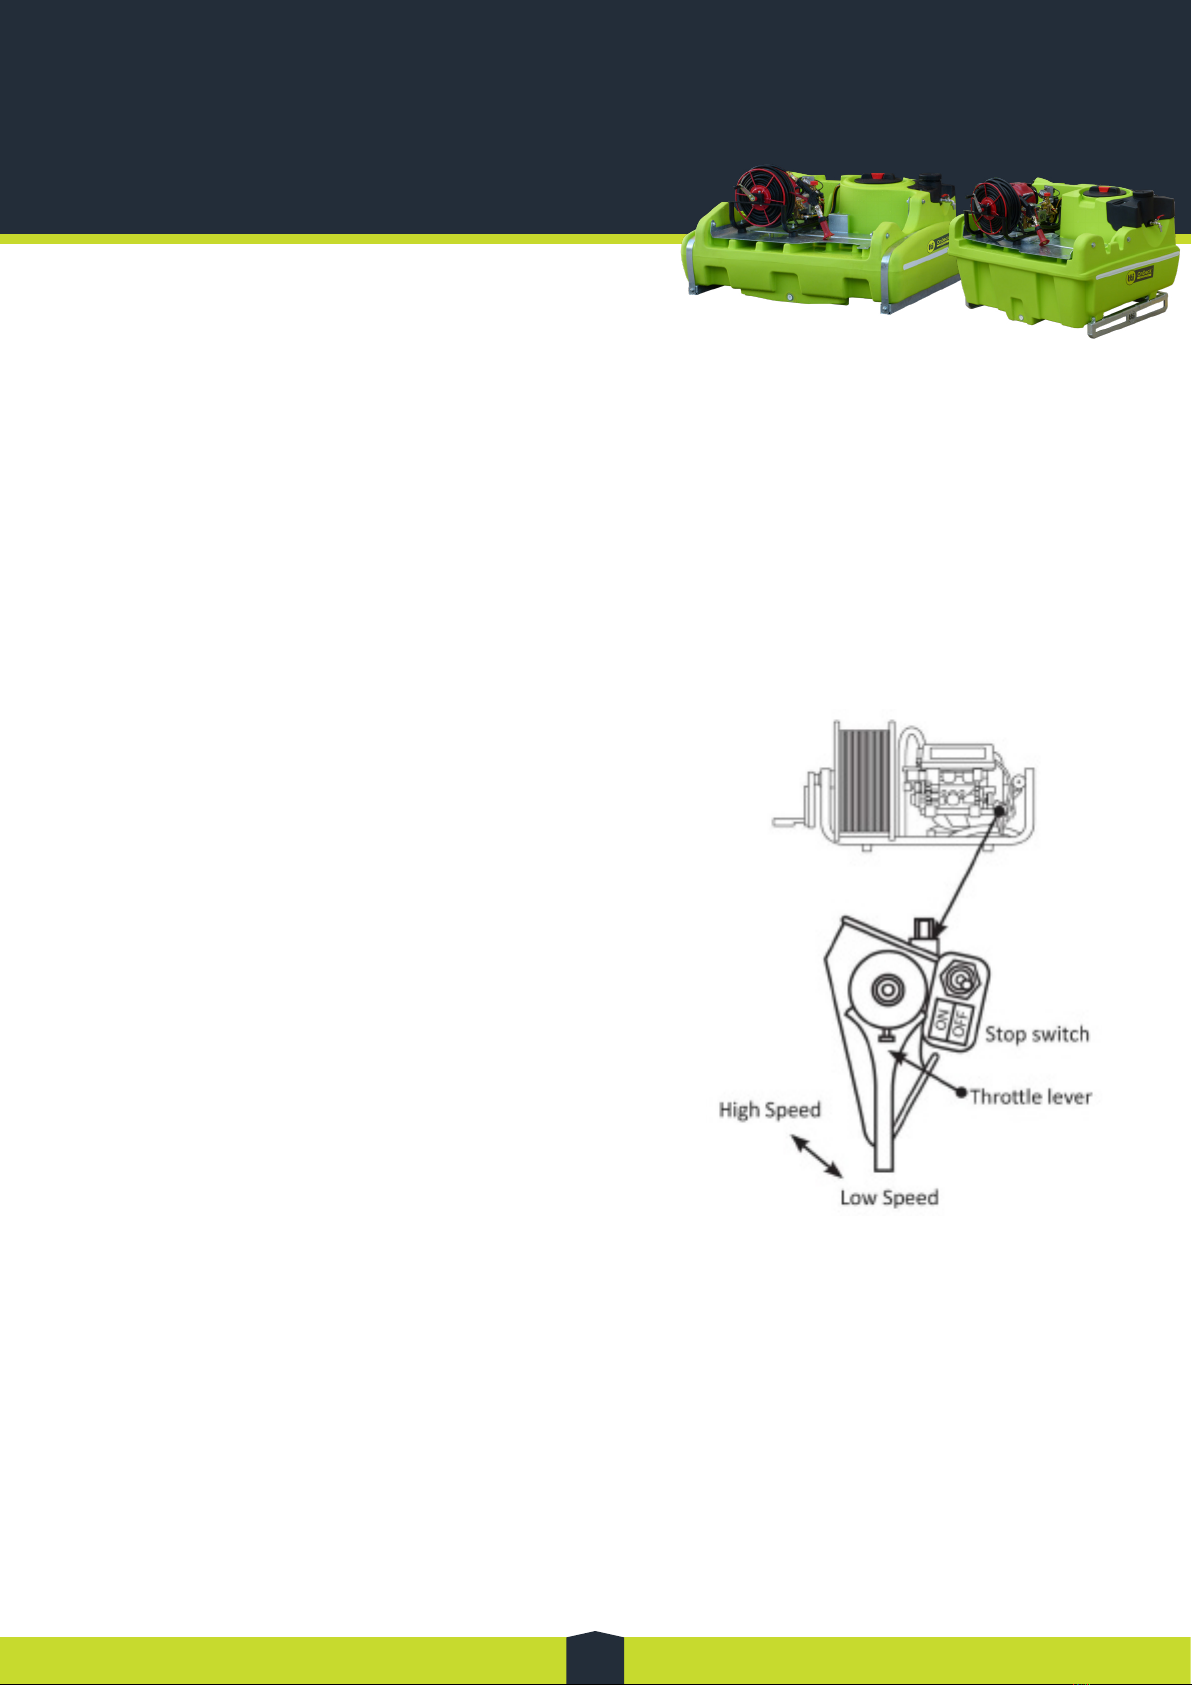
• Set the throttle level in the low speed position
• Wipe away any dirt or dust
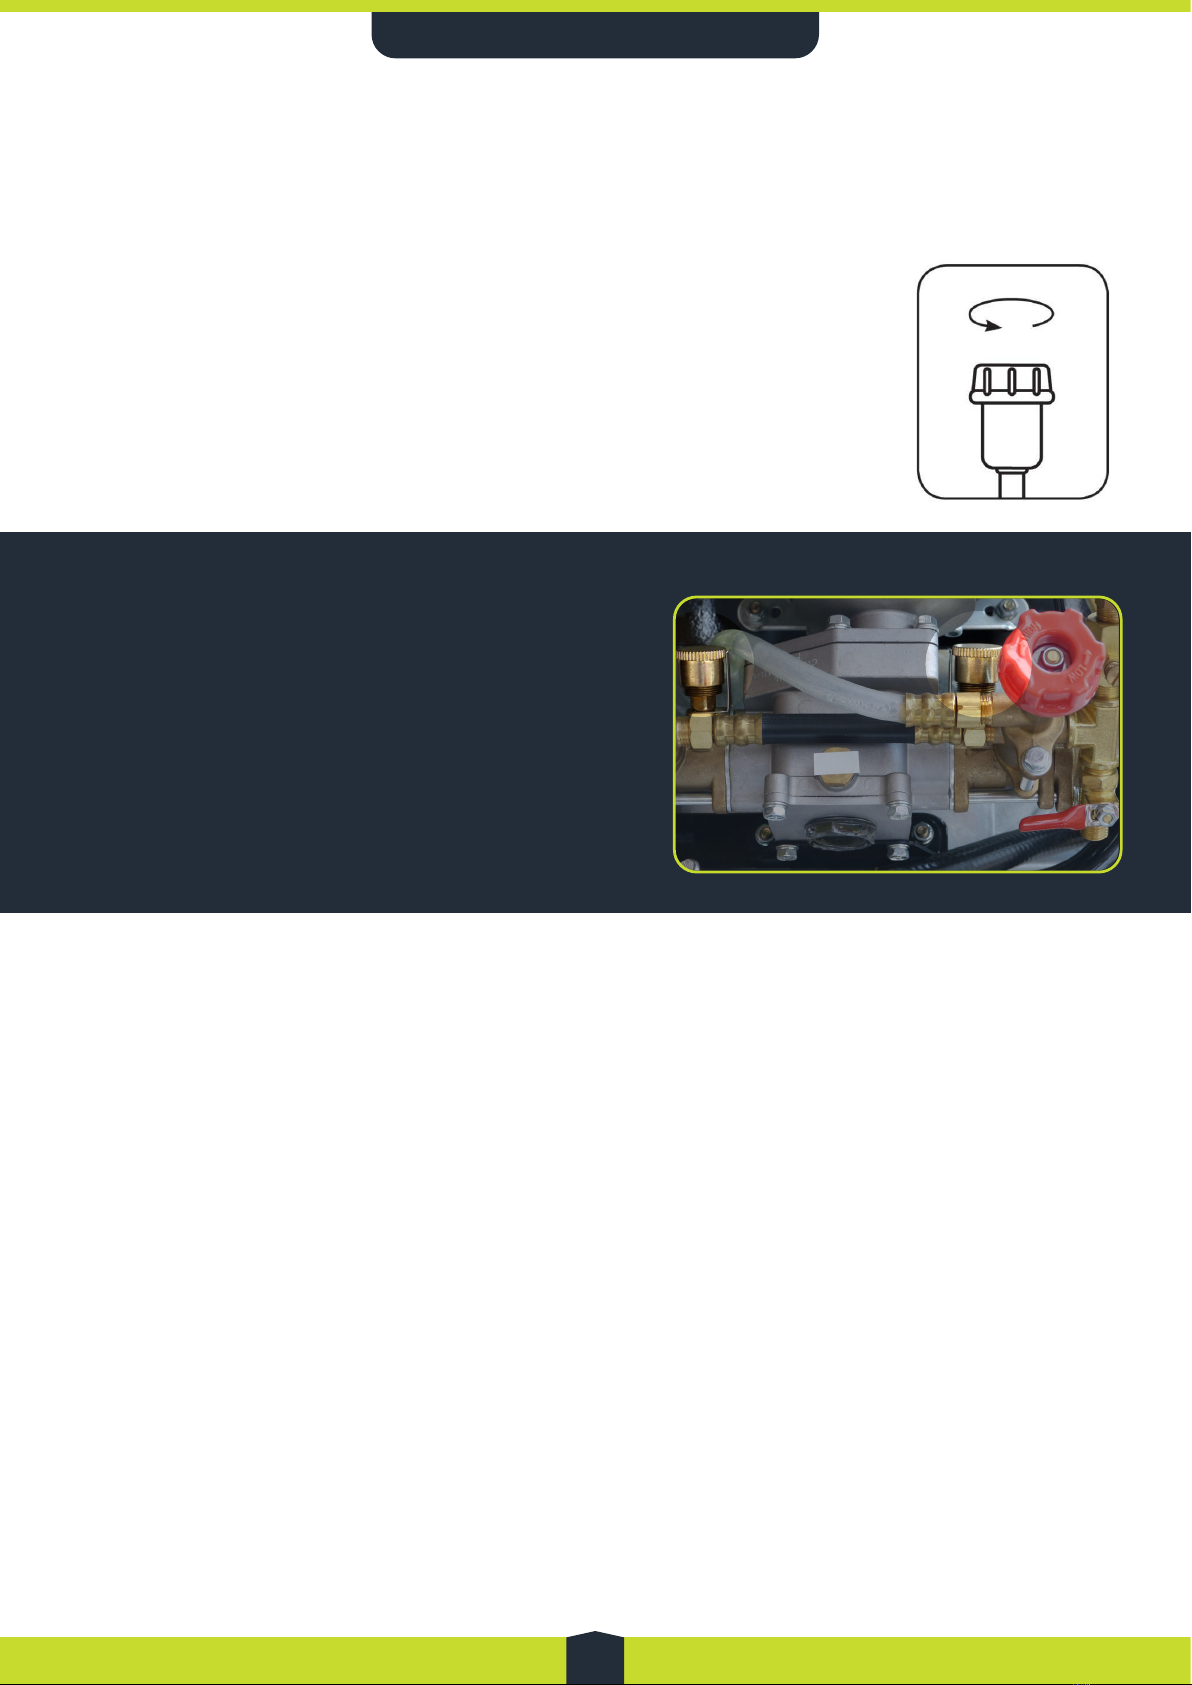
Lubrication
• There are two grease cups (marked
with “ “ on the back of the pump)
• Always ensure grease cups are filled
with grease. Screw grease cups 2-3
turns every 2 hours of operation.
• Once caps reached the end of
thread, undo, top up with GP grease
and screw caps back down until firm.