TransTank WeedMasta User manual
“HELPING TO DEVELOP AND PROTECT THE LAND”
Operator’s Product HandBook
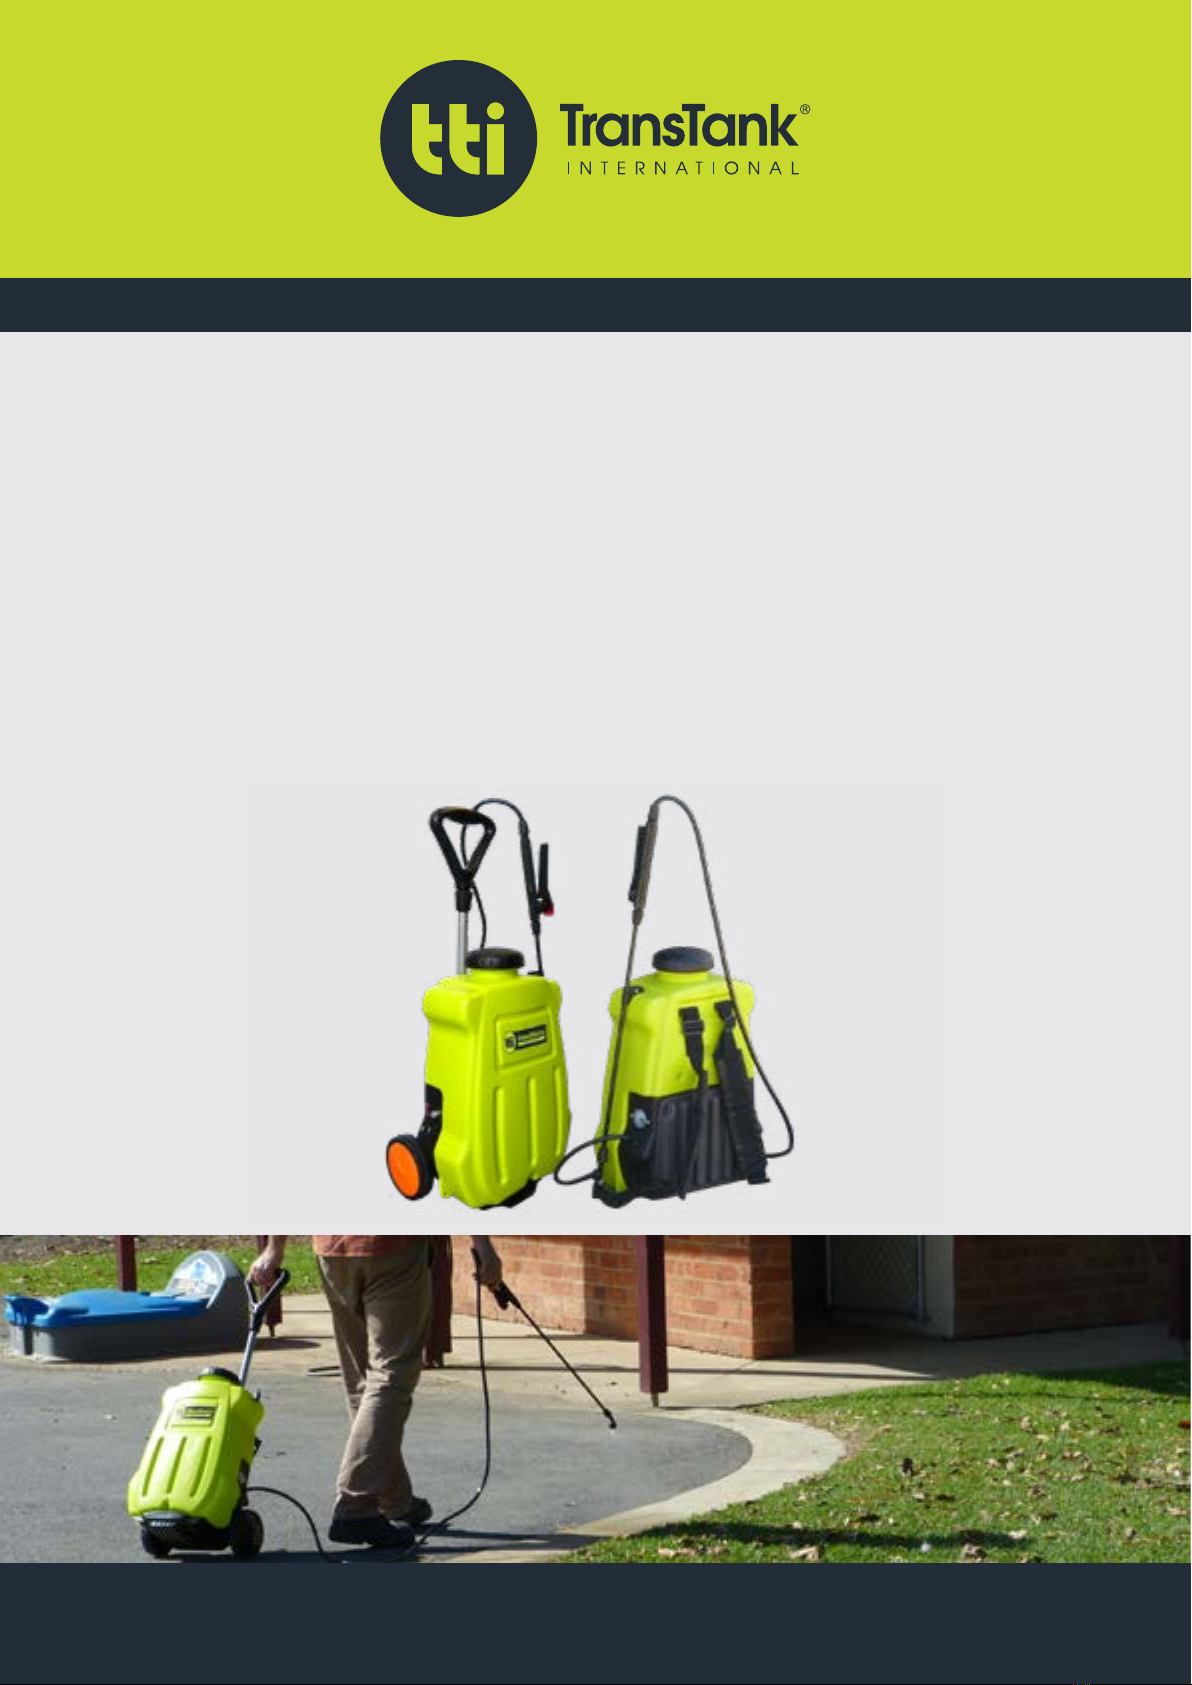
Backpack / Trolley Sprayer
WeedMasta™

www.tti.com.au
WeedMasta™
PRODUCT HANDBOOK
Freecall: 1800 816 277
2
Contents
Safety 4
General Safety Instructions 5
General Information 6
Specifications 6
Description 7
Machine Limitations 8
Recommended Pesticides and Spray Nozzles 8
WeedMasta Operating Instructions 9
Before first use 9
Filling the WeedMasta Tank 11
Operating Instructions 12
Clean-up and Decontamination 13
Maintenance 14
Periodic Checks 14
Maintenance Schedule 14
Trouble Shooting 17
Pump 17
Risk Assessment 18
Warranty 19
Warranty Policy 19
What this Warranty Does Not Cover? 19
How to Obtain Service Under this Warranty? 19
Warranty Limitations 19

www.tti.com.au
WeedMasta™
PRODUCT HANDBOOK
Freecall: 1800 816 277
3
Disclaimer
All information, illustrations, and specifications contained in this manual are based on the latest
product information available at the time of this publication’s printing. TransTank International
(TTi) reserves the right to alter and substitute specifications and methods at any time, in line
with our commitment to continuous improvement.
No patent liability is assumed with respect to the use of information contained within this
manual. While every precaution has been taken in the preparation of this manual, TTi assumes
no responsibility for errors or omissions.
Thank you for purchasing a TTi WeedMasta™ Rechargeable Knapsack Sprayer
with Trolley (WeedMasta), which will provide many years of reliable service
when operated and maintained in accordance with this manual.
The TTi WeedMasta unit has a capacity of 16 litres and includes a sturdy trolley as standard. With the
trolley easily removed, the WeedMasta is equipped with padded shoulder straps and backrest for maximum
comfort when using as a knapsack in more difficult terrain.
Supplied with a 12-volt variable speed electric pump and built-in sealed lead acid battery, the WeedMasta
provides over two hours of continuous spraying from a single charge. The WeedMasta is fitted with a kink-
free hose and trigger operated lance. This manual describes the operation and maintenance procedures
applicable to the WeedMasta.
All TTi WeedMasta tanks are rotationally moulded from quality polyethylene, purpose designed and
manufactured to high standards. The WeedMasta is specifically designed to be towed by hand using the
trolley, or worn as a knapsack, to spray everything from herbicides to pesticides at a constant pressure.
With the variable speed pump, pressure can be adjusted to suit your requirements.
The WeedMasta unit is supplied complete, tested and ready for use. TTi warrants that the WeedMasta has
been designed and built for its intended purpose as a pesticide/herbicide spray unit.
The owner is responsible to ensure that the equipment is operated in accordance with this manual, with
Australian WorkSafe requirements, and local council regulations. TTi is not liable for any loss, injury or death
resulting from the failure to observe all safe working regulations as required by law.
Included with your WeedMasta unit is the Operator’s Handbook (this manual, which includes the Warranty
Registration Card)
www.tti.com.au
WeedMasta™
PRODUCT HANDBOOK
Freecall: 1800 816 277
4
Safety
This manual is intended for use by personnel experienced in the use of this and similar equipment. Read and
understand this manual before attempting to operate or perform routine maintenance on this equipment.
Your safety is of prime priority.
A WARNING highlights an essential operating or maintenance procedure,
practice, condition or statement, which, if not strictly observed, could result in
injury or death of personnel, or long-term health hazards.
A CAUTION highlights an essential operating or maintenance procedure,
practice, condition or statement, which, if not observed, could result in damage
or destruction of equipment.
A NOTE highlights or clarifies an essential systems description, operating or
maintenance procedure, condition or statement.

www.tti.com.au
WeedMasta™
PRODUCT HANDBOOK
Freecall: 1800 816 277
5
General Safety Instructions
1. This unit is designed and manufactured solely for the purpose of carrying and spraying herbicides and
pesticides. Under no circumstances should it be used for any other purpose.
2. Only authorised and trained personnel are to operate this equipment. Operators must have read and
fully understood this manual before operating the WeedMasta unit.
3. Do not operate the WeedMasta anywhere near bystanders, livestock, watercourses or any non-targeted
vegetation that may be in danger from spray drift contamination.
4. Wind direction and speed must be taken into account, as windy conditions may endanger the operator
or damage to adjacent non-target vegetation. Avoid spraying on hot and sunny days or when wind speed
exceeds 6.5km/h.
5. Do not operate this equipment while under the influence of alcohol or any drugs that could impair your
capabilities in any way.
6. PPE appropriate to the chemicals being used must be worn at all times when operating the WeedMasta.
As a minimum, the PPE should include coveralls, gloves and boots. A face shield and PVC apron are
recommended depending on the task. It is recommended that the following documents should be read
and understood by the operator:
• Australian Standard for Chemical protective clothing AS3765
• Australian Standard for Respiratory protection devices AS1715
7. Care should be taken when lifting the WeedMasta, particularly when used as a knapsack, to avoid back
injury. As a guide, one litre of water weights one kilogram (kg), therefore a full 16 litre WeedMasta will
weigh in excess of 20kg.
8. In knapsack mode, ensure the WeedMasta is securely and comfortably worn, with the padded shoulder
straps adjusted correctly to reduce shoulder and back strain.
9. Care should be taken at all times, particularly when operating on rough or steep terrain.
10. The WeedMasta must never be left unattended while being filled with fluids.
11. Do not operate the pump when there is no fluid in the tank.
12. Do not disconnect any hoses, nozzles or filters while the equipment is operating. Disconnecting any
components while under pressure may result in uncontrolled fluid discharge which may be hazardous.
13. Ensure any electrical connections are properly configured, to prevent damage such as shorting or
reverse polarity.
14. At completion of operation, switch the pump off and relieve any residual pressure by squeezing the spray
gun trigger.
15. At completion of the operation, decontaminate the WeedMasta tank and spray lines. Drain any residue
chemicals and store in a sealed container. Dispose of any unwanted chemicals and tank rinse residue in
accordance with current environmental and workplace health and safety regulations.
16. The WeedMasta has safety labels affixed to various locations on the unit. These labels should be kept
clean and legible, and replaced if damaged.
17. Any unauthorised modifications to this equipment may affect its function and create a serious safety
risk. Any unauthorised modifications will void any warranty on the unit.

www.tti.com.au
WeedMasta™
PRODUCT HANDBOOK
Freecall: 1800 816 277
6
General Information
Specifications
Tank UV resistant polyethylene tank complete with large diameter lid and basket
filter – 16 litres capactity
Trolley Composite material and steel with height adjustable handle
Standard
Equipment
12V electric variable speed pump, 2.4L/min 70psi with ON-OFF switch and
fuse
Built-in rechargeable sealed lead acid battery
Kink resistant hose with spray gun and lance, c/w various nozzles:
• Cone spray nozzle – 3.0 – 4.5 Bar, 0.7 – 0.9 L/min
• Double spray nozzle – 2.5 – 4.0 Bar, 1.3 -1.6 L/min
• Fan spray nozzle – 0.2 – 0.4 Bar, 0.6 – 1.1 L/min
• Four-hole adjustable nozzle – 0.2 – 0.4 Bar, , 0.6 – 1.1 L/min
Three-stage Battery charger
www.tti.com.au
WeedMasta™
PRODUCT HANDBOOK
Freecall: 1800 816 277
7
Description
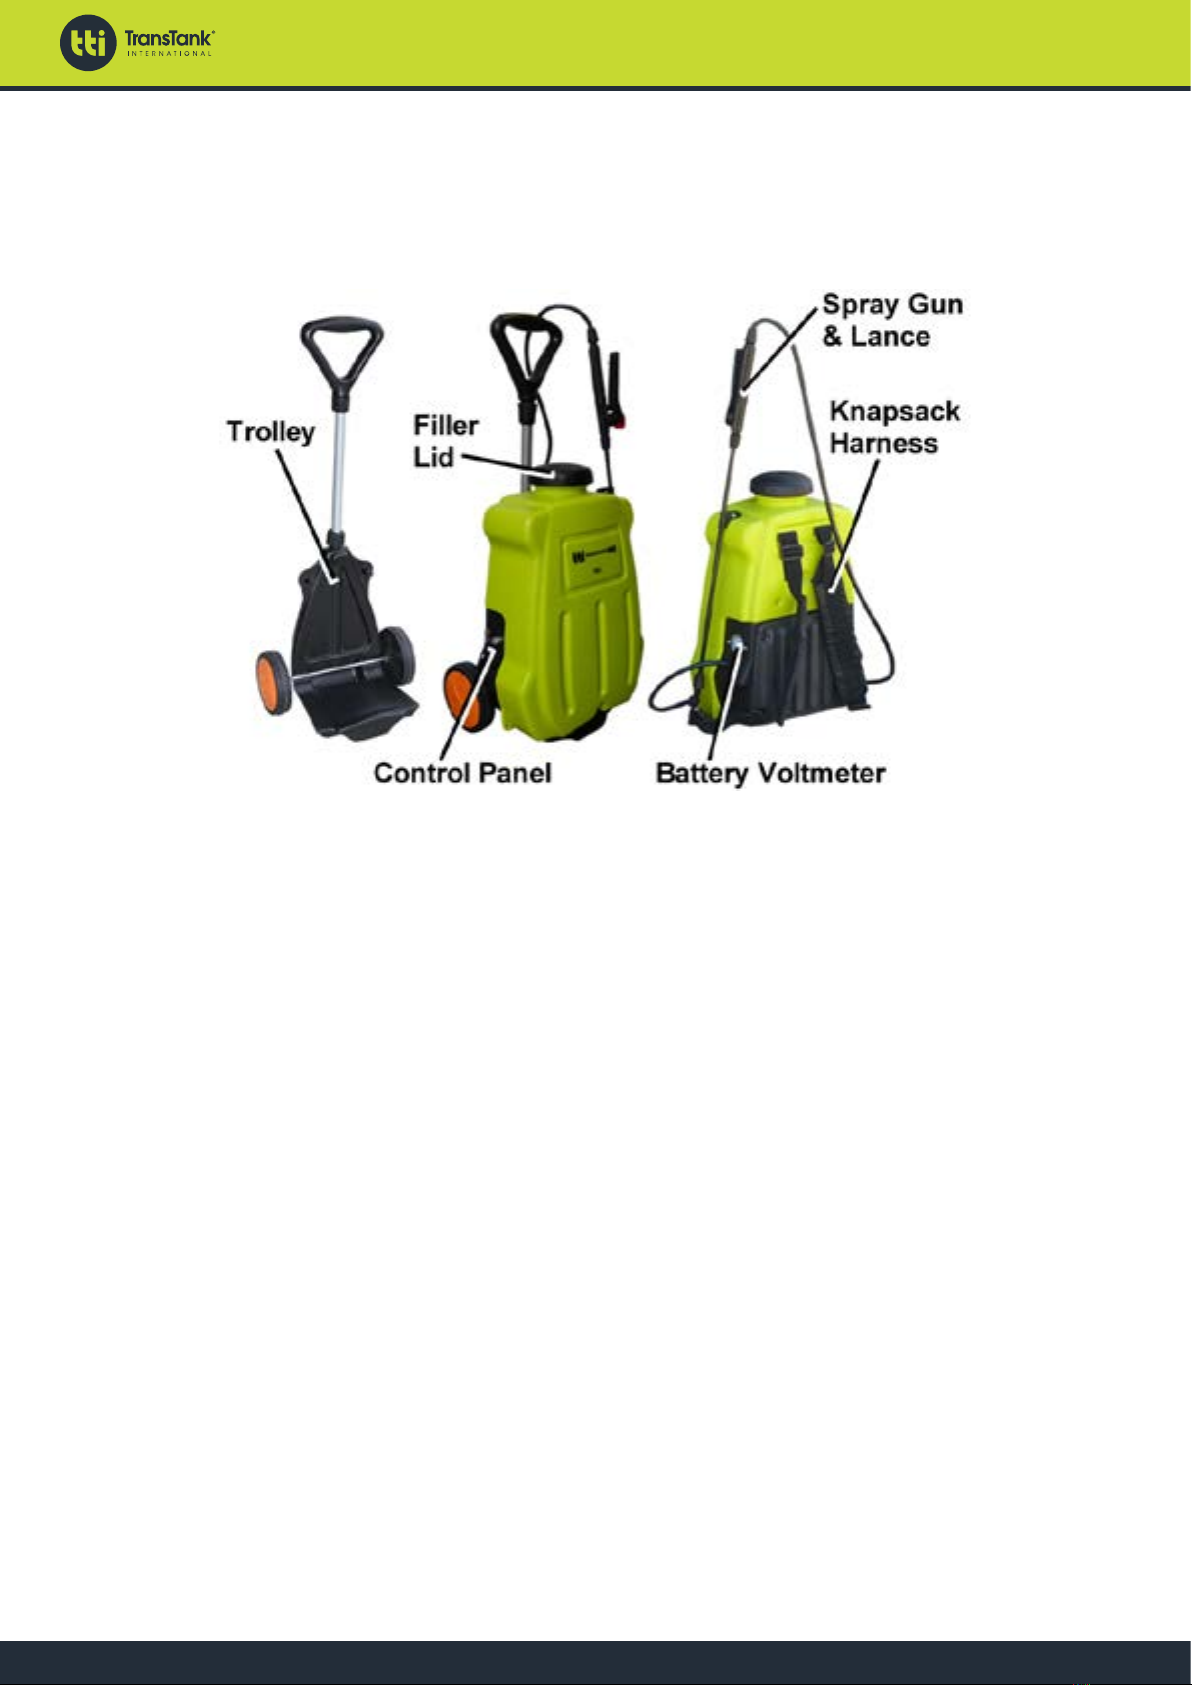
The TTi WeedMasta Rechargeable Sprayer is designed to carry and distribute herbicides or pesticides
using a self-contained pump and spray gun. The WeedMasta has the features shown in Figure 1
Figure 1 – Component Identification
Pump
The WeedMasta is fitted with a 2.4 L/min 70psi 12V variable speed electric pump, enabling adjustable
spray pressure. The pump pressure is controlled via rotary potentiometer next to the ON-OFF switch,
which varies the speed of the pump’s motor. If the spray gun is not in operation when the pump is running,
the fluid bypasses back into the tank.
Battery
The built-in sealed lead acid 12 volt rechargeable battery is connected directly to the supplied battery
charger via the socket adjacent to the power switch on the side of the WeedMasta. With the battery fully
charged, it will deliver more than two hours of continuous spraying.
Hose and Spray Gun
A manually coiled 10mm diameter kink resistant hose is connected to a trigger actuated spray gun
with a variety of nozzles supplied, depending on required use. When the trigger is squeezed, the
fluid is discharged; when the trigger is released, the fluid bypasses back into the tank. The spray gun
incorporates a sliding catch to lock the trigger open for broad coverage spraying. The spray gun has a
built-in filter and is stowed by means of a clip on the side of the WeedMasta tank.
Trolley
The WeedMasta trolley is constructed from robust composite materials, featuring large wheels and handle
for maximum ergonomic operation. The handle shaft incorporates three holes at lower end, enabling the
securing screw to be fitted for the most convenient height.

www.tti.com.au
WeedMasta™
PRODUCT HANDBOOK
Freecall: 1800 816 277
8
Tank
All TTi tanks are constructed from UV resistant, virgin material polyethylene. The tank is fully drainable
and has an internal basket strainer under the large filling cap. A small filter is located in the tank,
accessible through the tank filler opening.
Filters
The WeedMasta has a double filter system, in addition to the basket filter in the tank lid. The suction filter
is located inside the bottom of the tank, and is easily removed and installed. The secondary filter is inside
the spray gun’s handle unit.
Machine Limitations
The WeedMasta units are subject to operating limitations. It is the operator’s responsibility to ensure that
this equipment is being operated safely and within these limitations.
Recommended Pesticides and Spray Nozzles
PPE appropriate to the chemicals being used must be worn at all times when calibrating and filling the
WeedMasta. As a minimum, the PPE should include coveralls, gloves and boots. A face shield and PVC
apron are recommended. The following pesticides and nozzle combinations are as follows:
Pesticide Use Directions for use
Isoprocarb (MIPC) For control of planthopper,
leafhopper on rice fields.
Mix 150-200mL MIPC with 75-100kg water. Use the cone
nozzle to spray evenly with the wind on one side and crossly
spray in multi rows.
Capable of killing common thrips and leeches. Safe to
spiders and natural predators of planthopper.
Toxic to fish and bee, and can be harmful to tuber crops.
Unfit for application on tuber crops.
Chlorothalonil For prevention of stalk rot
on wheat
• Mix 11g 75% wettable powder with 6kg water for every
100 square metres.
For Prevention of leaf
mold and spot blight on
vegetables
• Mix 135 - 150g wettable powder with 60-80kg water. Use
the cone nozzle to spray evenly with the wind, on one side
and crossly spray in multi-row.
For prevention of downy
mildew on fruit trees
• Mix 75-100g 75% wettable powder with 30 - 40kg water.
Use the adjustable spray nozzle with the four apertures
to spray evenly with the wind, accompanied by significant
loss of chemical. Being toxic to fish, operate far away
from fish ponds.
Fluazifop-butyl Applicable for annual
graminaceae weeds with
strong inhibition function to
budlets of weed.
Safe to broad-leaf crops. Of no force for dicotyledonous
weeds. Toxic to fish, use the fan spray nozzle to spray evenly
with the wind, on one side while moving forward in a parallel
manner. Be sure to avoid hurting other unintended crops by
the chemical fog.
www.tti.com.au
WeedMasta™
PRODUCT HANDBOOK
Freecall: 1800 816 277
9
Crops To control Dilute rate
Wheat, Barley, Bean,
Cole, Peanut, Beet,
Potato, etc.
Cockspur grass, Hairy
crabgrass, Oat grass, Dentes
foxtail, Green foxtail, Chinese
sprangletop, and other annual
graminaceae weeds
Mix 40-50g active ingredient with 60kg water to spray
in one mu (approx. 0.16 acre)
WeedMasta Operating Instructions
Before first use
Your WeedMasta Sprayer is delivered partially assembled and ready for final assembly. Before use, it needs
to be set up using the following instructions:
1. Complete the warranty registration online at www.tti.com.au/warranty-registration, or use the Warranty
Registration Card at the back of this handbook.
2. Store this handbook in a safe and easily accessible place for future reference.
WARNING: The operator must fully understand all aspects of this handbook. Do not
operate the WeedMasta unit if you are unfamiliar with its operation until you have
read this handbook.
3. Read and thoroughly understand this handbook, paying particular attention to all safety requirements,
before using the WeedMasta for the first time.
4. Check that all fittings, hoses and electrical leads are secure following transit, and are not damaged in
any way.
5. Inspect the tank for any damage or abrasions that may occur during transit.
6. Tighten the two hand-nuts securing the WeedMasta to the trolley.
NOTE: If the WeedMasta is to be used as a knapsack, TTI recommends adjusting the
padded shoulder straps and trying it on while empty.
7. If the unit is to be used as a knapsack, loosen the two hand-nuts and lift the WeedMasta out of the trolley.
Unfold the straps and adjust to suit by lengthening or shortening as required.
8. Assemble the trolley handle unit as follows, refer to Figure 2:
a. Insert the handle onto the end of the shaft with the single hole, aligning the shaft hole with the
corresponding hole on the handle.
b. Using a screwdriver, insert the supplied screw to lock the handle onto the shaft.
c. Slide the cover nut along the shaft and tighten it onto the handle.
d. Insert the handle assembly into the top of the trolley, aligning one of the three shaft holes with the
corresponding hole in the trolley body.

www.tti.com.au
WeedMasta™
PRODUCT HANDBOOK
Freecall: 1800 816 277
10
e. Using a screwdriver, insert the supplied screw to lock the handle shaft into the trolley body.
f. Slide the cover nut along the shaft and tighten it onto the trolley body.
9. Unpack the spray gun and lance, then assemble, selecting the required nozzle as determined by the
spray requirements.
10. Connect the spray gun’s hose to the WeedMasta outlet.
NOTE: The WeedMasta’s battery is fully charged at the factory, however, some
discharge may occur during storage and transit.
11. Fully uncoil the battery charger leads and plug the connector into the WeedMasta’s charger socket.
Plug the 240V cable into a power point and turn ON.
12. At the WeedMasta, check that the pump speed potentiometer is turned fully anti-clockwise, then turn
the power switch to ON, to enable the built-in battery condition voltmeter. The state of the battery is
determined as follows:
a. GREEN indicates a fully charged battery
b. YELLOW indicates a partially depleted battery but has some residual power available
c. RED indicates extremely low battery power that requires immediate charging.
13. If charged, turn the power switch to OFF and unplug the charging cable. Your WeedMasta is now ready
for use.
Figure 2 – Trolley Handle Assembly

www.tti.com.au
WeedMasta™
PRODUCT HANDBOOK
Freecall: 1800 816 277
11
Filling the WeedMasta Tank
WARNING: Ensure the filling area is in an open, well-ventilated space if filling with
chemicals. Follow the instructions provided with the chemicals or the applicable
Safety Data Sheet.
Mixing and filling the WeedMasta unit should be undertaken at a carefully chosen site, away from any risk
of spillages draining into water courses or into environmentally sensitive areas. Children and animals must
always be kept away from mixing and filling operations.
The WeedMasta’s tank is filled as follows:
1. Open the tank filler by twisting and lifting the cap.
2. Withdraw the internal basket strainer and inspect it for any debris. Clean it if required and reinstall it into
the top of the tank.
3. Follow the chemical manufacturer’s instructions and safety precautions carefully, taking note of the
order in which the products are added to the tank.
4. Measure the correct quantities of chemicals using clean measuring containers specifically for this
purpose only, then add the chemicals to the tank.
5. Rinse out the measuring containers and any empty containers and pour all rinsing liquid into the
WeedMasta tank.
CAUTION: Do not overfill the tank. This may result in chemical spillage.
CAUTION: The WeedMasta must never be left unattended while being filled with
fluid.
6. Top up the tank with water to the required level, ensuring it is not overfilled.
7. Thoroughly mix the contents by stirring with a suitable paddle.
8. Upon completion of filling the WeedMasta tank, replace the filler cap and twist to tighten.
9. Wash off any spillage from outside the tank.
10. Close the chemical supply containers and store appropriately. Any empty containers must be thoroughly
rinsed and set aside for collection and disposal in compliance with environmental and work safety
requirements.

www.tti.com.au
WeedMasta™
PRODUCT HANDBOOK
Freecall: 1800 816 277
12
Operating Instructions
The WeedMasta is started and operated as follows:
WARNING: Suitable PPE must be worn by the operator when conducting manual
hose spraying operations.
CAUTION: Do not spray in windy conditions, where spray drift contamination may
occur.
1. Confirm the tank contains the required chemical or water quantity.
2. Check that the battery has sufficient charge (refer to Before first use section).
CAUTION: Ensure the potentiometer is set to the minimum position.
3. At the pump, check that the adjustable potentiometer is set to the minimum position by turning the knob
anti-clockwise, refer to Figure 3.
Figure 3 – WeedMasta Controls
4. Start the pump by turning the power switch to ON.
5. With the pump running, turn the potentiometer knob clockwise to the required pressure. As a guide,
refer to the nozzle details and delivery rates in the Specifications table.
6. Unclip the spray gun from its holder on the side of the tank.
7. Aim the spray gun in the required direction and squeeze the trigger.
8. Use a constant speed when spraying and release the trigger at the end of each swath or change of
direction, to prevent overdosing. Work in parallel lines when spraying large areas, rather than swinging
from side to side.

www.tti.com.au
WeedMasta™
PRODUCT HANDBOOK
Freecall: 1800 816 277
13
9. At the end of the task, release the spray gun trigger and switch the pump to OFF.
10. With the pump now turned OFF, aim the spray gun in the required direction and squeeze the trigger. This
will release the residual pressure in the hose, which will result in a small amount of fluid discharging.
11. With the hose pressure released, the hose is ready to stow back on the WeedMasta.
Clean-up and Decontamination
After use, the WeedMasta unit must be thoroughly decontaminated inside and outside – including the
pump, hoses, boom and spray gun – to avoid damage to crops from any harmful pesticide spray residues.
Decontamination also prevents sprayer corrosion and abrasion.
Cleaning the WeedMasta should be undertaken at a carefully chosen site, away from any risk of spillages
draining into watercourses or into environmentally sensitive areas.
The recommended decontamination procedure is as follows:
WARNING: Suitable PPE must be worn by the operator when cleaning and
decontaminating the WeedMasta unit. Follow the instructions provided with the
chemicals or the applicable Safety Data Sheet.
WARNING: Ensure the cleaning area is in an open, well-ventilated space, and any
flushingwateriscapturedtopreventrunoffintowatercoursesor intoenvironmentally
sensitive areas.
1. After spraying operations are complete, drain any residual fluid from the tank. Capture and dispose or
store any fluid in accordance with environmental and work safety requirements.
2. Rinse out the tank with several changes of water, plus a recommended cleaning fluid. Where it can be
reached internally, use a brush to scrub the inside of the tank.
3. Operate the WeedMasta unit with clean water, using the spray gun, to ensure no chemical residue
remains.
4. Reaching inside the tank, pull the small suction filter off its mount near the bottom of the tank – the filter
is shown in Figure 4. Soak the filter screen in clean water, brushing carefully with a nozzle brush. Refit
the filter by pressing it back into its mount.
5. Ensure that the tank’s basket strainer is free from chemical residue or debris.
6. Unscrew the rear section of the spray gun trigger unit and withdraw the filter, refer to Figure 4. Clean
and reassemble.
7. Nozzles, nozzle filters, nozzle caps and gaskets should be cleaned by soaking in water, brushing with
a nozzle brush and allowed to dry. Do not blow through the nozzles or use wire or pins to clear any
blockages.
8. Dispose of all rinsing water in compliance with environmental and work safety requirements.
If the WeedMasta unit is to be stored for an extended period, thoroughly clean and decontaminate the unit
as described above. Ensure it is allowed to dry, the tank and all lines empty and not pressurised then store
it in a well ventilated area.

www.tti.com.au
WeedMasta™
PRODUCT HANDBOOK
Freecall: 1800 816 277
14
Figure 4 – WeedMasta Filters
Maintenance
Your WeedMasta Spray Trailer requires minimal maintenance but regular cleaning and checks will ensure
safe and reliable service over its lifetime. Periodic checks and inspections will identify any potential issues,
enabling timely rectification and minimising downtime.
Periodic Checks
CAUTION: In dusty, dirty or smoky environments, cleaning, inspection and servicing
of the unit on a regular basis is essential. The cleaning, inspection and servicing must
be undertaken more frequently in harsh conditions to avoid damage or destruction
of equipment.
The following checks and cleaning operations should be undertaken on a regular basis (at least annually).
The frequency of these activities will depend on the nature of the operating environment and the operational
hours of the WeedMasta unit. Refer to the maintenance schedule tables below for details of maintenance
intervals.
1. Clean the unit and inspect it for any signs of damage or wear. Replace any safety labels if they are
damaged or illegible.
2. Check all fittings are firmly secured, tighten if necessary.
3. Unwind the hose fully to check that hose is in good order. Pressurise the line and check operation of
spray gun nozzle.
4. If the WeedMasta is to be stored for an extended period, thoroughly clean and decontaminate the unit as
described above. Ensure it is allowed to dry, the tank and all lines empty and not pressurised then store
it in a well ventilated area.
Maintenance Schedule
The following tasks are be conducted in accordance with each of the schedules. All scheduled tasks are to
be undertaken concurrently. For example, at the three month maintenance interval, all task listed are to be
undertaken, in addition to the daily, weekly and monthly tasks.
www.tti.com.au
WeedMasta™
PRODUCT HANDBOOK
Freecall: 1800 816 277
15
NOTE: Maintenance is important. Keep a record of all maintenance tasks conducted
on the WeedMasta unit.
TTi recommends photocopying these schedules in order to keep a detailed log of all maintenance tasks. A
copy of these schedules will be required to support any warranty claim.
Daily tasks
The following tasks are to be undertaken daily, or prior to each use, of the WeedMasta unit.
No. Task Notes
1Inspect the WeedMasta unit for any signs of damage or wear Clean, repair or replace
Weekly Tasks
The following tasks are to be undertaken each week or 10 operating hours, whichever occurs first.
No. Task Date Signed
1All Daily tasks
2Check battery, charge if necessary
Monthly tasks
The following tasks are to be undertaken each month or 20 operating hours, whichever occurs first.
No. Task Date Signed
1All Daily and Weekly tasks
Three Monthly tasks
The following tasks are to be undertaken every three months or 50 operating hours, whichever occurs first.
No. Task Date Signed
1All Daily, Weekly and Monthly tasks
2Check all hoses, fasteners, nozzles and fittings
Six Monthly tasks
The following tasks are to be undertaken every six months or 100 operating hours, whichever occurs first.
No. Task Date Signed
1All Daily, Weekly, Monthly and 3-Monthly tasks

www.tti.com.au
WeedMasta™
PRODUCT HANDBOOK
Freecall: 1800 816 277
16
Twelve Monthly tasks
The following tasks are to be undertaken every twelve months or 200 operating hours, whichever occurs
first.
No. Task Date Signed
1All Daily, Weekly, Monthly, 3-Monthly & 6-Monthly tasks
2Check internal tank and spray gun filters, replace if
required
Two-Yearly tasks
The following tasks are to be undertaken every 24 months or 500 operating hours, whichever occurs first.
No. Task Date Signed
1All Daily, Weekly, Monthly, 3-Monthly, 6-Monthly and
12-Monthly tasks

www.tti.com.au
WeedMasta™
PRODUCT HANDBOOK
Freecall: 1800 816 277
17
Trouble Shooting
If a fault develops with your WeedMasta unit, the following trouble shooting tables provides guidance to
identify and rectify the problem.
Pump Problem Possible cause Remedy
The motor fails to run after
being turned ON.
• The pump pressure has been set
at the min. value.
• Fuse burn-out
• Battery out of power
• Power switch has been damaged
• Power wires broken/
disconnected
• Motor damaged
• Potentiometer has been damaged
• Turn the knob clockwise to increase
the pressure
• Replace
• Recharge
• Replace the switch
• Disassemble the base to reconnect
the wires
• Replace the Motor
• Replace the Potentiometer
Abnormal sounds while the
motor rotates
The pump fastening screws are loose Tighten the screws
Leakage occurs to the
underside of the base
The pump inlet and outlet hoses loose
or broken
Disassemble the base to tighten the hose
clamp or repair it.
Poor atomization results • Extra-low pump pressure
• Sprinkler sheet holes are blocked
• Spray hole and split sheet are worn
out
• Spraying sheet has been inversely
assembled
• Pipe joints may be loose
• Battery short of power
• One inlet valve or outlet valve of
the pump has been jammed to
reduce the pressure by 50%
• Turn the knob clockwise to increase
the pressure
• Remove the debris
• Replace the sheets
• Disassemble and correct it
• Tighten the joint
• Recharge the battery
• Remove the base, pump clean water
while knocking at the pump head
gently; disassemble the pump housing
to repair

www.tti.com.au
WeedMasta™
PRODUCT HANDBOOK
Freecall: 1800 816 277
18
Risk Assessment
Task Hazard Risk Control Measure/Mitigation
Check weather
conditions
Manual handling; slips,
trips or falls
Low • Wear PPE as per chemical requirements
SDS – coveralls, gloves, safety footwear,
glasses & respirator
• Follow safe manual handling techniques:
don’t lift on your own if >20kg, bend knees
& keep back straight.
Mix chemicals (if
applicable) and fill
spray tank
As above, spray drift,
chemical spillage,
emission of vapours or
flammability: weather,
untrained visitors
Medium • As above
• User trained in relevant chemical mixing &
administration course, e.g, Chem Cert;
• Follow relevant Environmental Protection
Authority requirements;
• Fire extinguisher nearby;
• Keep visitors away from job location
unless wearing full PPE.
Clean up, maintenance
& storage
As above Low • As above;
• Continue to wear PPE for clean up;
• Store unit in a dry, well ventilated area.

www.tti.com.au
WeedMasta™
PRODUCT HANDBOOK
Freecall: 1800 816 277
19
Warranty
Warranty Policy
TTI will, at its option, repair or replace without charge any part covered by this warranty which is found
to be defective in material and/or workmanship within one (1) year after date of sale to the original retail
purchaser. If the product is used for rental purposes, this warranty is limited to ninety (90) days.
Upon request, the customer will make the defective part available for inspection and/or return the defective
part to TTi, transportation charges prepaid. All parts and components are covered by this warranty except
the following, which are warranted separately by their respective manufacturers:
⦁ engines
⦁ gearboxes
⦁ pumps
⦁ regulators.
TTi does not assume any warranty obligation, liability or modification for these items, which are covered
exclusively by the stated warranty of the respective manufacturers.
What this Warranty Does Not Cover?
This warranty does not cover:
1. Defects caused by depreciation or damage caused by incorrect mounting, normal wear, accidents,
improper maintenance, improper use or abuse of the product, alterations or failure to follow the
instructions and warnings provided.
2. Any charges for making service calls, clean up time and transport charges.
3. The use of non-genuine parts on equipment supplied by TTi. This will automatically negate any warranty.
How to Obtain Service Under this Warranty?
Warranty service can be arranged by contacting your dealer, or by contacting TTi directly on 1800 816 277.
Proof of warranty registration and date of purchase may be required to verify warranty coverage. Any
defective parts returned to TTI must be accompanied by a Return Goods Note. This form can be obtained
by contacting Product Support on 1800 816 277 or emailing ProductSupport@tti.com.au.
Warranty Limitations
Warranty limitations are as follows:
1. There is no other express warranty. Any warranty that may be implied from this purchase including
merchantability and fitness for purpose is hereby limited to the duration of this warranty and to the
extent permitted by law. Any and all implied warranties are excluded.
2. TTI will not be liable for any incidental, consequential or special damages and/or expenses in connection
with the purchase or use of this equipment, to the extent permitted by law.
3. Only the warranty expressed in this limited warranty shall apply and no dealer, distributor or individual
is authorised to amend, modify, or extend this warranty in any way. Accordingly, additional statements,
whether oral or written, do not constitute warranties by TTi, and should not be relied upon.

1800 816 277
PO Box 137, Nathalia, VIC, 3638
Murray Valley Hwy, Nathalia, VIC 3638
Proudly Built By:
Signature Date Signature Date
Quality Checked By:
www.tti.com.au
Table of contents
Other TransTank Paint Sprayer manuals


