manuals.online logo
Brands
  1. Home
  2. •
  3. Brands
  4. •
  5. TRASSIR
  6. •
  7. Security Camera
  8. •
  9. TRASSIR TR-D8251WDC User manual

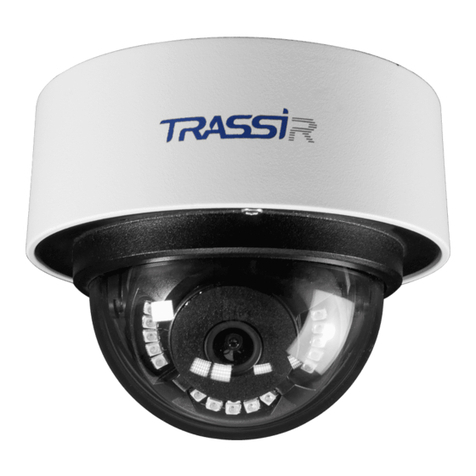
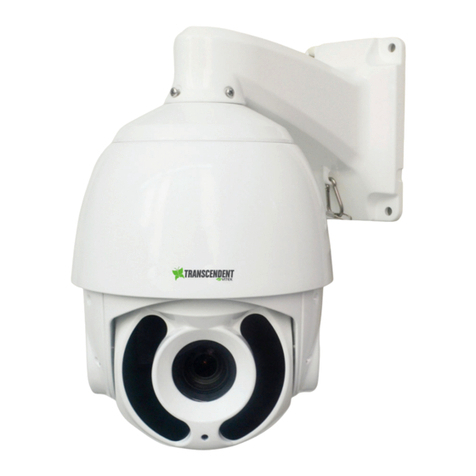
TRASSIR TR-D8251WDC User manual

Outdoor Full Time Color Camera
TR-D8251WDC
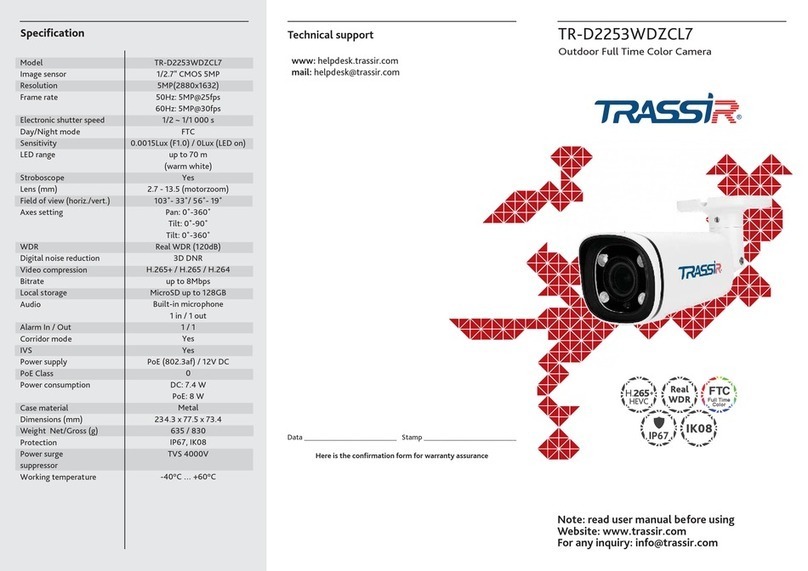
Specification
TR-D8251WDC
1/2.7" CMOS 5MP
5MP(2880x1632)
5MP@25fps
1/2 ~ 1/1 000 s
FTC
0.0015Lux (F1.0)
2.8 / 4.0
2.8mm: 101˚ / 58˚
4.0mm: 87˚ / 46˚
Pan: 0˚-360˚
Tilt: 0˚-90˚
Rotation: 0˚-360˚
Real WDR (120dB)
3D DNR
Н.265+ / Н.265 / H.264
up to 8Mbps
MicroSD up to 128GB
Built-in microphone
1 in / 1 out
1 / 1
Yes
Yes
PoE (802.3af) / 12V DC
0
DC: 1.8W
PoE: 2.4W
Metal
Ø93 x 92.2
400 / 490
IP66, IK10
TVS 4000V
-40°C … +60°C
Model
Image sensor
Resolution
Frame rate
Electronic shutter speed
Day/Night mode
Sensitivity
Lens (mm)
Field of view (horiz./vert.)
Axes setting
WDR
Digital noise reduction
Video compression
Bitrate
Local storage
Audio
Alarm In / Out
Corridor mode
IVS
Power supply
PoE Class
Power consumption
Case material
Dimensions (mm)
Weight Net/Gross (g)
Protection
Power surge
suppressor
Working temperature IK10
Full Time
Color
Technical support
www: helpdesk.trassir.com
mail: helpd[email protected]
Data ___________________________ Stamp ___________________________
Here is the confirmation form for warranty assurance
Note: read user manual before using
Website: www.trassir.com
For any inquiry: inf[email protected]
Manual setting of network parameters
In order to connect to the IP camera, the PC should be in the same local
network as the camera. The IP address of the camera, the PC and any
other device on the network should not match.
The IP camera has the following default settings:
- IP address: 192.168.1.188
- Subnet mask: 255.255.0.0
- Gateway: 192.168.1.1
- HTTP-port: 80
- username: admin
- password: admin
PC network settings example:
- IP address: 192.168.1.10;
- Subnet mask: 255.255.0.0.
There are 3 options to set up your camera:
1. Change IP address of a camera manually.
Start your browser, connect to IP camera and enter your
username and password. Choose appropriate menu item and change
network settings of IP camera.
2. Set up camera IP address using fast configuration utility that can
be downloaded from www.trassir.com.
3. Change IP camera settings using TRASSIR professional software.
You can find detailed camera settings instructions in User Manual that
can be downloaded from trassir.com.
Introduction
Congratulations on purchasing TR-D8251WDC IP-camera.
Please read User Manual before using the camera.
Key features
• Supports H.265+
• Wide Dynamic Range (Real WDR 120dB)
• Built-in video archive (Edge Storage) – local recording
on MicroSD card* up to 128GB
• Two-way audio (1 in / 1 out, built-in microphone)
• Alarm: 1 in / 1 out
• TCP, IPv4/v6, HTTP, FTP, DHCP, DNS, DDNS, RTP, RTSP, RTCP, PPPoE,
UPnP, SMTP, NTP, Onvif protocols
• IVS: Human detection; Line crossing; Intrusion detection; People
counting; Loitering
• Power supply 12V DC or PoE
___________________________
* MicroSD Card is not included into camera package
Camera package
1. IP camera . . . . . . . . . . . . . . . . . . . . . . . . . . . . . . . . . . . . . . . . . . . . . . . . . 1 pc.
2. User Manual . . . . . . . . . . . . . . . . . . . . . . . . . . . . . . . . . . . . . . . . . . . . . . 1 pc.
3. Mounting kit . . . . . . . . . . . . . . . . . . . . . . . . . . . . . . . . . . . . . . . . . . . . . . 1 pc.
Attention!
The power supply should meet the following requirements: output
voltage, current, polarity, and working temperature. When using the
camera in thunderstorm conditions, make sure there is a lightning rod or
unplug the power connector.
Pay attention to the temperature requirements for IP camera operation.
Avoid using the device in excessively high or low temperatures.
Do not install the camera near heaters. Do not point the camera lens at
the sun or at bright objects as this can damage the image sensor.
Connecting
To get started with IP camera you are required to have a PC connected to
the local network with Windows installed and Internet Explorer version 8
or higher.
1. Connect IP camera to the network.
2. When the camera is connected through a switch which doesn't support
PoE, connect the adapter to the power jack.
Dimensions
923-31.1.22
93
92,2
∅4,5
∅93
48,4
48,4
Mic
Micro SD
Reset
Other TRASSIR Security Camera manuals

TRASSIR TR-D2283WDZIR7 User manual

TRASSIR

TRASSIR TR-D2283WDZIR7 User manual

TRASSIR TR-D3121IR2 User manual

TRASSIR

TRASSIR TR-D3121IR2 User manual

TRASSIR TR-D2B5 User manual

TRASSIR

TRASSIR TR-D2B5 User manual

TRASSIR TR-D4141IR1 User manual

TRASSIR

TRASSIR TR-D4141IR1 User manual

TRASSIR TR-D3281WDIR4 User manual

TRASSIR

TRASSIR TR-D3281WDIR4 User manual

TRASSIR TR-D2S1 User manual

TRASSIR

TRASSIR TR-D2S1 User manual

TRASSIR TR-D3253WDZIR3 User manual

TRASSIR

TRASSIR TR-D3253WDZIR3 User manual

TRASSIR TR-D3251WDIR3W User manual

TRASSIR

TRASSIR TR-D3251WDIR3W User manual

TRASSIR TR-D3221WDIR3W User manual

TRASSIR

TRASSIR TR-D3221WDIR3W User manual

TRASSIR TR-D3183ZIR3 User manual

TRASSIR

TRASSIR TR-D3183ZIR3 User manual

TRASSIR TR-D4S5 User manual

TRASSIR

TRASSIR TR-D4S5 User manual

TRASSIR TR-D8181IR3 User manual

TRASSIR

TRASSIR TR-D8181IR3 User manual

TRASSIR TR-D2283WDZIR7 User manual

TRASSIR

TRASSIR TR-D2283WDZIR7 User manual

TRASSIR TR-D8152ZIR2 User manual

TRASSIR

TRASSIR TR-D8152ZIR2 User manual

TRASSIR TR-D4S1-noPoE User manual

TRASSIR

TRASSIR TR-D4S1-noPoE User manual

TRASSIR TR-H2S1 User manual

TRASSIR

TRASSIR TR-H2S1 User manual

TRASSIR TR-D4281WDIR2 User manual

TRASSIR

TRASSIR TR-D4281WDIR2 User manual

TRASSIR TR-D8121IR2W User manual

TRASSIR

TRASSIR TR-D8121IR2W User manual

TRASSIR TR-D4221WDIR2 User manual

TRASSIR

TRASSIR TR-D4221WDIR2 User manual

TRASSIR TR-D2183IR6 User manual

TRASSIR

TRASSIR TR-D2183IR6 User manual

TRASSIR TR-D8121IR2 User manual

TRASSIR

TRASSIR TR-D8121IR2 User manual

TRASSIR TR-H2S6 User manual

TRASSIR

TRASSIR TR-H2S6 User manual

TRASSIR TR-D4251WDIR2 User manual

TRASSIR

TRASSIR TR-D4251WDIR2 User manual

TRASSIR TR-H2D2 User manual

TRASSIR

TRASSIR TR-H2D2 User manual

Popular Security Camera manuals by other brands

Avigilon 2.0C-H6SL-D1 installation guide

Avigilon

Avigilon 2.0C-H6SL-D1 installation guide

Avigilon H4 installation guide

Avigilon

Avigilon H4 installation guide

Atoms Labs AWF50 Installation and operating instructions

Atoms Labs

Atoms Labs AWF50 Installation and operating instructions

ROHS 6400AK Series user manual

ROHS

ROHS 6400AK Series user manual

Axis P3807-PVE user manual

Axis

Axis P3807-PVE user manual

D-Link SECURICAM DCS-7110 user manual

D-Link

D-Link SECURICAM DCS-7110 user manual

Nuvico CD-H21P-LI installation manual

Nuvico

Nuvico CD-H21P-LI installation manual

Speco HT - INTB8/9/10 user manual

Speco

Speco HT - INTB8/9/10 user manual

D-Link DCS-936L Technical Support Setup Procedure
D-Link

D-Link DCS-936L Technical Support Setup Procedure

Sony Ipela SNC-CH180 Specifications

Sony

Sony Ipela SNC-CH180 Specifications

GE CyberDome II installation manual

GE

GE CyberDome II installation manual

Broadlight Systems BCB-36C installation manual

Broadlight Systems

Broadlight Systems BCB-36C installation manual

AVYCON NTSC owner's manual

AVYCON

AVYCON NTSC owner's manual

Verkada D50 Setup guide

Verkada

Verkada D50 Setup guide

ESVI MH30A user manual

ESVI

ESVI MH30A user manual

HIK VISION DS-2TD4136T-25 user manual

HIK VISION

HIK VISION DS-2TD4136T-25 user manual

ZMODO Pivot quick start guide

ZMODO

ZMODO Pivot quick start guide

Photon Focus MV1-R1280-50-G2 Camera Series user manual

Photon Focus

Photon Focus MV1-R1280-50-G2 Camera Series user manual

manuals.online logo
manuals.online logoBrands
  • About & Mission
  • Contact us
  • Privacy Policy
  • Terms and Conditions

Copyright 2025 Manuals.Online. All Rights Reserved.